When “Hell Freezes Over”


Our first “large” Napoleonic game with hundreds of stands, infantry, artillery, and cavalry!

While talking to my longtime gaming buddy Stevie G the topic of 15mm Napoleonic’s was being bantered about when he waxed poetic about the great Napoleonic games we used to play with large groups of friends and acquaintances in years gone by, how he missed those games since most of the games now are largely just us two.  Now we have great games, but over and over with the same two general’s gets old. Steve said he wished the “Dogs of War” played Napoleonic’s, I almost choked at the thought and said “keep dreaming that will be a Cold day in Hell” when they take up Napoleonic’s much less Napoleonic’s in 15mm!! I had heard several members even boast about the fact they had gotten rid of anything in 15mm! The last time I ever even heard of a Dogs of War member playing a Napoleonic game was back when we were at the clubhouse in Burbank and Steve V was among us….

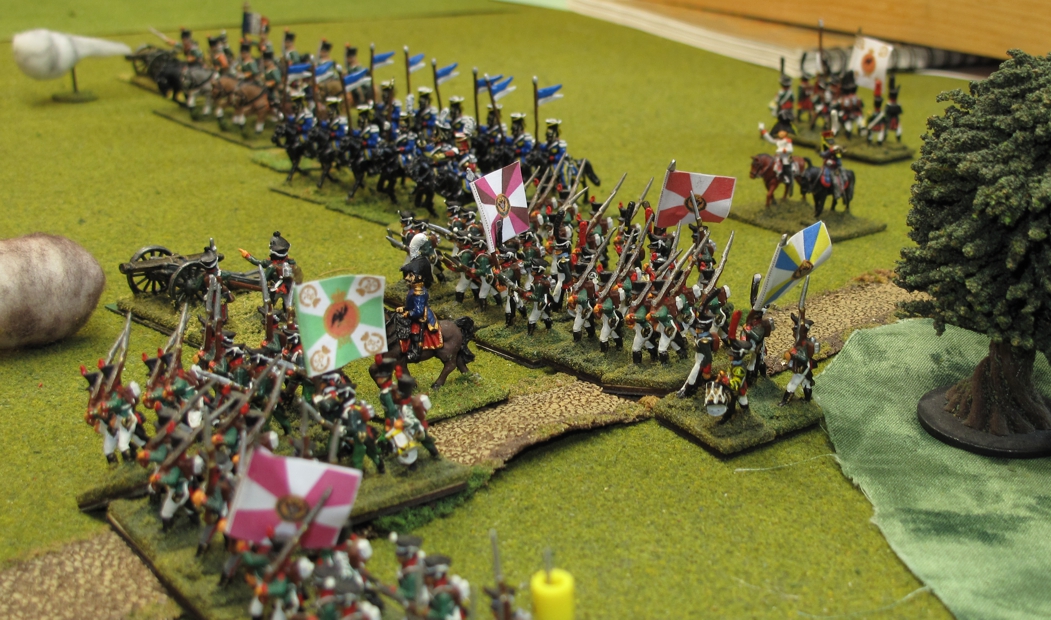
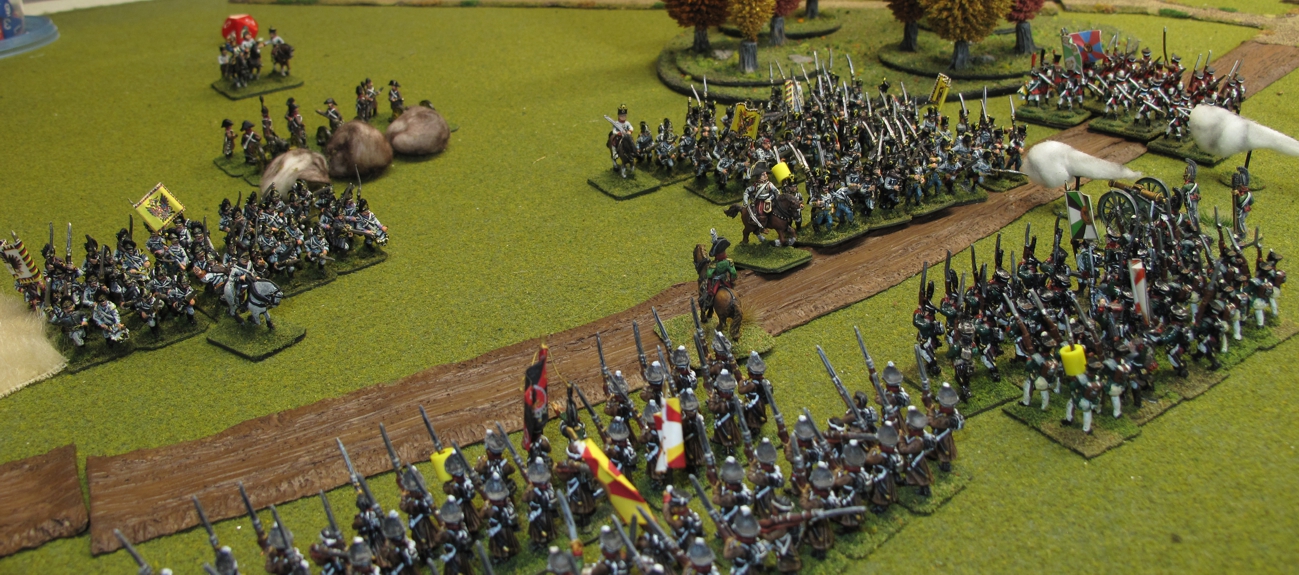
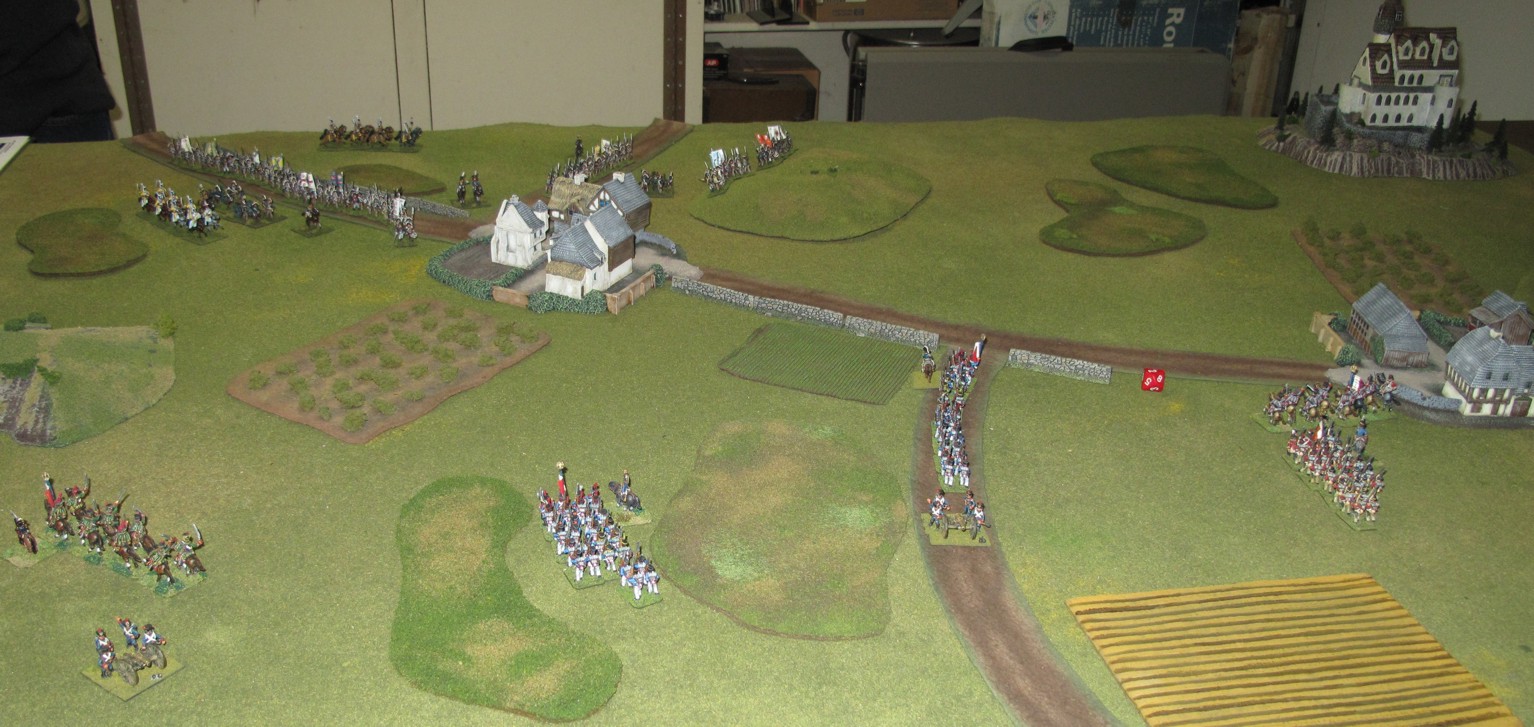
You got to love the look!, masses of colorful Napoleonic troops on the field!

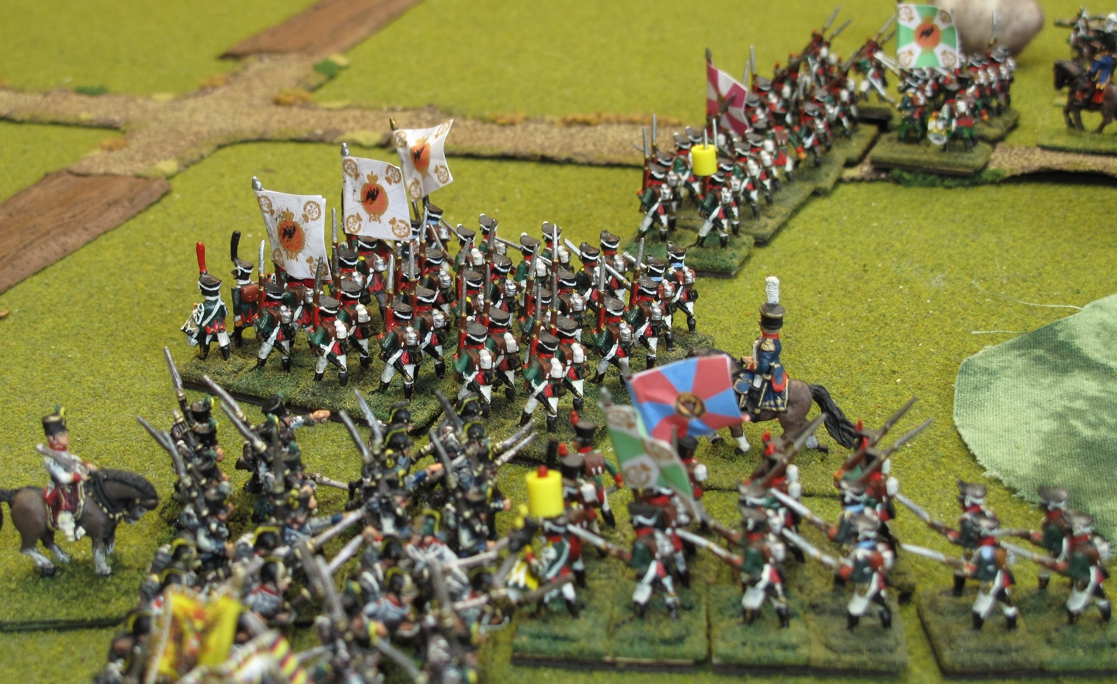
A turn later the cannons roar as steel prepares to clash with steel!

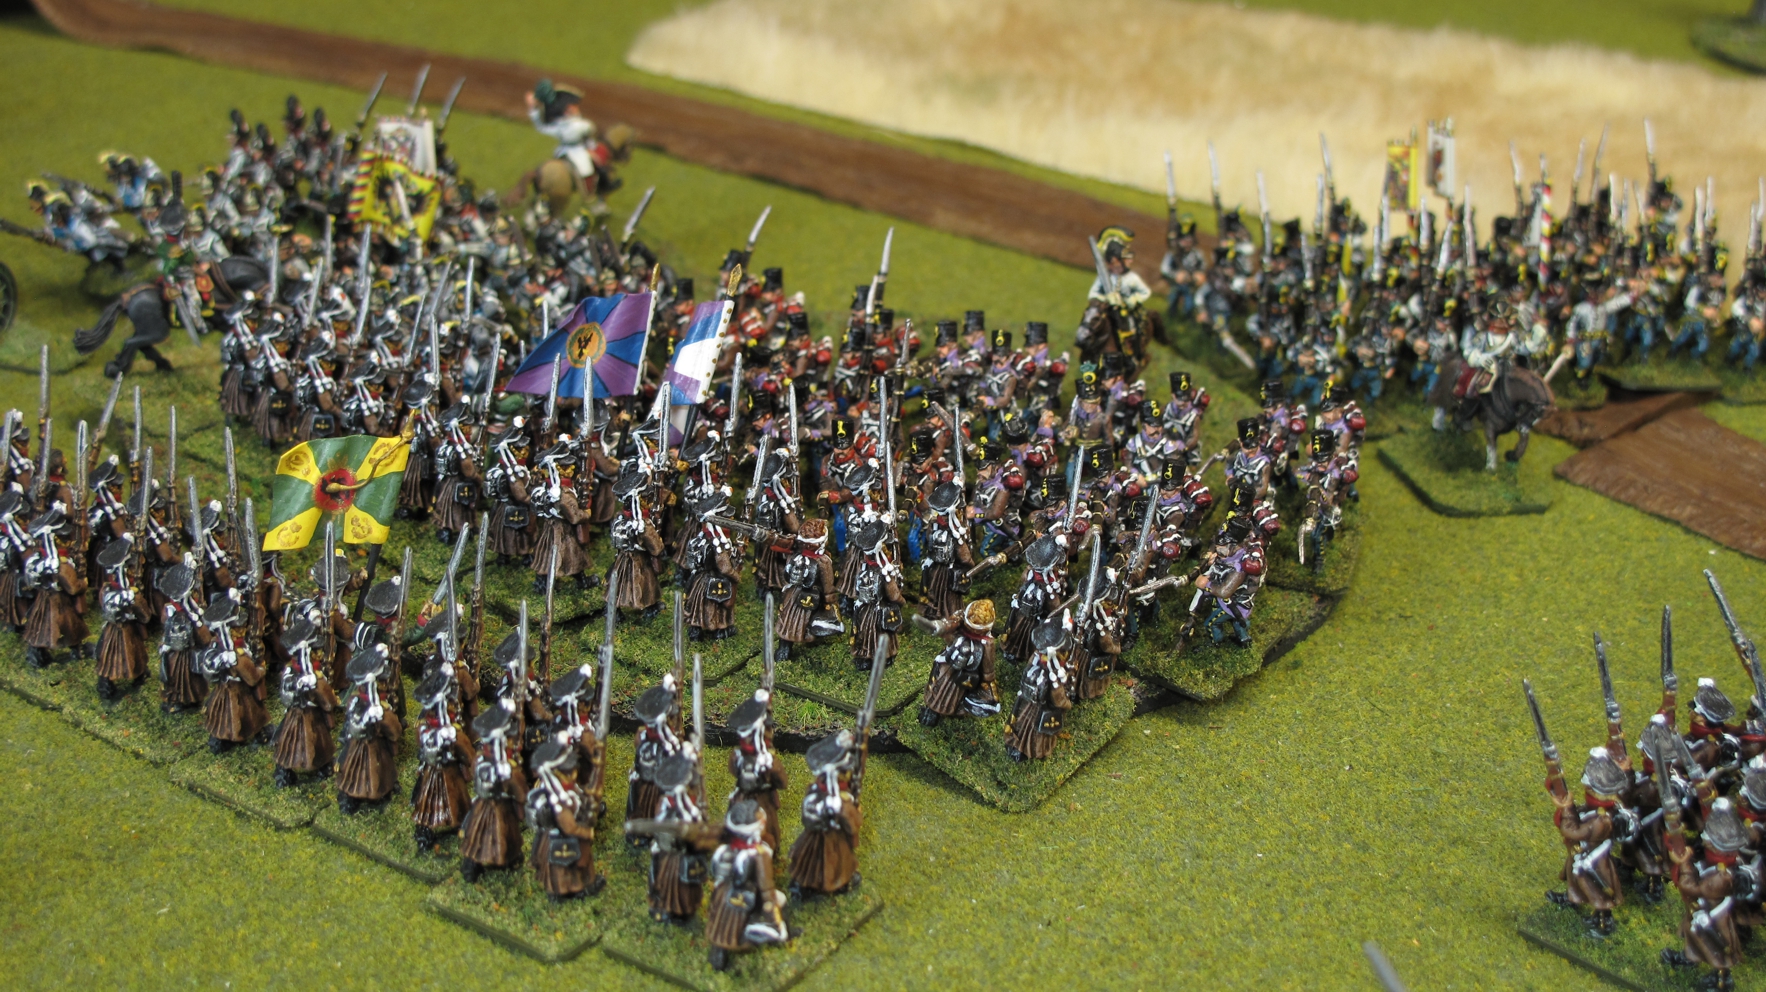
Russians in their long brown coats trade blows with Austrians.

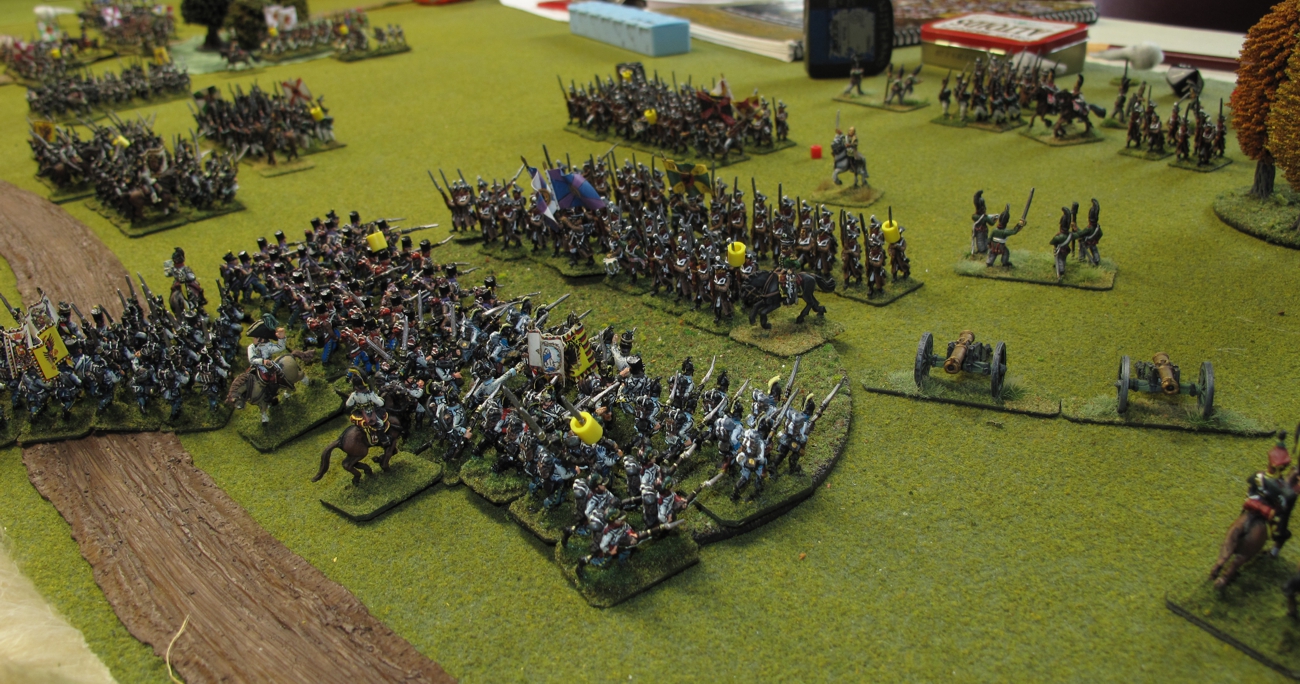
Well last month “Hell Froze Over” as not only are we playing games of 15 mm Napoleonic’s at the “Dog’s” we have been doing it almost regularly and members have started to buy the rules (Age of Eagles) and assemble troops! We have done several introductory, learning games, to get player interested and acquainted with the rules. The pictures I took are not that great as I was tired after working in the yard all morning but it shows the first BIG learning game, we played with five commanders (3 Austrian / 2 Russian). Yes it was a “hypothetical” game pitting forces (Russian and Austrian) that historically never fought each other, but this allowed players to get some of their own figs in the battle.

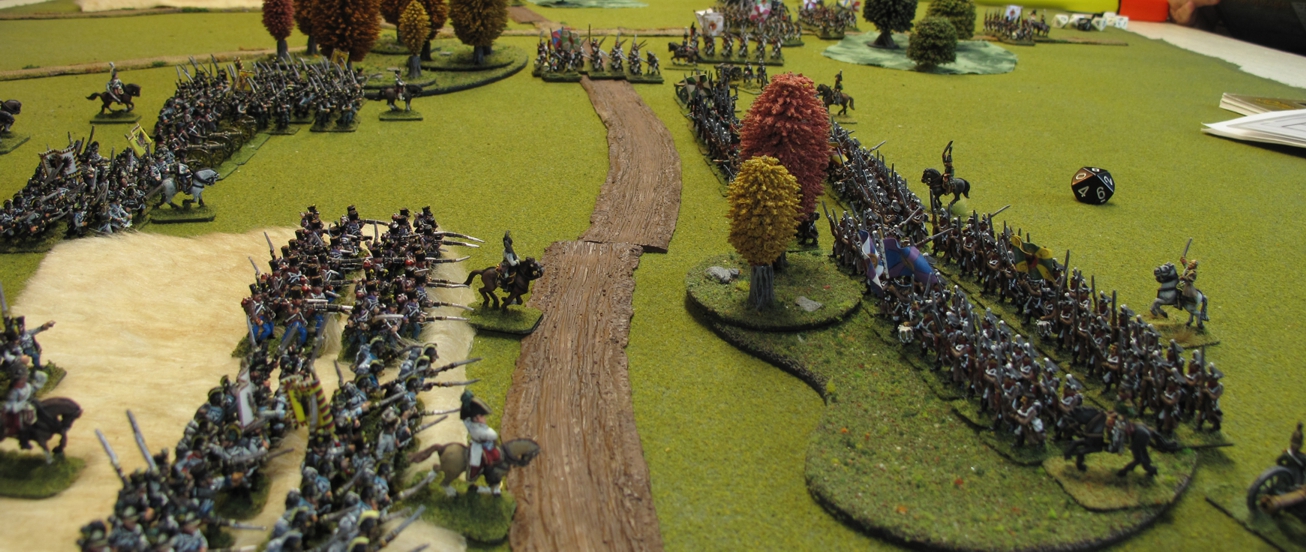
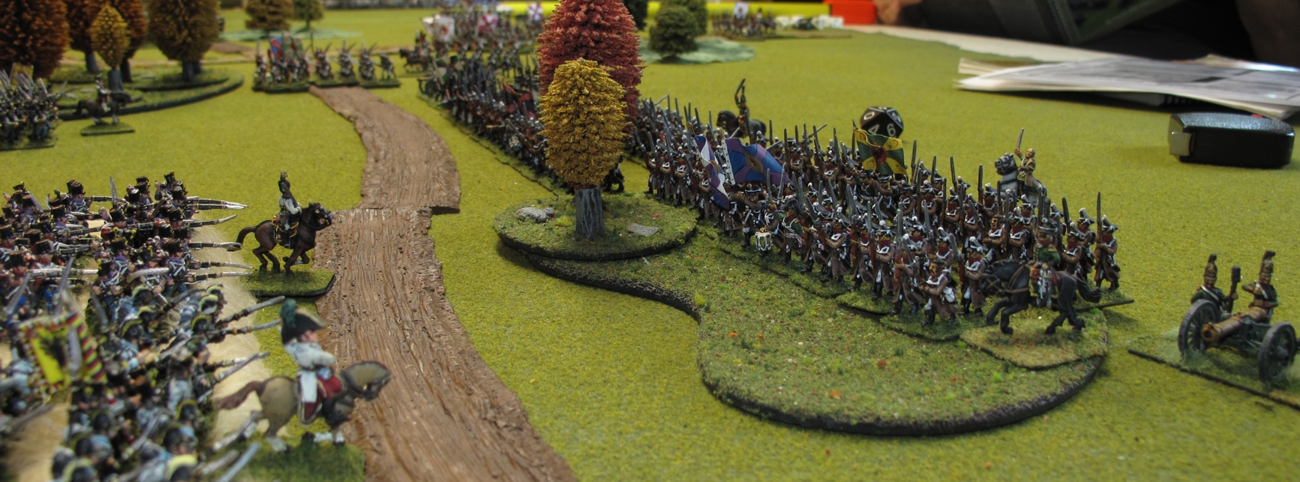
The action gets close and furious, a great game, with a fair amount of maneuvering and back and forth. One wonders what words may have passed between these two generals of division….

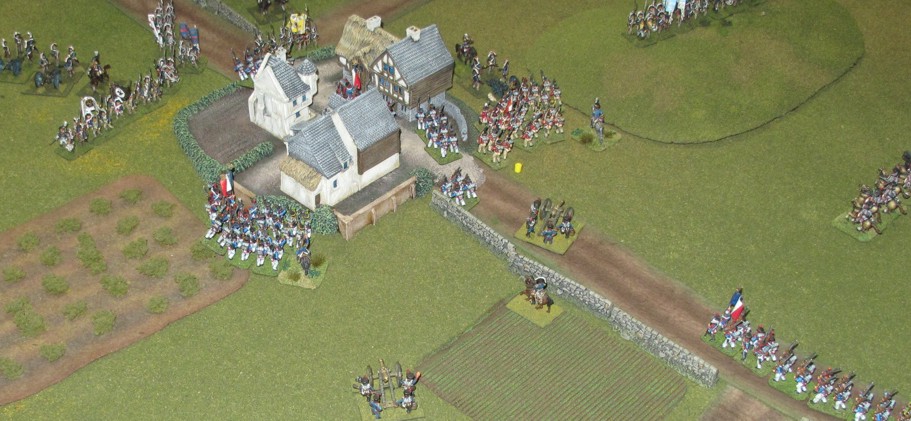
Just out of frame there was a large cavalry battle that see sawed for a few rounds until the Austrian Cav got the upper hand and drove the Russian Hussars and Dragoons off the field as well as capturing the Russian heavy artillery battery. The Austrians here in the center are slowly weakening the Russians infantry while driving them back as well!

No real report other than to say the Russians (Bill and Frank) got basically swept off the field by the Austrians (Chris A, Steve G, and Galen Y). The great thing about the battle was that Bill and Frank were the most experienced players while Chris and Galen have just stated playing and beat the more experienced guys! Shows how easy the rules are to pick up and how much players have already learned. For the most part the new players had the rules down well enough to run their sections with out help.

Right flank commander Frank V push his forces up in support but confusion in orders hampered his efforts against Galen who brushed him aside with cavalry while sending his infantry to help support Chris and Steve’s main attack on the Russian center. Frank has re-based and re-flagged Danny’s old Russians. “Looking good”


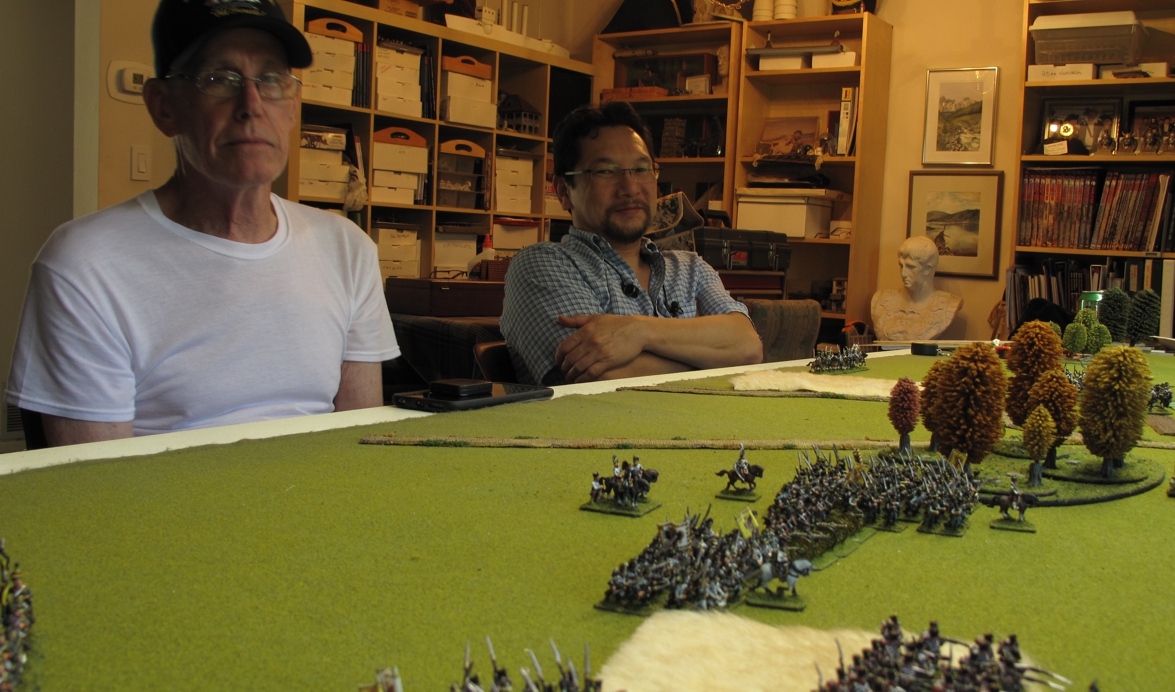
Austrian commanders Steve and Galen, “Gee Steve after getting your wish for a big Napoleonic game at the Dog’s you might look a bit happier!” Steve did smile a bit later, in fact he shouted with gusto when firing his artillery battery at a crucial point he rolled a 10! Yes believe it or not!

There seems to be quite a lot of enthusiasm for 15mm Napy’s at the moment and I hope this is the start of 15mm Napoleonic’s on a regular basis down at the Dogs!  Terry stone was observed wandering around the table muttering to himself about some bug that was biting him?

It was a magnificent sight! Napoleonic Cavalry goes head to head!

Most commanders have a battle plan, a plan that they hope will unfold and work according to plan. This seldom happens in the Napoleonic period since once a battle commenced there was little a commander could do except to decide where and when additional forces were committed.

Commanders in the Napoleonic period spent much of their time preparing for the battle by arranging their forces to their best advantage based on what they thought the enemy commander was planning. Trying to figure out what the enemy commander was going to do was a daunting task requiring many hours of careful thought. Unlike modern battlefield leaders, commanders in the Napoleonic period had very limited resources available to them. No Aerial photography, no spy satellites, very slow communications, no radios, TV’s, computers, etc…. maps were many times lacking in detail, wrong, or just not available. General staffs were just being thought of! They had spy networks which were sometimes good, sometimes bad, and always slow! They could try and predict an enemy’s move based on what might be his immediate and long term campaign goals, go over past performance of the enemy commander, and try to get inside his head. Finally as the battle approached a commander used his Cavalry for determining enemy strength, moves, and to try and screen his own moves, strengths, and intentions.
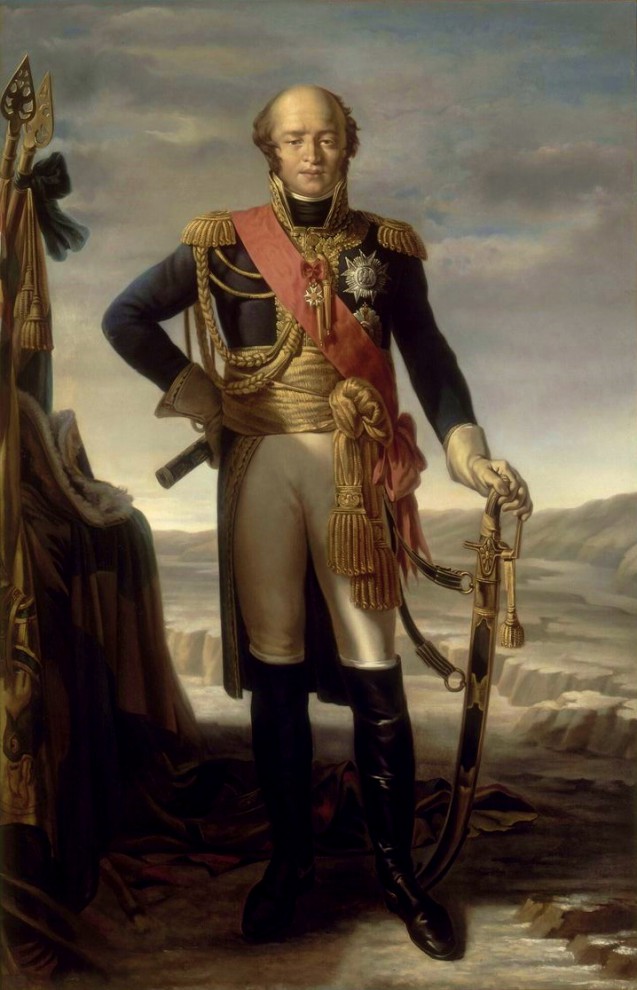
Louis Davout was one of Napoleons ablest commanders. I has been often said that if he had been present at Waterloo the outcome would have been very different.

Our Saturday battle was based on this type of action where a large cavalry force has been sent out to both scout ahead, secure, and possibly be the beginning of flanking action against an important area on the Austrian army’s flank. The area consisting of a road and village network. This force also had an infantry force intended to hold the area after the cavalry has moved on.

I played the “Iron Marshal” Louis-Nicolas Davout in command of the French right and Davout has decided to personally ride with this force to make a timely assessment of the area. The Austrian commander Archduke Charles has planned to do almost a mirror image of the French move! (The Austrians are learning!) To mix this up a bit and introduce the effect of battlefield intelligence during the period, scouting, spies, and information gathered locally, would be simulated by modifying the way and time troops would be introduced to the battle field. I invoked a rather simple method to simulate this. Each commander would roll a D10 and high roll would be allowed to decide whether or not to place a unit on the battlefield one move in. Placement in this way gives an advantage to the winner by being able to make his opponent place his troops first or second and then being able to react to that placement later, or place some troops hoping to deceive the enemy into thinking that would be an area of deployment. The winner is not required to place any troops on the field thus
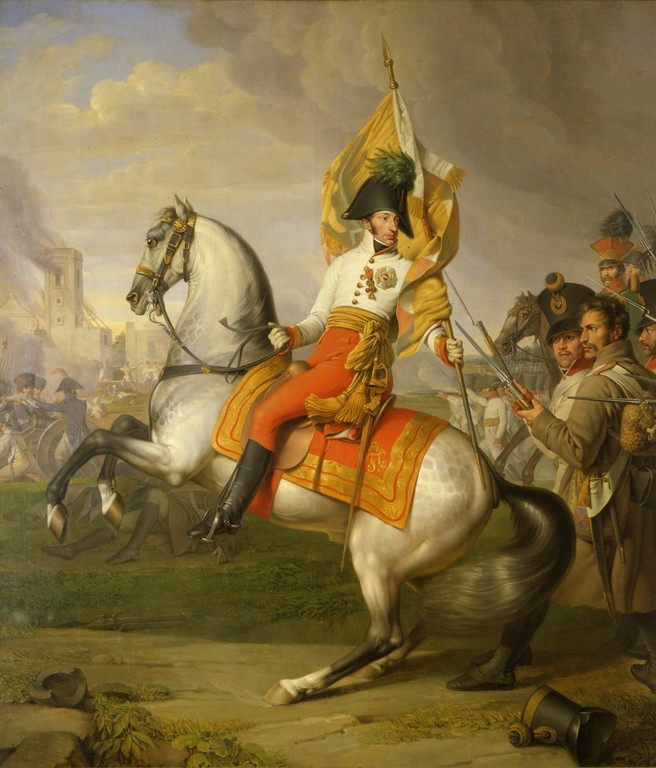
Archduke Charles the best of the Austrian commanders was always hampered by the commanders and politics around him.

can save any un-deployed troops to the end of the deployment phase(very powerful!). The Archduke (Steve) rolled badly and this resulted in Marshal Davout (Bill/me) being able to deploy almost 2/3rd of my force after Steve! The French clearly had the better scouting/intelligence this day!

My plan was to pin/feint on one side where (Steve) had deployed much of his Cavalry force. Then because of my better “scouting/intelligence” use my ability to hold off deploying much of my force until I saw where his forces were deployed, allowing me to concentrate more of my troops against his weaker flank. This would be an advantage for the French provided they were to act quickly, fight well, and have success before the Austrians could effectively react. The Austrian force was a bit larger in Infantry, Cavalry, and Artillery, not huge but enough to make it hard on the French should they make even small mistakes.

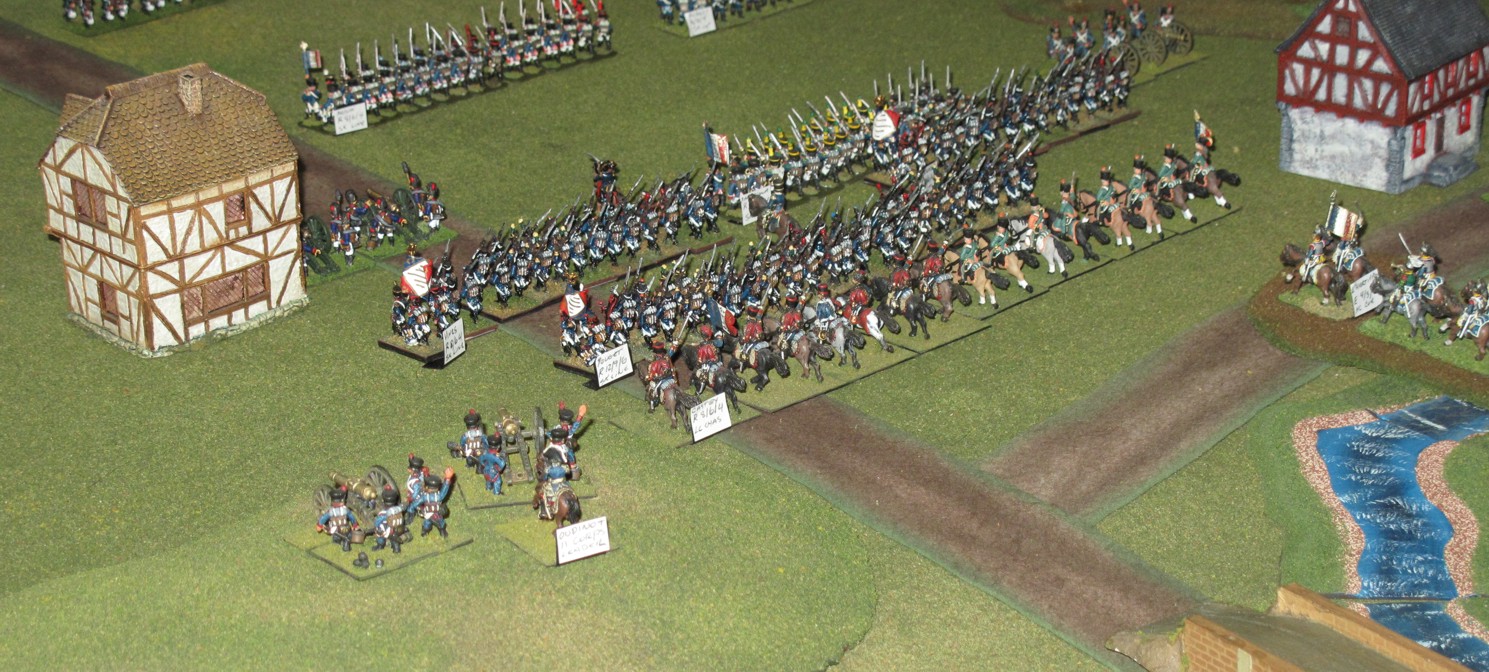
A familiar sight on Saturday mornings on my gaming table…. Steve and a general overview of the battlefield from the French side look towards the Austrians.

My initial plan was to hold the road and village on my right pushing my cavalry down the open area on the of the village, but after the deployment rolls this strategy was changed to an all-out attack on the left and center based on “new” information and I deployed much of my remaining force to accomplish this. This simple process for deployment worked out so well in creating a more interesting battle that I’m at a loss as to why I never thought of it before!

There are several things that I like about it;

  1. It eliminates the “I go u go” deployments that leads to the same old boring heads up fight.
  2. Presents challenges to both commanders other than “roll well and live”
  3. Makes commanders pay much more attention to initial setup and terrain effects.
  4. Makes players think link commanders and consider the abilities of their troops carefully.!

I’m also now toying with a “strength roll” to have a force “weakened, strengthened, or remain the same” and possibly then a secret roll for the opponent to know this fact.

So on to the battle! I have recently painted a lot of French Napoleonic cavalry and wanted to get them into it, many games have Cavalry in them but normally in a supporting or breakthrough roll. I wanted a battles where Cavalry was the main focus.

The forces would reflect his;

French, 28 stands infantry (10,080), 32 stands Cavalry (5,760), 3 Artillery Batteries (16-24 guns).

Austrians, 36 stands infantry (13,680), 42 stands Cavalry (7,560), 4 Artillery Batteries (28-32 guns).

We used “Age of Eagles” rules by Bill Grey (Excellent!) and figures are 15mm primarily Old Glory (French) and AB & Old Glory (Austrians)

The Austrian force was larger for several reasons, Steve’s rolling of dice is less than “stellar”, and I know the rules better! I figured this would give a bit better balance, it did! (and actually, Steve rolled better than normal during the battle) but his roles for initial scouting were abysmal!
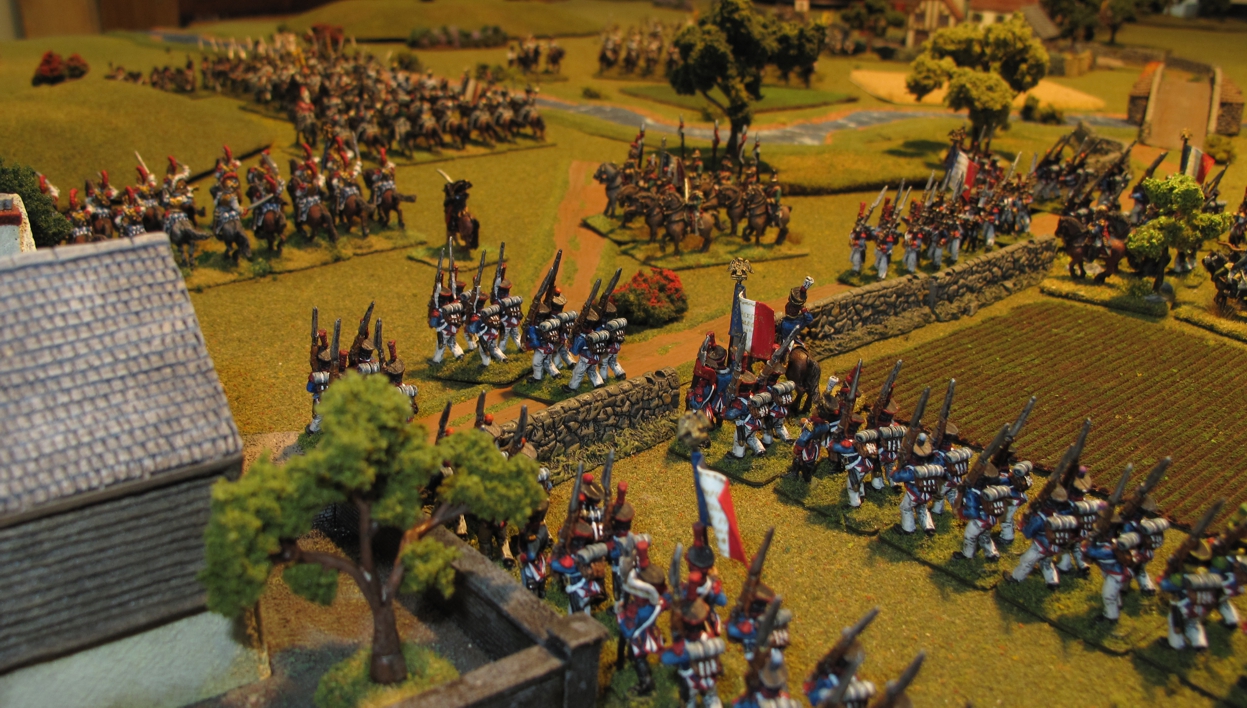
French infantry on the French left flank get new orders and goes on the attack!
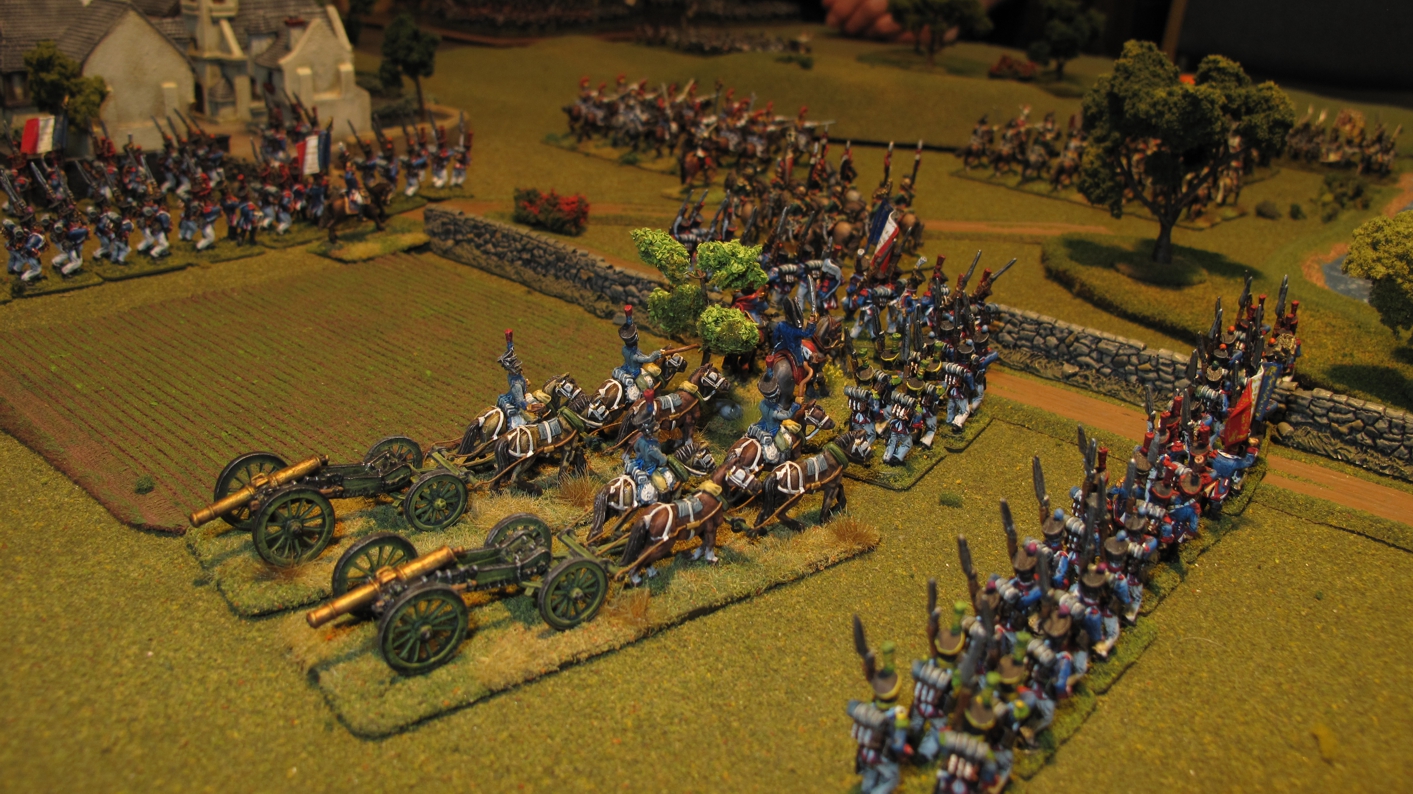
Half of the the French infantry on the left goes into the attack while the other half supported by a battery of “12 pounders” moves to support the French Cavalry in the center.

Archduke Charles and his staff quickly recognize flaws in their plan and issue orders to strengthen the center and ad weight to stem the French push on the Austrian right! Austrian heavy Cavalry thunders to the attack!

The “French” plan was simple and very much as Napoleon himself liked to do, threaten the flanks, weaken the center, strengthen your center, crush one flank while your strengthened center prevents or slows their reinforcing the flank under attack. I won the first few initiative rolls allowing me to choose to move first or second and instead of occupying my right flank as the original battle plan called for I pushed my infantry hard on through the town on the left and into some woods in the center, my battery of 2-12 pound guns also moved into the woods. On the French right flank my Hussars and a Horse battery acted as a decoy/blocking force drawing the bulk of the Austrian cavalry and some of their infantry away from the middle.
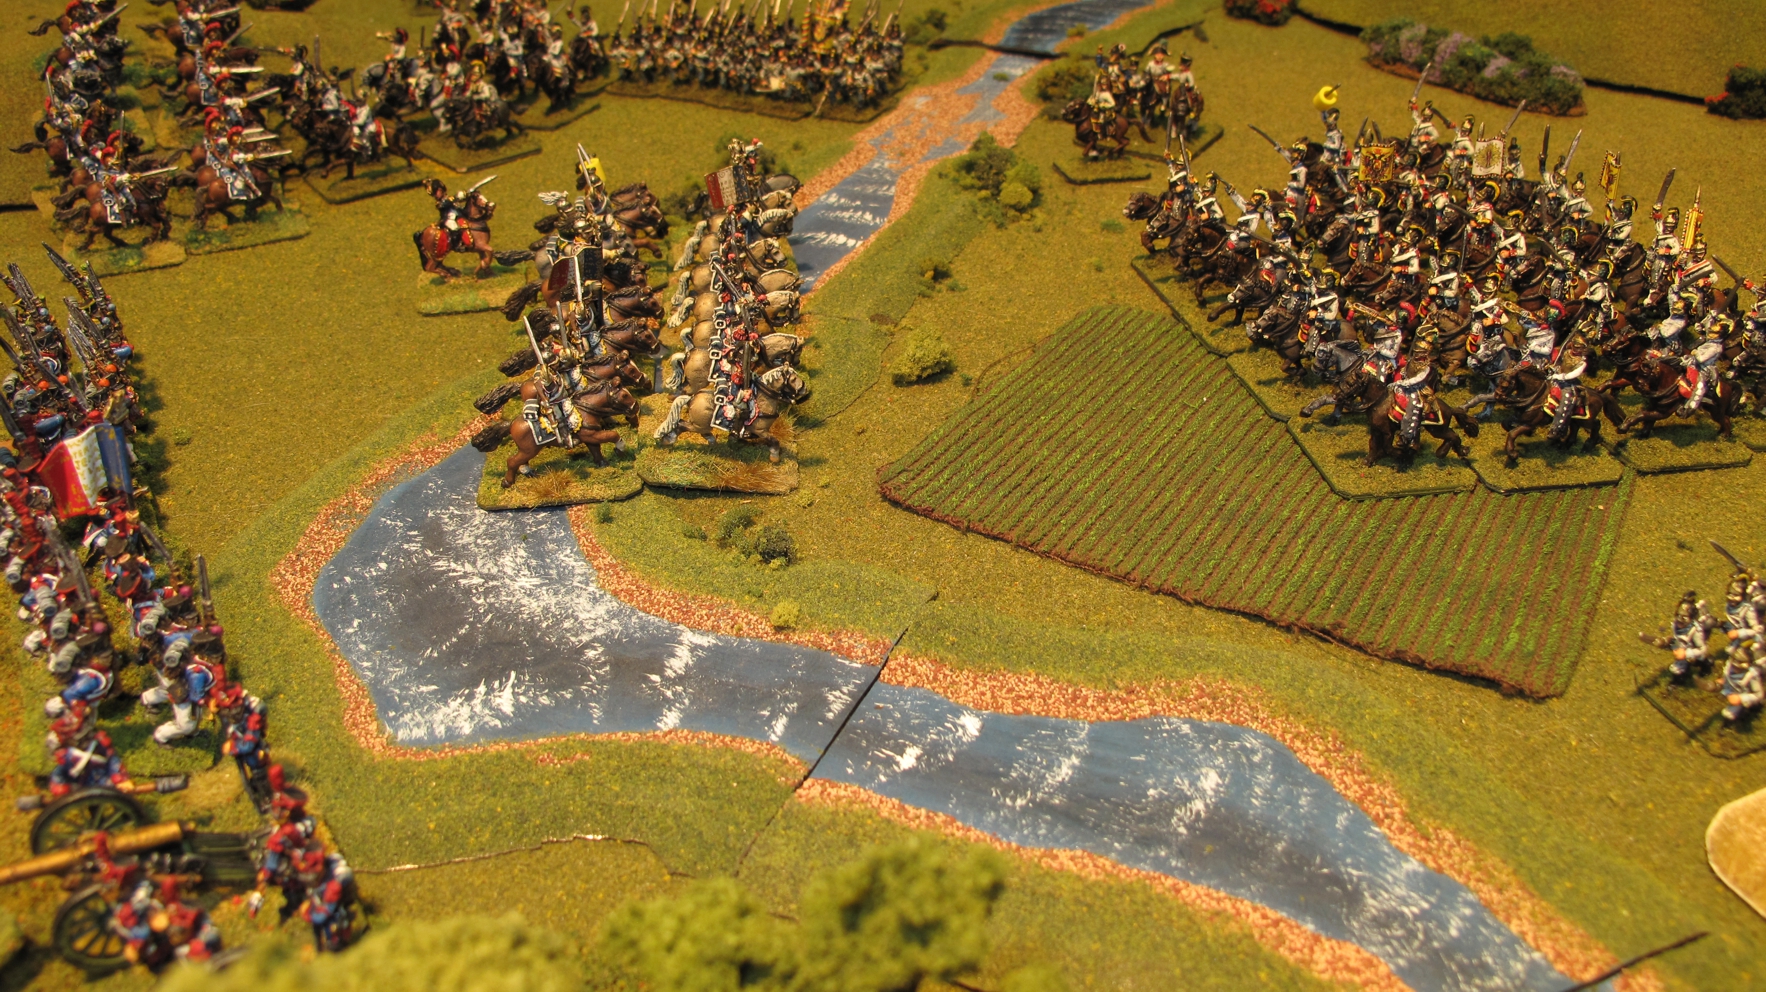
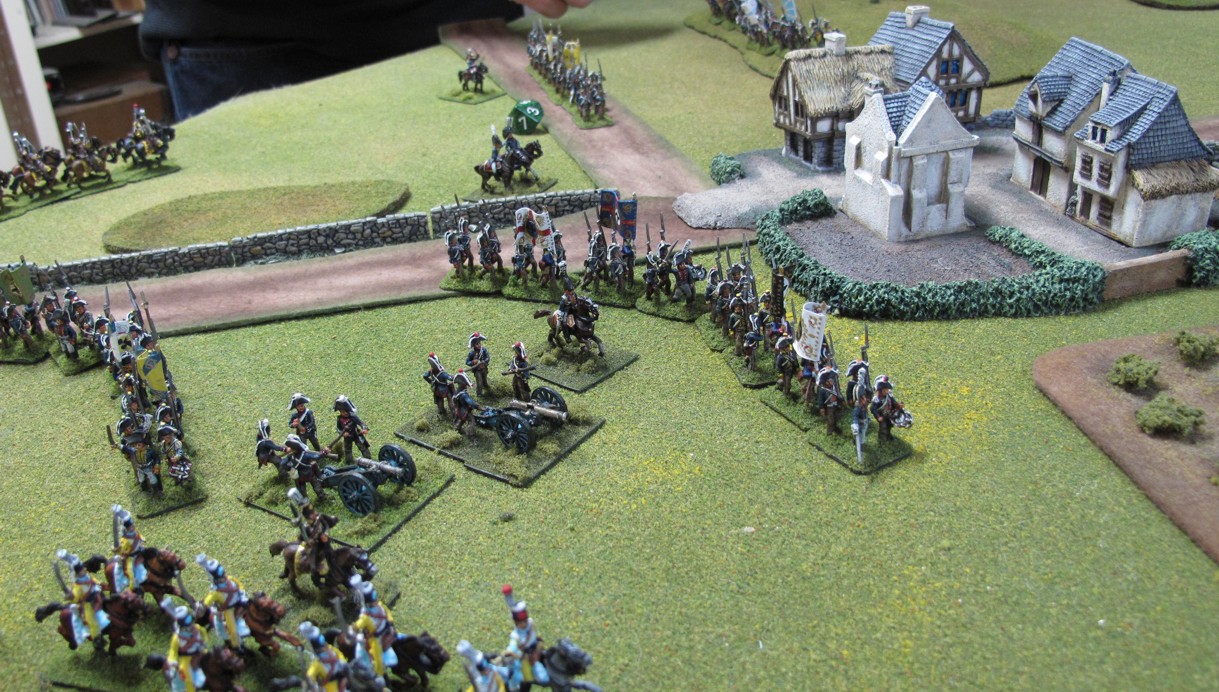
Because of some poor activation rolls on my part I have to send in my French Cuirassier early to prevent the Austrian cavalry from charging my still deploying infantry and artillery. Realizing the importance of this charge their commanding officer goes with them! In the upper left you can see the French Carabiniers already engaged with the Austrian Dragoons, a fight that would see saw the entire game!
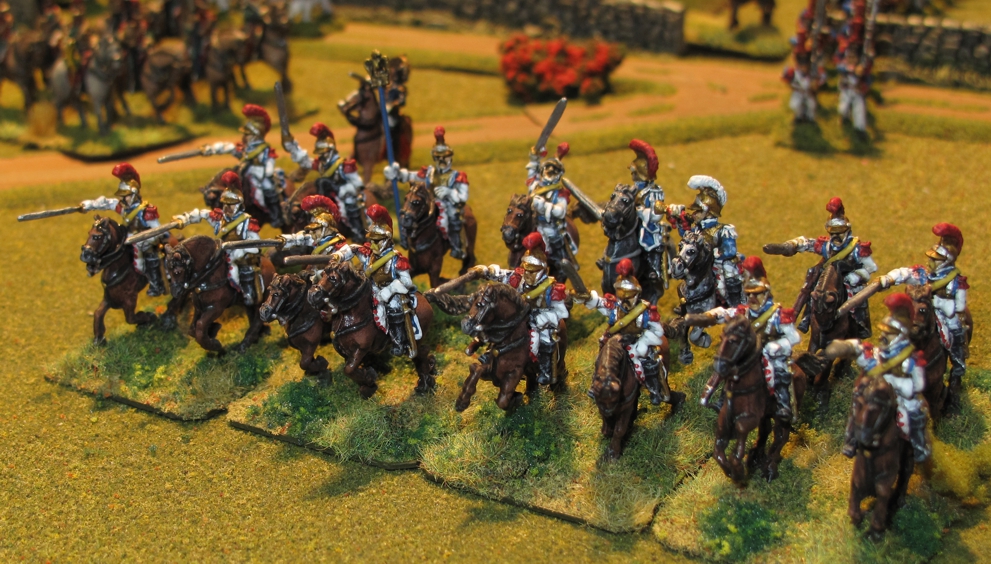
My French Carabinier fresh off the paint table make a great showing in their first battle…well they held their own stemming the tide of Austrian cavalry just long enough, and finally shattering the Austrian Dragoons! That fight went at least five rounds with the Austrians giving a great account of themselves until the end.

The battle went pretty much along those lines but was touch and go many times. Archduke Charles made several timely adjustments to his forces and rolled his dice rather well while I as Davout, had a good plan but rolled more 1s and 2s than usual resulting in my forces being a bit sluggish in getting to their positions. The battle that followed was just dam fun with a large cavalry fight occupying the center of the map for the entire game. Austrian Dragoons, and Cuirassier, exchanging charges and counter charges with French Carabiniers, and Cuirassier. The number of charges, counter-charges, retreats and reforming were amazing and made for a very exciting game with neither side getting the upper hand until the last turn when what was left of the French Carabinier routed the Austrian Dragoons.

The French left flank had all the infantry and the heavy foot artillery. These four brigades pushed into the town and deployed on both flanks of the cavalry battle to their center. Two brigades and the Heavy artillery deployed along some woods where they could threaten the Austrian Infantry and Cavalry trying to reinforce their right flank. The other two French infantry brigades supported by a small unit of French Lancer Cavalry pressed on to attack and crush an Austrian Infantry brigade and Artillery battery holding that flank.

The French right flank (Austrian left) was held by two French Cavalry units, the 5th Hussars and the 13th Chasseurs a Cheval, along with one battery of horse artillery. Opposing them were two Austrian Hussar units, a unit of Austrian Dragoons (these Dragoons were almost immediately sent towards the center) and a horse battery. The French put on a brave front and let the Austrians get just close enough but not within charge distance before retiring behind a small hill. The Austrians followed for several turns finally splitting their Hussars around the hill in an attempt to cut off the Hussars retreat. Once the Austrians split their force the French 13th Chasseurs a Cheval about faced and charged one of the Austrian Hussar units badly mauling it, Killing some, capturing others (as well as their commander) and routing the rest! (Bill rolls well!) The Austrian hopes of flanking the French in the center were dashed as now French had their horse arty and the 5th Hussars covering the bridge in the center while the other victorious French Chasseurs pushed back around the hill the threatening the remaining Austrian hussar unit from the rear.
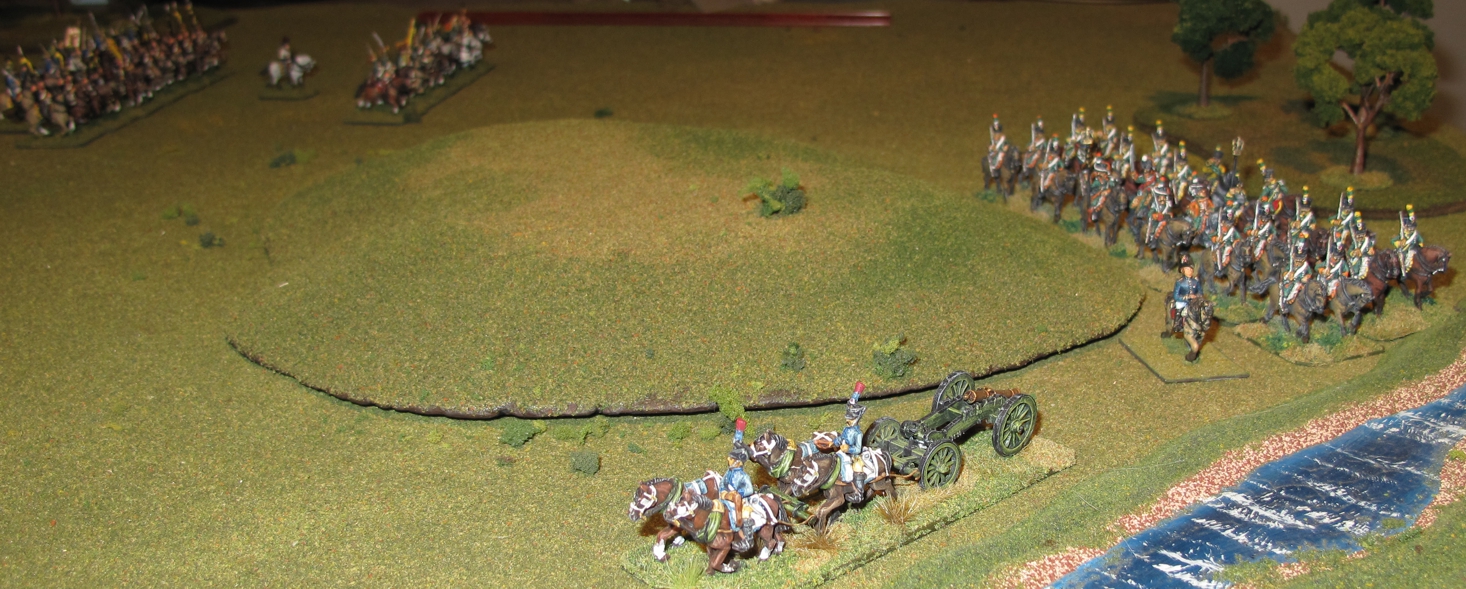
The French Hussar and Chassuers move off refusing battle further splitting the Austrian forces a turn or two later they would turn on one of these separated Austrian Hussar units and shatter it!

On the Austrian right the French infantry crushed the unsupported Austrian infantry killing or capturing hundreds, some standards, and a battery of guns. The center battles also ended in the favor of the French with over 1,000 prisoners, and an Austrian Cavalry general captured, the rest routed or were unable to press the fight any longer. At this point Archduke Charles realized the battle was lost and ordered what remained of his Cavalry to cover the infantry and guns retreat. The French Cavalry pursued the Austrians until nightfall when both sides bedded down for the night wondering what the morning would bring. Marshal Davout looked with satisfaction at the lines of Austrian prisoners filing past his headquarters and the standards lying at his feet while writing his report to the Emperor, Archduke Charles rode on into the night once again wondering where and how he could turn the tide……
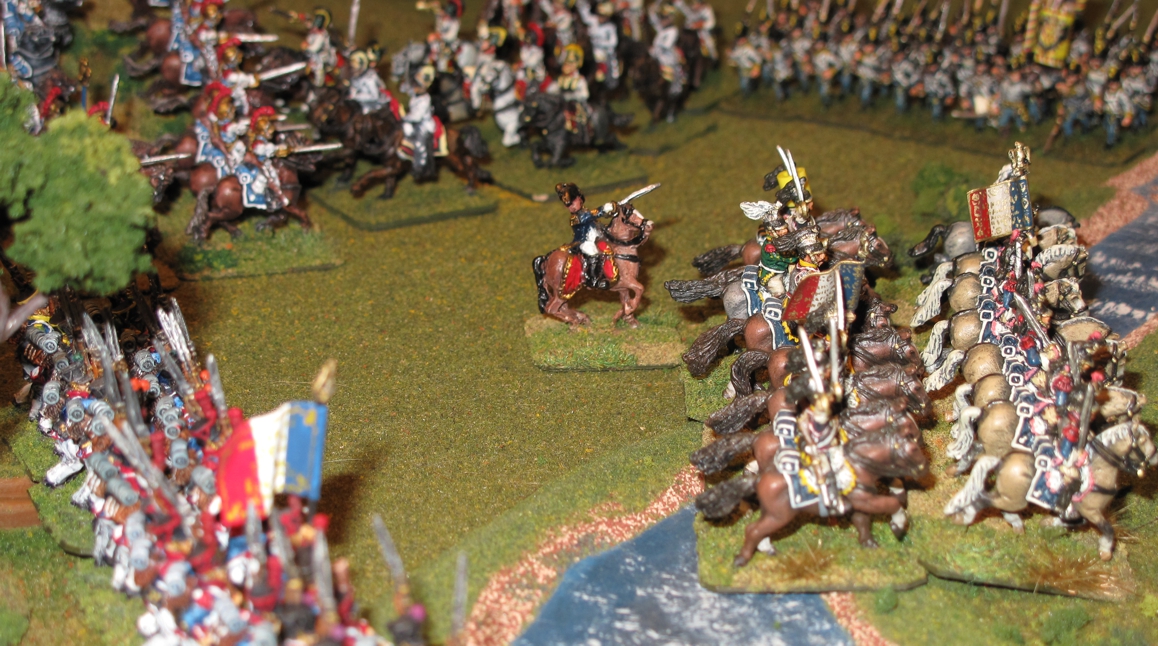
The French Cavalry General shouts to the slowly forming infantry “Quickly comrades! We will make time for you!”
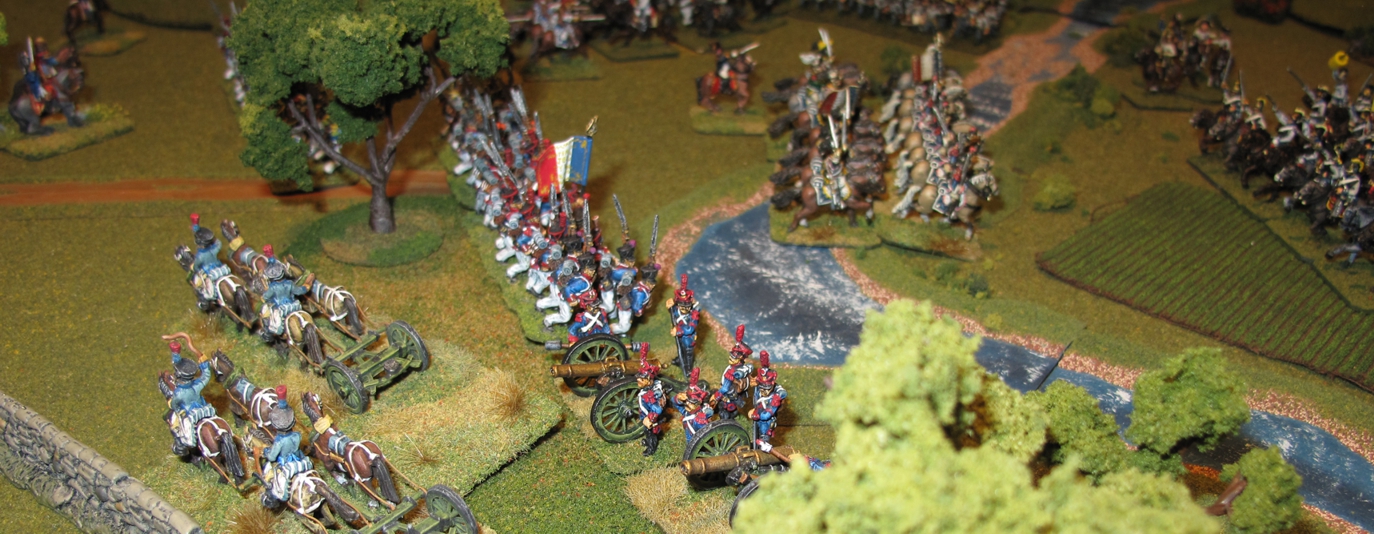
French infantry and guns deploy.
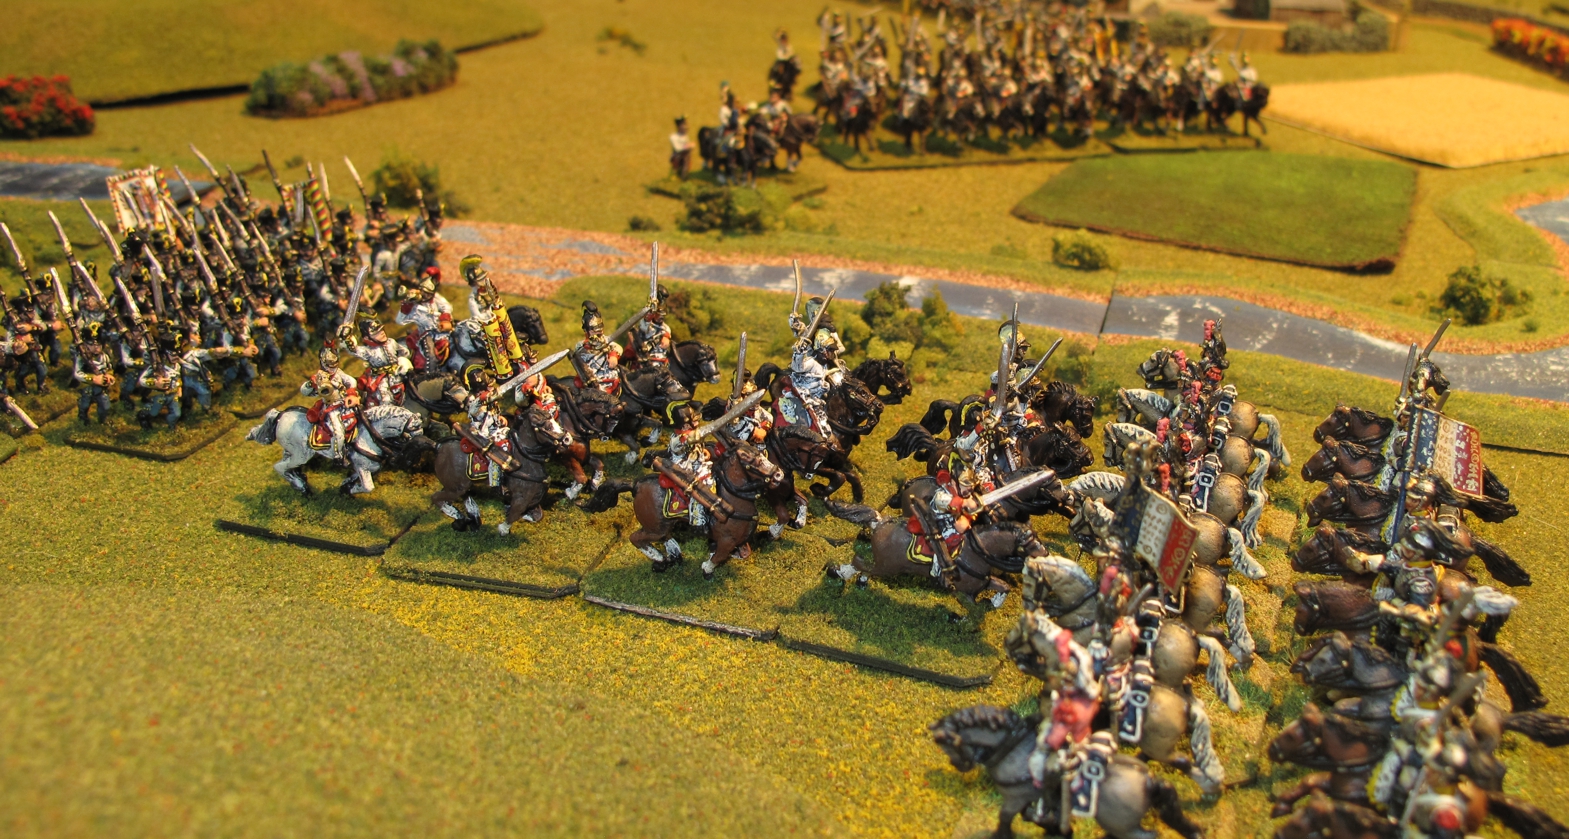
This battle found roles reversed, infantry now playing the supporting role to cavalry! This is the first clash of Cavalry early in the battle the Austrian Dragoons (the heroes of the battle on the Austrian side) take on the French Cuirassier, briefly defeating them and causing the French cavalry to retreat (they later take on the French Carabinier! who finally defeat them)
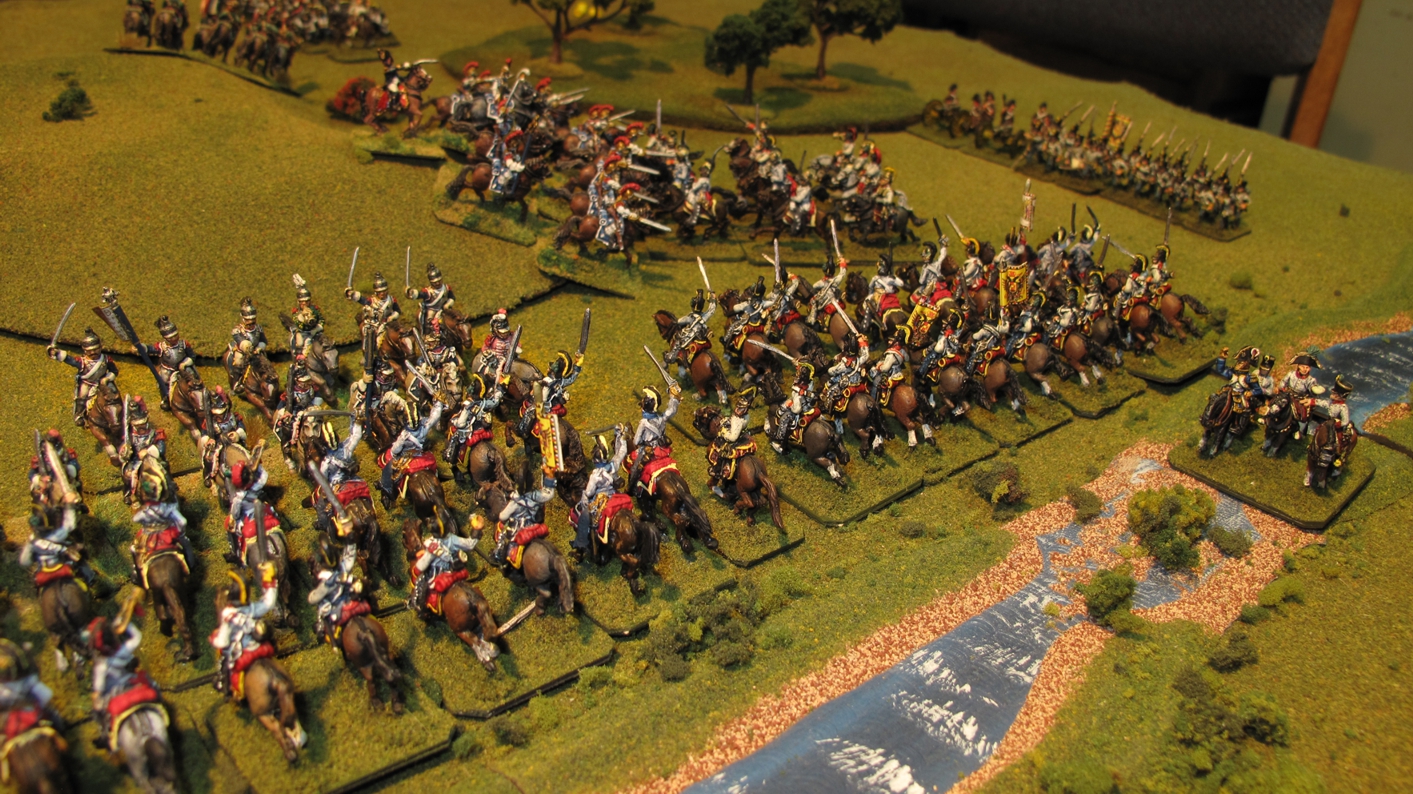
The high water mark for the Austrians with their cavalry crossing the river and pressing the French hard!
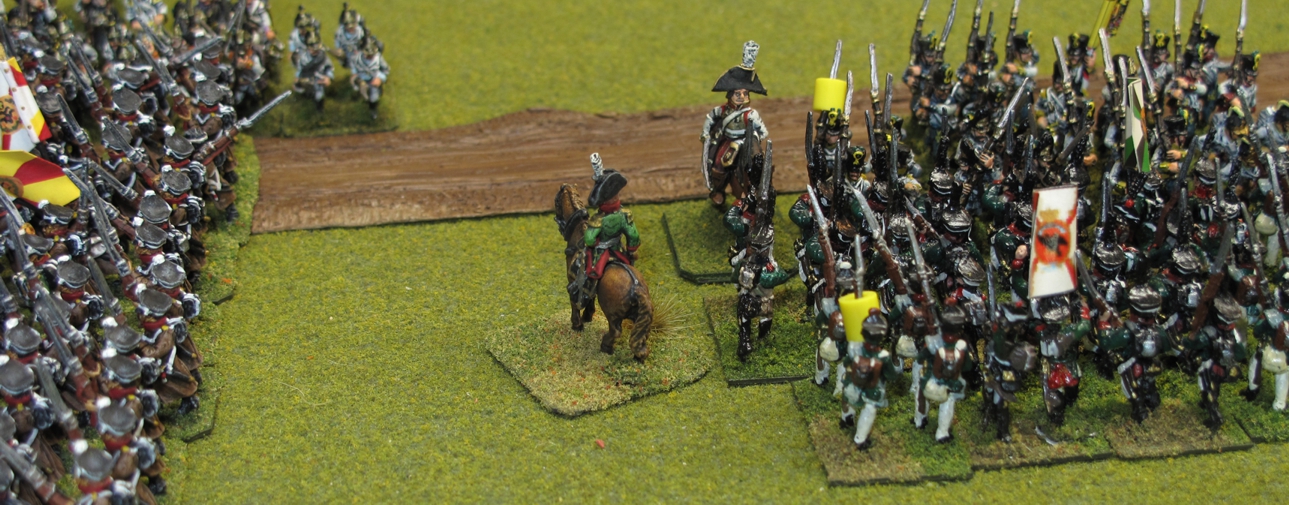
 

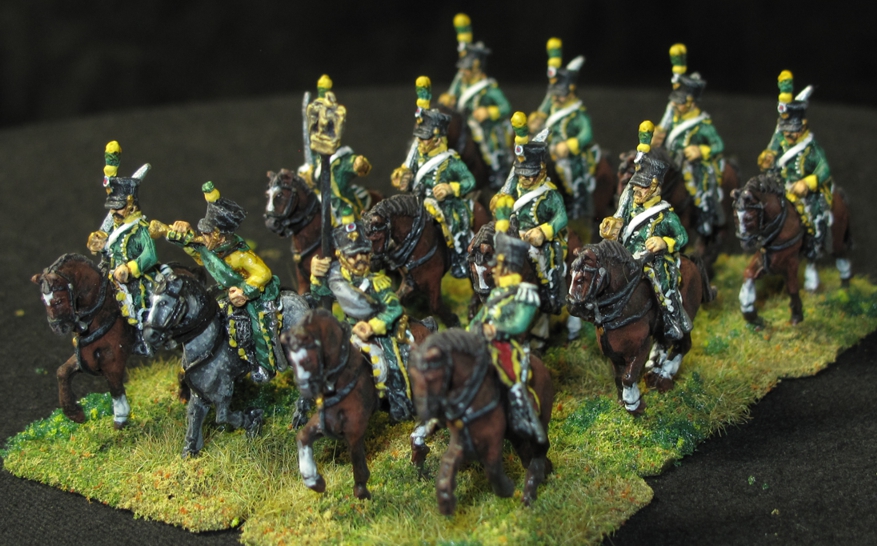
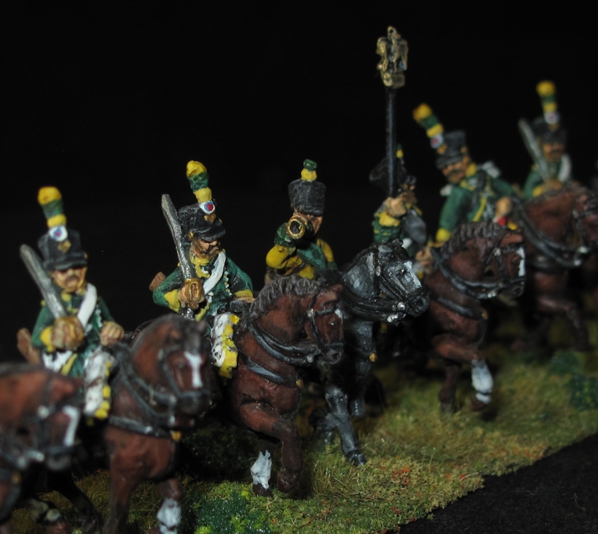
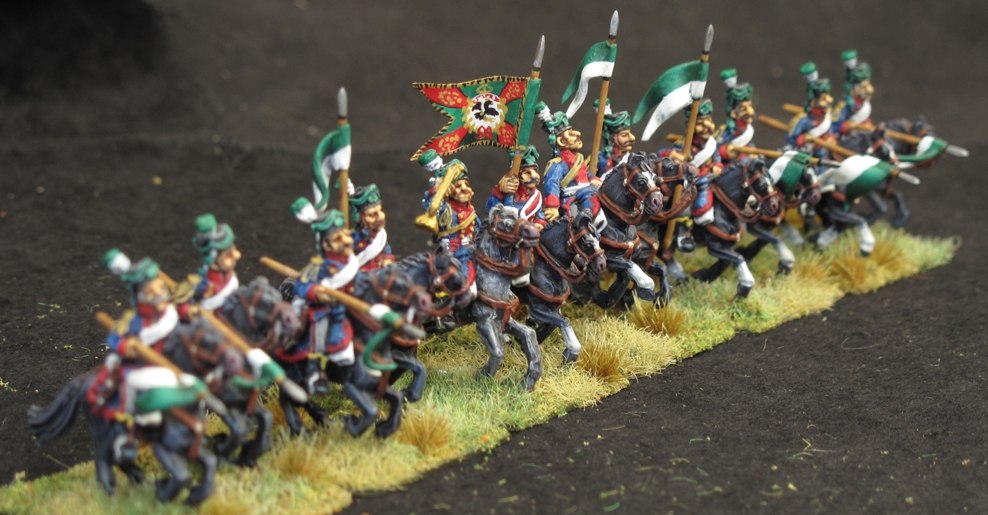
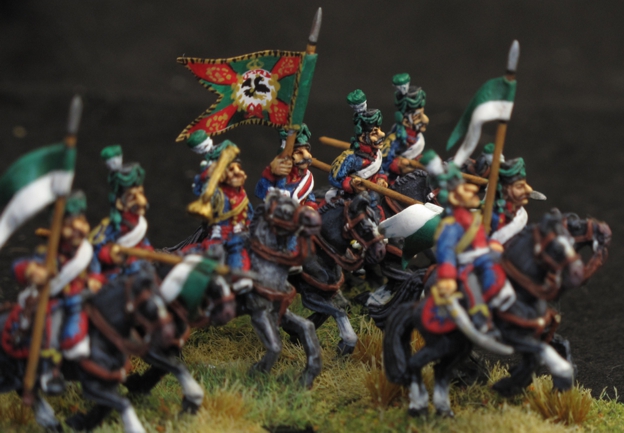
Napoleonic Chasseurs a’ Cheval

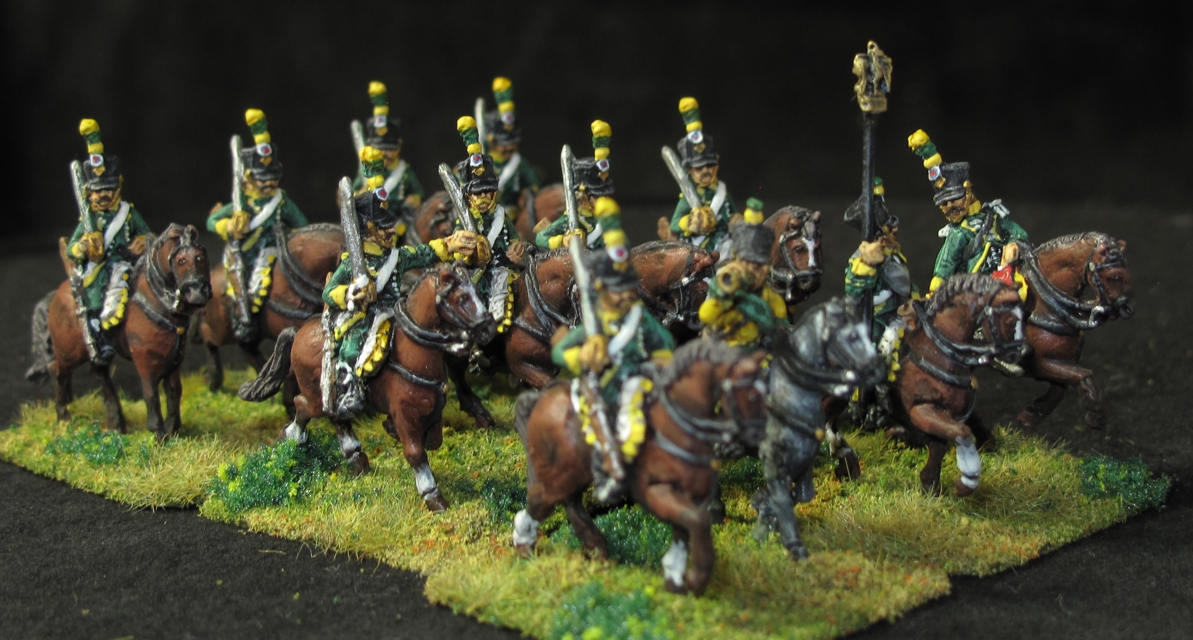
Light Cavalry the “eyes and ears” of the army! (remember all pictures are “clickable” for a larger more detailed image!)

There is something about the Napoleonic period that has always fascinated me. I think it’s a bit like my fascination with feudal Japan the period of Sengoku-jidai  (The Age of the Country at War) where war was raised to almost an art form, truly “The Art of War”. Uniforms, dress, tactics, and weapons remained basically the same for a long period of time but were honed to a fine edge. I love painting miniatures, but both Feudal Japanese and Napoleonic figures hold a special joy in painting for me!

I recently decided to toss a paint brush and some time at reducing my 20+ pounds of unpainted 15mm Napoleonic figures as well as retire some ebay units to be replaced by units painted by me. Since much of my early gaming in the Napoleonic period was done using “mercenary units” standing in for Cavalry units I had not painted I figured that was a good place to start. Looking into the “Napy box” showed I could use some more light cavalry, in fact I had only one small unit of Chasseur’s a’ Cheval (and that was painted by my friend Stevie G over 25 years ago!).

I’ve always been a fan of “Old Glory’s” original line because of the cool poses! This officer looks to be saying something to the “Eagle” bearer, perhaps “Good luck Monsieur Barrett, once again we seek glory for France!”

Most of my Napoleonic figure are from 19th century miniatures (former Old Glory line) as I think they have not only one of the most extensive lines, but their variety of poses within the pack is outstanding. The sculpts are on the whole excellent, casting good, and in the hands of a good painter look very good as well (like most figures). I feel the figures  are much more dynamic as well, charging figures really look the part, even “at rest” or “in reserve”  figures look like they are getting ready to jump in the fight not the “trotting on the parade ground” pose you see in some figure lines.

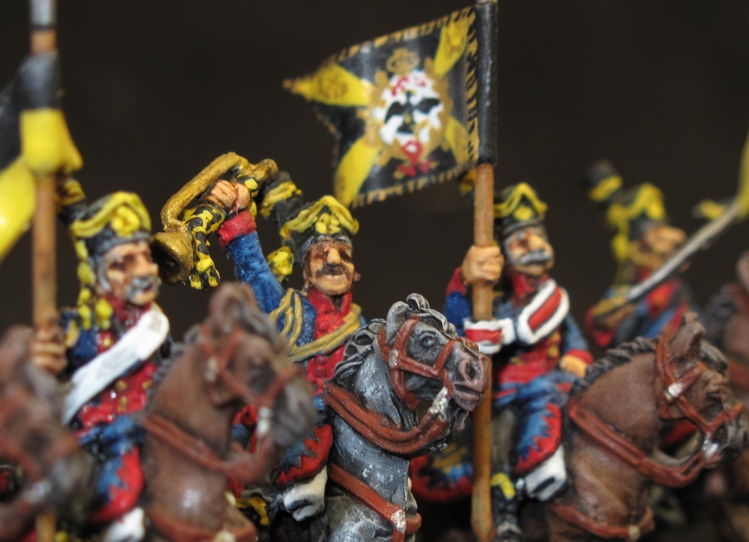
I started with 24 figures, to be split into two groups of twelve, resulting in two six stand units based for the Age of Eagles rule set. The unit Steve had given me years ago was painted as the 13th Chasseurs and as an homage to him (he started me in Napoleonic’s) one-unit world be painted in the 13ths Chasseurs colors while the other would be modeled after the 4th Chasseurs a’ Cheval. Here are the 4th Chassaeur’s a’ Cheval. Stay tuned for the 13th Chasseurs soon to follow!

Napoleonic figures are I feel some of the hardest figures to get the uniforms correct simply because of the detail, complexity, and changes that went on over the period. The research can be frustrating and mistakes will be made even with exhaustive research by the best painters… I have made a few “simple ones” in these figures, can you spot them?

Horses are always tough to make look real. Over the years I think I have learned to do a fair job. Here we have the proverbial “Horse’s Ass!”

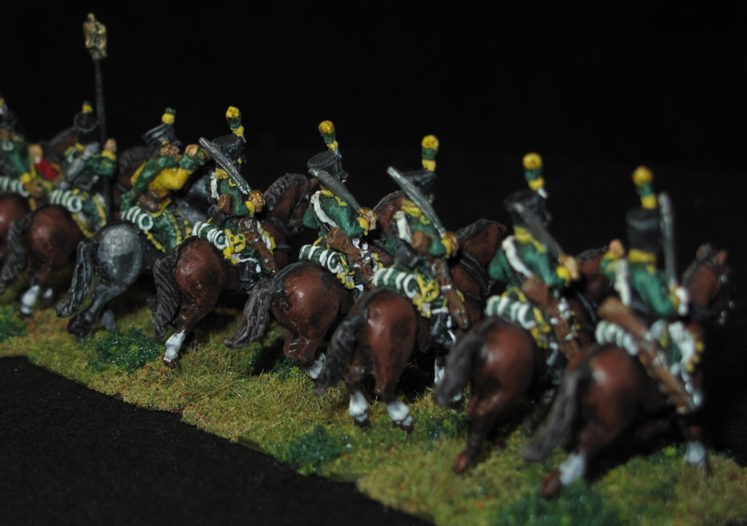
Lined up in “Attack Column” ready for the Emperors command! If you click and expand this picture the face of the horse in the back on the left is quite comical. He seems to have an expression of “good lord! not again…cant we all just get along!”
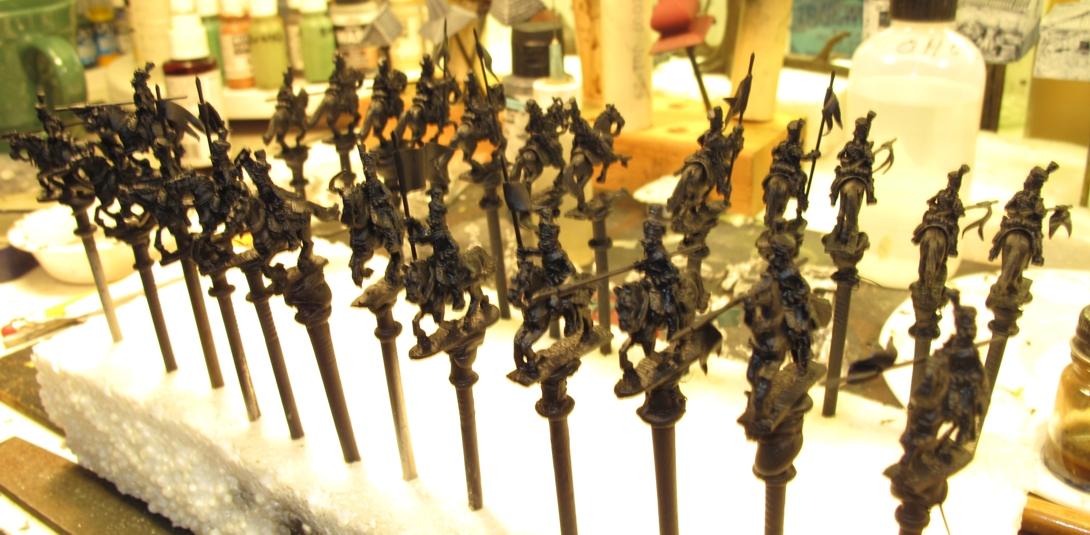
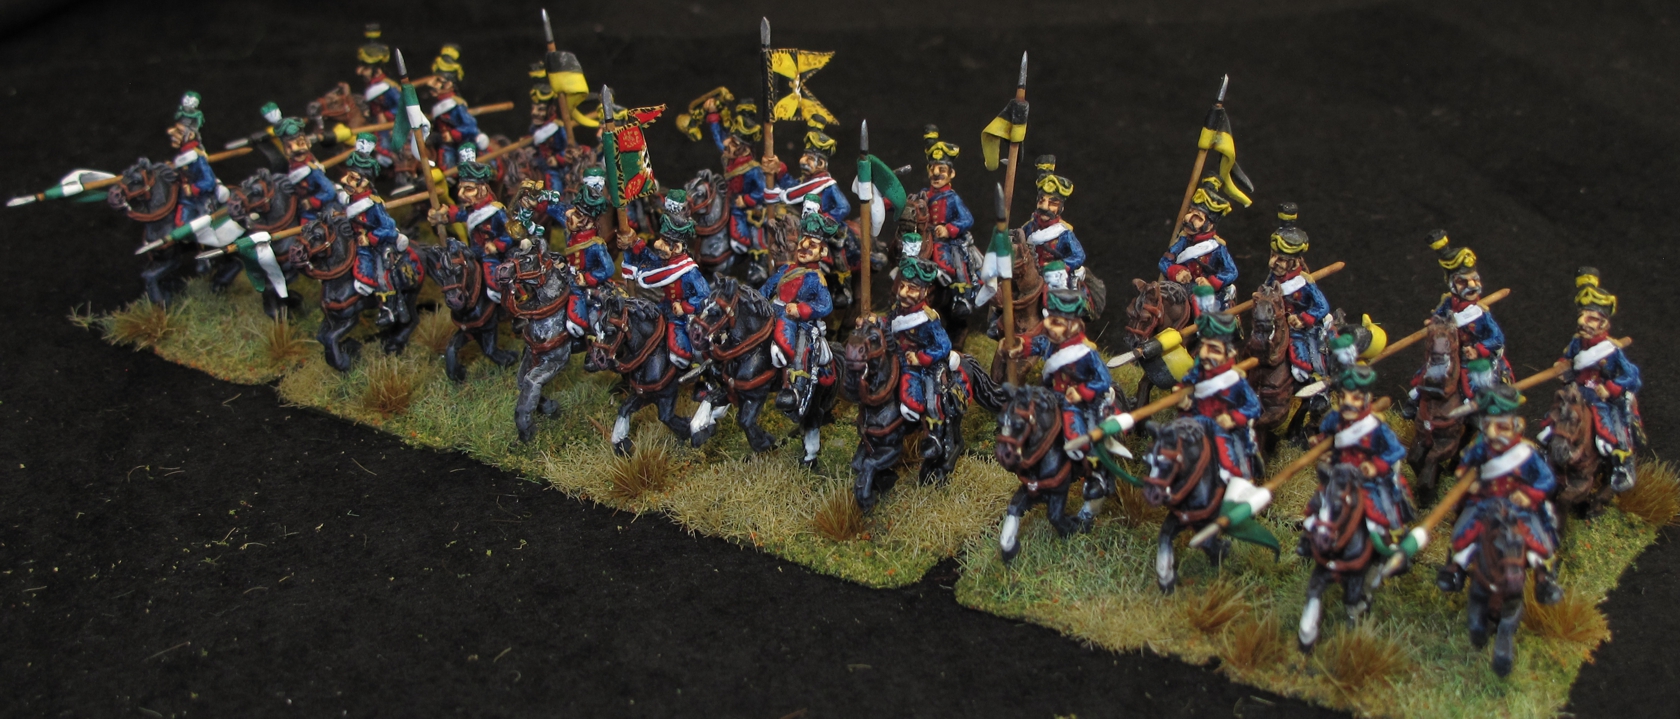
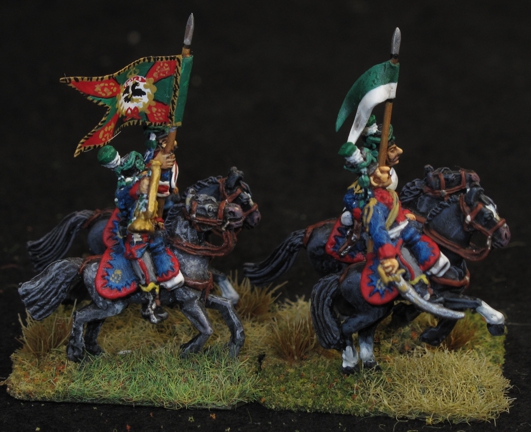
15mm Prussian Cavalry “Towarczys”

It seems that as of late I have been doing more painting but haven’t reduced my lead pile at all since I have continued to buy more for myself and all the painting was done for friends! Both enjoyable none the less!

The current project was for my long time gaming buddy Stevie G and a couple of Napoleonic Cavalry units. Steve has a big Prussian force and recently picked up some Prussian “Towarczys” Lancers from Boki miniatures out in Estonia! They are some of those troops that are rare from a collector standpoint but look awesome on the battlefield.

They are going to make a fearsome looking unit on the battlefield! Makes me wish I had Prussians so I could keep them for myself!
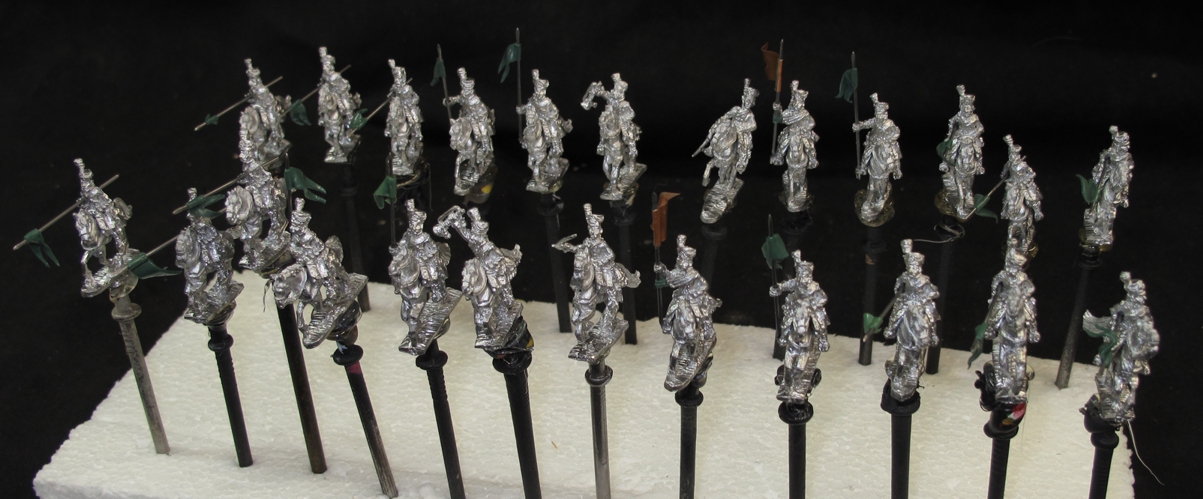
The minis are well sculpted with lots of details and are both fun and easy to paint. The casting is a bit off requiring some work in cutting out bubbles and filling some poor cast areas. I believe the problem is that these are gravity cast and not done with a spin cast machine. Its just a small chore and not really a big deal. The minis do not come with horses or lances. Horses from either AB miniatures or 19th Century Miniatures work well, I used horses from Old Glory 15’s (19th Century Miniatures) and though a bit less beefy than the 19th century horses on average I think they work well as eastern European horses tended to be smaller than their western European cousins.

Next were the “lances”, they don’t come with any, not a problem for me as I replace ALL my flag poles, spears, and lances, on all my figures with STEEL! Over the years I have gotten pretty good at this and make some nice looking replacements. That how I got hooked into painting the figures by offering to make the lances and do the pennants for them as well.

Stevie G like I mentioned before is a long time gaming bud as well as the two of us being “grips” in the movie biz in Los Angeles. We have spent many a long day/night together on sets, Star Treks, Profiler, Charmed, and more, passing them time between shots talking miniatures (on Deep Space Nine we spent our lunch hours painting minis right on the set!) Steve has a heart of gold and has always jumped whole hog into any type of miniature wargaming that I dragged us into so the more I looked at the figures and worked on them the more I felt like going the whole way “prep to paint” with them. I felt it would be a great way to thank him for all the support and friendship over the years.

The first stage was cleaning and matching the horses and riders. I always carefully look at the riders pose and position, then select a horse that matches action wise. In other words don’t put a lance down charging figure on a horse that’s standing still! I also look at the figures and try to get as many varied poses in the unit and space repeated poses out to make them less obvious. Sometimes small mods can help with this, same rider different horses, bend a sword arm, cock a lance, and gently twist a head. Then since these riders and horses were from different manufactures I took time to cut and file both the back of the horse in the saddle area and the rider to get a good natural looking fit.

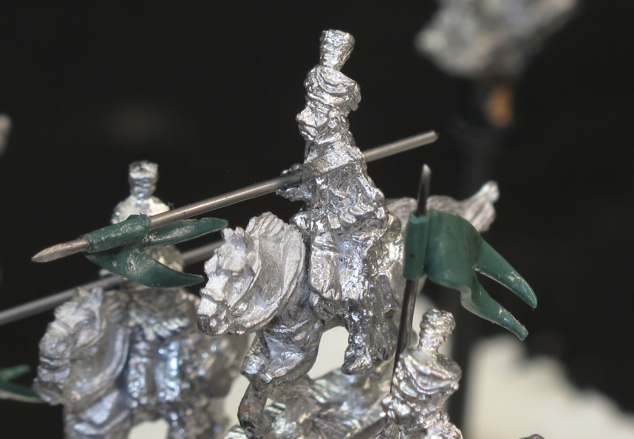
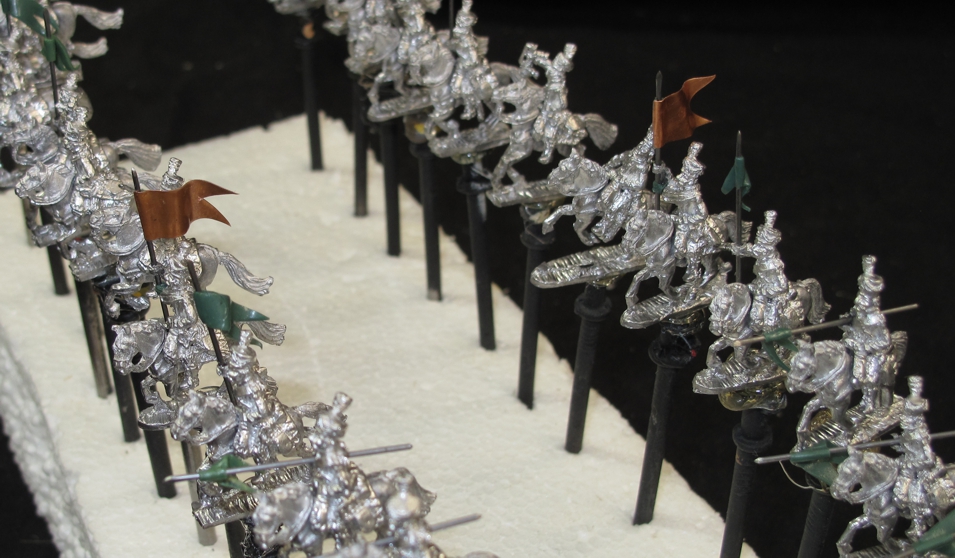
Hot gluing the figure to nails is something I started doing 30 years ago as an alternative to the common practice of gluing them to Popsicle sticks. A chunk of Styrofoam is used as a base…easy peazy!

I always assemble the figures into the unit and determine each figures position in the unit before painting. This can help give the finished unit a more cohesive fee. I might have a figure that is pointing complimented by selecting a figure that has his head looking in that direction, have charging or running figures on the same stand, charging figures in the front, etc.…

They were a lot of fun to paint and work on!

For a larger view just click on the picture!

Flags are something I added and perhaps were not historically carried but they look good and heck this is wargaming!

Unit colors were selected from text of one of Knotels prints from the excellent books by Elting on Napoleonic uniforms

I’m really happy with the way the poses came out. I think the units have a very dynamic feel, truly looking like they are just laying down their lances to begin a charge!

Black primed with Vallejo primer and ready for paint!

Total Battle building project

I have written a few articles on the TOTAL BATTLE miniatures buildings and how much I liked them. Well I still like them and everyone who plays in my battles echos that along with my decision to go with 10mm buildings in 15mm games for a better look when representing towns and villages.

The slightly smaller 10mm buildings allow more buildings using the space that would only allow two or three 15mm buildings

Over the last year in between other projects I have been painting these buildings and occasionaly transporting them to games not at my place. I quickly realized that to prevent dammage to them I needed to come up with safe and easy way to transport them.  For years I have made an effort to bring innovation to wargaming with miniatures, especially when transporting miniatures and terrain. I dare say some of the things that are common today in the miniatures world where developed by myself and a few others. Bold statement? Yes but when I started miniature gaming people were slapping 3-4 colors on mini’s, gluing them on some painted cardboard, and transporting them to games in old pizza boxes!  Times have changed!

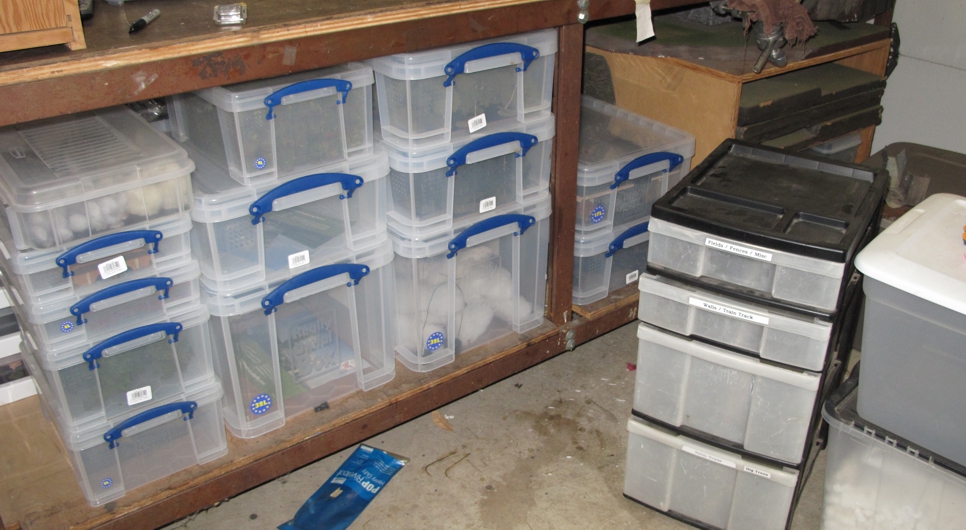
So this article is about finding a way to store and transport all my lovely Total Battle miniatures buildings easily and with out damage!  Recently I decided to change the way I store terrain at my place because overtime I found much of my terrain was getting dusty and dull looking even though it was stored in those multi level plastic storage drawers. The drawer system did a pretty good job but over time dust would still filter in especially since my gaming area shares the same space as my shop and terrain making area. The drawers were also not that convenient for transport. My career in the movie business had given me a lot of experience in storage and moving of equipment safely so I’m a bit of a stickler when it comes to this. I want a system that works quickly, easily, and most important does the job. I searched long and hard and finally settled on a plastic stacking box system from “the Really Useful Box” system. The system is readily obtainable, strong, and economically priced. In the US they can be found at Office depot and Office Max as well as tons of internet sellers, I’ll list the common sizes I use at the end of the article but the one used for my buildings box is the 17 liter box.

The beginning of the “new” system. Old drawer storage on right and new “Really Useful Box” system on left. Easy to see and grab what you need and the stuff stays clean!

Over the last year or so I have been replacing my “plastic drawer” system with the “Useful Box” system and had reached the point of finding a good way of storing my Total Battle buildings in one. I wanted to keep all the buildings in one box but I also did not want to use too big a box (length & width) so I settled on one that was smaller but deeper. This box would to hold most of the buildings in it on one level but required me to “create” a second shelf in the box for the balance of the buildings with a bit of room left over for a few other terrain items.

The next step was to figure out how to keep the buildings organized and secure in the box so to prevent damage as well as easily see that everything was there (useful when picking up after a convention/away game when your tired and may miss something. My first idea was to use some powerful Neodymium Magnets in the base of each mini and then line the box bottom and shelf with thin steel. This required drilling the base of a building and then gluing a magnet or two flush in the bottom. It worked ok but not perfect. If there was a jar or a lot of vibration to the box the buildings could shift and it would be a bit of work to modify all the buildings….I didn’t like it. Next idea was to go back to another tried and true method we use for camera gear and other delicate gear, foam cut to size. This too required some work but in the end was a better system and not that hard, it was the way I went.

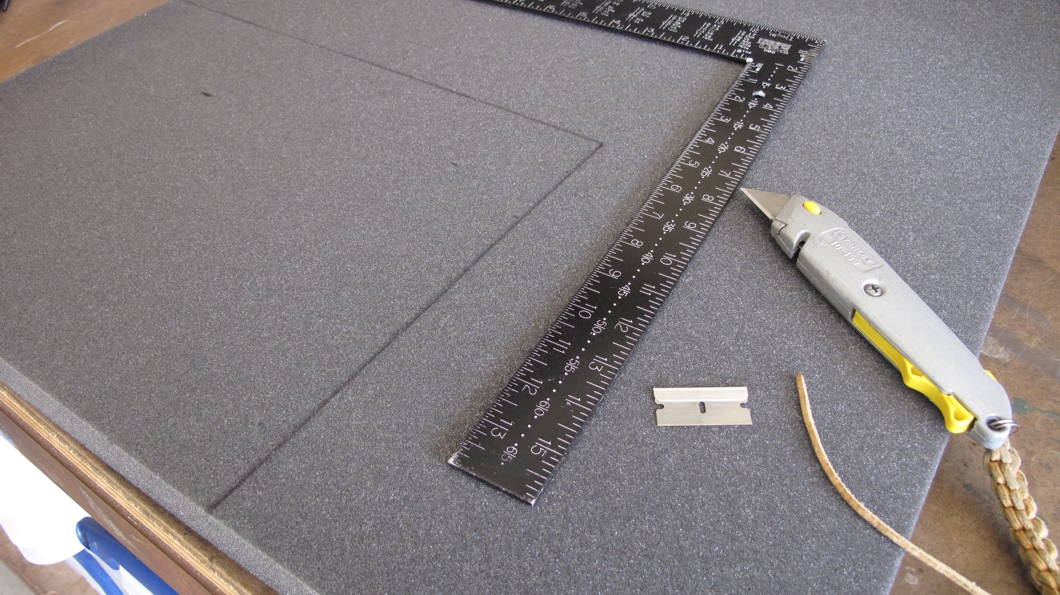
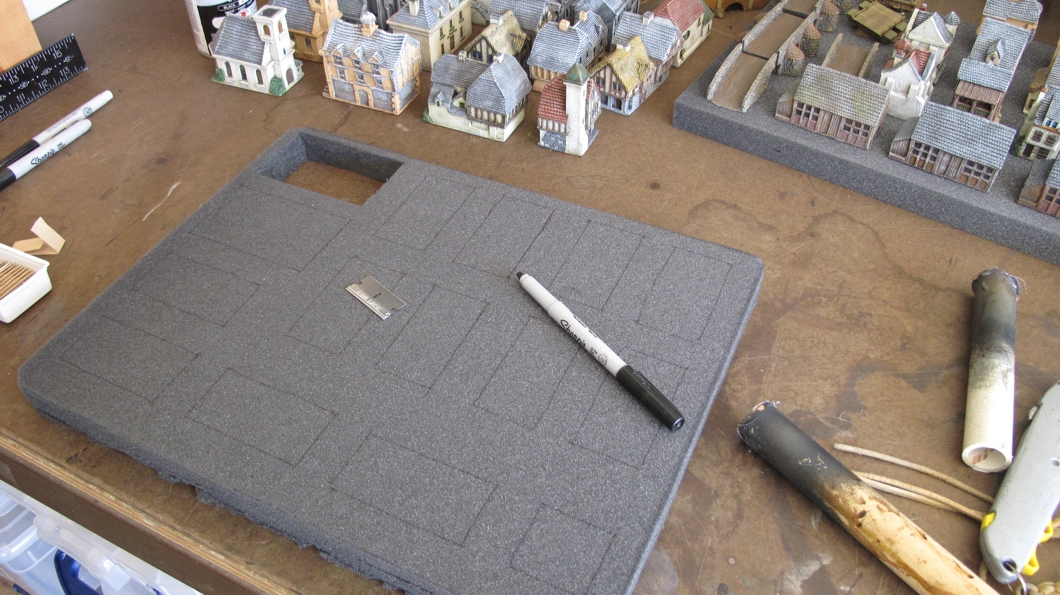
The right tools always make the job easier, safer, and faster. Note the single sided razor blade.

I recommend getting a good piece of foam not the white or tan soft foam found in chairs and couches as that foam tends to age and deteriorate when not sealed up in furniture. Use the grey packing type foam, it’s stiffer, last longer, and cuts easier. You can pick up this foam at any foam supply cheap. I bought a 2’ x 6’ one inch thick piece for $12. This project would only use around 2-3 feet so plenty left for other projects! To cut the foam a RAZOR sharp tool will be needed, utility knife, xacto knife, or even the razor blades made for single sided cutting. I used all 3 types and found the simple razor blade to be the best. Blades will dull up and this project took three.

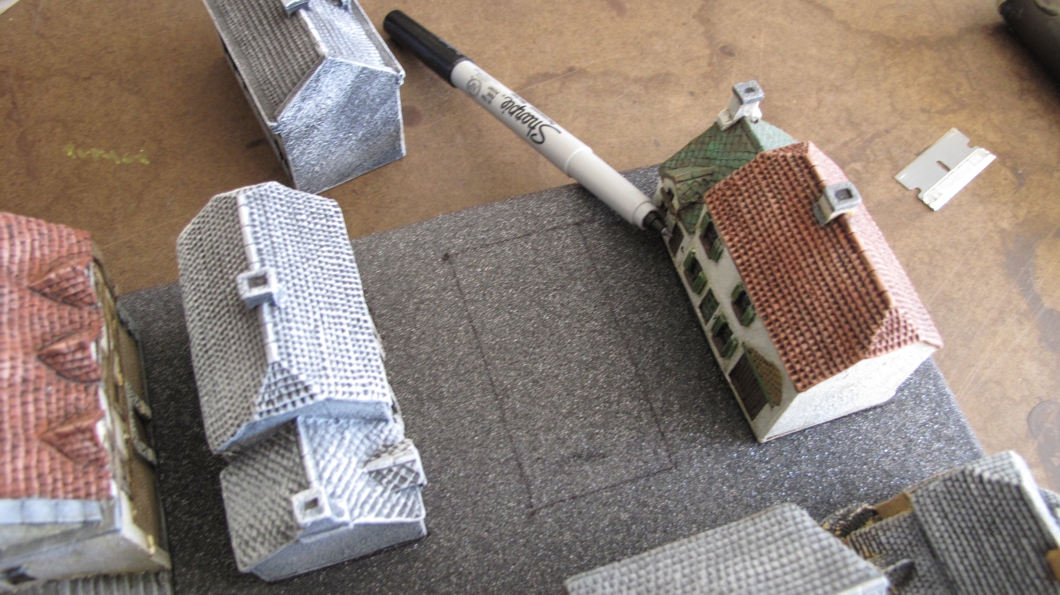
Measure the bottom of the box and cut a piece of foam to match. Make sure to get a tight fit. I cut a bit over size and then trim down. Next the buildings are laid out on it and using a fine tip permanent ink marker (this ink wont later rub off on buildings), one by one mark the buildings position on the foam. Turn on some music, take your time and cut out foam from where the buildings will sit. It’s important to make these cuts just right. Too tight and paint may rub off over time, to lose and your buildings will fall out. Take your time and watch your fingers.

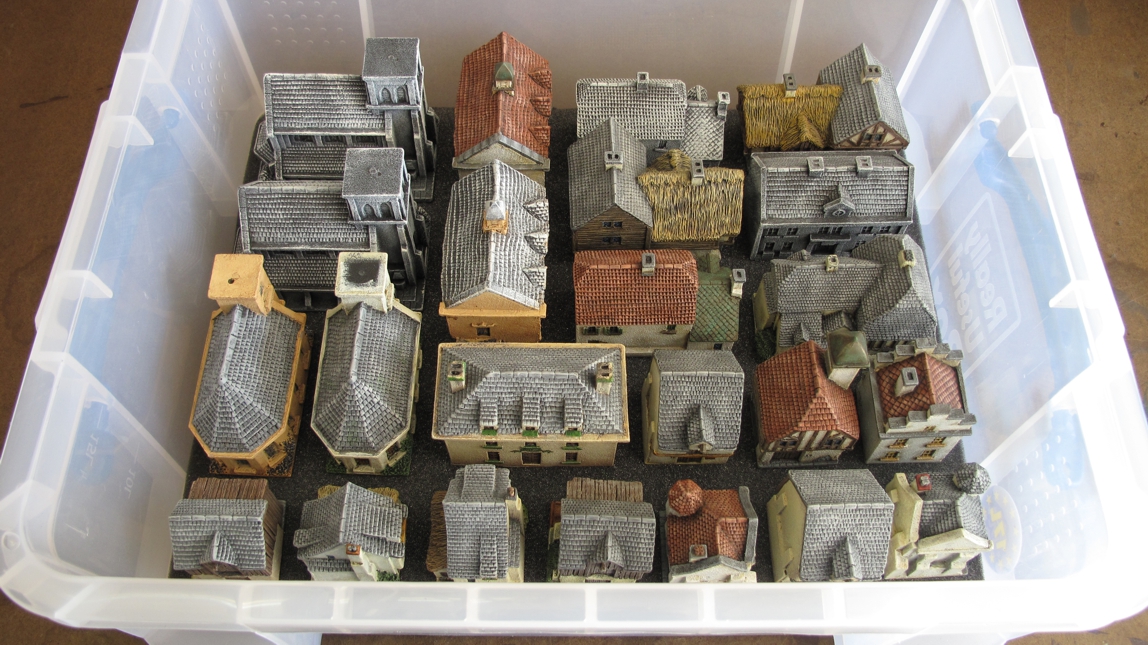
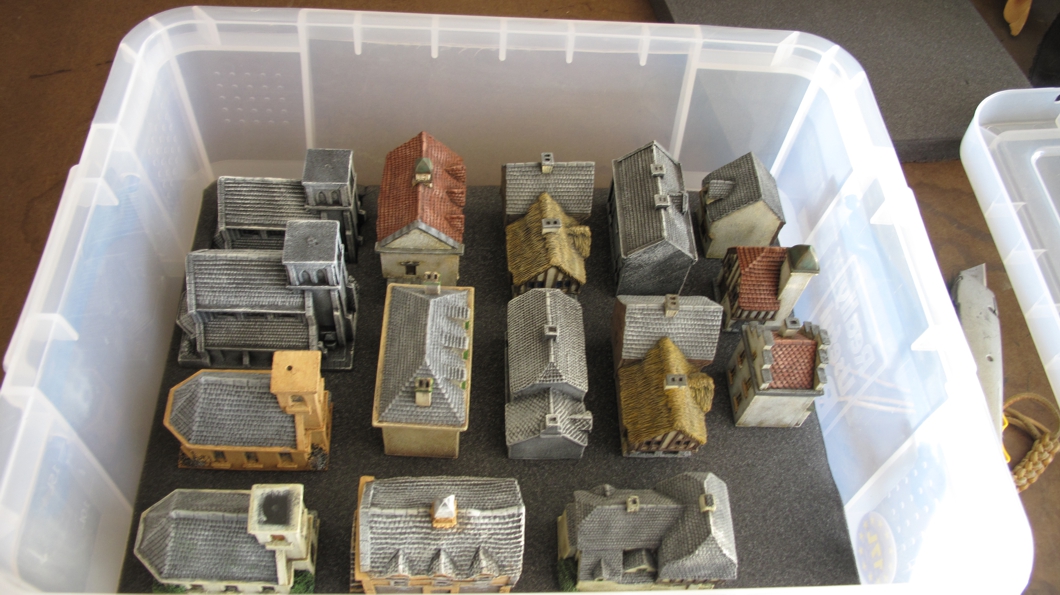
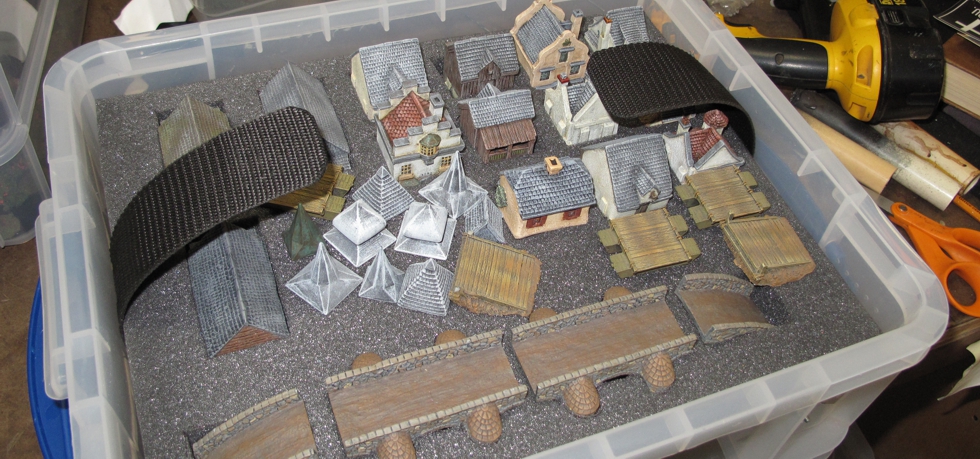
My first attempt at spacing was a bit to crowded and would have required the foam to be cut to thin and then lose needed strength so after a bit or rearranging the bottom layer looked like this.

Now that I had the spacing to my liking it was time to cut the foam.

Check your arrangement several times and when you are sure it works its time to mark the areas that will be cut out. Use a fine tip permanent ink sharpie for this if you have one, other markers may have cheap ink that wont really dry and rub off later on your buildings!

Cutting foam or anything else requires careful attention to what you’re doing! First to prevent injury to yourself and secondly to make sure you get the cuts right! Take your time! There is an old saying about cutting “measure twice cut once, measure once cut twice!” and its always possible to remove more material but once a cut is too big your in trouble. I did all this building cutting and fitting with a single sided razor and used 3-4 blades since even foam dulls the blades.

When cutting I made sure I cut slightly on the inside of the line ensuring a tight fit and remembering I could always take more off if I needed to. Switching to new blades after abut 5-6 buildings made sure the blade was always sharp enough to be able to cut by simply pushing straight down using a slight side to side motion.

As with most of my projects and articles at a certain point I get so wrapped up in it I start forgetting to take pictures! When I finished the bottom section and started work on the second level that was the case for this project.

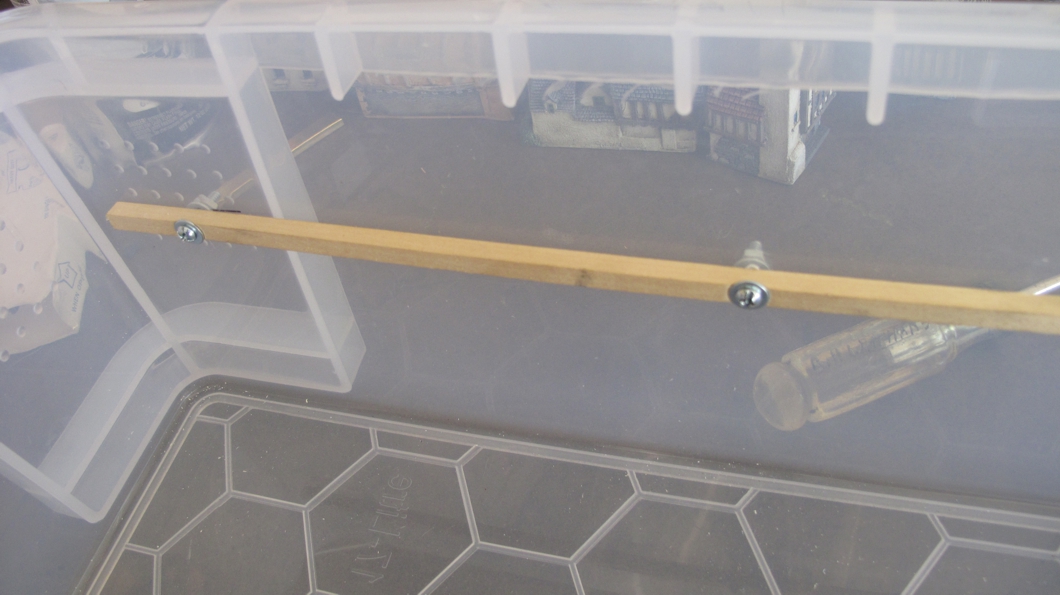
My top shelf will sit on these two wooden “runners” holding the top shelf just above the bottom buildings. For my project full length runners on each long side were strong enough to support the top shelf. Take care to make sure these are level and an equal distance off the box bottom on each side so the shelf sits correctly in the box.

The second level would be made of 1/8th inch plywood (luan) and sit JUST above the tops of the bottom level of buildings. The bottom level hold the biggest and tallest buildings, the top shelf the smaller buildings (height wise). Make sure you plan all this out at the beginning of the project!!! Be doubly sure that all the measurements and tolerances will work out!

The top shelf being 1/8th inch is easy to cut using a small power or hand saw, again cut oversize and trim to fit. A second piece of foam is cut for it and the process of layout and cutting in the buildings happens just like the bottom shelf. I haven’t yet but I may use some spray contact cement (3M 77 spray) to bond the foam to the top shelf.

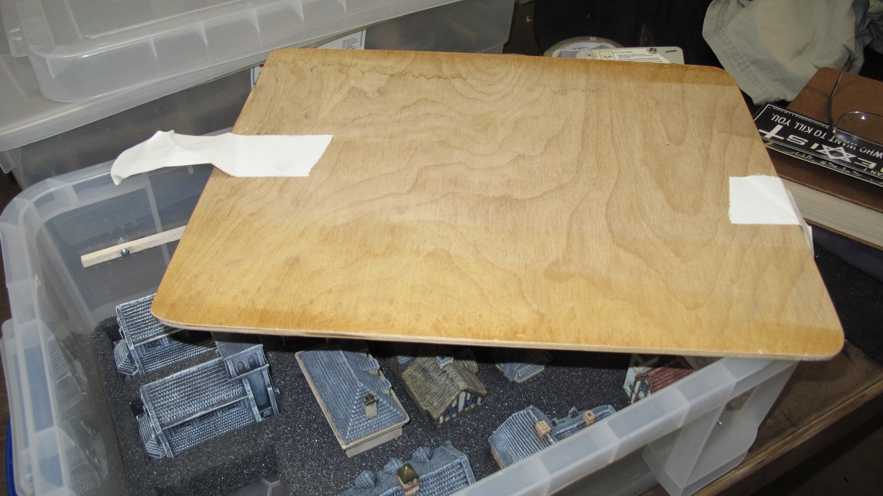
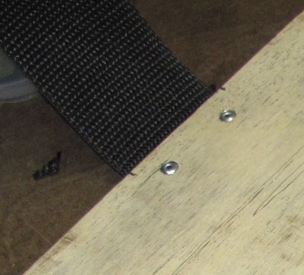
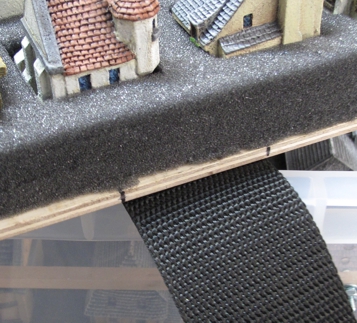
As a final step I put a couple of flexible “tabs” on each end of the top shelf so I could lift it out and get to the bottom section. I started with couple of temporary tape tabs to allow me to get the correct spacing and balance for the tabs. Later I used some 2 inch webbing material pop riveted in to create a strap for this purpose. Don’t complete this step until you have arranged and cut in your buildings since the weight may not be balanced meaning your straps may need to be off set so you get level lift out of the box! Find the balance and center of gravity and adjust the straps to match this ensuring a level lift. Pop Rivet guns are cheap and a really useful tool to have around the house! Holes are drilled in the shelf insert and the strap where the rivets will go. I used a hot wood burning pen (a small heated nail will do!) to burn and seal holes in web strapping and a lighter to melt and seal edges of strapping after cutting.

Top shelf in and tabs just lay across the top. Some lose stuff has still not been cut in yet.

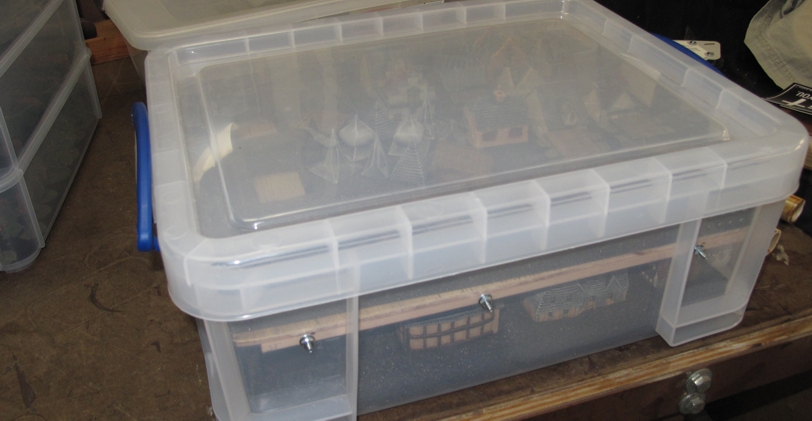
Finished box. You could drop this setup from several feet and have no damage to the buildings! the box may be damaged but the mini’s will not be.

All in all I think this project came out very nice and made my hauling these buildings down to a game easy and safe from any damage. It’s also going to do a much better job of keeping my terrain looking good for years to come!

The only fault I could find with these boxes is they do not give dimensions on the box except to list capacity in liters. Their website does give the dimensions as well as a picture that does a fair job of letting you see which ones match for stacking.
I’m currently using:
64 L, 33L (both stack) Big
32L, 17L (both stack) Medium the 17L was the size used for the building box.
9L, 4L (both stack) Small


The Building continues!

Set3

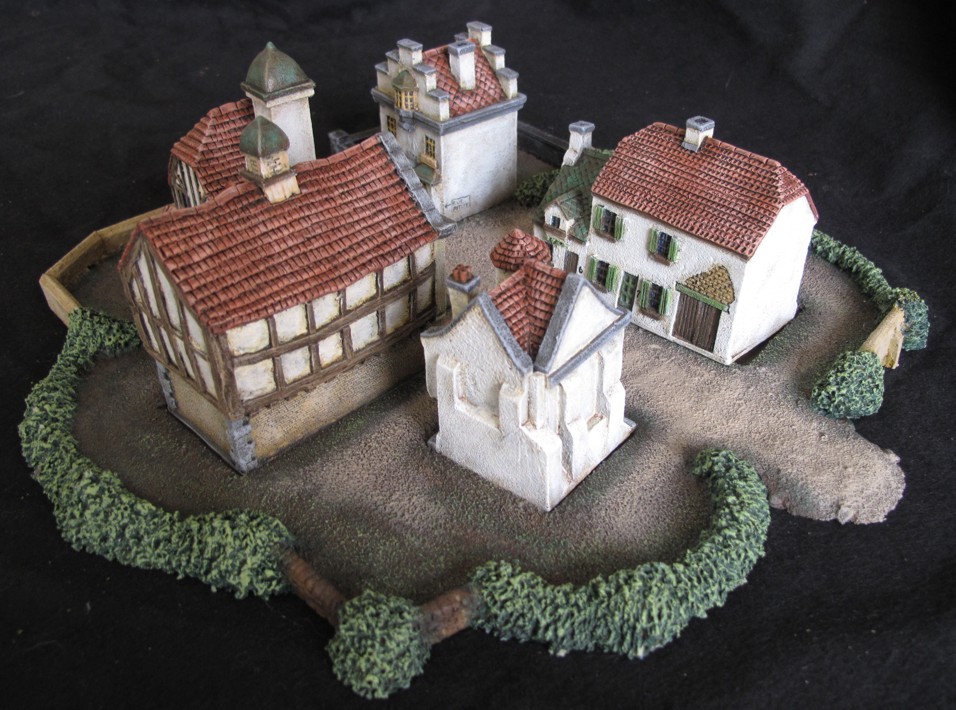
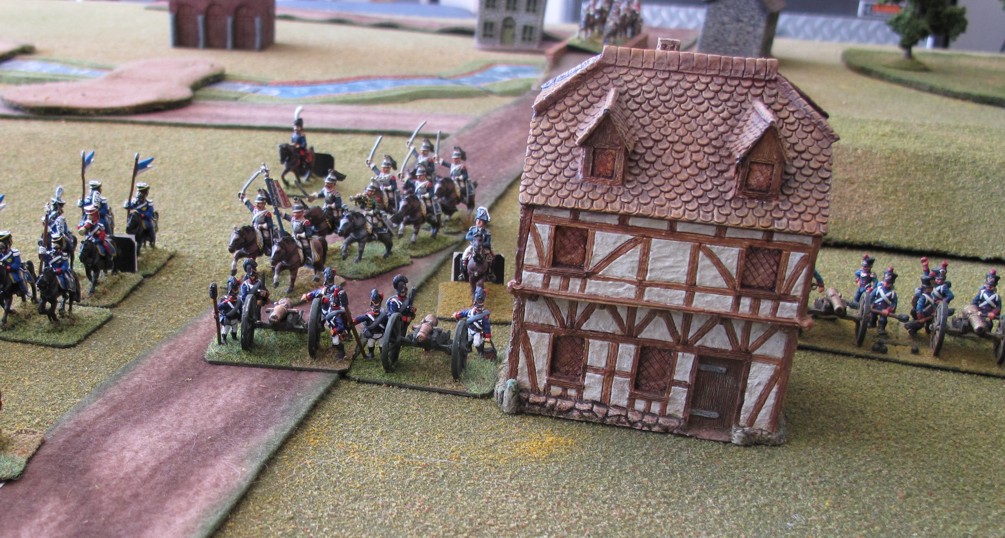
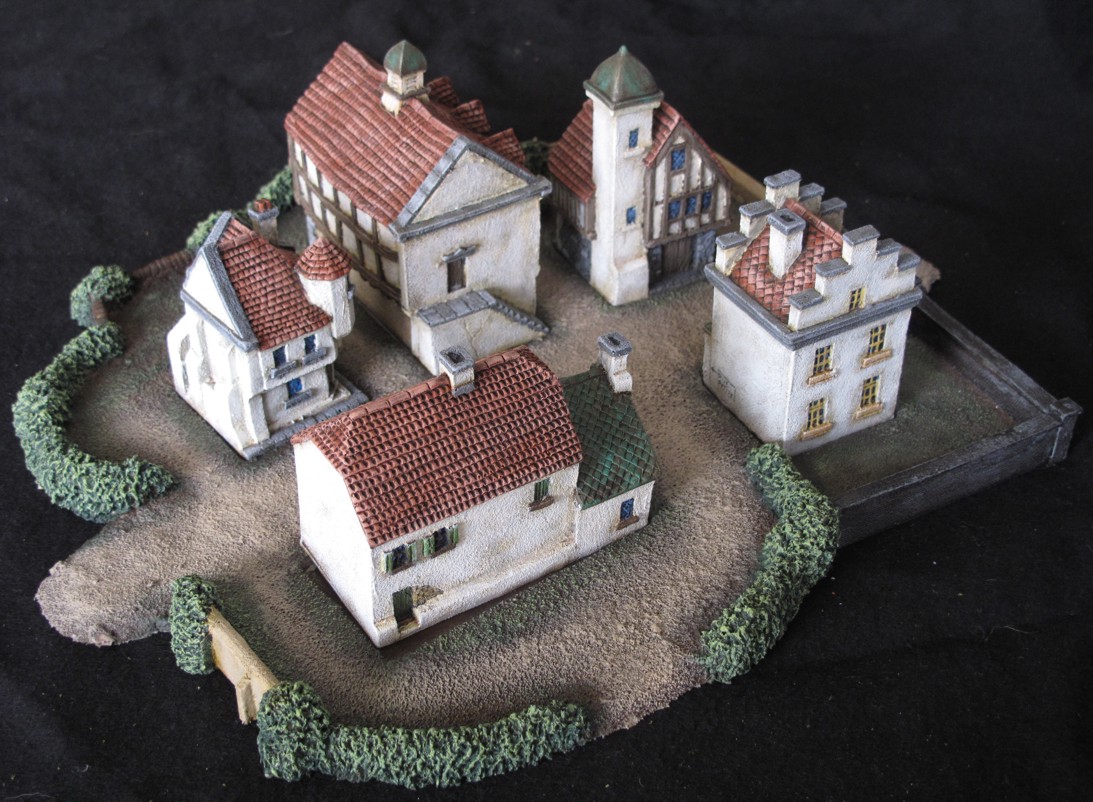
The “Homeowners association” in this Village is tough! Red Roofs only!

As a follow up post to the last one on the “Total Battle Miniatures” 10mm Buildings for the Napoleonic Wars in Europe I figured I would post pictures of all the buildings as I worked my way through painting them. Here are the next five I have done. In the “Total Battle” base system five buildings would be the number required to fill one of the “Village” bases and is a comfortable number to paint as a group, speeding things up as you can paint the same areas such as roof, walls wood, ect…at the same time. This set of five I did a bit different look for the roofs, using a red/orange color for the tiles and selected some of their buildings with a distinctive style “cap” to some of the roofs. This different roof treatment was treated as a “copper” sheet roof, not uncommon back then in Europe and other places. I gave it a weathered look to show copper as it looks after years of exposure to the elements. I also did a bit of house numbering as well and signage.

Set3dWhile these buildings are all painted with the same style and color palette they can easily be mixed into the other buildings as some towns had buildings that looked very different from one another. Painting this way however speeds up the process enormously and helps you to have a consistency when you want it.

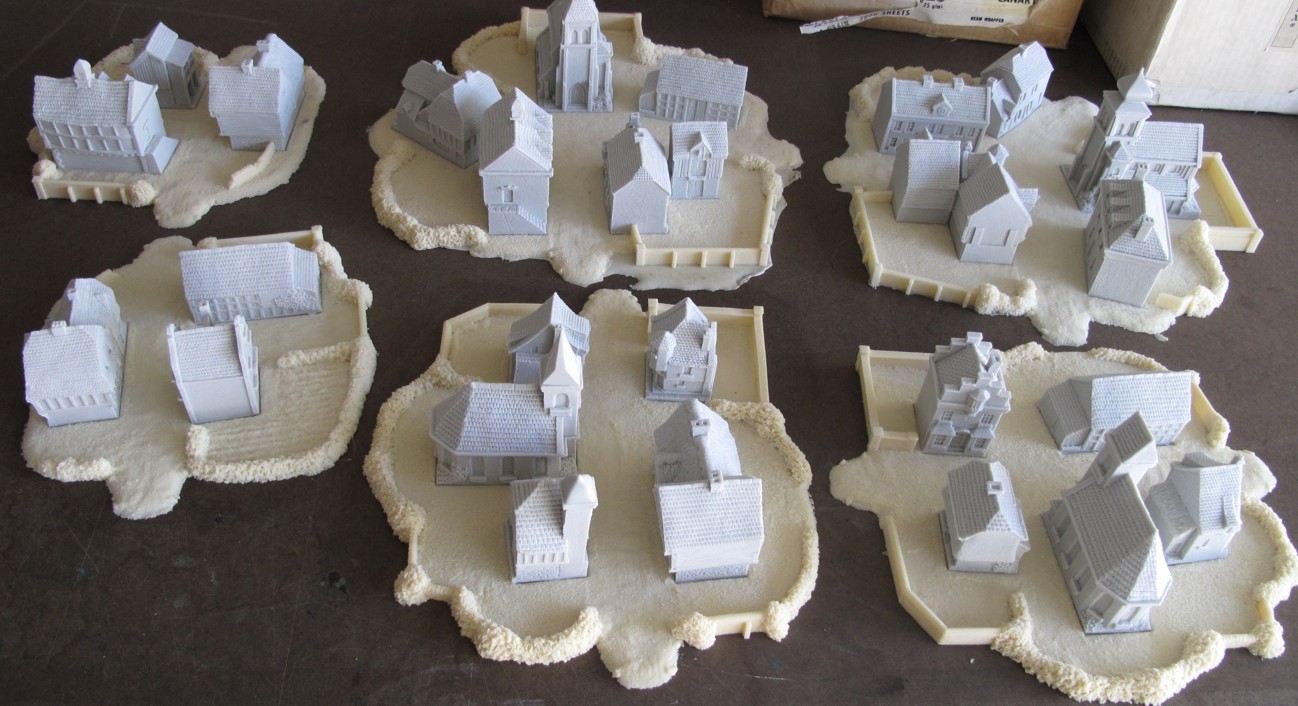
Here's the whole set as ordered.

Here’s the whole set as ordered.

BasepaintWash

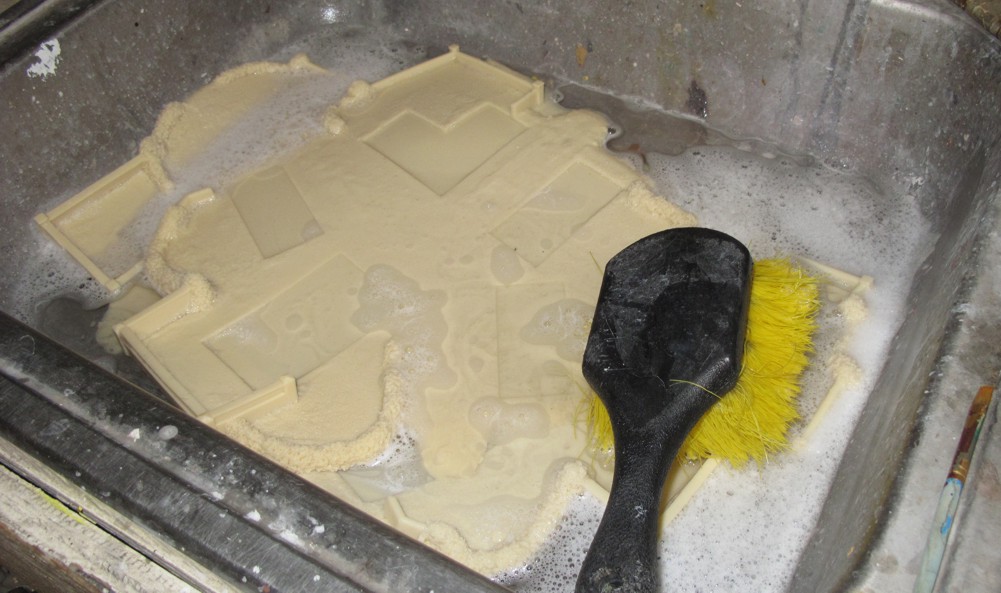
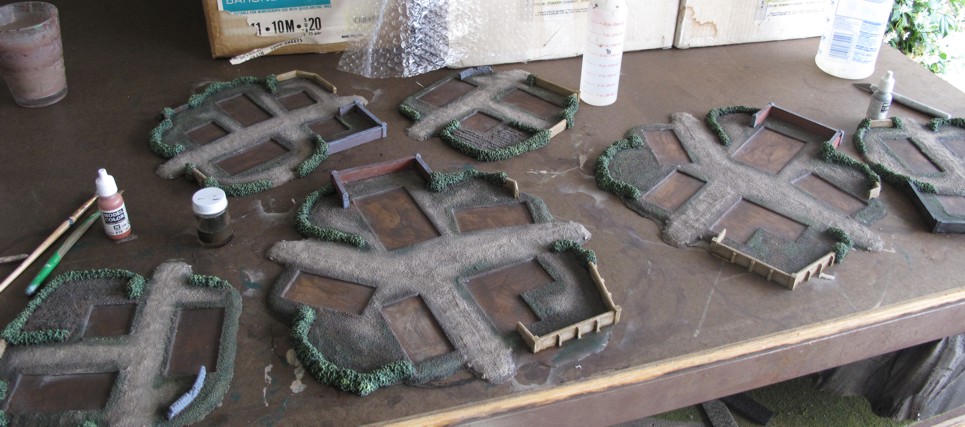
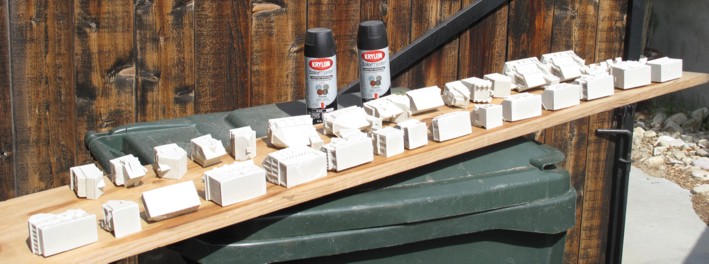
In the last post you saw this picture of the whole unpainted set. All the buildings need to be washed in warm/hot water with dish soap to remove any mold release. I was told no primer was need and a good acrylic craft paint would be fine. I used a combination of craft store paint with some Vallejo and washes.

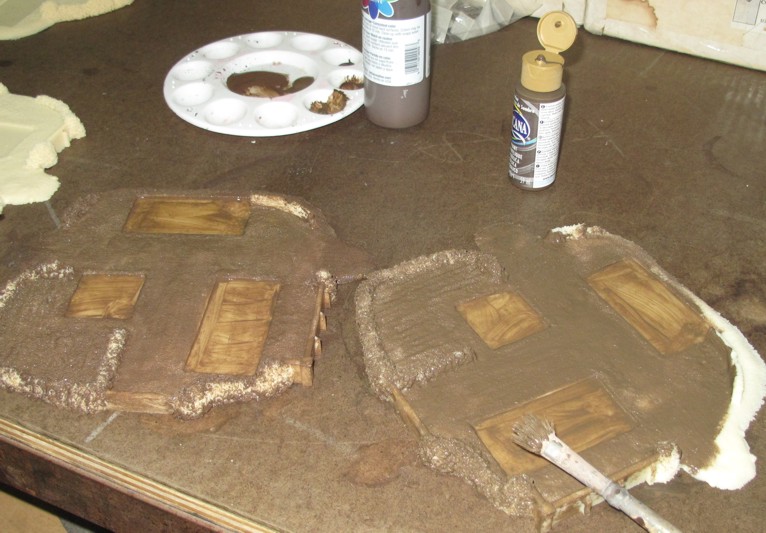
Basepaint1I have several large old paint brushes picked up from garage sales and swap meets that I use for big projects. You want to make sure of complete coverage, push the brush in every nook and cranny.

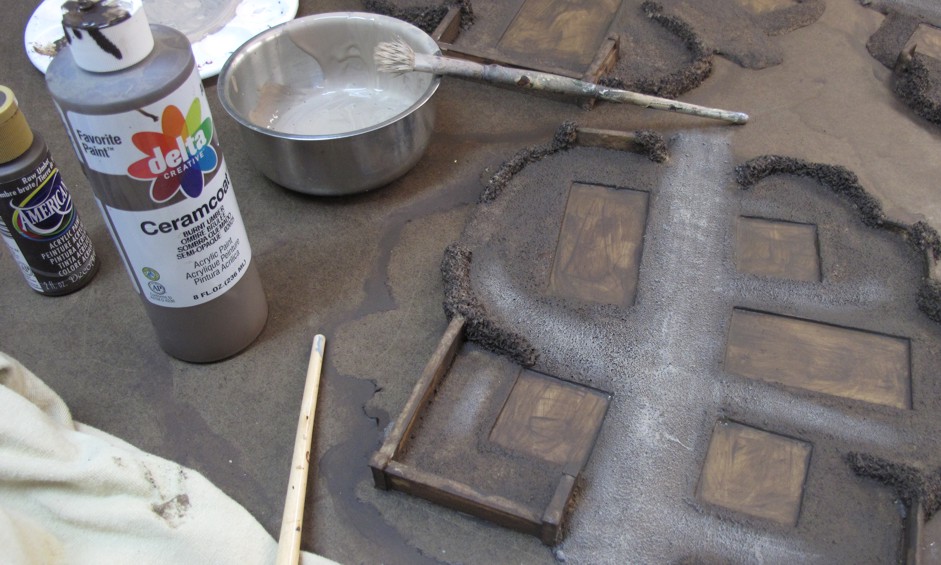
Basepaint4 After a few base coats you can begin “texturing” in roads and details. This is a good look at the fluffy brush I use! Many people toss out brushes like this but they are perfect for big terrain projects.

All the bases done and detailed. I used no clear coat on them as I did not want any paint that might not take the slight bending of the base.

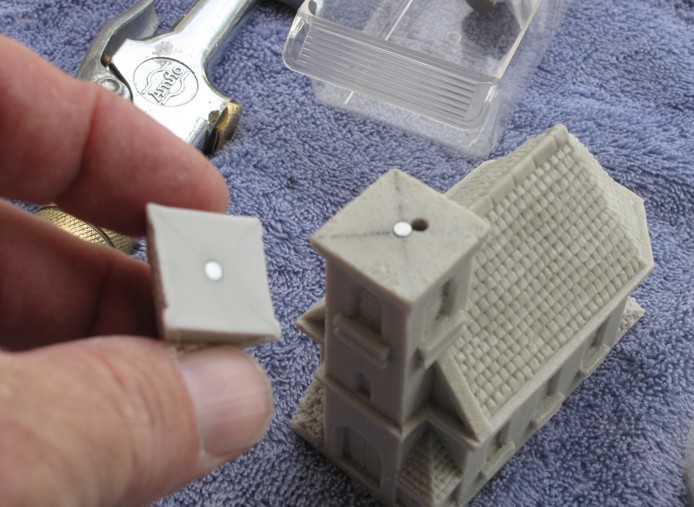
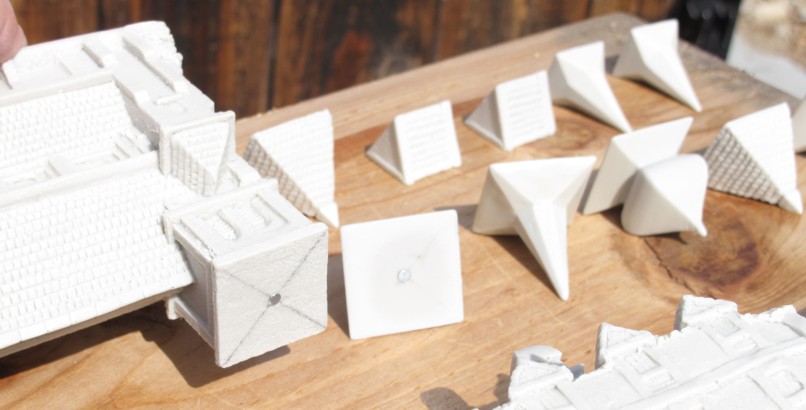
Basepaint5All of the Church buildings come with a couple of “dome” or “steeple” options and I was had pressed to select one so I decided to to make the different “steeple” options for the church’s secure yet ale to quickly be switched out. This involved a simple drilling enough space to insert a magnet in each piece and gluing flush. To do this you take a ruler and draw lines from on corner to the opposite corner giving you an “X”. Where the lines cross is exact center and where you dill your holes in the church steeple base and the “dome” top.

ChurchMagDo not drill the wholes any deeper than you need and be sure to check polarity of the magnets before gluing to keep their facings correct since one way they attract and the other they repel! When you glue in the magnets take special care to get them set in deep enough so that the dome sits flat or it will stick up looking silly. I was off on this one at first and you can see where I had to drill another hole to allow me to pop the magnet out and reset depth.

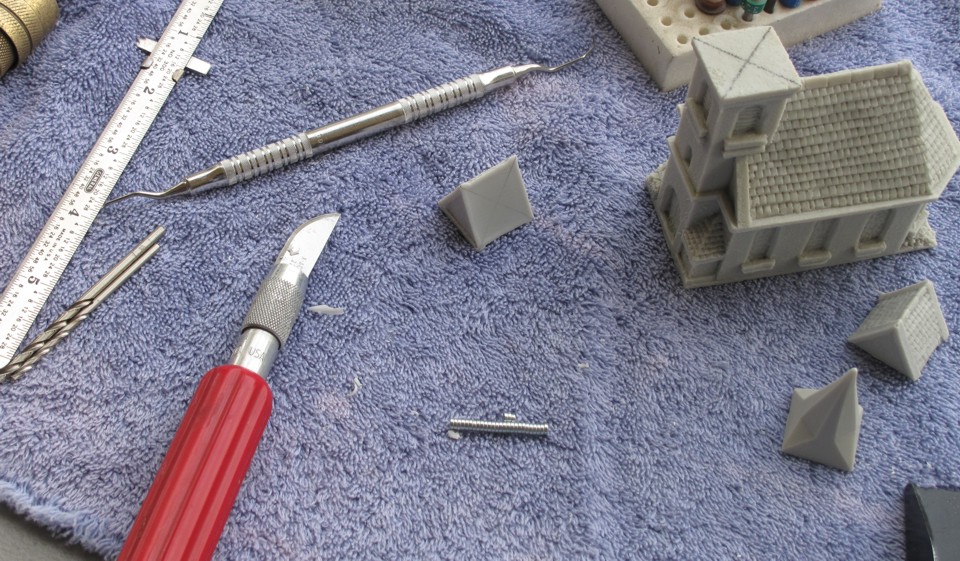
Tops1Some of the tools for this project, not shown are a drill motor (I cheated using a drill press!) Exacto hobby blade for flash, Drill bits (use a drill motor, Dremel tool, or even a hand pin vise) the Magnets are off ebay, I bought 25-100 of several different sizes just to have around the work bench. The dentist toll is just one of a dozen or so collected over the years (ask you dentist if they have a few old ones) a small ruler. You can see the “X” marked on the church steeple and the roof section.

Tools1Assembly line painting methods save time and money when doing large projects of even small projects where the pieces or miniatures all require a couple of the same steps such as priming, base color coats, washes, ect….For Resin buildings my “go to” primer is always Krylon Automotive Charcoal Grey (black) as it really adheres to surfaces well and is fairly unaffected by dirt, mold release, or other contaminants left on the model or mini, yep use this on my minis although I have just started trying Vallejo’s primer with very good results! It’s water based and allows me to use smaller amount in my airbrush (paints on with regular brush as well) saving both time, money, and the environment while still doing a bang up job! The Vallejo primer is also safe for plastics like the Perry and Warlord miniatures that the “Auto” primer would damage!

PrePrimePlease leave a comment if you enjoyed this article on these fine Napoleonic Buildings, I truly enjoyed painting and now using them on our battlefields! Here are a few more pictures, enjoy! Bill W


Our Napoleonic battles expand (or shrink?)

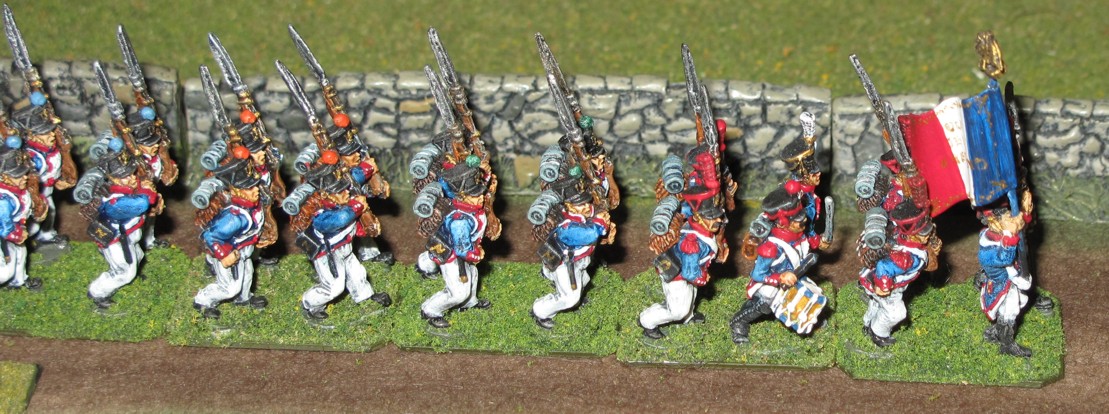
Always start a Napoleonic post with the French marching!

Always start a Napoleonic post with the French marching!

Been doing so much SAGA (battles in the Dark Age Skirmish) around here and painting 3 Warbands for it from scratch that there has been little time for any other projects or gaming in any other periods. So after finishing my last Warband, Anglo-Danes, I decided to take a break from SAGA painting and dive into the prepped and primed set of Napoleonic buildings that I had gotten over the summer from “Total Battle Miniatures”. I had looked at re doing my Napoleonic buildings for some time now as Steve and I have a collection of random 15mm buildings but we were just not real happy with their effect on the battlefield.

One of our "15mm" buildings by I think "hovels" its not really true to scale either. This building is about medium size for a 15mm building.

One of our “15mm” buildings by I think “hovels” its not really true to scale either. This building is about medium size for a 15mm building.

Our 15mm buildings looked fine paint wise and good on the field but the size of the building meant that in the scale we play (Age of Eagles rules) towns were represent by one or two buildings and even then the large size of the buildings did not give either a good look or anywhere near the correct ground scale. Now ground scale was not that important to me as I was going to modify the AOE town combat any way into something slightly simpler and I really just wanted towns to look like towns, or closer than what we had now.

The way we had been showing "Hamlets" or "Villages" not very satisfying in my opinion.

The way we had been showing “Hamlets” or “Villages” not very satisfying in my opinion. I later went to placing brown felt under the building to show the towns outline for troop disposition.

I had looked over the “net” for over a year at different building manufactures, comparing look, variety, size, and price. I finally settled on “Total Battle Miniatures” because their “Big Battalion-Black Powder Europe” line was not only beautiful it was extensive, giving me a selection of 20 different buildings and 3 different bases to use. The line is well thought out, well cast, and priced very fairly. I liked the novel hamlet, village, town, base system they have where all the buildings in the line have “foot prints” that fit into the village, town, or hamlet, so that you can vary the look of several villages infinitely! Some footprints allow either 1 big building or 1-3 smaller footprint buildings to be placed in them. The bases are made of a soft synthetic material and allow a bit of conforming to uneven terrain. The buildings could certainly be used with out the bases but I like to over all effect as well as it would give me a definite “boundary” to define units being in or out of the urban area.

Now that is not the end of the story or even the reason for this post….. the real reason is to talk about the decision I made to go with their “10mm line” instead of the 15mm buildings, YES they not only make this line in 15mm, they also do the line in 10mm!!! and they also have some of the buildings in 20mm and 28mm!!! So after a bit of discussion with the chaps (Pete & Mark) at Total Battle about the size difference in 15 verse 10mm they mentioned that a few of their customers had used the 10mm for 15mm games and had good feedback on this. They were also kind enough to send me some comparison pictures showing a 15mm figure next to the 10mm buildings. Looking at the pictures I was sold on 10mm and decided to order the complete line, well actually more… I ordered 2 Hamlets, 2 Villages, and 2 Towns, that gave me 6 bases and 29 buildings! This is plenty for even large Napoleonic battlefields up to 4’x12’. (we play mostly 4’x6’)

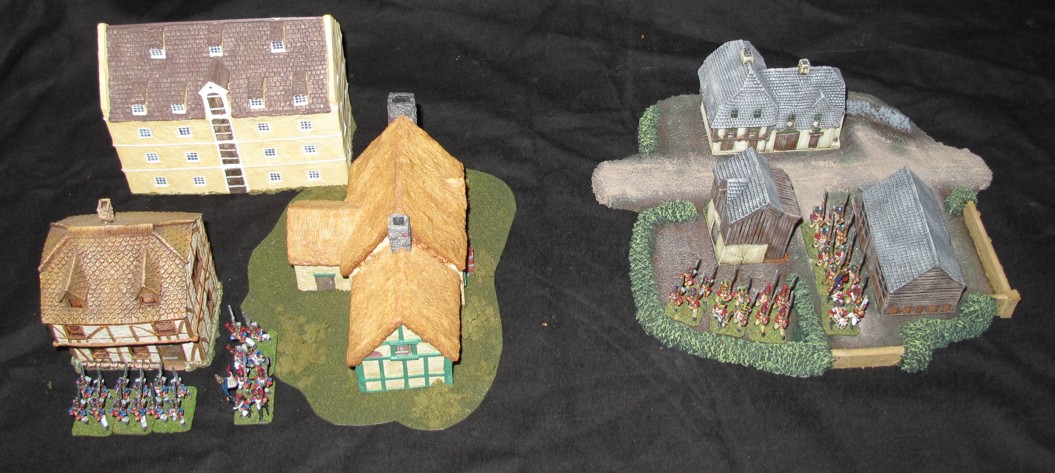
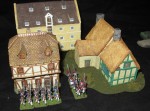
This shows the difference in the building scale between 15mm (left) and 10mm (right) with a similar foot print. The 15mm occupy an area of aprocimatly 9" by 10" while the 10mm are 8" x 8" to the base edge. Figures are "Old Glory 15mm.

This shows the difference in the building scale between 15mm (left) and 10mm (right) with a similar foot print. The 15mm occupy an area of approximately 9″ by 10″ while the 10mm are 8″ x 8″ to the base edge. Figures are “Old Glory 15mm.

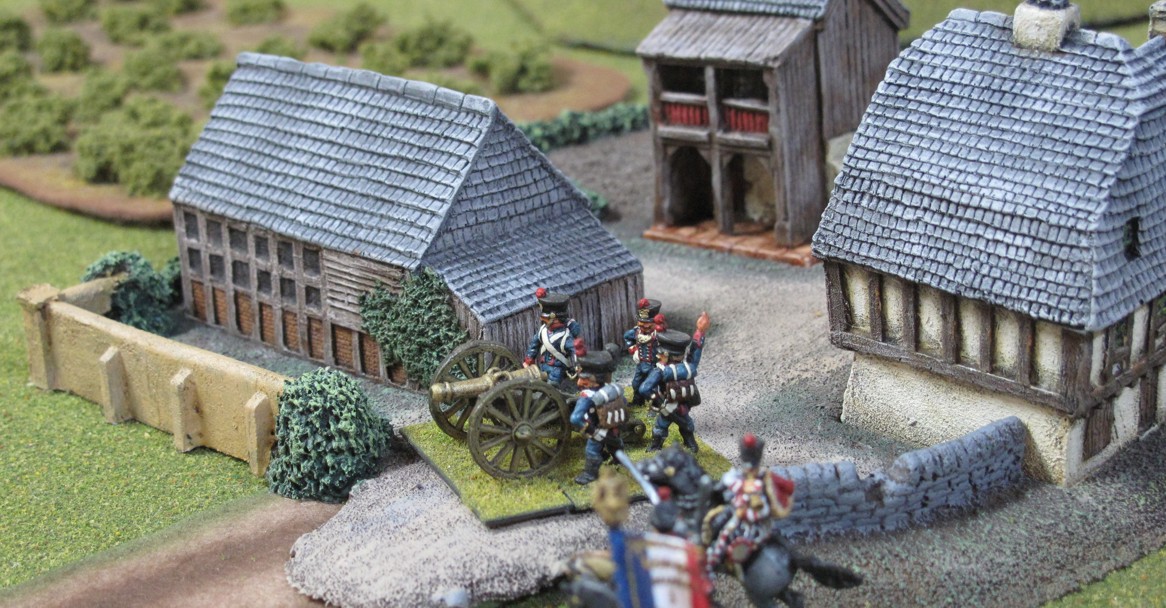
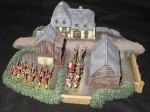
We just did our first battle using the first of the painted 10mm buildings and both Steve and I were quite pleased with the look and playability the 10mm scale gives us. We used two “Hamlet” sized bases with 6 buildings, 3 finished painted, and 3 almost finished. They look awesome and give a great look. You now have several buildings representing a small hamlet instead of one and you have some room around them on the “base” to deploy troops, clearly defining who is “in” town and what bases are “out”. The scale of the 15mm figures is in my opinion fine compared to the 10mm buildings and the look on the field more than out weighs the slight loss of real scale figure wise after all the figures are already much larger than the ground scale so this puts the buildings closer to ground scale.

The whole picture, now that looks like 2 "Hamlets" instead of two buildings!

The whole picture, now that looks like 2 “Hamlets” instead of two buildings! Sorry forgot to place the “trees” in the green cutouts.

The battle we fought was fairly small 2 “division’s” per side with a small Cavalry Division…30 infantry stands and 8 of cav apiece. It was a meeting engagement with the Hamlets and control of the road net the objective. Steve’s Austrians reached one town first and deployed, other Prussian brigades turned both north and south to counter expected French thrusts. The French commander (me) however used the legendary French marching speed to fall instead on the center where the Prussians had occupied the town.

Wide

Austrians move around and into the Hamlet of Hoffbrau, drinking a bit to much on the way through…..

The French assembled 2 battery’s, a 6 pound horse battery, a 12 pound infantry battery, and 3 Brigades for the assault on the Prussian held Hamlet. Preliminary fire by the French got lucky and rolled very well disordering the Prussian defenders while only suffering “disorder” to one of their own brigades. The French assault threw the smaller Prussian force back out of town with a “breakthrough” charge catching and “shattering” the Prussians fleeing the town as well as over running a Prussian Heavy battery. This pretty much ended Prussian hopes and the game.

French Breakthrough3

While he Austrians set up to fight a proper battle the French cheated as usual and out marched them arriving in mass at the Hamlet before the other Austrians were were close enough to lend support.

People who know me “know” that I am the first to speak out when shits not right and conversely I like to sing out when companies get it right and in the “miniatures” hobby it is sometimes rare to find one getting right, well “Total Battle Miniatures” got it right start to finish! from their great packaging (from England), to the casting, the range of beautiful terrain pieces, and even prompt answering of all my email questions!!!

They paint up very easily, typical resin buildings, wash, dry, prime…paint. The bases however are a SOFT synthetic material so you must use paint that has the ability to flex over time as well. I was told no primer was needed…things are so far OK with only minor chips in just a few spots…I would have like these bases to be resin or at least had the choice…that’s just me. I will do a separate post soon on the painting of these guys, I’m currently on three out of the six you see here!

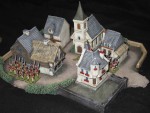
Here's the whole set as ordered.

Here’s the whole set as ordered.

Here are some more pictures to give you all a chance to decide for yourself, and if you buy from Total Battle Miniatures please tell them you saw it here!