Last Saturday saw me and good buddy Stevie G beg off gaming down at the infamous “Dogs of War” club and return to our “roots” by doing some American Civil War gaming in 15mm.
Steve and I had met 30 years ago over a battle of Johnny Reb ACW at the “Last Grenadier” in Los Angeles California, the city of Glendale to be exact. The Last Grenadier (sadly now gone) was a local Mecca for miniature gamers in Southern California and many of us cut our wargaming teeth there. Steve and I had never met but both worked as “Grips” in the Hollywood film business and because we both had the habit of painting figures during our lunch breaks on the set had known of each other. Now grips have a particular style and look and it was just moments into the gathering of 10 or so guys doing the battle that we looked at each other and realized at long last we had met! Over the next 25 years we have gamed, worked together, and had a great time doing it!

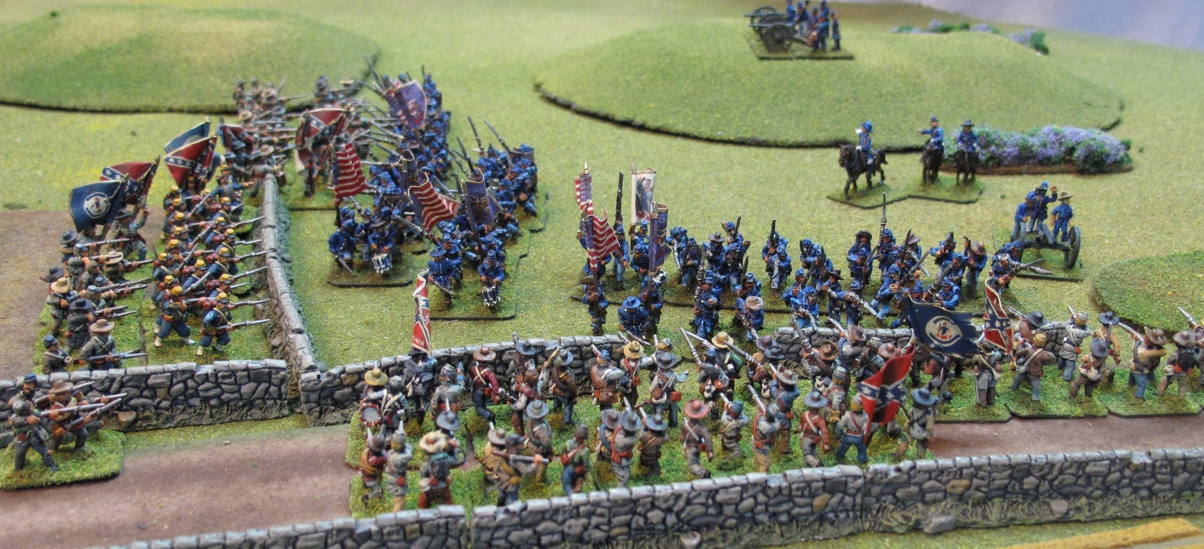
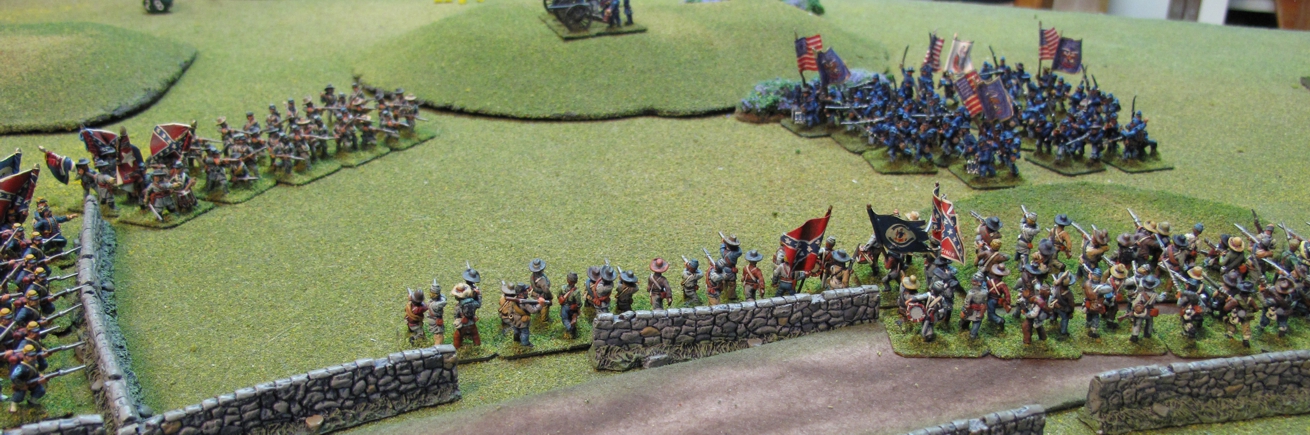
My “Main Man” Stevie G. This is his happy face…before his dice decide not to co-operate! The stone wall area would be the site of the bloodiest fighting for the day. The upside down “T” section of the walls would become infamous to both side as the “Bloody Angle”
We no longer use Johnny Reb but have moved over to Fire and Fury since it is a bit more streamlined, simpler, faster, more popular, and is used for the basis of the Age of Eagles rules we use for 15mm Napoleonic’s.
This battle report is not going to be too detailed since neither of us have played Fire & Fury for several years it was to be a “shake the Dust off game” at best. I’ll mostly let the pictures speak for themselves.
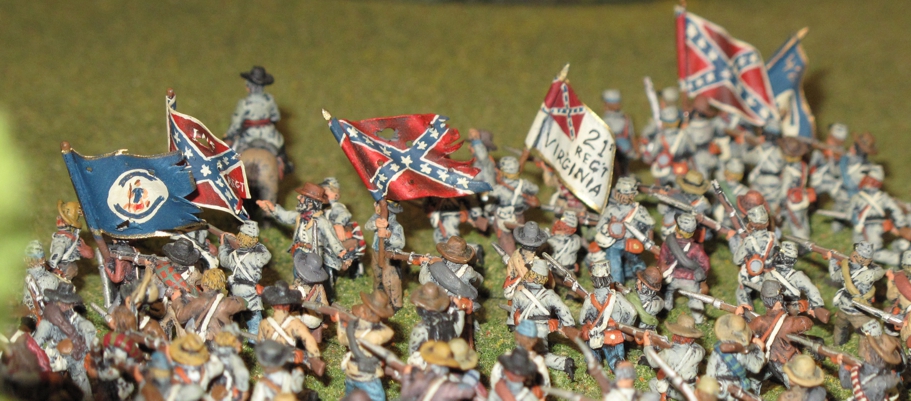
Looking good you Johnny Rebs!
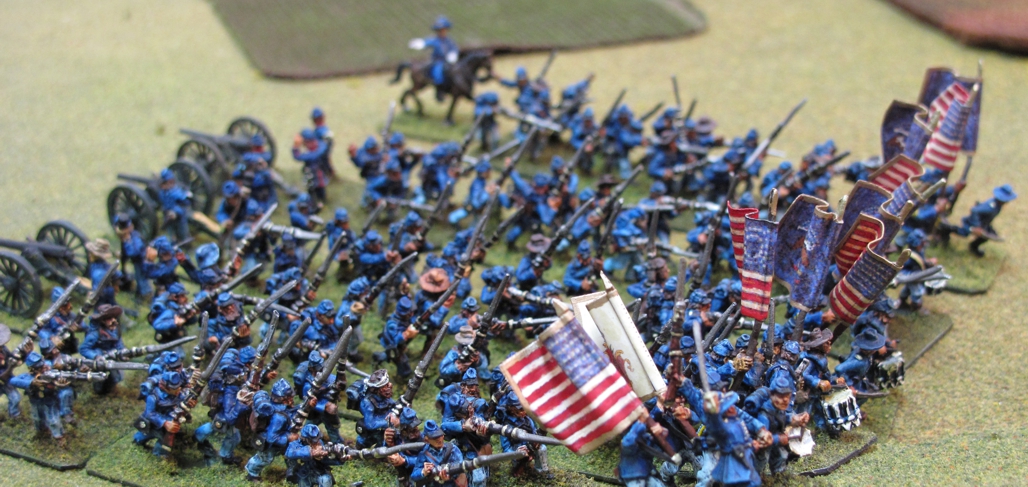
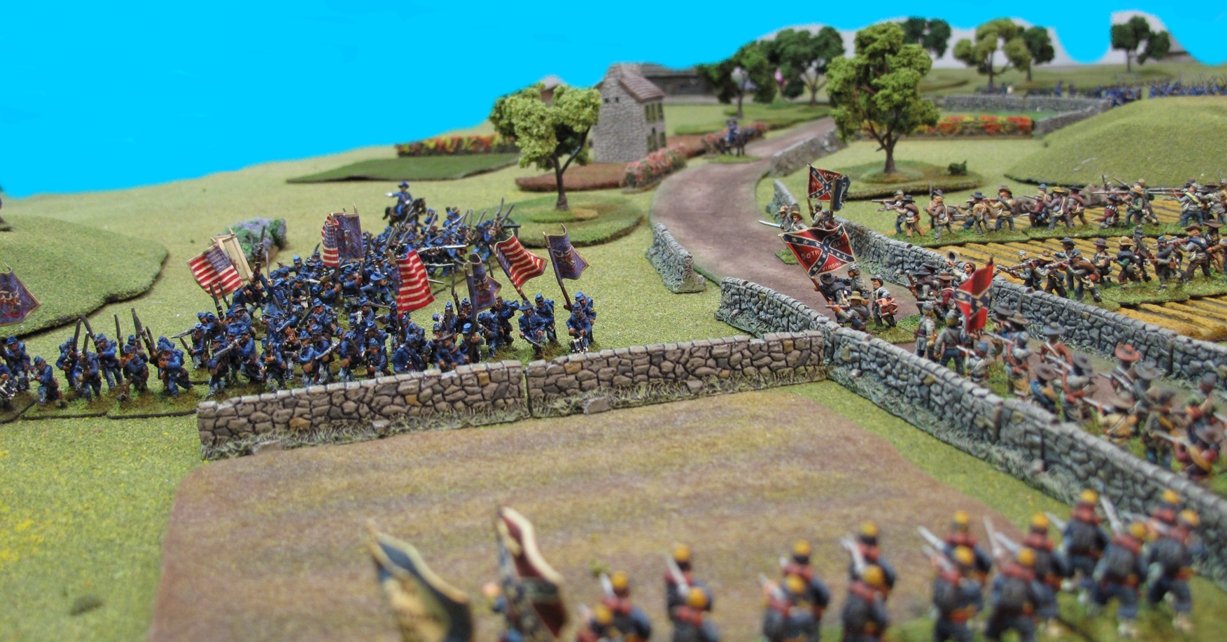
We took fairly balanced forces, 50 infantry stands each representing 1 small Division each. Each of us also had 2 Division Generals and a Corps commander. (forgive me if I misuse Brigade, division, Corps, in my descriptions, comes from playing Johnny Reb and painting units for that system) The Union had 2 three gun battery’s and the Confederates 2 two gun battery’s since Union artillery was normally better and more numerous. The Confederates received better troops and commanders. I rolled a random entry on my side and Steve picked entry for each of his divisions. The scenario was to get control of the area thus denying the enemy the entrance to the pass.
My first brigade the “Stonewall Brigade” commanded by Brigadier General James Walker advances onto the field. On the road in the background you can see the lead brigade of my 2nd division.
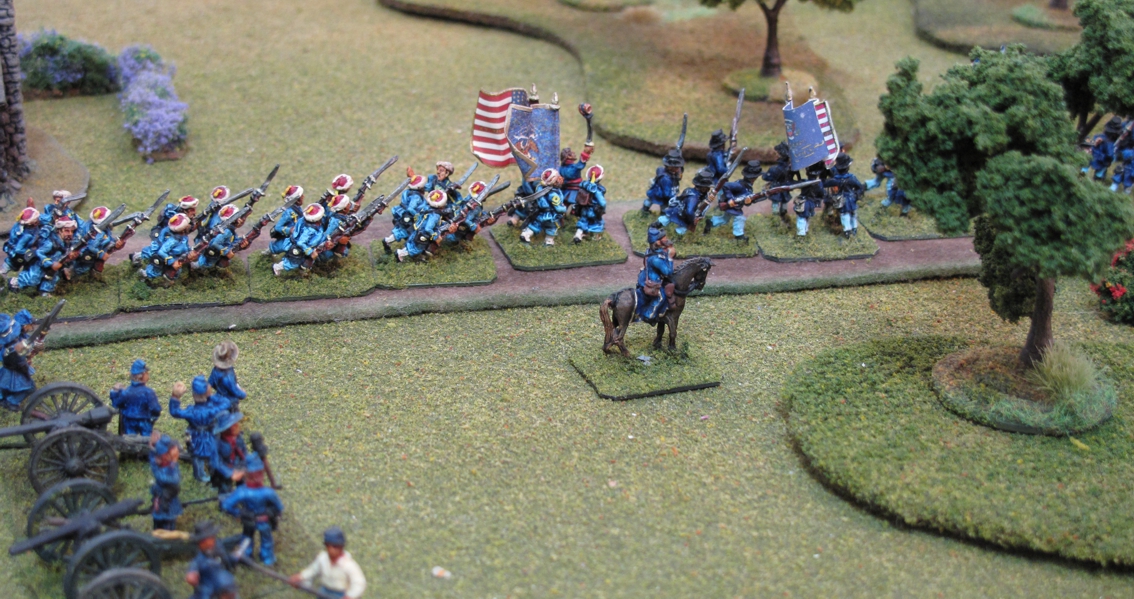
Major General Edward M. Johnson watches Stewart’s Brigade move brigade up the road leading to the stone wall later known as the “Bloody Angle” The 2nd Maryland in their early war Zuoave uniform lead the way! We see the messenger arrive confirming that the Stonewall Brigade has dispatched reinforcements. Brigadier General Stewart is seen on the other side of the road.
Since I had rolled my troops entry areas before Steve’s entry I new where my troops were going to enter and had a vague plan on what area I wanted to occupy. Steve got too choose where he wanted to go after me but without knowing where I was. No real advantage to either side. Both sides pushed their men hard trying to get to the best positions first. Commanding my forces was Major General Edward M. Johnson, Johnson quickly realized that the Union commander was making a mistake and separating his forces in a flanking maneuver that would result in his two brigades not being able to effectively support each other. Johnson decided to deploy the “Stonewall Brigade” defensively and attack with the 2nd Brigade in the north along the stone wall. Johnson also decided to send 2 regiments of the Stonewall brigade to help while recalling the 2nd brigades artillery south to help defend against the “Blue Belly’s” about to attack there.
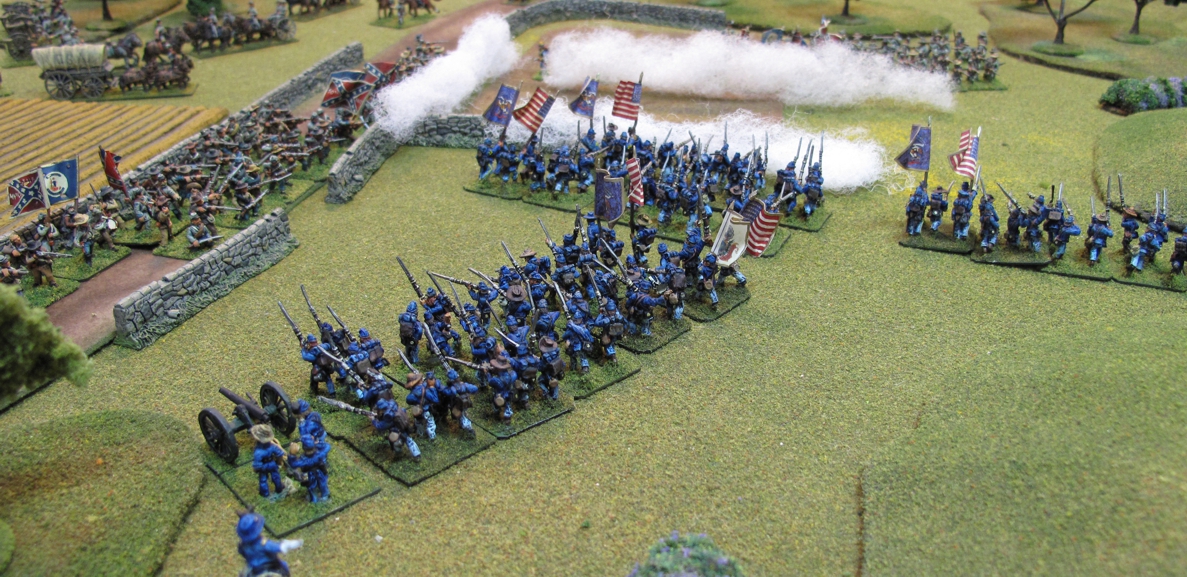
The Union 2nd Brigade advanced as a dense mass, another mistake of it’s less experienced officers! this would quickly cause deployment problems as they approached the angle.
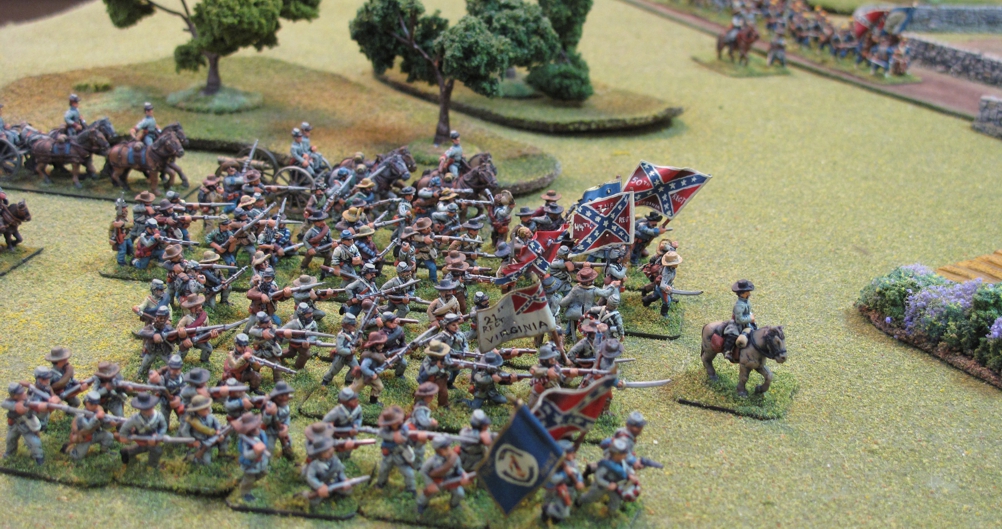
Using the road the Unions elite 1st brigade attempts to flank the Confederate forces. This took time, allowed the southerners to form a strong defensive line along the woods, forcing the Union to now advance through a storm of shot and shell in the open field.
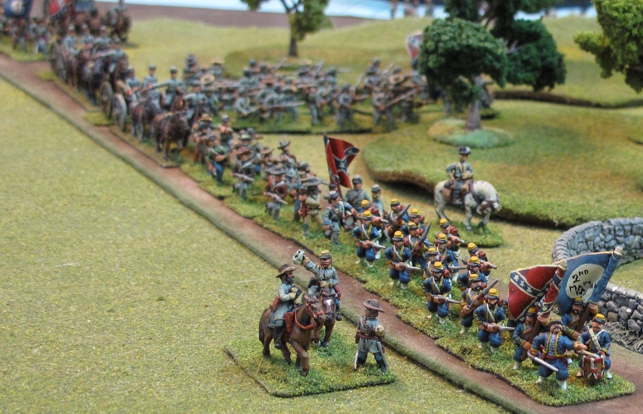
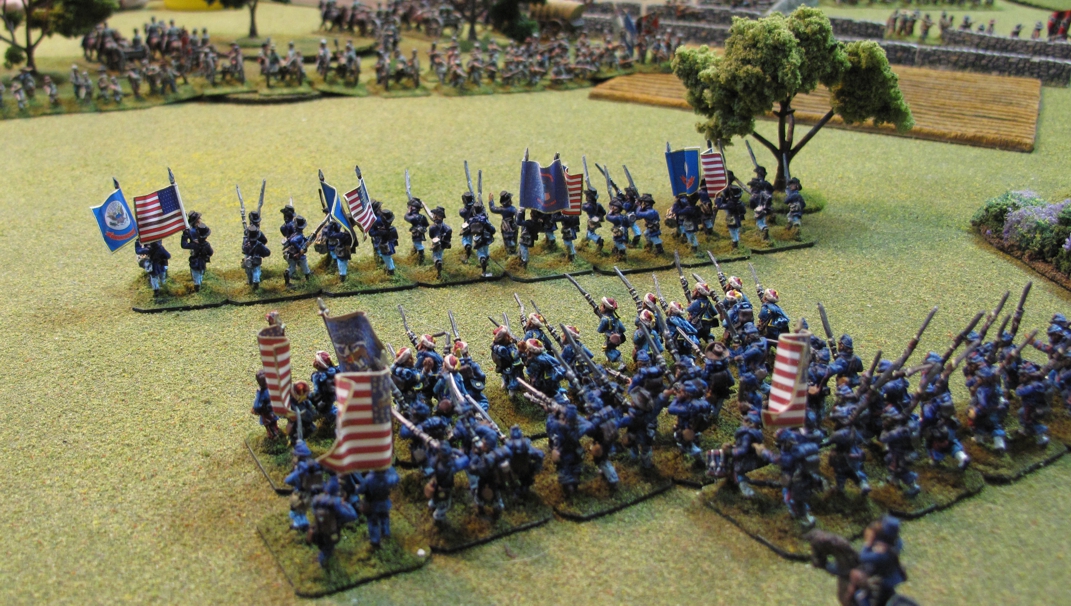
Steve’s Union troops are very nicely painted with detail that one normally see’s only in 25mm and larger. Here you see some of his Zouaves as well as the tail end of the “Iron Brigade” in their “Hardee” hats.
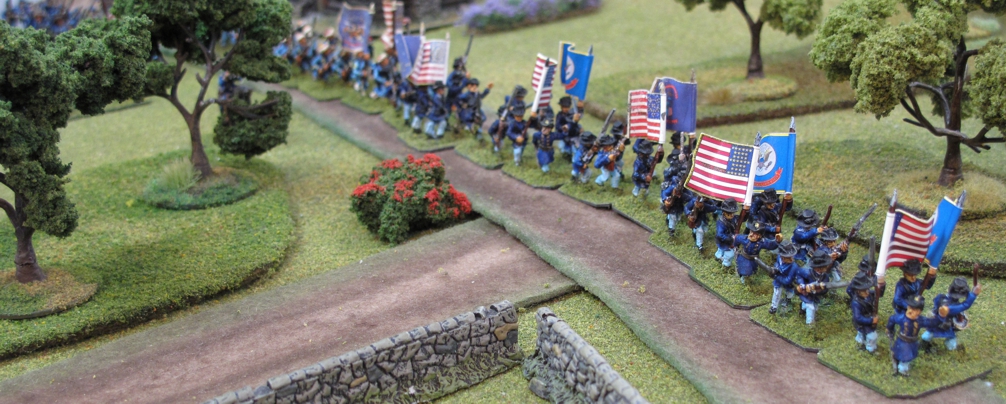
The Union’s “Iron Brigade” leads the way. They would suffer greatly in the coming advance across the “Killing Field” but survive to fight another day!
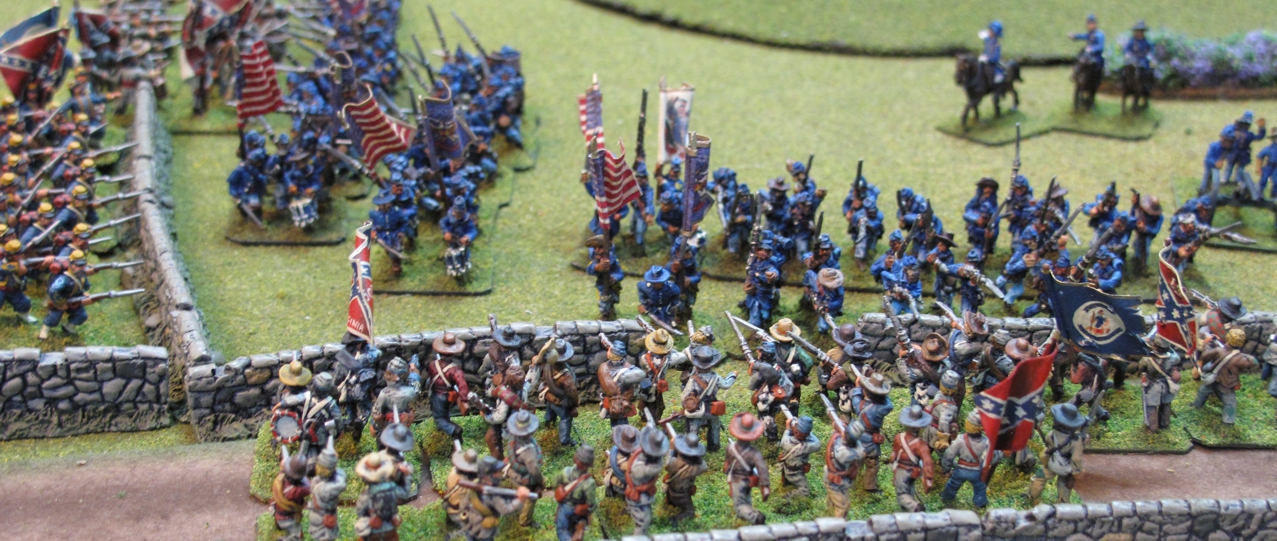
The first few turns saw only troops rushing to take up position, at first the Union commander surly felt his choice of of terrain was going to work well…but the men arriving at he positions were met with a sea of fluttering enemy flags and the howl of Rebel yells across the fields!
Seeing the enemy already so close Union soldiers deploy into line of battle…trusting in their commanders.
The more experienced of the Union brigade commanders realize that they have already fallen in to a dangerous trap! Outflanked and facing superior numbers they prepare for a hard fight.
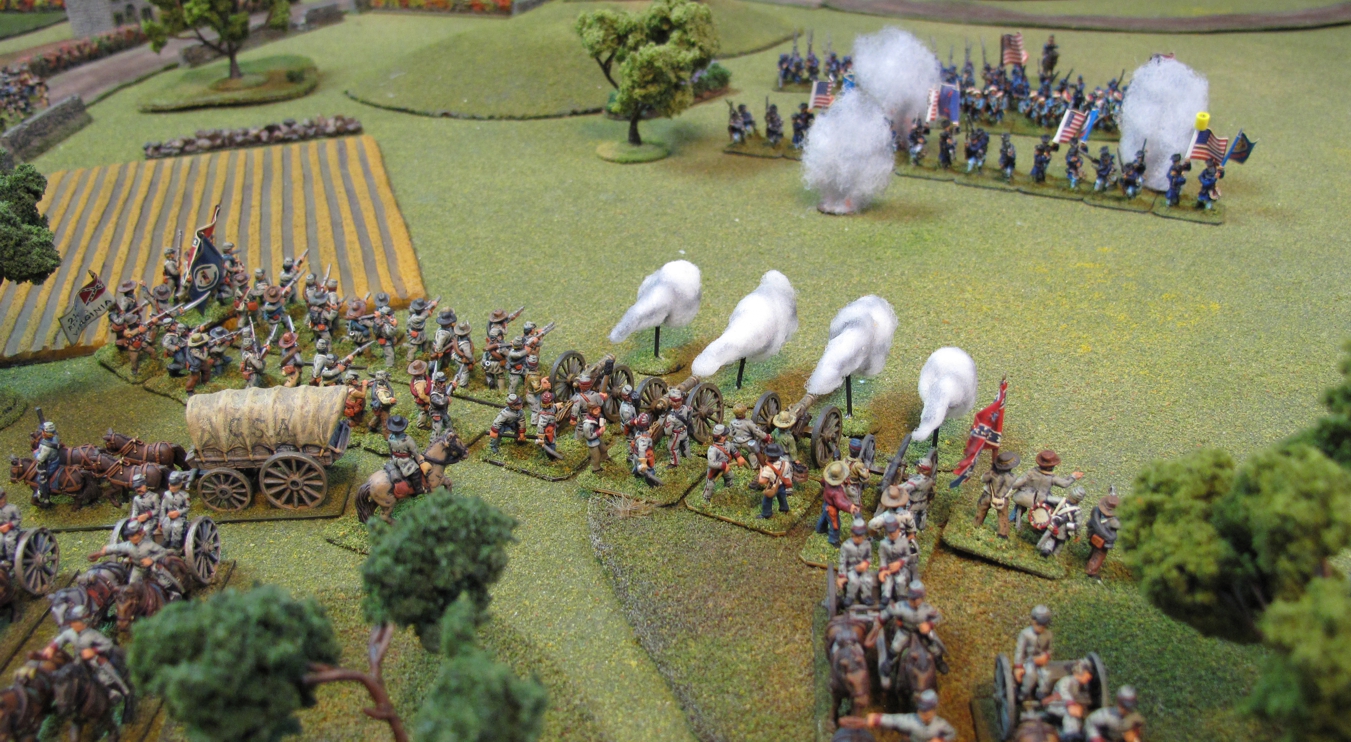
Rebel forces surge forward enveloping Union forces on two sides before even a shot is fired. Union artillery is mostly still moving up and the one battery deployed is badly handled in the confusion missing and doing little damage!
On the Union right at the “Angle” both side open up a hot exchange of musketry. Either uncertainty, inexperience, or Union commander Steve’s dice result in the Rebels coming out on top in nearly all the exchanges of musketry!
While the right exchanges shots the rebs on the left hop the wall preparing to charge with their superior numbers and better close in abilities.
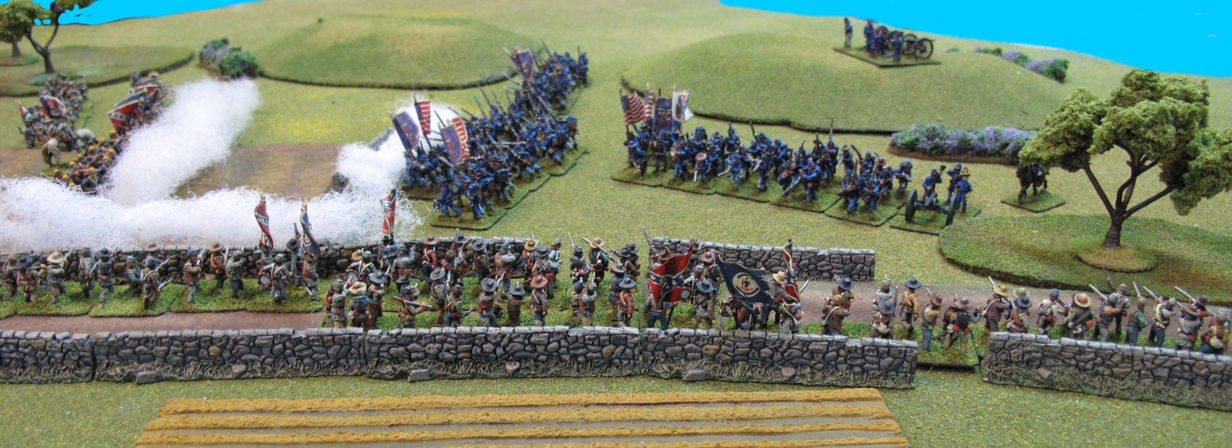
The Union officers continued to urge their men forward trying to reach the wall and halt the Rebel advance. They would make it but a moment later a howling mass of Rebs charged over and into the Union line. A finial round of musket fire cracked all up and down the “Angle” as steel met steel and blood flowed….
Confederate charges go into both Union side of the “Angle” with the Blue coats slightly disorganization and in disorder it will not go well! The Union artillery on the hill only managed to get off one shot and did little to the advancing Rebels.
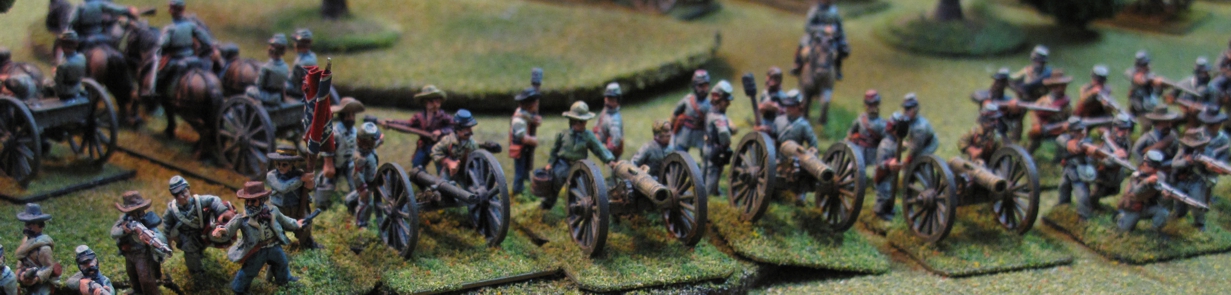
On the Confederate right, just south of the “Angle” a powerful line of battle is setup with Rebel forces even retreating some to increase the distance and time it would take the Union forces to reach them. General Johnson hoped this would give him time to crush the Union force in the north and then use his combined force to deal with the Iron brigade and the Union forces crossing the field. He was also counting on his concentration of artillery there to severely weaken the advancing blue coats.
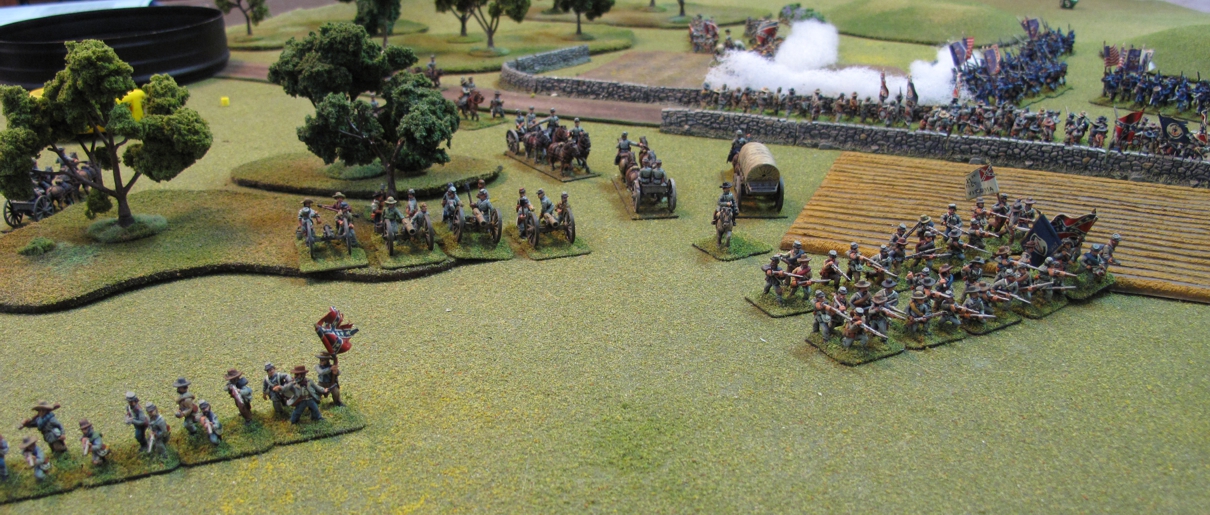
The southern flank of the Confederate lines, The Rebels are slowly withdrawing to the line along the woods that their artillery now occupies. Beyond them we can see the fight at the “Angle” start to heat up!

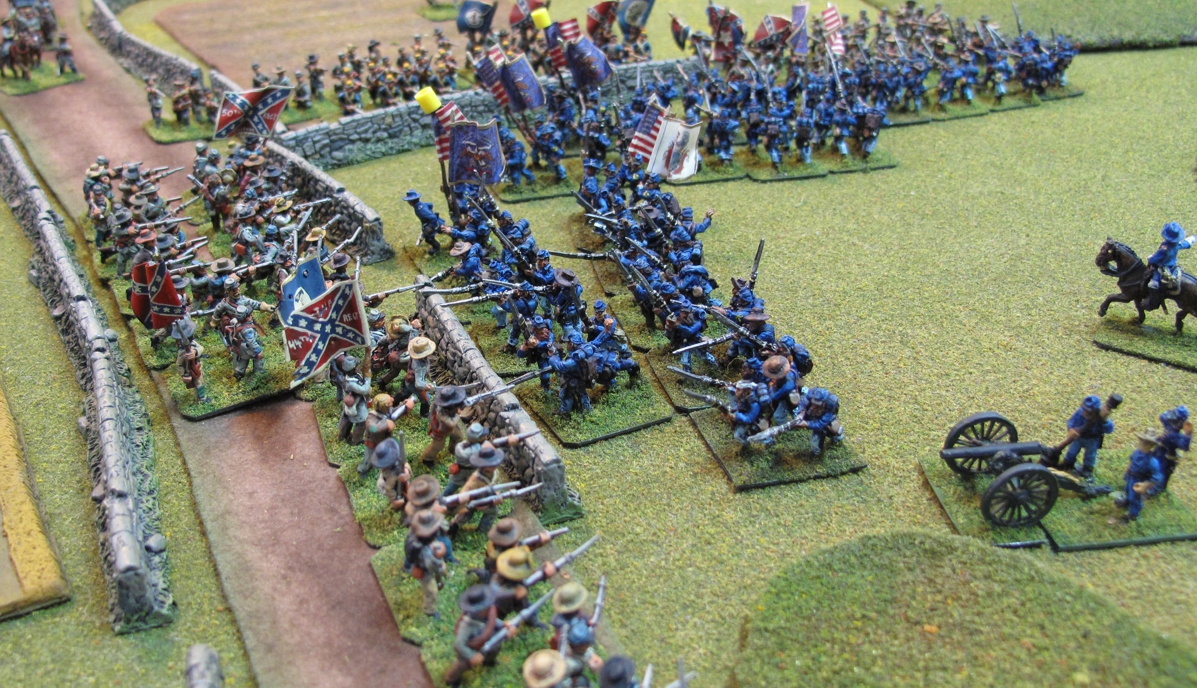
After two turns of charges and melee, the Union was beaten back in disorder and lost several stands. Before they could recover the rebels charged again capturing (swept from the field results with a 10+2 roll and a 10+3 roll!) or destroying two full brigades, one Union Battery, capturing both the Division and Corps commanders! As the remnants of the Union northern force skedaddled two Reb Brigades were released to reinforce the southern force.
One set of charges later half the remaining Union force would be dead or captured.
The Confederate line of battle was ready and waiting!
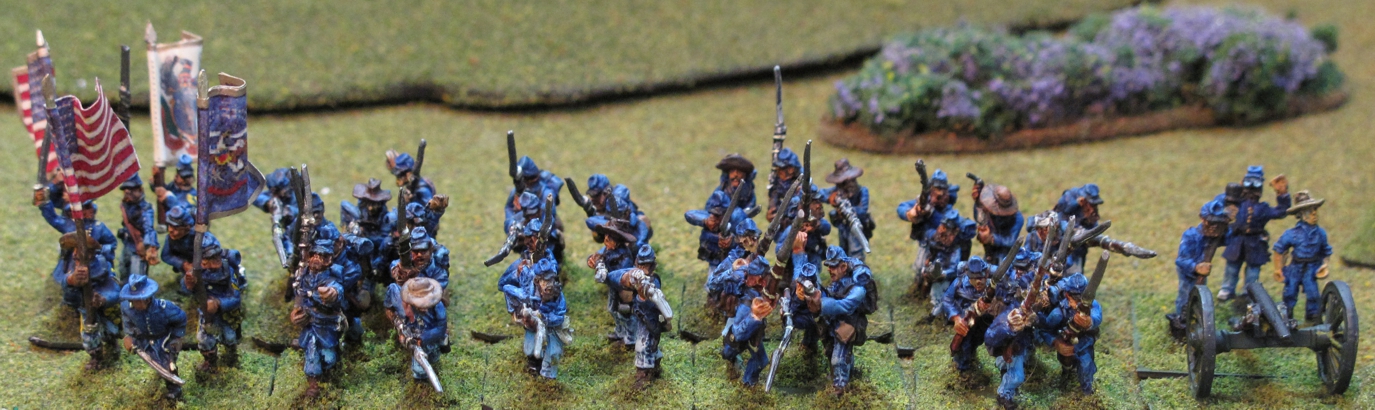
I painted these over 25 years ago but they still look pretty good! (Several rebasings..lol)
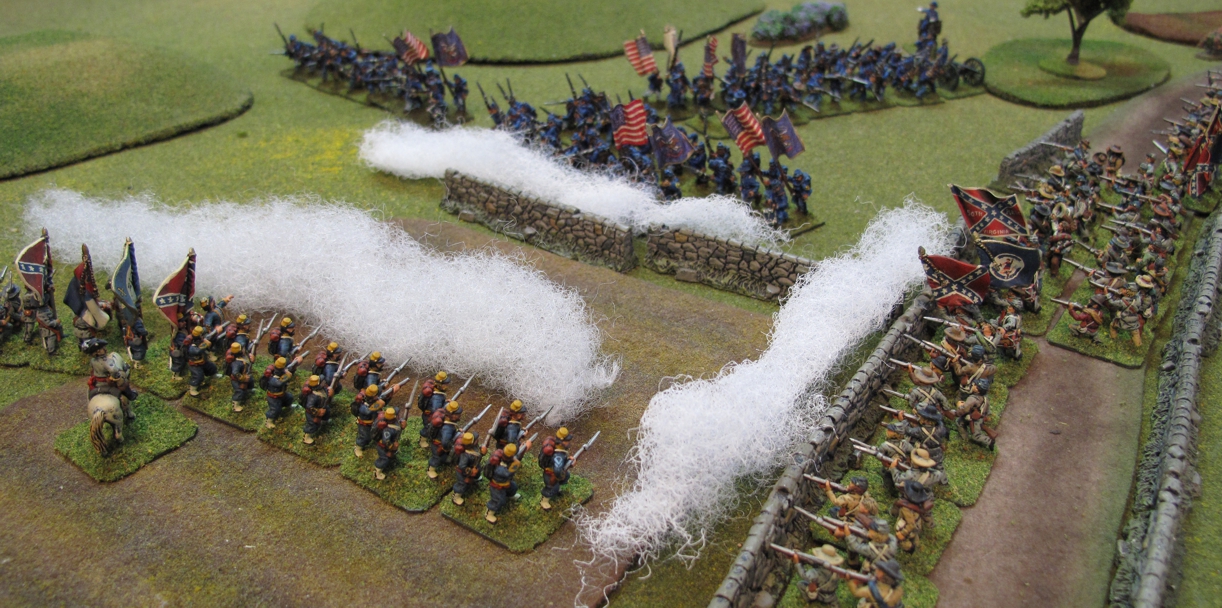
Seen from the Union side. I sure would not want to be in these boys shoes! It really makes you stop and think on the bravery of men both North and South who for the most part didn’t understand why they were fighting other than “There’s a fight about something and I’ll not be left behind!”
Proud as ever the “Iron Brigade” leads the way!
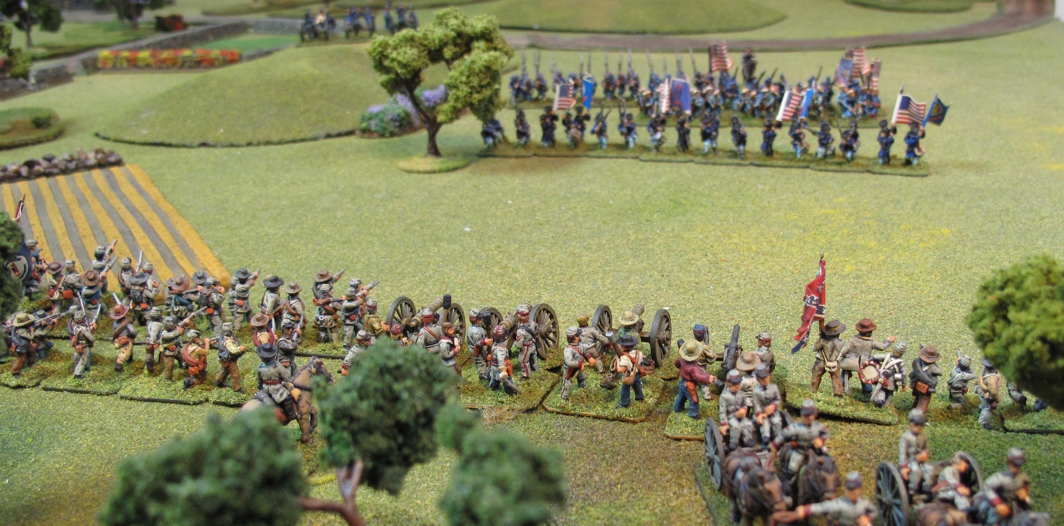
The Confederates held their fire, not used to being on the waiting side as the Federals approached. One Rebel gunner was heard to say “agin us or not them are some brave boys!” as he touched his wick firing the first round….

Southern Battery’s open up a devastating fire on the advancing Federals. My high die rolls help them hit there marks!
Despite their bravery the Iron Brigade feels they wrath of the southern battery’s. This day Union Artillery failed to live up to it’s reputation, providing little in the way of support for the boys in blue!

Southern fire seals the loss for the Federal troops this day, but swears one Sargent, “There will will be a reckoning one day soon Johnny Reb!”
With their one division wrecked and unable to make headway against the other flank the Union commanders sound retreat and use the fading light to cover their withdrawal.
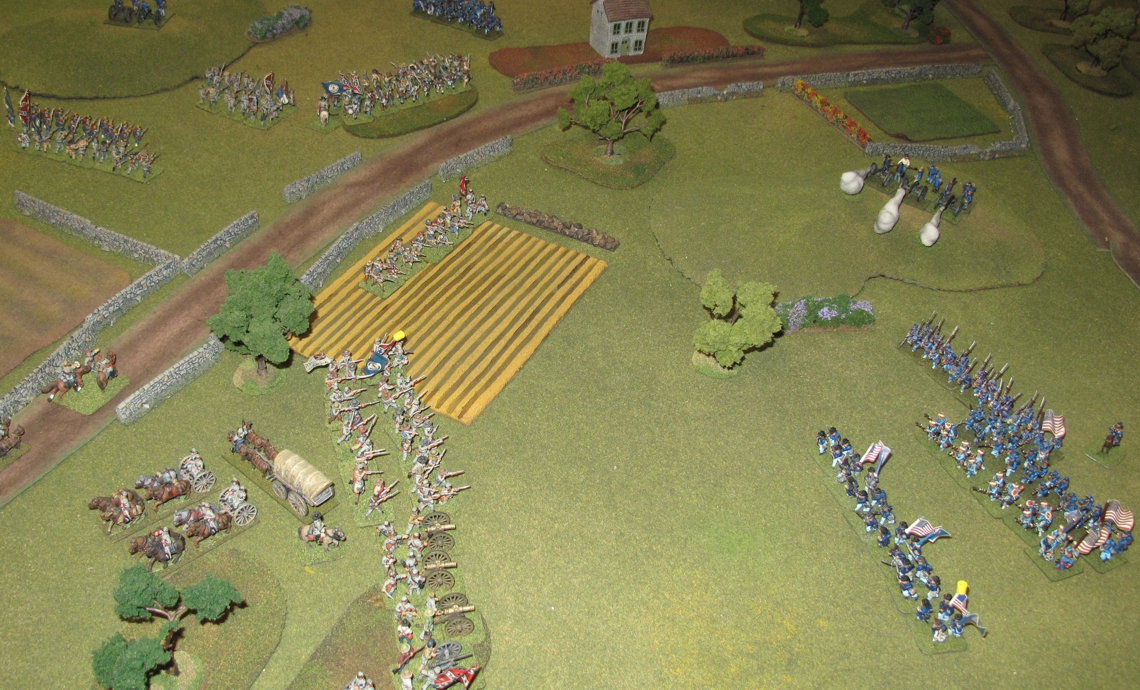
The battlefield as it looked on the last turn.
Steve and I shook hands and despite his loss agreed it was a lot of fun. The rules play very easy and we remembered things as we went along. We did a bit of an after battle kibitzing and both agreed it was a union loss due to mistakes in deployment and not helped by lackluster die rolls on his part. I wish someone would invent a game where “1s” are great cause Steve would be unbeatable! It was great to get out figures that have not been used much in the last years, heck I even may do a bit of work on my small Union force!