WWII Train Track “How too”

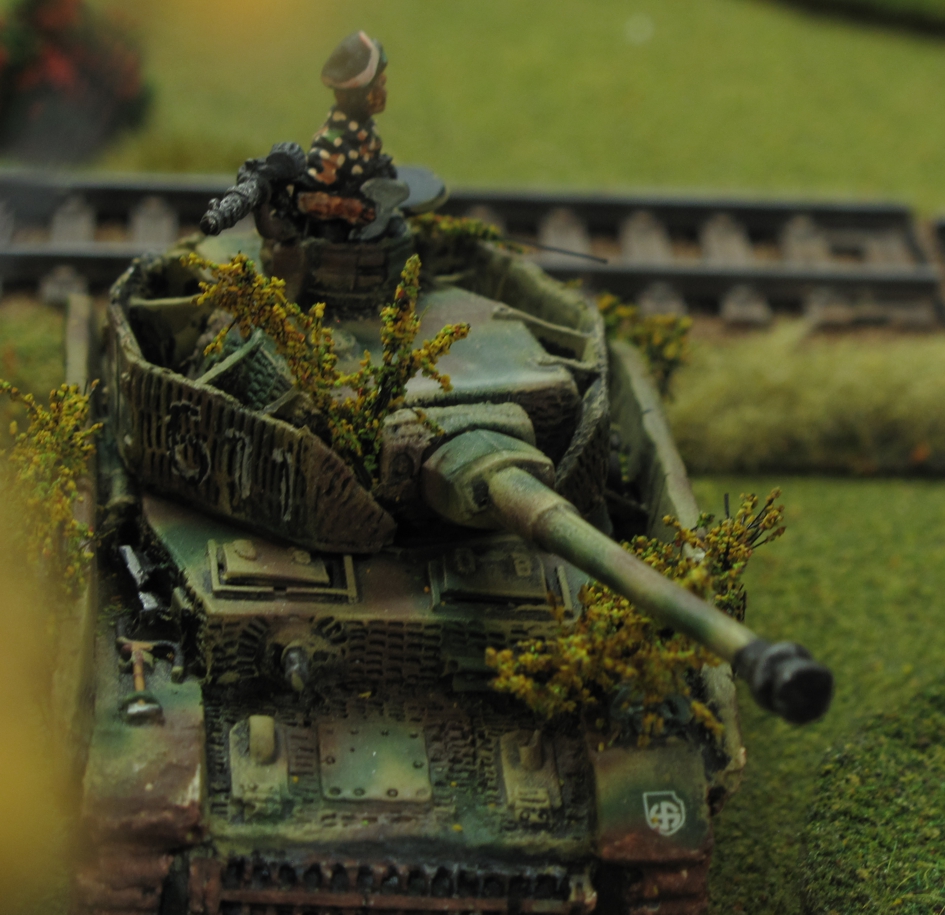
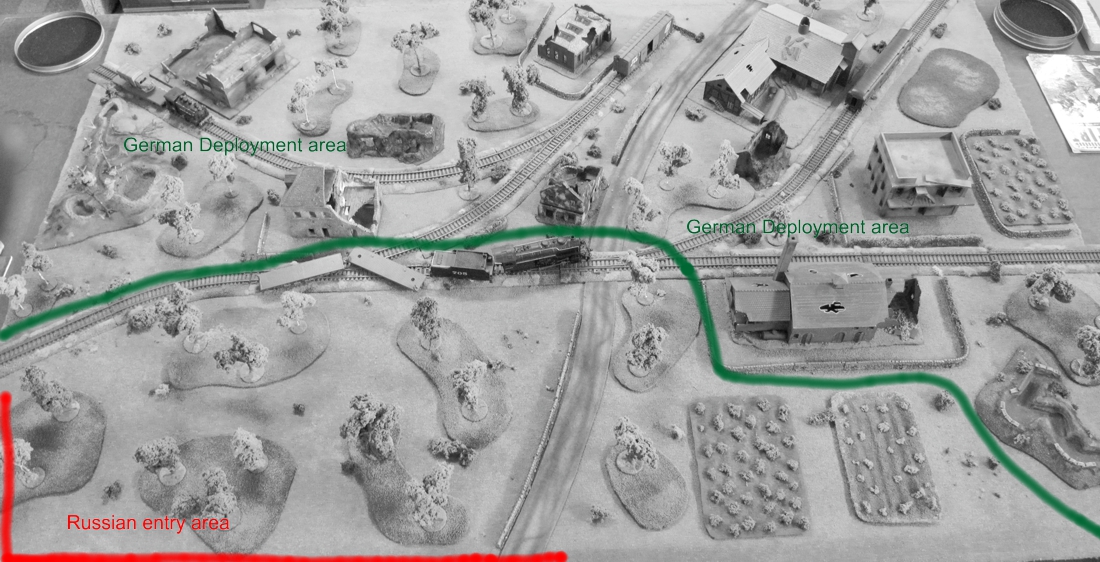
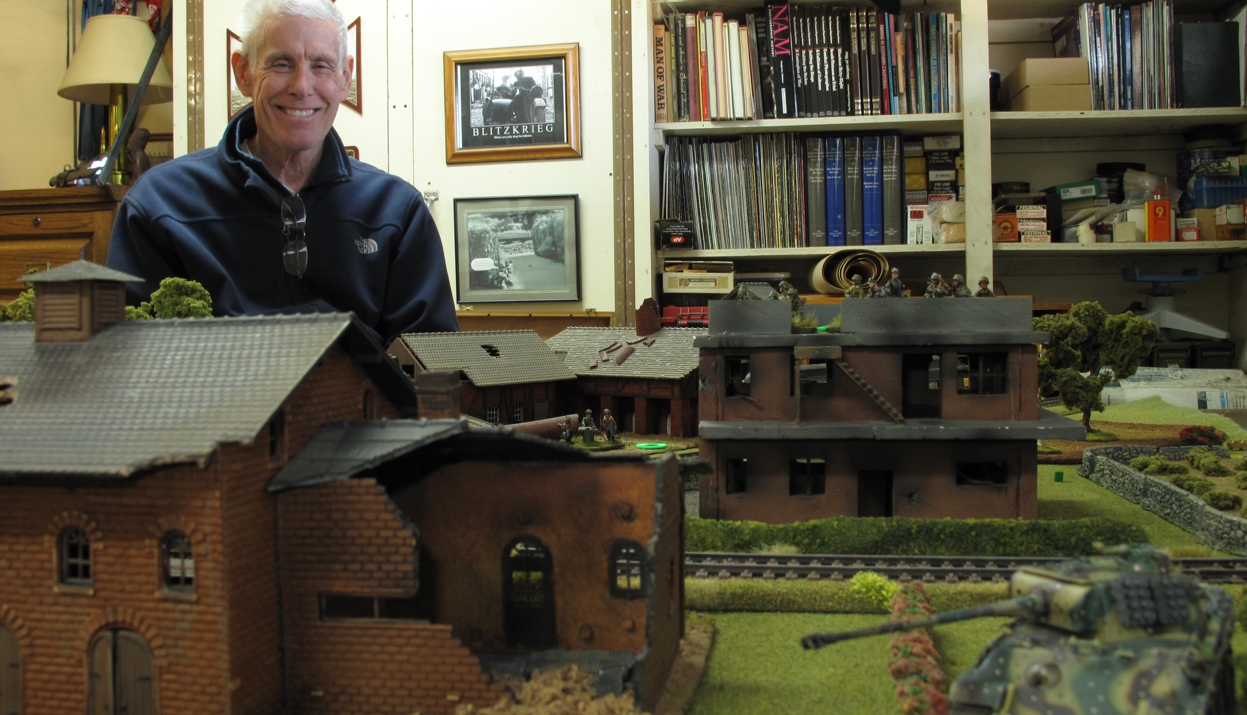
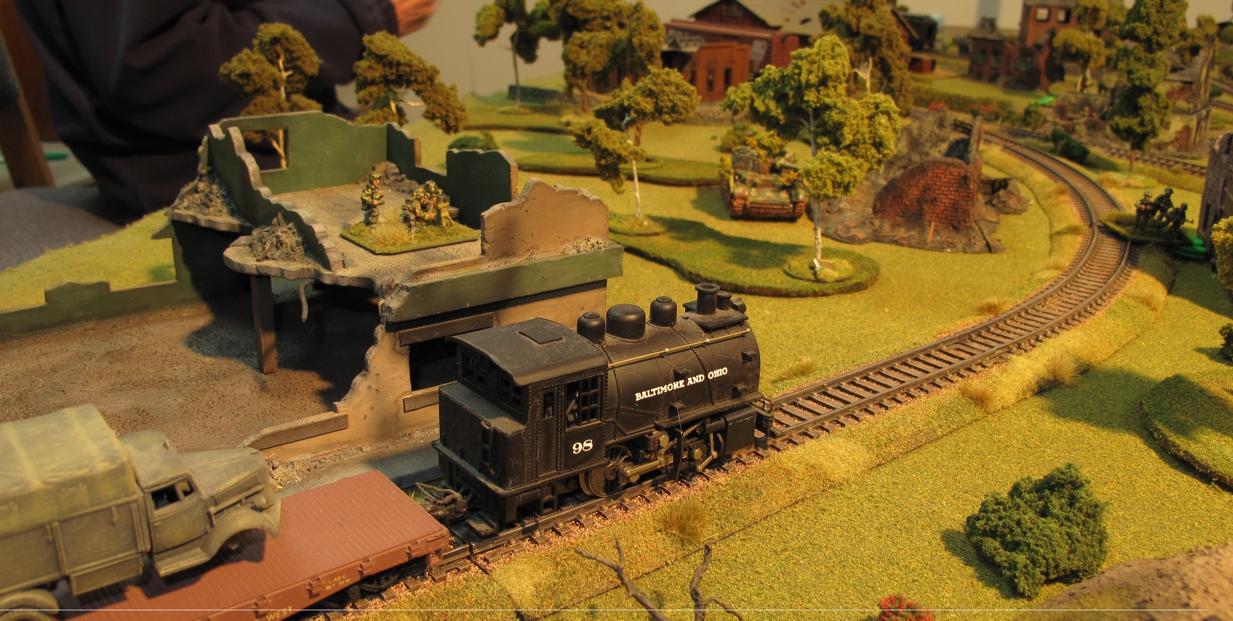
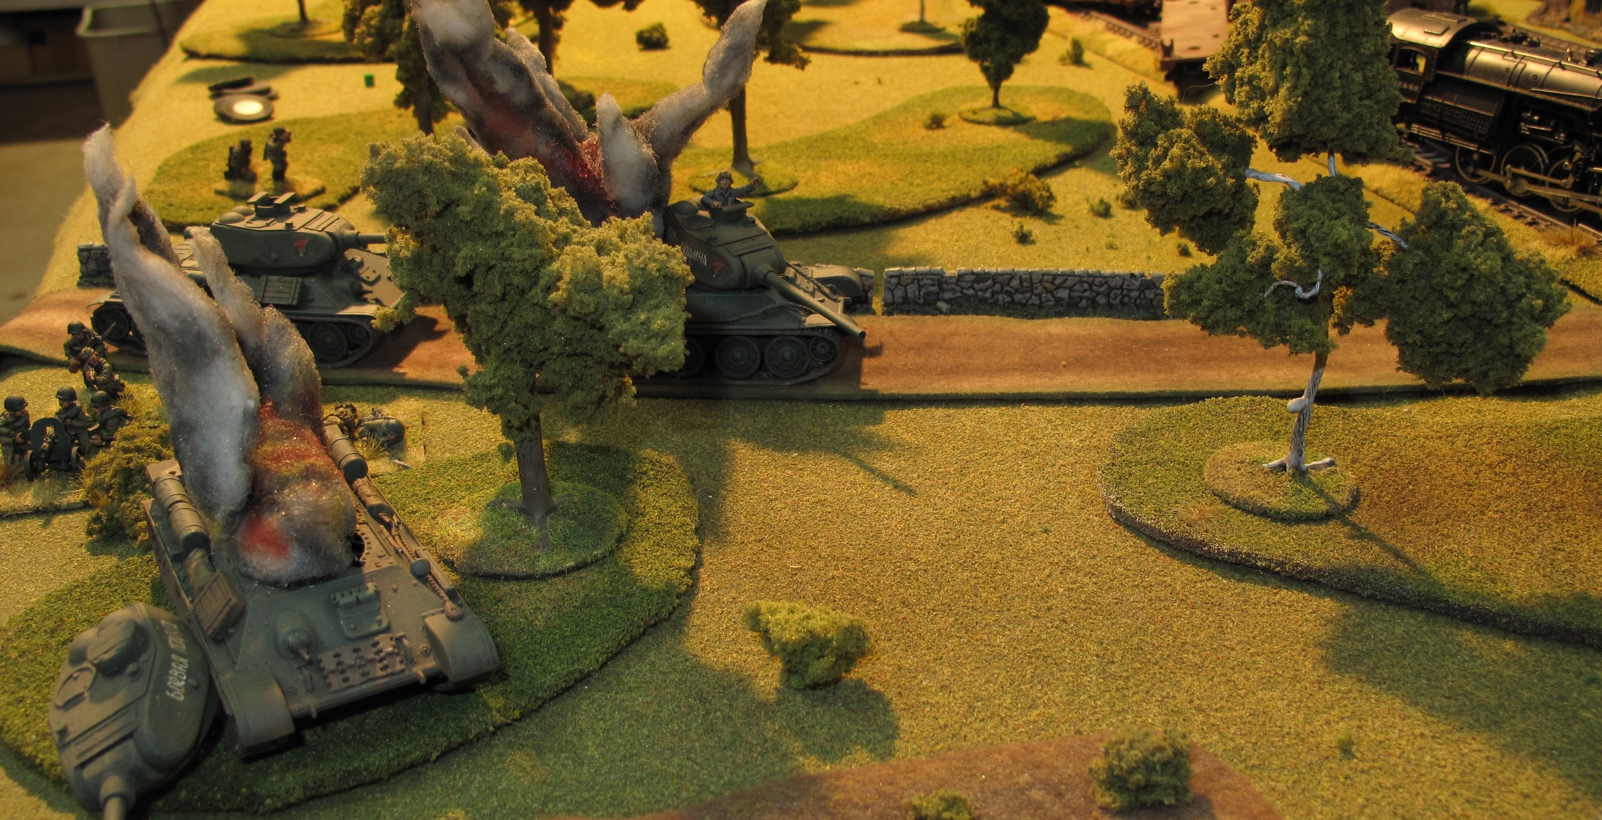
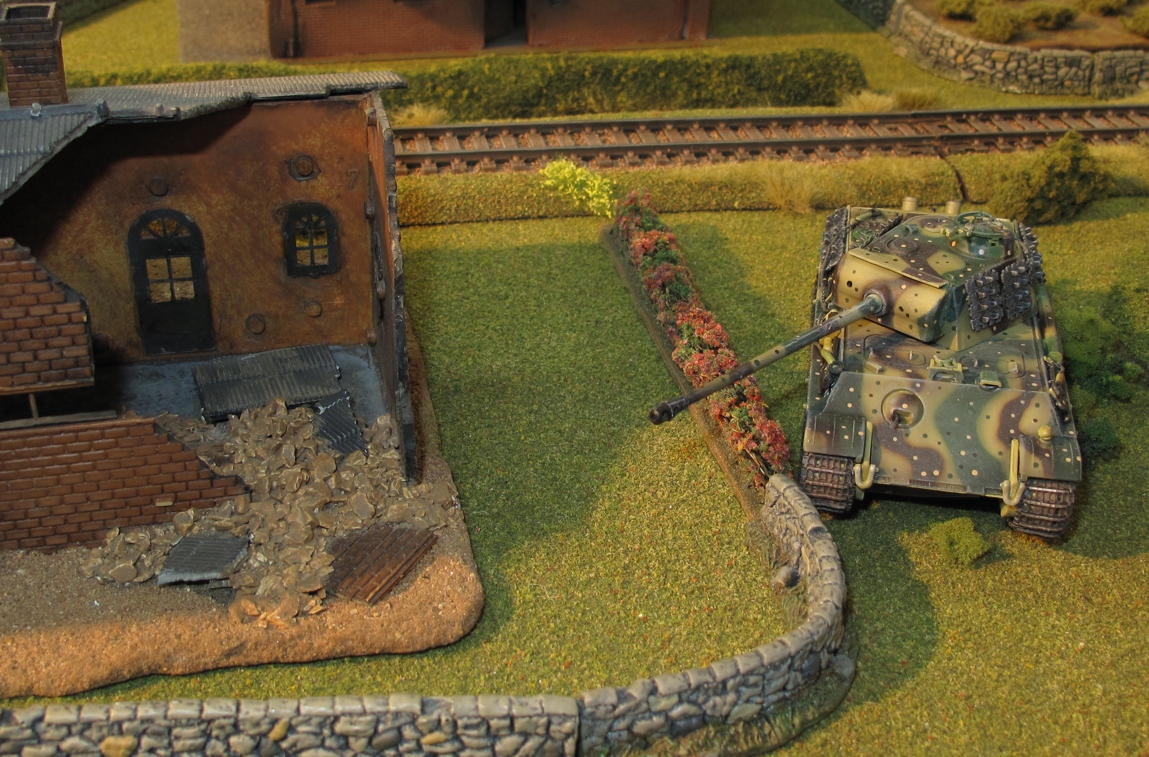
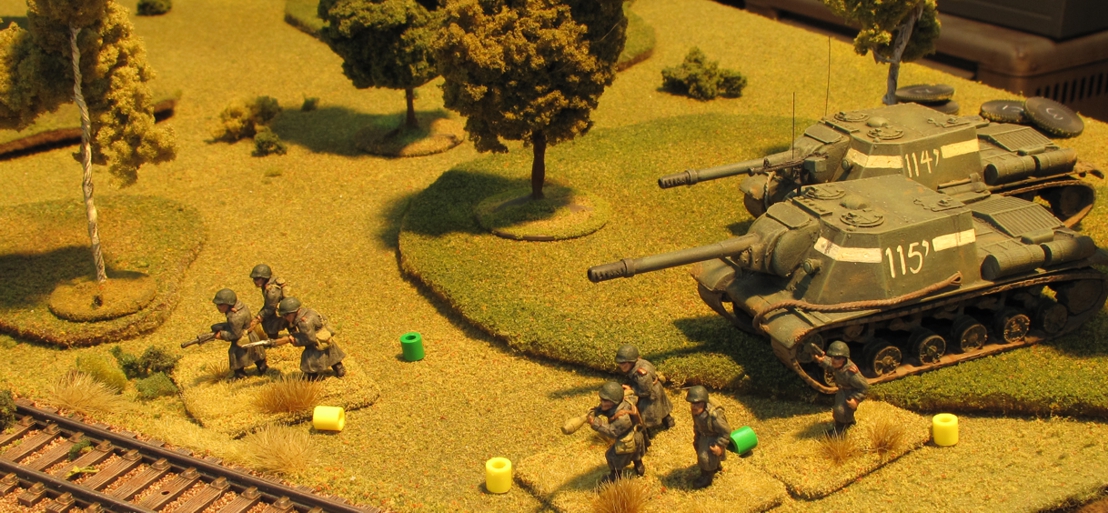
Several of you have asked how I did the train tracks for my WWII 20mm set (featured in the last posts Battle report) and I remembered that I had taken pictures of the process done a few years ago intending to do a “workbench” article. So, digging deep I found them and wrote up a bit on what I did.

I use HO scale for my 20mm WWII games, yes it is just a bit small being 1/87 scale and 20mm being 1/72 but it is hardly noticeable and given how much is out there and how cheap you can pick it up for its a winner. I had done several games using the HO scale track before but it looked a bit phony just laying on top of the game map. Most train tracks are on a raised “roadbed” and I put my mind to trying to figure out how best to accomplish this. The raised roadbed would not only look better it would make the track stay in place better on the game table, as well as create the “berm” for troops to hunker down behind and tanks to go “hull down”

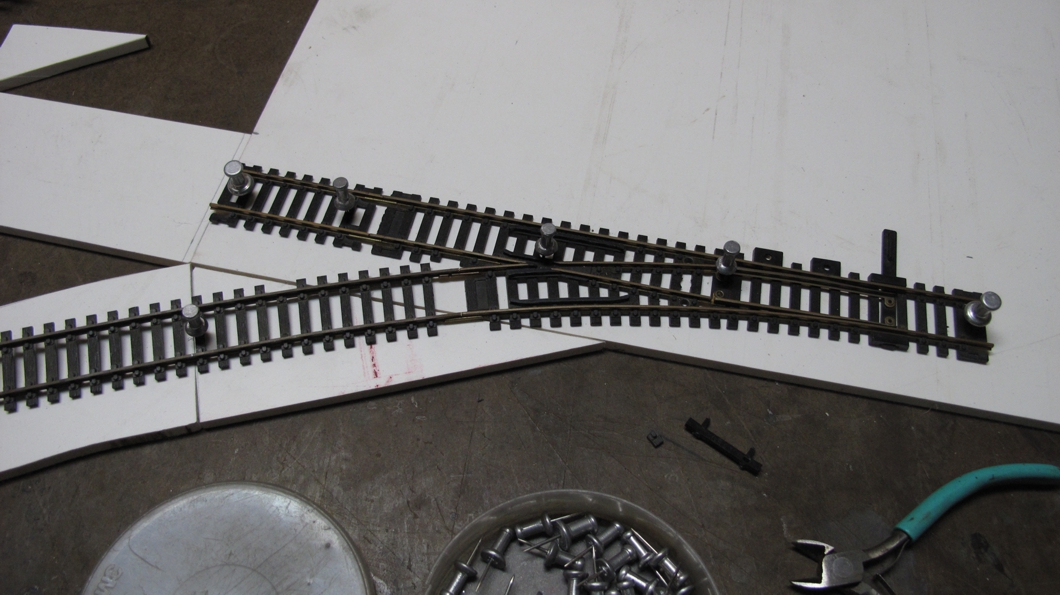
The first step was to determine the “roadbed” size for the different pieces of track I planed to use.

The roadbed is made from 3/16 plastic PVC sheet that you can pick up from plastic supply vendors (sign shops carry it many times). It comes in 4′ x 8′ sheets but most suppliers have some cut offs or will split a sheet for you. It’s a very handy material for all sorts of wargaming projects.

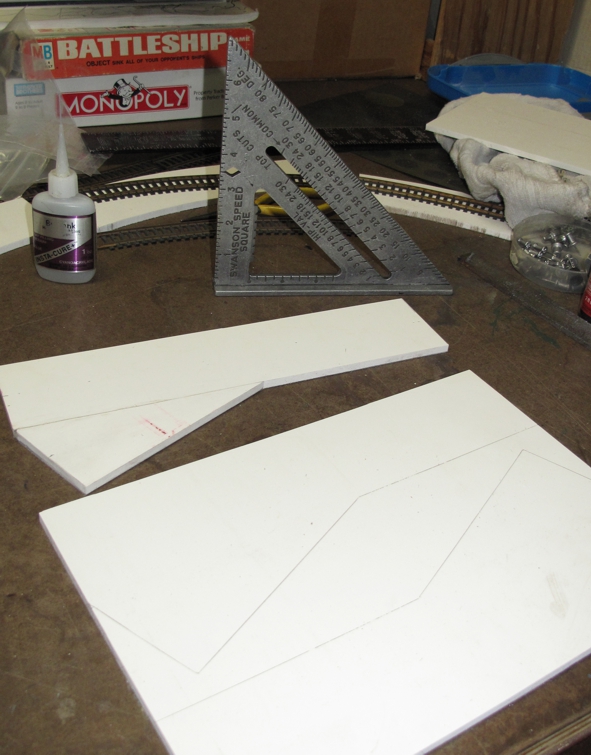
After determining the different sizes I would need I made a master for each type and then traced enough outlines to the PVC

Care has to be taken at each step to make sure the “ends” all match size wise so the track is interchangeable from piece to piece and end to end. I then used a bandsaw to cut the “angle” on each side. If you do not have a bandsaw you can use a small hobby copping saw. When doing this “angle” I created irregular sides to make the pieces more natural looking. Just take care to make sure the ends remain uniform. The first saw cuts are made straight, the second pass the cut is made at an angle and irregularly.

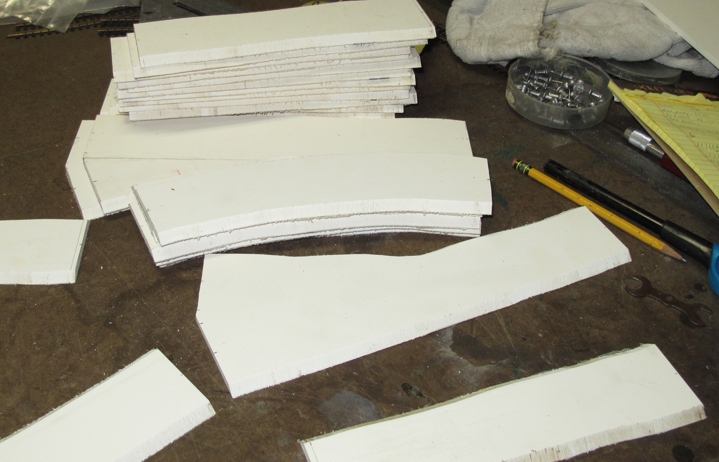
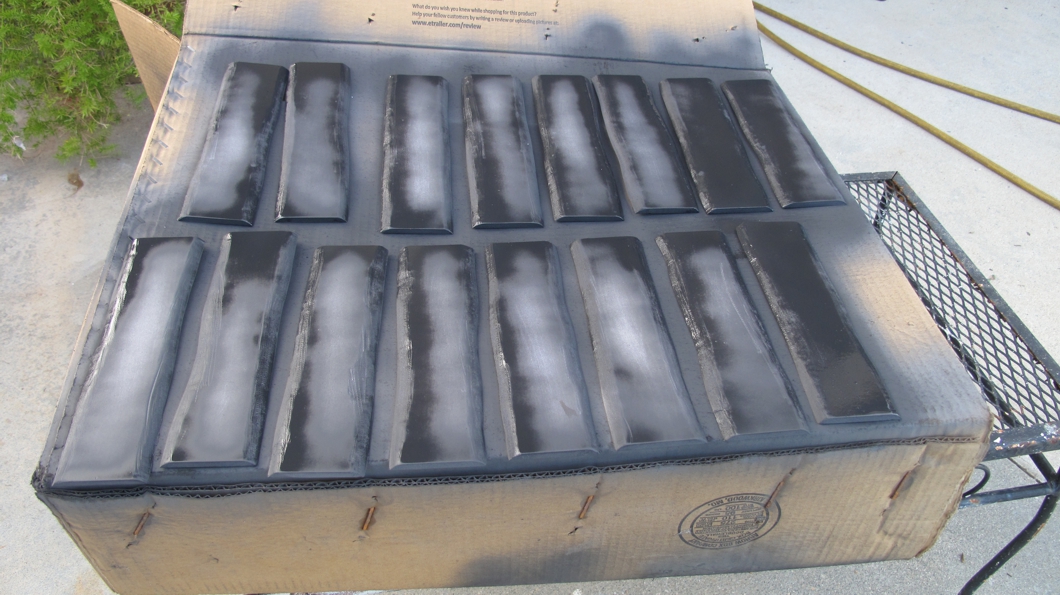
All the basic roadbeds done.

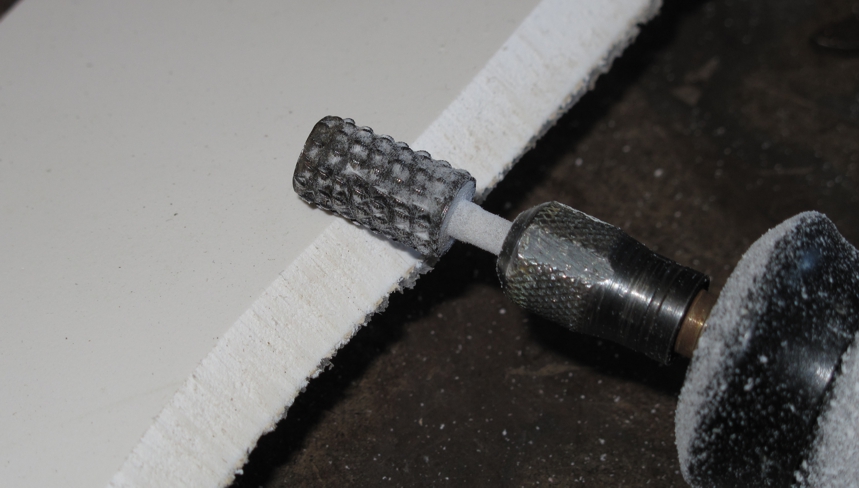
A Dremel rotary tool with a rough grinding tip followed by sandpaper smoothed out the sides again to make it look natural.

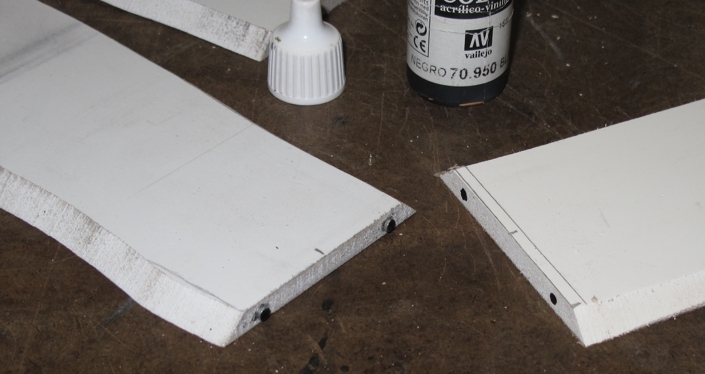
While not essential I went an extra step and used magnets on each end of a section so that they would stay together better. If you do this pay close attention to the polarization on your magnets.

I should mention that in the picture above the magnets are all FLUSH MOUNTED! The picture shows how I made sure the polarity was correct by using my “master” track, then sticking the next track pieces magnets to that “masters” magnets, applying a small amount of super glue and using the “master” track to push the other tracks magnets in to place. This assures a flush mount with no gap. By then sliding the track pieces sideways to separate them instead of just pulling them apart the glue can dry without bonding the track pieces together. When finished the magnets on both pieces are flush to the ends of the track.

All the PVC was primed using a good automotive primer. I use fast drying Krylon black primer.

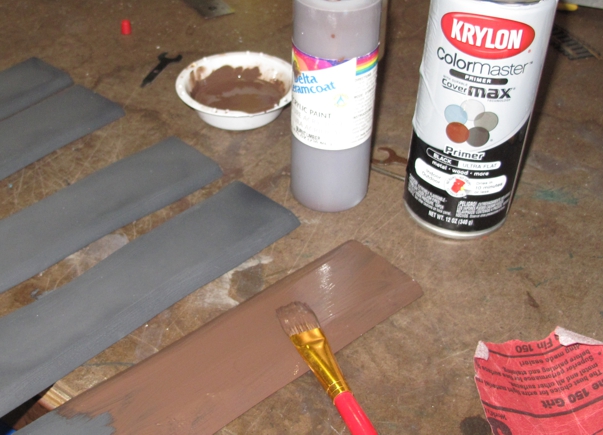
Cheap brown poster paint did the trick for the earth color berm.

The tracks received the same treatment, Krylon primer, then brown poster on the tracks as well.

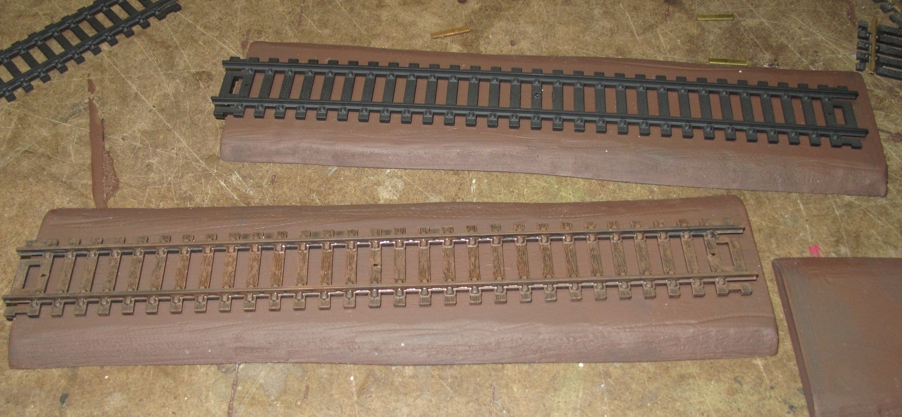
The next step is to mount the tracks to the roadbed. Take your time and get the track EXACTLY centered so no matter what combination you do they line up! Do one track as the master and then you will line every other track to match that one.

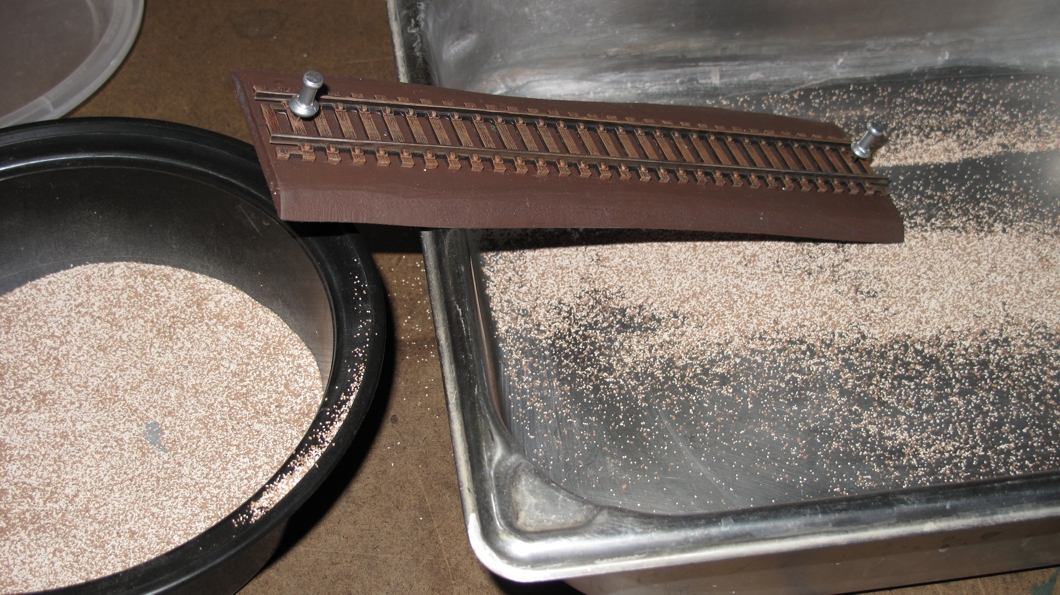
Once I had the “master track” set and pinned in place I glued the track down with Super Glue (not cheap stuff hobby quality) then carefully painted white glue in between the tracks and sprinkled rock “ballast” in and around.

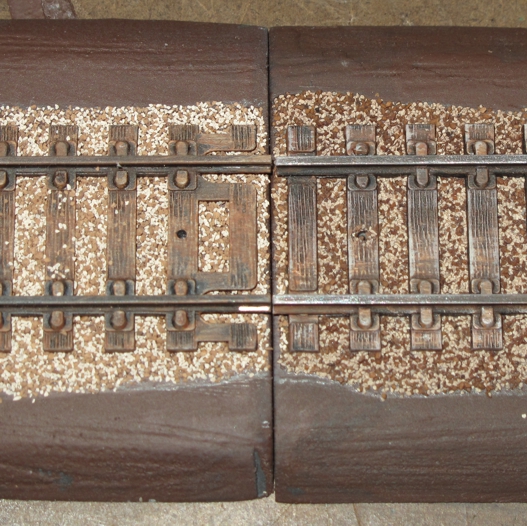
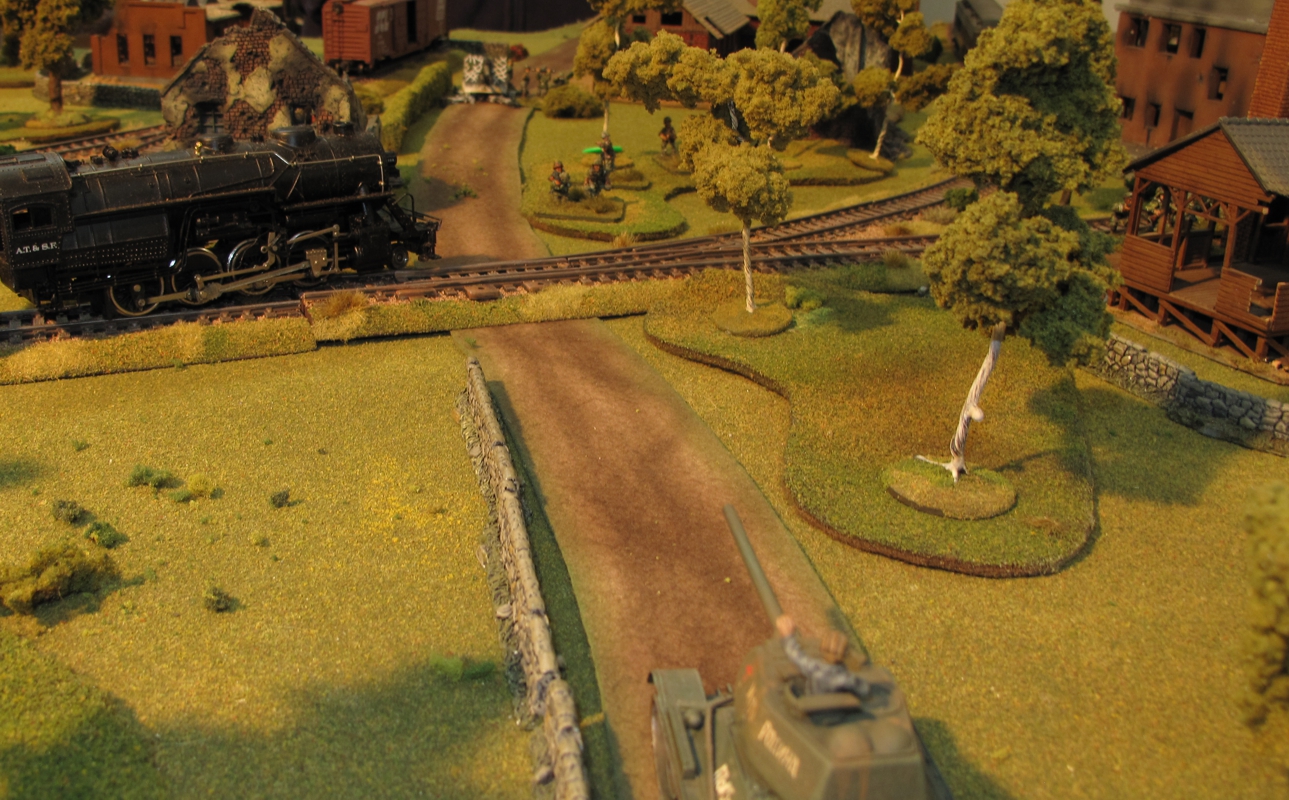
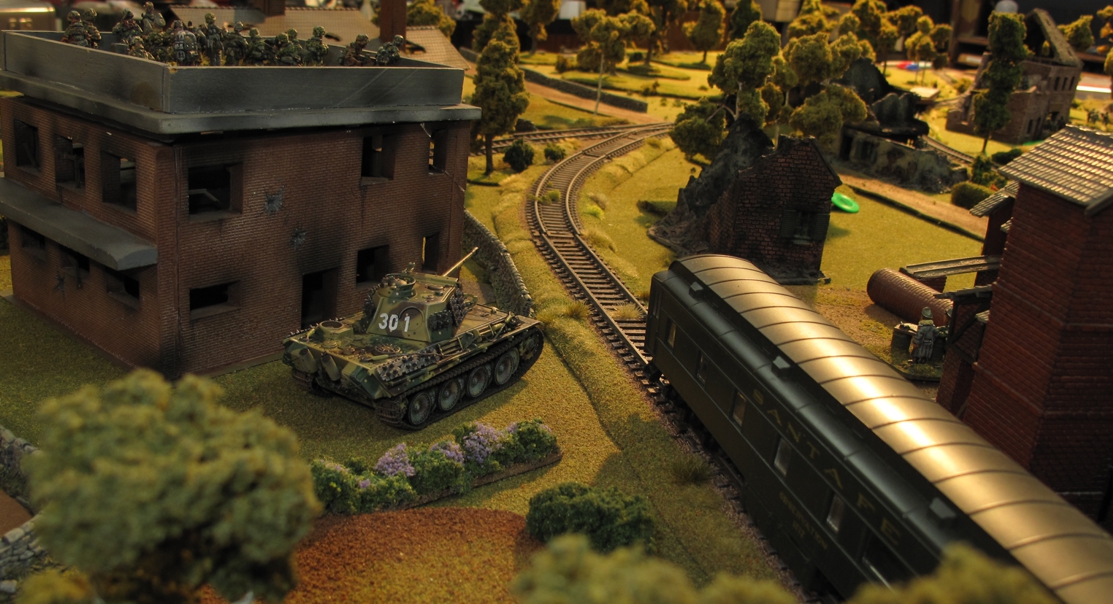
When done right all your tracks should line up no matter the piece or order the are laid out in. The track on the left has only the black primer coat and a thin coat of cheap brown to give the wood, iron and rust effect. The track on the right has been finish painted. Wood, bare steel, and rust highlights make it look real!

Green flocking, the same shades that I have done my game mats with is added to help blend in the roadbed. Bushes, brambles and tufts were the used to break up the sameness and again make it all look more natural and realistic.

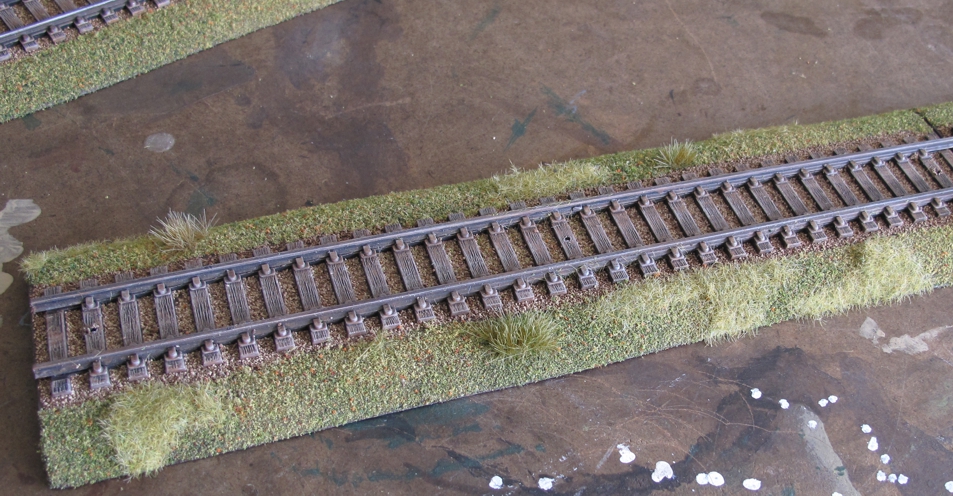
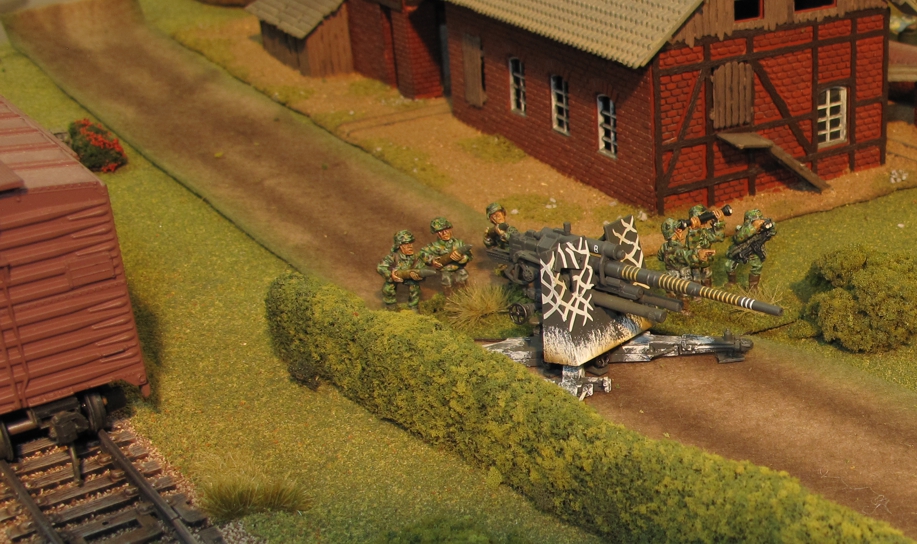
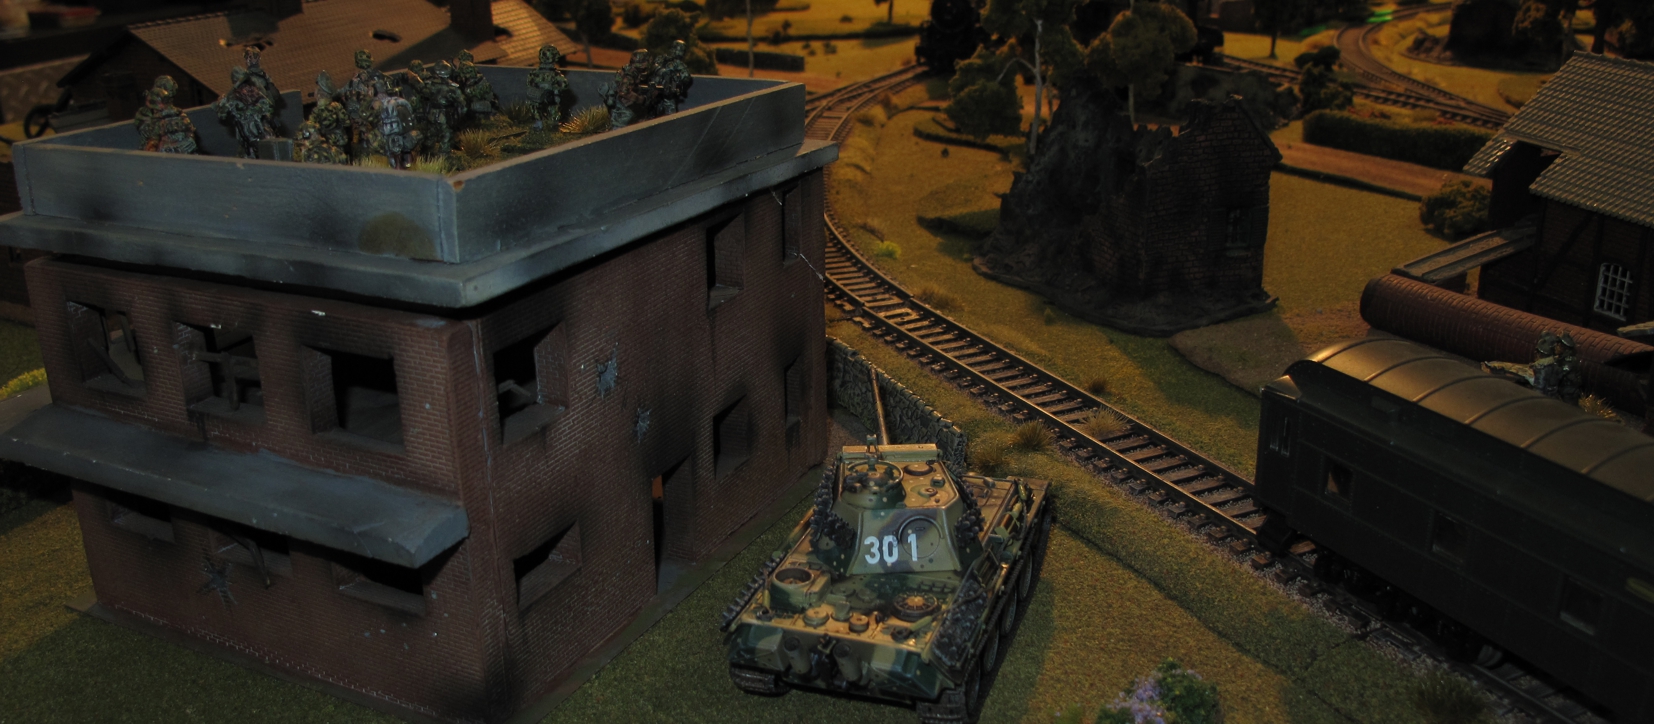
The finished product! I was pleasantly surprised at how good they came out and how well they work in games.

Next project is to do just a bit more track, 1/2 sections and end sections with bumper stops. I also want to do a few bombed out and destroyed sections. Then onto repainting the train engines and rolling stock to make it look more WWII period European. If you enjoyed the article please leave a comment!


WWII Russian Front in 20mm, the Hell you say!

The first real Wargaming I did was WWII micro armor and that became a lifelong fascination with the period, the conflict, the men and women who fought, died, and sacrificed so much for their beliefs. The battles in Europe and in Russia have always had the bulk of my interest as they were by far the most epic and important during the war. Micro armor had me for about 5+ years then I was introduced to 20mm or 1/72 scale WWII figures and was truly hooked. I have collected and played this scale for over twenty years and now have a huge collection of figures (both painted and unpainted!), more terrain and buildings than you could imagine (enough to do Berlin 1945 on a 4×8 table). Unfortunately as happens in wargaming rules change, periods go in and out of fashion, scales too…and over time I and my friends played less and less WWII, some got hooked on Flames of War and 15mm but I couldn’t get behind that type of game, to me Flames of War was a lot like Warhammer 40K, a game that made you buy their bloated rules, buy their figures, use their army list, and frankly the games don’t look like WWII. OK enough of that, bottom line our WWII games became few and far between. Well last week Steve and I dragged out the WWII 20mm toys! Wow I don’t think they have seen the light of day for years! I had even contemplated selling them off! I figured to have one last game before making that kind of decision.

Clicking on a picture will give you a larger version!

20mm scale is “Gods scale” when it comes to WWII “in my opinion”! I have always felt it gives great detail compared to 15mm, easy on the eyes, fun to paint without the detail or cost of 28mm.

A wrecked train adds realism to the scene as well as breaking LOS and providing cover. I hope to repaint and age these soon and I think this game has sparked my interest to do it!

For most of my WWII games I like to use maps to aid with the hidden deployment. I make this easy by setting up the terrain then taking a overhead picture and producing a map from it for the players.The Germans had the advantage of being deployed in defensive positions covering about 3/4s of the map with the Russian entering on the remaining quarter. Crossfire uses hidden deployment so I as the Russians had to start by probing the German lines in an effort to find them. This first probe quickly got out of hand and turned into a full-blown attack by the Russians.

The commanders maps are made from pictures taken from “their” side and then put in a clear page protector. Players then use “wet” erase markers to mark their deployments and moves.

We did a Russian front scenario loosely based on a game we did perhaps 4+ years ago where its late 1944, the Germans are fighting a tactical withdrawal back towards the borders of the Reich. The fight takes place with the Germans trying to hold a strategic section of railroad open as long as possible to allow both military and civilian transport trains to move west and escape the Russians. German forces consisted of a Company of infantry, a couple of Heavy Machine gun squads, 1 81mm mortar, 1 PzIV H, 1 Panther, and flak 88 AT gun. Russians had 2 companies of infantry, 2 Heavy machine guns, 2 x 120mm mortars, 3 T34/85s, and 2 ISU 152s. They also had some off-board artillery.

One of my first 1/72 scale buildings done 25 years ago! As I remember this one was from an Arifix kit and made of cast plaster! It originally a RAF control tower, I added stairs walls on the roof, window frames, doors, ect…. Its still going strong!

The Germans had the advantage of being deployed in defensive positions covering about 3/4s of the map with the Russian entering on the remaining quarter. Crossfire uses hidden deployment so I as the Russians had to start by probing the German lines in an effort to find them. This first probe quickly got out of hand and turned into a full-blown attack by the Russians.

Steve’s Waffen SS look real nice, he did a great job painting these!

Steve played the Germans and I the attacking Russians. The rules used were CROSSFIRE by Arty Conliffe, a very unique set of rules that while fairly simple use some very interesting mechanics that in my opinion give players the ability to play WWII in a much more realistic way. Less emphasis on dice results and more on tactics and maneuverability.

Steve once again playing the part of the “10,000 foot General”

One of the problems with most WWII rules and with larger scale rules in general is the “10,000 foot General” the fact that both player can see the deployment of the enemy force and couple that with most rule systems “I go, You go” turn based approach the games lose the ability to simulate the uncertainty in the decision process that commander faced in the field. In most games you look at the map see the other fellows force disposition and plan your attack. you can see all your enemies move and simply counter them as they can with your forces. Games turn into a simple stacking of odds and who roles better dice!

Russian armor appears in the form of three T3485s on the main road. Silly Russians…what are they thinking? That big striped thing down the road isn’t a Zebra!

Crossfire has fairly simple yet novel mechanics that allows you to as the defender to use the fact that the enemy would not really know your positions until the battle was joined and even then that knowledge would be limited. That is why in defense smaller forces many times held of or even destroyed attacking forces many times their size.

The Flak88 is a “Dragon” 1/72 model and the figures either Battle Front or Britannia.

Steve has a long-time reputation for poor die rolling so I had taken fewer troops to compensate, that was a big mistake! Steve proceeded to roll better than I have ever seen frustrating all my attacks.

Steve’s Panther works a crossfire with the flak 88 to insure a killing zone on a suspect Russian approach area. The control building was the main German held strong point.

The trains and the original track came from a HO set given to me by a neighbor. The trains need repainting and some conversion work to look more European. The track has been mounted on PVC, repainted, and flocked to look more part of the terrain.

German 81mm mortar deployed in bombed out warehouse. The painting, ageing, and basing of the train track really helped to make it look more part of the scene as well as create a defensive “berm” for troops or hull down position for tanks!

20mm gives plenty of opportunity for creating photo ops not possible in smaller scales.

After a short exchange of shots between the German “88” and the T34 the score was T34-0 Flack 88-1! The Panther moved up and soon all 3 T34/85s lay in a smoking pile…

The German Panther moves up into a better position. Now the Russian T34/85s are caught in a deadly crossfire!

The other flank saw the second Russian push but the results were not any better. The first Russian squad to leave cover was pinned down with heavy casualties, I ordered two Russian ISU 152s to destroy the German Mark IV and take the pressure of my advancing infantry but with Steve’s stellar die rolling they too soon lay as smoldering wrecks!

Britannia ISU 152s move up only to fall prey to the exceptional German fire! The pips/beads are use to mark things like Pinned, Suppressed, No fire, etc..

So within two hours the Russians lay strewn about like so many spilled matchsticks, their armor all ablaze, and I as the Russian commander being escorted into the woods, flanked by several commissars, to a fate familiar to “under preforming” Russian leaders…Dam we haven’t had that much fun in a game for years! I may even paint some stuff of the 20mmm lead mountain. .

A second German strong point on the other side of the railroad yard. The German forward observer scans for Russians.

Steve’s a happy camper given the performance of his Germans! and dice!