SAGA Birthday Bash!

This last weekend saw the coming and going of another birthday for yours truly and I had planned to spend Saturday playing SAGA with old comrades down at the World Famous “Dog Pound” and the Los Angeles based “Dogs of War” group and Sunday with the family, a perfect weekend! Ahh plans, they never quite work…my co workers decided that for my birthday they would surprise me with my very own copy of the cold everyone on the set had that week! Saturday I awoke to that stuffy, achy feeling you get as it creeps up on you, not quite feeling like leaving the homestead. My main gaming buddy Steve had come over and he looked terrible, having had the “cold” for a couple of weeks before. We both felt crappy and decided that instead of carrying our misery down to infect the rest of the group we would just hang and practice our SAGA playing at my place.

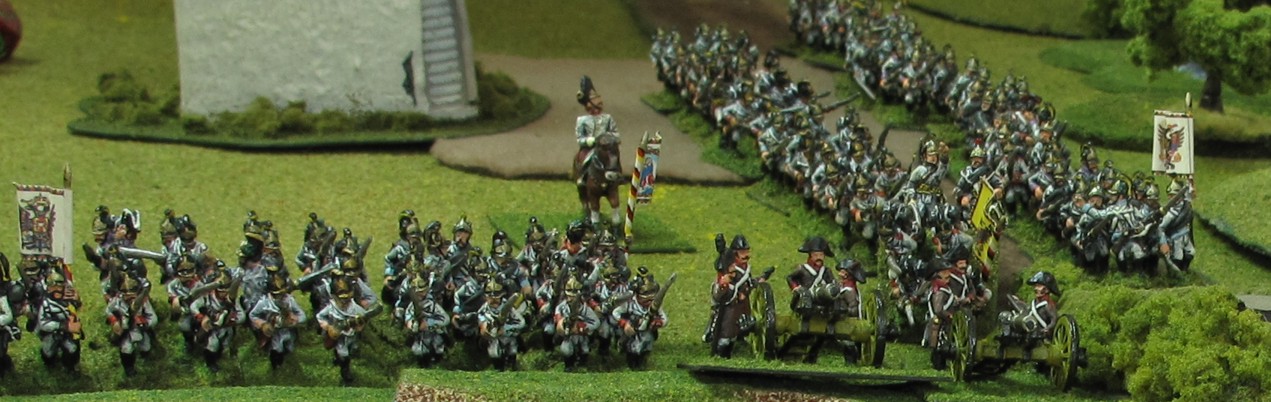
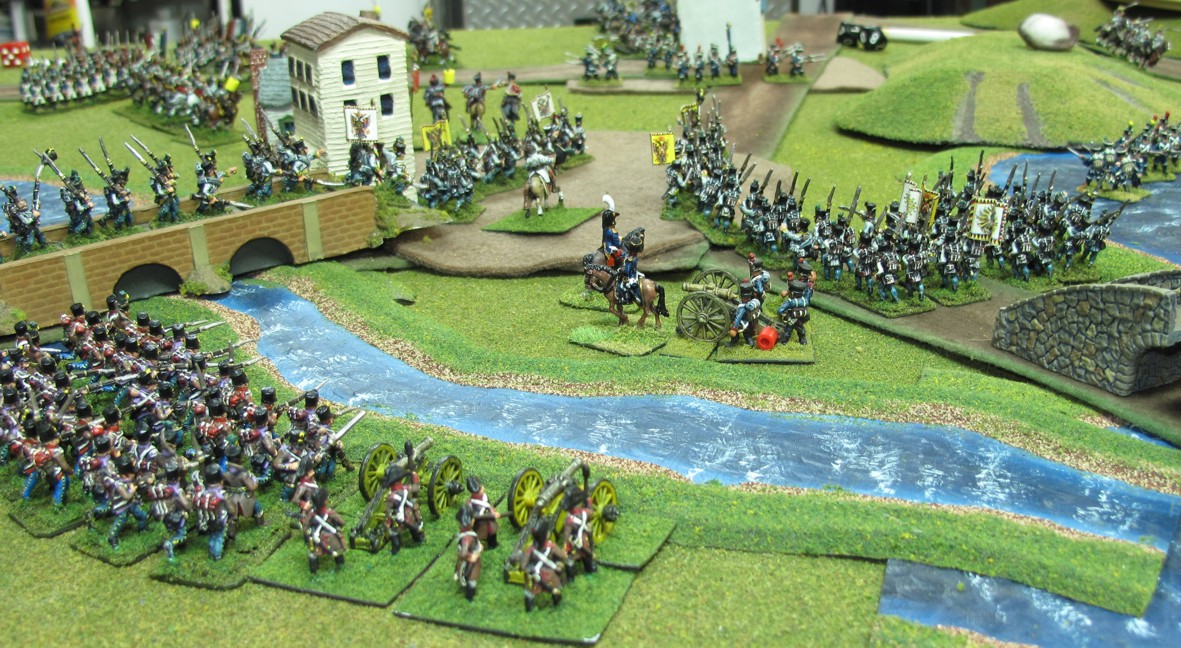
Steve had commissioned a Byzantine Warband from a painter back east and was having trouble getting a handle on playing it so we decided to do a game or two with it against my Normans to see what strengths and weakness’ we could find. The Normans and Byzantines are historical foes with similar warbands, both having Cavalry and Bows used in slightly different ways as their main force with various infantry units rounding the warband out.

game12614f

The Byzantines are a very colorful, good looking warband! Their archers have the powerful ability to fire “over” there own troops!

SAGA is currently one of my favorite “miniature wargames” rules systems as it is fairly simple in its rules and play, BUT extremely complex in the fact that it forces you to really lead your warband based on what is happening at the moment. Very true to life for Dark Ages combat on this scale at this time in my opinion. Now some players will have a problem with this as (like Steve) they are used to having looked at the charts, calculated the distance, moved properly, having stacked the dice in their favor, and can be reasonably assured of a certain result. SAGA does not quite work that way. Yes you do the all the regular things as above but when the execution of the plan comes you need to have the “right” SAGA dice to do it, and if you don’t you must as a commander modify those plans to fit the current situation and SAGA dice you have. There is an element of chess to the game and players who can think moves ahead for both their own troops and those of the opponent do well, those that cant die quickly. Add to this the sometimes extreme differences in your opponents warband and you can have a very exciting, interesting battle or for some a very frustrating and difficult match. Some people call this a Beer and pretzels game, hardly, at first glance yes, you can play it that way, have a few brews, as I tear you apart… I was frustrated at first playing SAGA but loved the concept and persevered until one battle the haze cleared and I “got it!” Now its just “polishing the sword” and on to battle.

game12614b

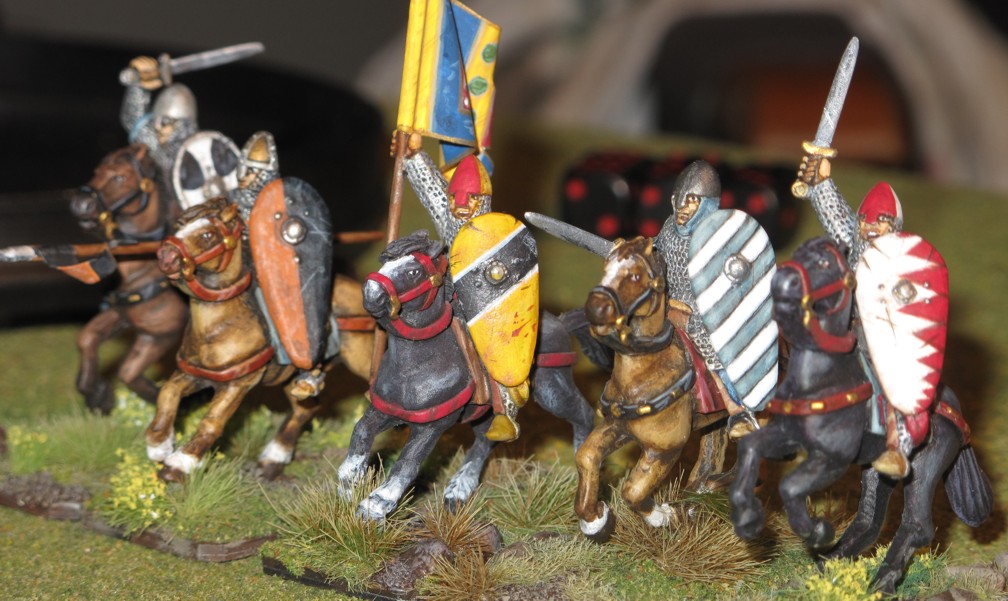
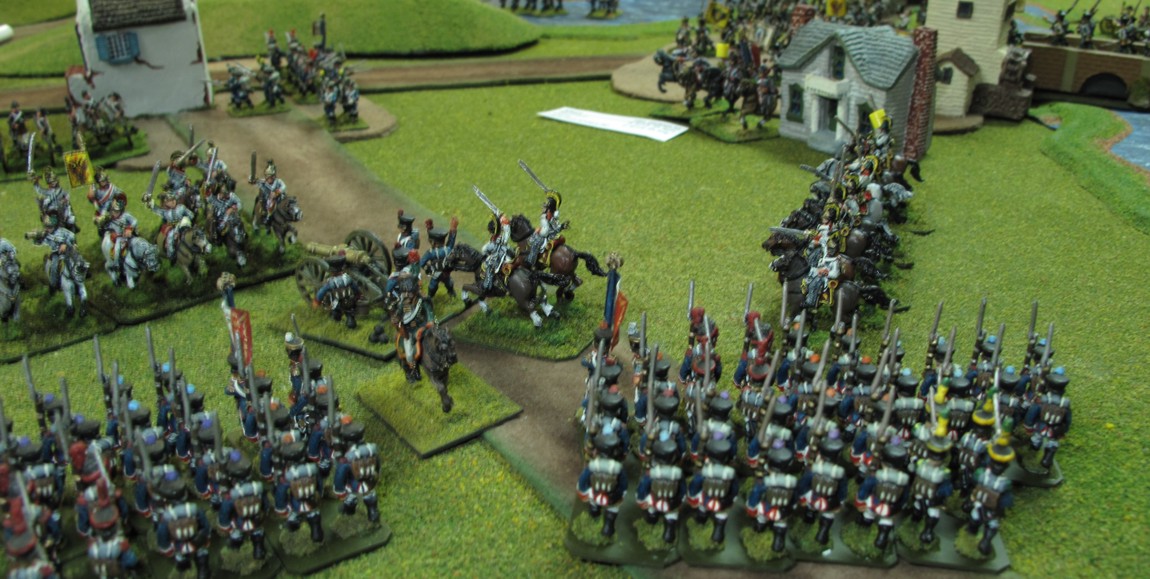
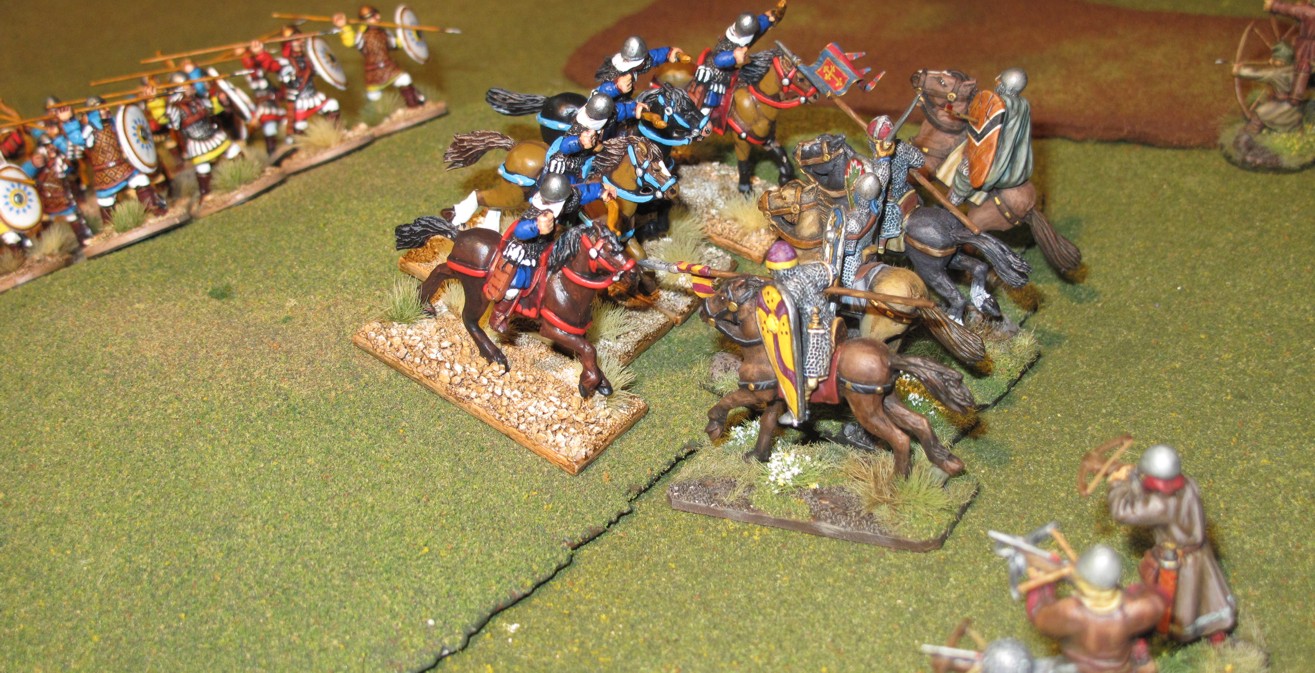
My Normans charge his Hearth Guard, “looking good Norman” No shield transfers or printed flags here, just paint!

Both of us being sick and really concentrating on game play and tactics I did not take a lot of pictures or keep a battle record but here is what I did get….

game12614j

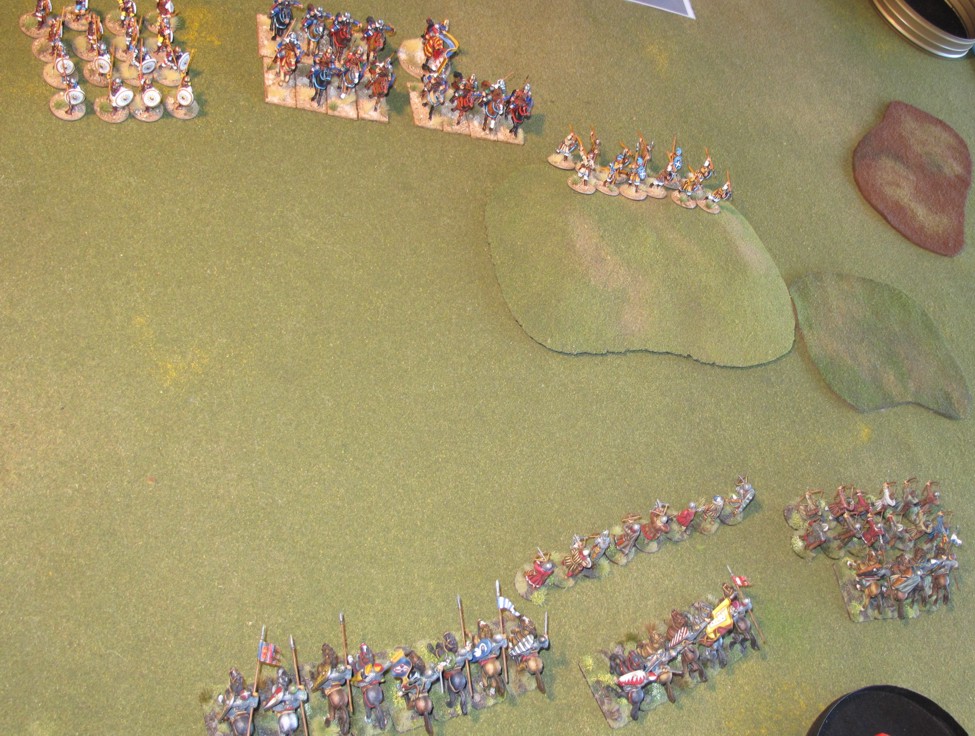
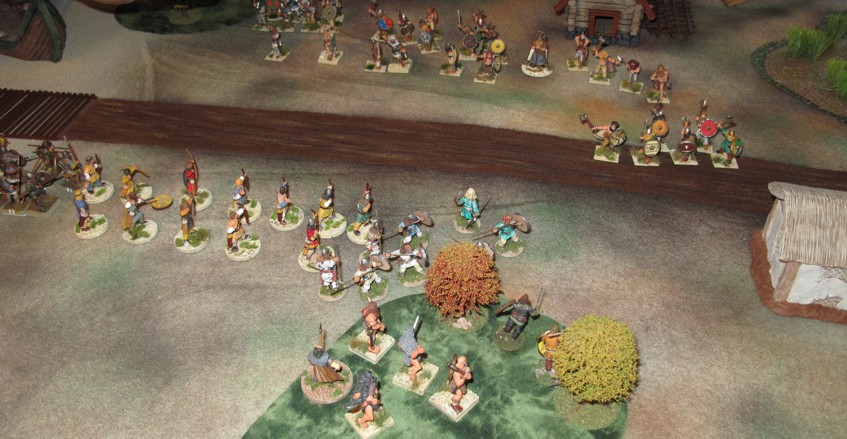
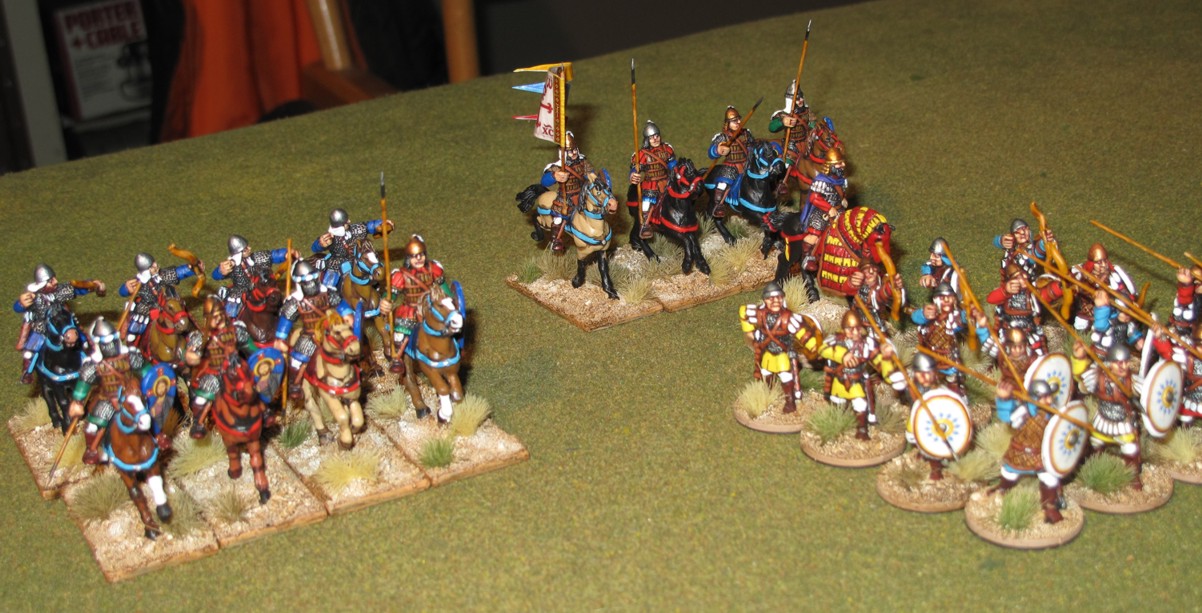
The first games initial warband positions, Byzantines to the top Normans at the bottom.

We both took little terrain hoping to exploit our Cavalry’s movement and bows power. I didn’t take any pictures of the battle but it was hard fought with both of us concentrating on learning the army’s and therefore helping each other to make the best moves. The Normans were on there way to a win when the Byzantines commander and his remaining Hearth-guard made a desperate charge at my Warlord and killing him won the battle! Thus epitomizing “battle in the Dark Ages” were the death of a single figure if important enough can lead to a victory as your forces leaderless melt away in desperation!

game12614h

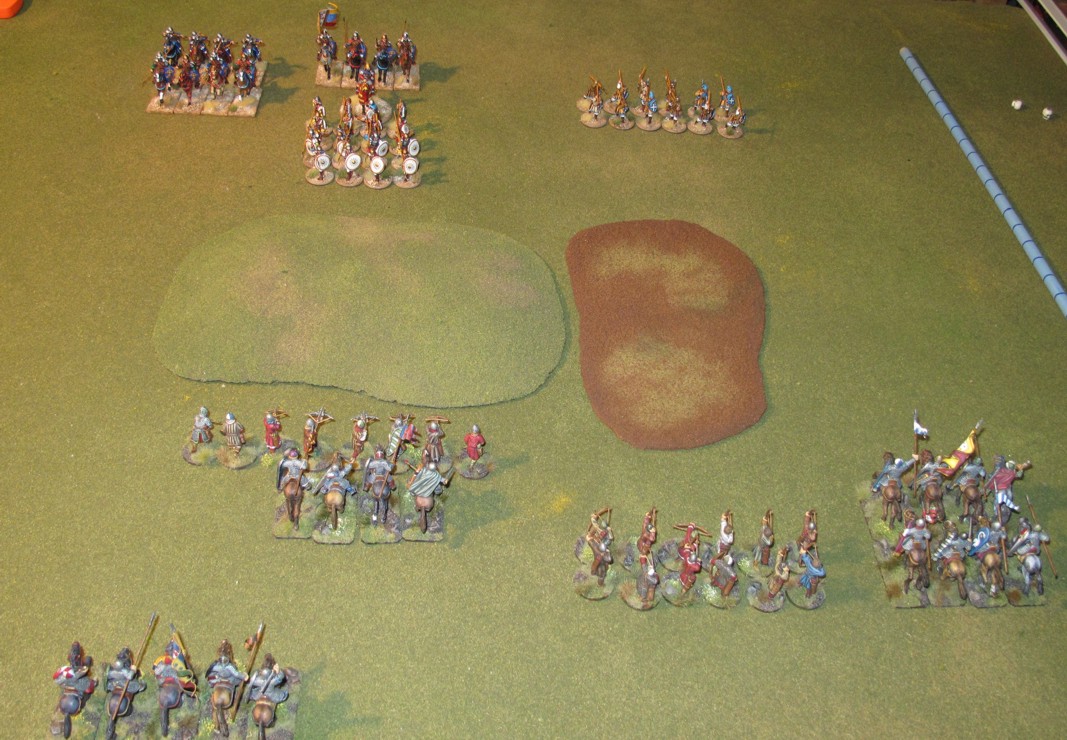
Second battles setup, Normans again at the bottom. My Warlord at the extreme left attached to Hearth Guard

I still did not really shoot or write down the game as it happened but did take a few more shots as we went at it, still stopping to retake moves and figure out what the best game play would be during situations.

The second battle I lost the “setup” role and tried a bit different tactics with a large flanking cavalry force on the open right flank with bowmen anchoring the center and left. This caused the Byzantines to despair from the beginning! and use his first powerful turn to retreat his javelin men out of range. SAGA is very psychological in game play at times, this was a perfect example where my opponent was spending his SAGA dice unwisely because of my units actions and I wasn’t even losing figures to do it!.

Steve fearing my cavalry and bowmen on his flank pulled back on that side allowing me to push forward unopposed, you see this in the picture below.

game12614c

The Byzantines regroup and order infantry forward. My cavalry advancing in far right corner of the picture.

He then decided to attack on the left with his powerful Hearth guard backed by his Horse archers, my Crossbowmen and levy Bowmen took them under fire as my smaller hearth guard cavalry unit counter charges to contact with them. The dice gods favored me and his cavalry soon died were they stood…..

game12614d

Cavalry go at it in the center, at this point the front rank of Byzantines have already died…..

Steve and his Byzantines were not finished yet as his Warriors backed by yet more support archers took on my victorious Hearth guard Cavalry and nearly pounded them into submission. game12614k
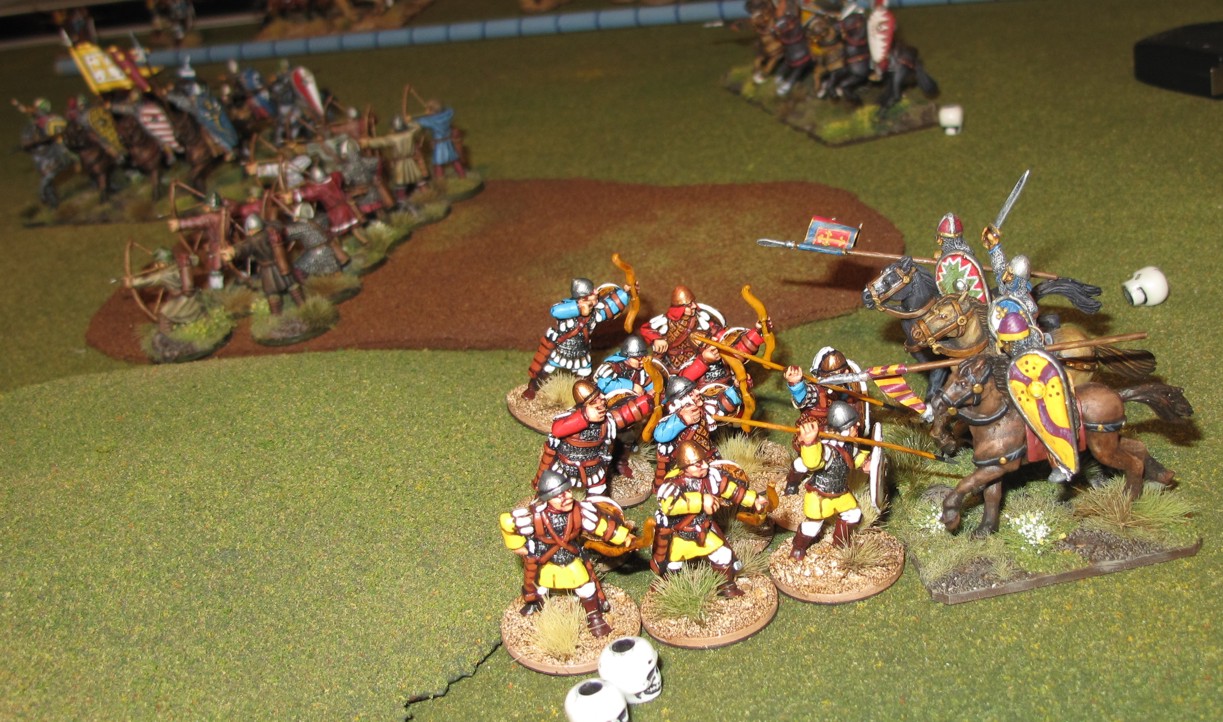
At this point I felt my Warlord was in a dangerous position, since I had out pointed him so far in victory point it would be senseless to risk him at this late stage of the battle so he and his Hearth guard horse unit self activated out of range to the left. The Byzantine commander then as I figured launched himself and his Hearth guard Cav at what was left of my center Cavalry, destroying them. The game was now on its last turn and it was mine! I decided to charge his Warlord with mine just to seal the battle. His group had several fatigues, I rested mine off and self activated charging into melee….a hard fought melee with the Byzantine warlord finally going down…victory to the Normans this time!

A low key good time battle that we both learned a lot playing!

If you are in the Southern California area or even just passing through and would like to get in on a battle, begin playing, or just check it out contact me to get on our mailing list of up-coming and spur of the moment battles.

Contact Me!

Napoleonic’s “The Battle of Souffel”

In an attempt to guard Frances borders while he defeated the main Allied force (British and Prussians) Napoleon had stationed several “Observation Corps” on the most vulnerable approaches. On June 28th 1815 French General Rapp and 19,000 French infantry and around 2,000 cavalry squared off against Austrian Crown Prince Eugene, 34,000 infantry and 4,500 cavalry, this was the very last battle of the Napoleonic wars.

Newly conscripted French infantry prepares to defend the town and river crossing

Newly conscripted French infantry prepares to defend the town and river crossing


An English reporter for the London Times (Percy Wordsmith) sent this eye witness report while traveling with the Austrian army.

Map showing initial French deployment (Yellow) and Austrian advance (Orange).

Map showing initial French deployment (Yellow) and Austrian advance (Orange).

French troops had spent most of the early morning pushing civilians out of their homes and out of the villages. Other French units set to work clearing fields of fire building barricades, and improving their lines along the river until the scouting Hussar units galloped back across the bridges with reports of Austrian columns fast approaching. As the French hunkered down in their defensive positions the far side of the Souffel river bristled with the bayonets from half a dozen Austrian columns. Huge Austrian brigades nearly the size of French divisions maneuvered around each other in an attempt to quickly close with the French. The French artillery opened up on these columns, seldom causing real damage but throwing them into disorder and slowing them down. In the center Austrian heavy cavalry pushed to the center causing the French horse batteries to withdraw and French heavy cav to counter the move in order to guard the flanks of both towns.

AustEarly1

Austrian commanders position their supporting Artillery battery’s with a cheer ans a “Hats off” salute!

FrenchEarly2

French Cavalry and a Horse battery cover the center

Austrian forces in the center had finally started to push across the bridges but were repulsed at both crossings by stubborn French resistance losing a few troops along the way. The Austrians retreated back across the bridges to regroup and await the redeployment of their gun batteries in a better supporting position. Over two hours had passed by now and as general Rapp anticipated the Austrians had detected his weak undefended left flank. Reports of Austrian cavalry and guns crossing there in force were now coming into his headquarters, Rapp quickly dispatched an ADC to Colonel Merlin commanding the French cavalry to move west to block the Austrian flanking move. Rapp also gave orders to send a brigade from each of his other divisions to also move into a blocking position to the west allowing his cav to resume their job as a mobile reserve in the center.

AustBridge2

Austrians mass and move to the assault. Austrian Cav gives french Cav something to think about in the center.

The Austrian commanders however had planned this diversionary attack on the French left flank to do just exactly what it had done, weaken the center, and they choose that moment to launch a renewed assault, a much more coordinated, powerful, attack. The Austrian batteries roared, slamming shell after shell into the French defenders. The French defense remained firm and the artillery had little effect but that of making a shambles of the town. Now over the bridges came the renewed attack of the Austrians, two brigades now reformed into assault columns (thanks AOE Yahoo group) and combining their numbers for the assault against the small French brigade left in town.
On the eastern side of the battlefield the Austrians were finally sorting out the traffic jams caused by their massive and unwieldy brigades. One of the Austrian brigades charged forward across the bridge but suffered the same results as the Austrian attacks across the bridges there. The eastern Austrian push settled down to an artillery dual with the Austrian commander waiting for developments elsewhere on the field. To the west the French and Austrian forces squared off and waited for one another other to see make the first move.

Auststare

Austrian troops across the river at Souffelweyersheim spend most of the battle just tossing angry shouts and an occasional cannon ball at the French.

The center now erupted into pitched battle over the bridges of Mundolsheim and again the Austrian dragoons once attempted to cross the Souffel in the center, succeeding in causing the French cavalry to move back from their blocking position in the east  to the center, again countering the Austria dragoons. This time the Austrians Dragoons charged, the French Hussars counter charged and after a brutal fight the weight of Austrian heavy cav succeeded in crushing the French Hussars. The Austrian commander had watched intently this clash and was now joyous with the possibility of splitting the French center and even falling onto the rear of the French line to the west. However he had no cavalry reserve to push across the center and the Dragoons were far from fresh. The Austrian Dragoons sensing that this was the moment, their moment shook off their disorder and preparing too charge the rear of the French defenders to the west.

Austrian columns assault and shatter the french center, the french Officer and gun battery in the picture have been "captured" survivors flee to the rear.

Austrian columns assault and shatter the french center, the french Officers and gun battery in the picture have been “captured” survivors flee to the rear.

Meanwhile the Austrian infantry attack on the French center had succeeded in forcing the crossings, nearly destroying the defending French brigade, the French losing two regiments, their guns and their commanding general captured, the remnants falling back out of the town.

The final positions just before dark and the close of the Battle. French / Yellow, Austrians / Orange

The final positions just before dark and the close of the Battle. French / Yellow, Austrians / Orange

The Austrians now sensed the French were in trouble and pressed on, their infantry columns flooding through and out of the town in pursuit, forming up in line of battle preparing to roll up the French left flank. Once again as they had done several times already this battle French forces despite being of less than normal quality (50% of the infantry were conscripts) rose up in defiance and struck back.

French Infantry and Cavalry make a last ditch counter attack to stem the Austrian tide!

French Infantry and Cavalry make a last ditch counter attack to stem the Austrian tide!

The French reserves had finally arrived in the center and deployed with a heavy battery with in effective range of the reforming Austrian dragoons and just as they were about to charge, delivered a devastating combined volley killing several stands, throwing the Austrian dragoons back into disorder, and pinning them in place where they stood till they died. A small victory for the French but it had little effect overall the Austrians had pushed back the french left flank and now four huge Austrian brigades had were in position to move forward taking the rest of the French positions in the flank or rear…. Fate and darkness intervened at this point with the battle ending at 7:30 pm. General Rapp ordered skirmish screens and a general withdrawal towards Strasbourg.

From the Austrian camp,

Percy Wordsmith, London Times

When the victory points were added up the French were ahead, coupling that with their success in keeping at preventing the Austrians from archiving a quick crossing of the Souffel and possibly trapping Rapps main force gave the French an overall win. Herr Gausche playing the part of Archduke John did a splendid job in forcing the river crossing against a determined opponent. We learned how to do a few things within the rules that we had not come across before. Once again the “Age of Eagles” rules rose up and proved to be equal to the task and provided us with one of the best Napoleonic battles yet played by us over the years.

Rules: Age of Eagles (AOE) by Bill Gray from Fire and Fury

Scenario courtesy of the Susquehanna war-gaming group

French, 5 Commanders, 50 infantry stands, 11 Cavalry stands, 4 Batteries

Austrians, 6 Commanders, 90 Infantry Stands, 25 Cavalry stands.

A Balloons eye view of the Battlefield at the end

A Balloons eye view of the Battlefield at the end


SAGA, a foray into the “Dark Ages”

If you had asked me a few months ago if I would be playing ancients or even painting them I would have looked at you, cocked an eye and said “are you kidding? no way” In fact I had just sold my last Ancient army (only ever had two!) A beautiful “Tactica” Late Roman army composed of Essex figures. I had kept that army on display for 15 years without using it…..

SAGA's Basic rules are all you need to start.

SAGA’s Basic rules are all you need to start.

So when I started hearing the buzz about these “SAGA” rules I didn’t take much notice, ancients rules come and go all the time…. but then a few people I have a lot of respect for started to talk about them.

When the email list of my old gaming group the “Dogs of War” started to buzz about it and they began to play SAGA on their traditional Saturday game days coupled up with my job preventing me from playing up in my area on Fridays nights I decided to make the 20 minute drive down to the “Dog Pound” to see first hand what the “buzz” was really about. ( in the fishing world this is is where the bait has hit the water and the gets the fishes attention)

Saturday morning was hectic and I got a late start down to the “Dog Pound”. When I arrived I found Tim had designed a scenario for SAGA, a large one that he wanted to play test. The battle already had a full roster of players so I decided to just sit and watch the action while catching up with fellow “Dogs”. Tim’s scenario was beautiful with a nicely airbrushed games mat and a brand new scratch built “berg”? or stockade in the middle. The sea shore of England formed one end of the mat complete with dock and 2 Viking longboats! The opposite side was a huge forest. The scenario involved Ragnar Lothbrok being trapped by approaching Normans and trying to make it to the boats. The Normans started along the northern edge of the battlefield, played by Galen and Clark (Clark’s frikken 7 and a better player than many a gamer I know) Ragnar and the Bergs occupants were controlled by Chris Armstrong, with the dubious Anglo Danes controlled but Frank V. coming to help him…. The battle progressed slowly and as a first time “look see” was not that appealing. (The fish is just not liking the presentation of the bait) Well just as I was about to pack it up Chris A had to leave and as he walked out the door shot me a glance and said “your Ragnar!” crap I’m thrust into the roll of the main character in the battle and I have no idea on how to play the game, much less how the scenario is to be won!

Additional “expansion sets” allow you to field other armies as well as ad in some variables to game play.

So after being guided through a few turns, finding out the Normans can shoot further than me and are content to just sit outside and slowly pummel me with arrows I can’t return I ask Tim “just what is Ragnar’s mission?” Tim replies “to get to the boats and escape”. Ok great, now rather than wait till the Normans weaken me further I decide to have Ragnar (whose own rescue Viking force has moved off the boats and arrived at the gate) make a run out of the Berg and to the ships…. I did not trust the motives of the Anglo Danes as they seemed reluctant to close with the Normans and I suspected treachery.

So out of the gate flies Ragnar and his bodyguard, “charge” cries Clark to his Norman Knight’s (who knew they could go so far!), Ragnar takes cover behind a group of stout looking lads, wait that’s not armor their wearing but pig dung covered jerkins, “what? Those are levy? They die on a what” crap! The Norman Nights crash home, dead Levy, dead bodyguards, dead Ragnar, game over….. After a lot of ribbing and what were you thinking I pack up my pride and go home… (Fish swims away from the bait)

So the next week I’m a bit deflated about my intro into SAGA and wonder if its for me…I see from emails there will be more SAGA next weekend and decide to go early and see if I can get in a small one on one learning game in. (fish swims around pond hungry and still thinking about that bait…..fish decides to swim back there and give it a second look)

So arriving early to have a bit of time to kibitz and peruse one of the club copies of SAGA I talked with Chris Snell and Galen Yee about SAGA warbands and what miniatures they recommended. We were supposed to start to play at around 1pm but due to one of those all to frequent LA freeway disasters (insert picture of overturned tanker truck here) Tim and wife Jennifer were about 2 hours late! Now this was bad for them but equally bad for me…two hours of looking at all those beauty full 28mm miniatures…both on the internet and in the GIANT dog pound permanent collection (the fish swimming up was liking the look of the bait…but was it more than he could chew?)

Tim wanted to do his large scenario again but the turnout at the pound was light this Saturday and I mention I would like to do a small learning game….Tim was happy to oblige…(Tim being a good fisherman knew when to make a second cast and try a different presentation)First game5

I was soon in command of a 6 point Viking force. While the “Dogs” have lots of the SAGA army’s I felt the Vikings were the “vanilla” of warbands and probably the best with which to get a good impression with. Tim made it even better by taking a mirror image warband that would allow me to learn from his moves how to handle my army warband as well. We deployed and with Galen kindly acting as my “Aide de Camp” and helping me with game mechanics as well as pointer on what I might do during a turn soon had me handling some task alone. The game lasted only about an hour and a half and I was dead, again, but this time having felt that I had a least had a chance and learned much about the mechanics of SAGA. (The “fish” is getting interested in the bait and lured in….)

The Warbands face off trying to gain an advantage on the flank

The Warbands face off trying to gain an advantage on the flank

First game4

Wait, didn’t this unit have 12 archers a minute ago? Tim’s Archers fall to my good rolls and battle board dice reducing his armor and increasing my attack dice.

Having enjoyed the small game and all of us ready for a bite to eat we decided to go for some true “Viking” fare so went to the Japanese place around the corner. After a lot of dinner chat about SAGA we returned to the pound where Tim made a final cast and lured me into another game of SAGA…. (Many times when fishing and having a slightly hesitant fish, anglers will retrieve the bait before the fish strikes making it worried at missing the meal, a mad fish has less hesitation the next time bait is presented….) This time the game went quickly and bold moves were made on both sides, I felt I had learned enough to put some simple strategy together using the battle board and dice. The dice gods were rolling my way and good timing and shooting soon caused Tim to alter his battle plan and counter strike my attack in the center that was close to destroying his second full unit. He sent in his Warlord and Berserkers hoping to stop my Warrior unit in its tracks. No dice! Meaning I got the dice and Tim didn’t….. It went down to the wire and I had one more hit on his Warlord than he could save, dead Warlord, game over, I had won! ( this was the part were after grabbing the bait  the fish realizes he has been “hooked” and sees, to late, the net about to scoop him up….)

So after some post game kibitzing I said my goodbyes and thank you’s to the group and headed home feeling like a child before Christmas with thoughts of shiny new rules and great additions to the “lead pile”

Nice job Tim and the rest of you Dogs……..

This picture says it all, Tim wondering what happened.... his Warlord with only one Beserker left (at lower left) facing my band of Warriors is about to die.

This picture says it all, Tim wondering what happened…. his Warlord with only one Beserker left (at lower left) facing my band of Warriors is about to die.
Of course this might also be Tim trying to cover up his “smirky smile” from knowing that he’s truly hooked me…..


After the Battle Report; WWII Eastern Front “Hube’s Pocket” using “CROSSFIRE”

My main buddy and Wargamer par excellence Steveie G and I got together for another game in our favorite period WWII in 20mm, “God’s” scale! It was mid week our wives were away, and the gamers will play!

Hubs1board2

We have been using CROSSFIRE rules by Artie Conliffe and we are getting to know them quite well, so well that I have been looking into converting some of the old Squad Leader scenarios into Crossfire scenarios. Squad Leader has a ton of great scenarios in them with a lot of historical research done by some real WWII scholars. Looking over the Force layout showed me that with some fairly simple force conversions, like dividing the troop strength by 1/3, leaving armor alone, and piling individual weapons into the Squads and Platoons things should work out well. Then I looked at the maps and realized that SL and ASL maps are 10 times the size we normally play Crossfire on. There was going to be no easy way to convert them…so I set to figuring out how to create my own map that would look and feel like the Squad Leader map is a size we could use for Crossfire. I read the scenario, checked victory conditions, and then studied the map trying to see what, why, and how the terrain affected the battles scenario. I then tried to reduce and combine these features while retaining the look and effect it would have on the battlefield in a size and scale that would work for our 20mm Crossfire games.

The first Scenario I decided to do was “Hube’s Pocket” a Russian front Scenario taking place in February 1944 during the trying period when the German Werhmacht was being hammered by the Soviets and only able to fight back with one hand, the other tied behind their back by “Hitler’s” no retreat orders and constant interference with his Generals.

I also picked this one because we had ALL the troops for it and Steve has beautifully painted Waffen SS that he loves to get into action. This being a relief attack by Paul Haussers 1st SS Panzer army, late war, and involved Panthers, Panzer Grenadiers, and a “target rich” environment Steve was all for it!

This would be a rescue and breakout scenario for the Germans with Russian forces simply trying to prevent this and cut off escaping German forces.


I normally do a nice map using a overhead photo of the battlefield but as we were just play testing and there were really no hidden units I didn’t as we put all troops on table as of the first move. I regretted this when writing the battle report… so you get a hand drawn one from memory…it shows both sides deployment points route taken and final position during the battle.

The Germans came on Strong with Panthers moving forward on the Northwest most road followed by Panzer Grenadiers in Sdkfz 251 ½ tracks just behind. The South west road saw a similar group led by a couple of PzKw IVs trying to make as much distance as they could to link up with the Germans racing West out of the “Kessel”

The cry of “Ruski Panzer” rang out as sharp eyed German commanders spotting from there unbuttoned AFVs sighted the Russians streaming out of the woods to the Northeast. Hatches slammed shut, turrets swung, armor piercing rounds slammed into breaches, “Fire”, the first rounds slammed into Russian hulls and turrets, one of the six Russians burst into flame, the others however survived the Panthers hits? The German commanders looking more closely now realized that half of the Russian armor is made up of T34/85s and KV85s! A much tougher nut to crack and one that can fight back and win, even against a Panther!

The Russians came on in a fearsome attack to destroy the Fascist Vipers before they could properly deploy. The Russian tank riders moved off and into an ambush position to the East blocking the Northern road and taking the approaching German column under fire. Russian infantry soon had the first 3 German vehicles of the column burning. The Russian Armor unfortunately had to advance across the front of the Panthers in an attempt to out flank them and get into a position to get flank shots and a fair chance of penetration against the better armored and gunned Panthers. The first Russian tank T34/76s raced forward followed by a few better gunned and armored T34/85s that took up firing positions to try and cover the T34/76s flanking moves, the 85mm guns barked and the Russian guns hit their marks, rounds bouncing off the Panthers thick hulls. The return fire from the Panthers was ineffectual, probably because of the stunning effect of the Russians fire.

The Southern Road saw the advance of the German Mark IVHs and more Panzer Grenadiers attempting to also reach another column of 1st Panzer Armies escaping troops. The Russians had sent part of their force around the hills dominating the center of the battlefield in an attempt to take up a blocking position astride the southern road waiting for the columns of 1st Panzer Army to appear. The Russians arrived at the southern road junction and deployed around some nearby light woods just as the German MkIVs came into sight. The Russian Southern battle group was comprised of T34/76s and some very heavily armored KV85s also mounting the same powerful 85mm gun, this group was more than a match for the 2 MkIVs. As the Russian and German armor began their firefight Russian SMG armed infantry that had been riding on the tanks jumped off and took up positions in the woods along the southern road just as the 1st Panzer Armies columns came into view.

The Mark IVs fired and hit the Russians numerous times but their 75mm rounds bounced of the thick Russian armor. Russian return fire soon saw the two German Tanks burning and their accompanying Panzer Grenadiers taking cover in the woods.

In the North the battle soon swung in favor of the Germans as the Panthers made short work of the Russian armor, 6 Russian vehicles lay destroyed and burning. The Germans now pushed forward, the way for the Panzer Grenadiers being cleared. One of the Panthers moved up to support the advance of the German infantry while the other two moved slightly south to engage the Russian armor that had just destroyed the Mark IVs. Catching the Russians off guard and to their side the Panthers soon knocked out the Russian heavies, even though the one Russian KV 85 did send a round into one of the Panthers destroying it, common sense sent the others looking for cover. The Russians had now taken devastating losses, had their armor commanders killed, and their infantry had little in the way of anti-tank weapons suited to dealing with the German heavy armor.


Panzer Grenadiers deploy in the center with support of the Northern most Panther

German Panthers press home their attack in the center. One Panther is “brewed up” by the KV85s potent gun. The second Panther looks for revenge!

With in moments of destroying the Panther the Heavy Russian KV85 suffers the same fate at the hands of the other Panther. (yes it is a KV1 substituting for a KV85 model yet to be finished)

The Russians fired a few last rounds at the German infantry causing them to temporarily fall back to cover but the German panthers return fire cut deeply into the Russian infantries flank eliminating two Russian squads. The Russians infantry at this point melted back into the forest from which they came, to regroup and wait for reinforcing armor to renew the attack with!

We ended the game here and declared the try at converting a Squad Leader Scenario to Crossfire a success. Victory? Well it was not fair to say the Germans won since I don’t feel the Russians had a fair try at it. They ran out of Steam despite doing well. There should have been more Russians arriving during the battle. we will modify it slightly by for future use by giving the Russian infantry limited antitank capability, and having more Russian vehicles show up after say initiative 12 on turn generated rolls to simulate the arrival of more Russian troops as was the case. This will have the affect of causing the Germans to push harder and bring on their columns more aggressively in order to exit the ten trucks off the East board edge and victory.

The game was a lot of fun since it had clear objectives for both side and some interesting tactical deployment problems for both sides to overcome.

Steve’s Panzer Grenadiers deploy in textbook fashion preparing to assault the Russians!

HistoricalHobbies.com gets a facelift!

I have led  Napoleon's divisions in the snows of Russia, fought on the beaches of Normandy, and commanded Starships on the far side of the Quintaree Rift.... Wargaming the garden of your imagination!

I have led Napoleon’s divisions in the snows of Russia, fought on the beaches of Normandy, and commanded Starships on the far side of the Quintaree Rift…. Wargaming the garden of your imagination!

ATTENTION!!!!

Just a little heads up here to say thanks for all the great feedback and visits to the site and to help you guys navigate there is a little something many people miss. When you select from the top bar menu here most have a drop down menu that opens. Remember that ALL the tabs are clickable and lead to pages with content IE; if you click “Painted Pile” clicking that link as well as the drop down links will take you to a content page. Many people miss items because they just click the last link bypassing the first one. Also don’t forget that this is the 21st Century and you can easily keep abreast of new post, comments, and updates to the site by simply subscribing via RSS fee (really simple syndication) at the lower right bottom.

Hi All!

Well after a lot of putting it off and clinging to my old style website built with the now ancient “FrontPage” by Microsoft I have decided to go more interactive with a updated “WordPress” blog type page. I think this will be even better as it will allow more interaction between me and the visitors, providing a 2 way flow of information in the miniatures community. It’s a melancholy (younger viewers can look it up) move that causes me to shed a tear or two for the “old” days before everyone and including the “paperboy” had one…oh wait we don’t have “paperboys” anymore either. I remember when the internet started and then became a spot where tech savvy geeks (many wargamers!) started to put up pages devoted to their hobbies, no pictures, just green phosphor screen army list. I remember the first few sites I found that had “wargaming” pictures on them!  long gone “Ed’s Hobby Hovel” page, “Major Tremordons” colonial page, and perhaps several dozen others (mine included). It was the dawn of a whole new era! Wargaming had for years been in the closet as far as hobbies were concerned, D&D had brought it out a bit but you still had to look to find or play it. The internet changed all that! The current range of rules and figures we enjoy is a direct result of the internet and its “shrinking” of the world! Its a great thing on one hand but it has come at a price…..It has lead to the death of the “Brick and Mortar” stores, and the resulting loss of “public” playing areas where many of us first met the people we game with today. It has also hurt conventions to a point, since one of the big draws for folks going was to see and buy the “new” stuff only available there.

CountvonShootem2During the recent 3 years of being President of the “Historical Miniatures Gaming Society’s” Pacific Southwest chapter and Building their website using WordPress www.HMGSPSW.org I got a fair amount of experience with WordPress that gave me the feeling that it was time to update my own site. I hope to transfer all past pages, articles, and pictures here in a better organized format. As I’m not an expert “blogger” and a bit unsure as how to structure a blog properly I figure to just post new content here as a post,  then latter on put some of the post onto their own pages under the other headings. Please re-browse old page content as things will often be updated or added. This new format should allow me to get new content up faster and make maintaining a web-presence easier, with out taking a lot of time better spent on building and painting. So sit back, hang on, and will see where this goes!

Regards,

Bill Witthans 2013