
As usual my posting of projects and updates has gotten spotty at best as my house remodel, commission “build/paint” projects, and just painting for myself just left little time. When you add Christmas into the mix and a full-time job it’s near impossible but here’s episode #3 of “The Secret War-band”. I guess that after 2 previous post on them it’s hardly a secret anymore, and in fact there are enough of them finished that we played a 6 point SAGA game with them about a month ago! It was our first “Age of Magic” game and even though they lost my opponent said they were an intimidating force to look at anyway! (who knows as it was close and we misplayed many things)
I was really happy with the look of these and they gave me a chance to expand my painting skills with colors and techniques not normally used on straight historical s.
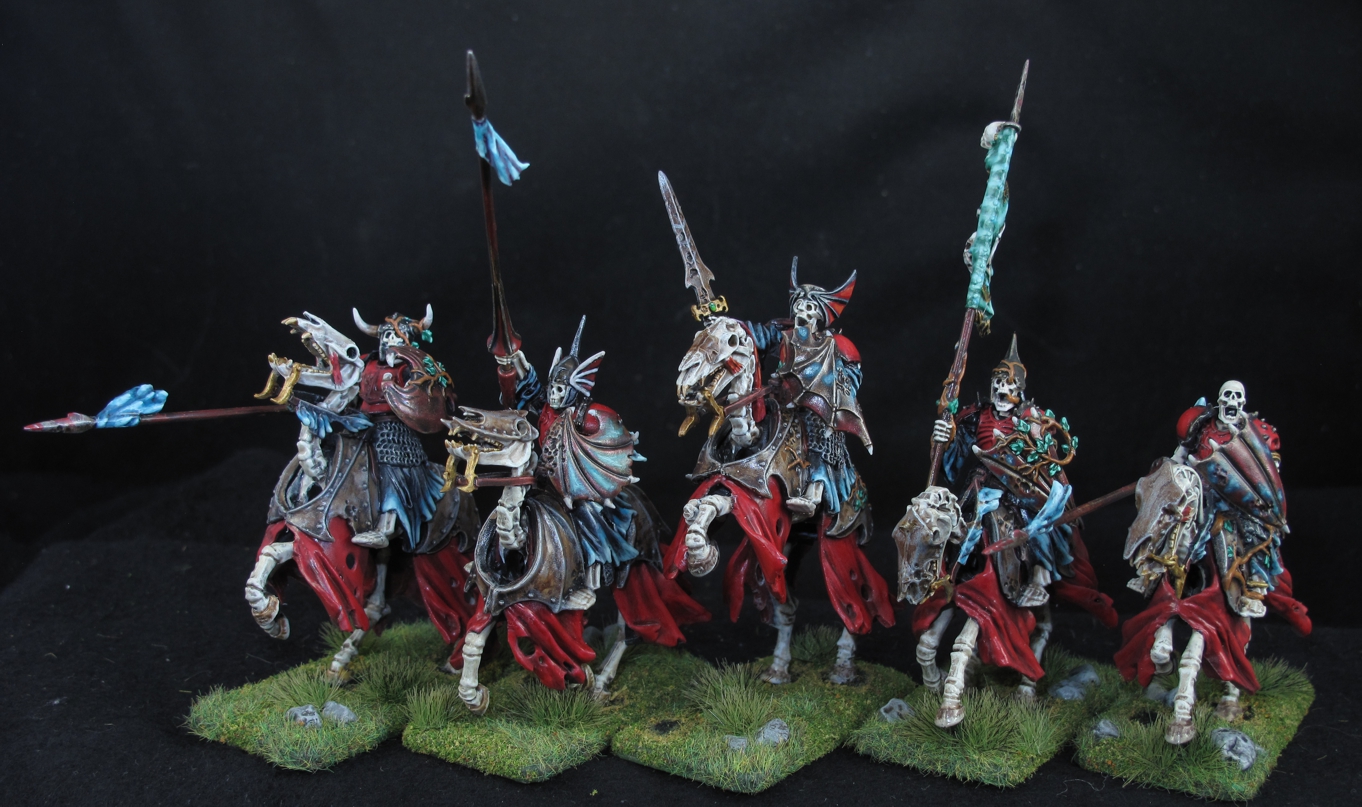
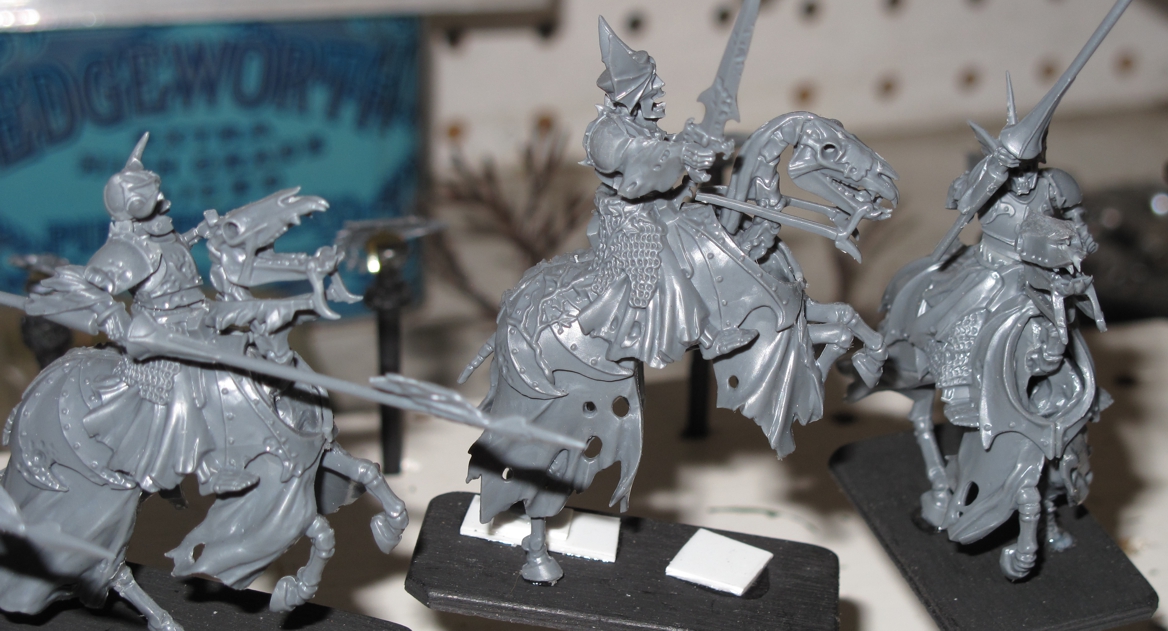
The basic warriors that you saw in the last post were fun and a simple way to start getting colors and a style down. After doing about 30 of them I decided to switch it up and move over to a more complicated Hearth guard unit of mounted un-dead knights. I looked at a lot of different manufacturers but settled on Games Workshop figures from their “Age of Sigmar” collection. Particularly I used the “Black Knights” from the large boxed set “Skeleton Horde” that contains, 10 Warrior infantry, 5 mounted knights, and the warlord “Arkhan the Black”. It’s not a cheap set and I was a bit worried that I would not like them. I was really hunting for a badass Warlord and with some modifications I felt “Arkhan the Black” would be great (more on his build/paint soon). After doing enough research on the internet about the figures and seeing the different builds from other painters I felt they would work and took the plunge.
Where ever you look on these guys there is some cool detail.
Yep, after nearly 40 years I actually broke down and bought some Games Workshop mini’s! Well sure I had bought flee market bits and pieces for conversions before, but never paid full price for figures to be used in an army like that. While I do use some of their miniatures at times I have never been interested in their games or style of play. Truth be told these figures are very nice and not goofy looking or too “over the top” like I feel most GW stuff is (well for my taste). These are plastic but they are well defined, go together nicely, and being plastic are easy to modify should one want to, and I always “want to!” Being a guy who beats up on Games Workshop at times I have to say I really love their “Age of Sigmar” line!
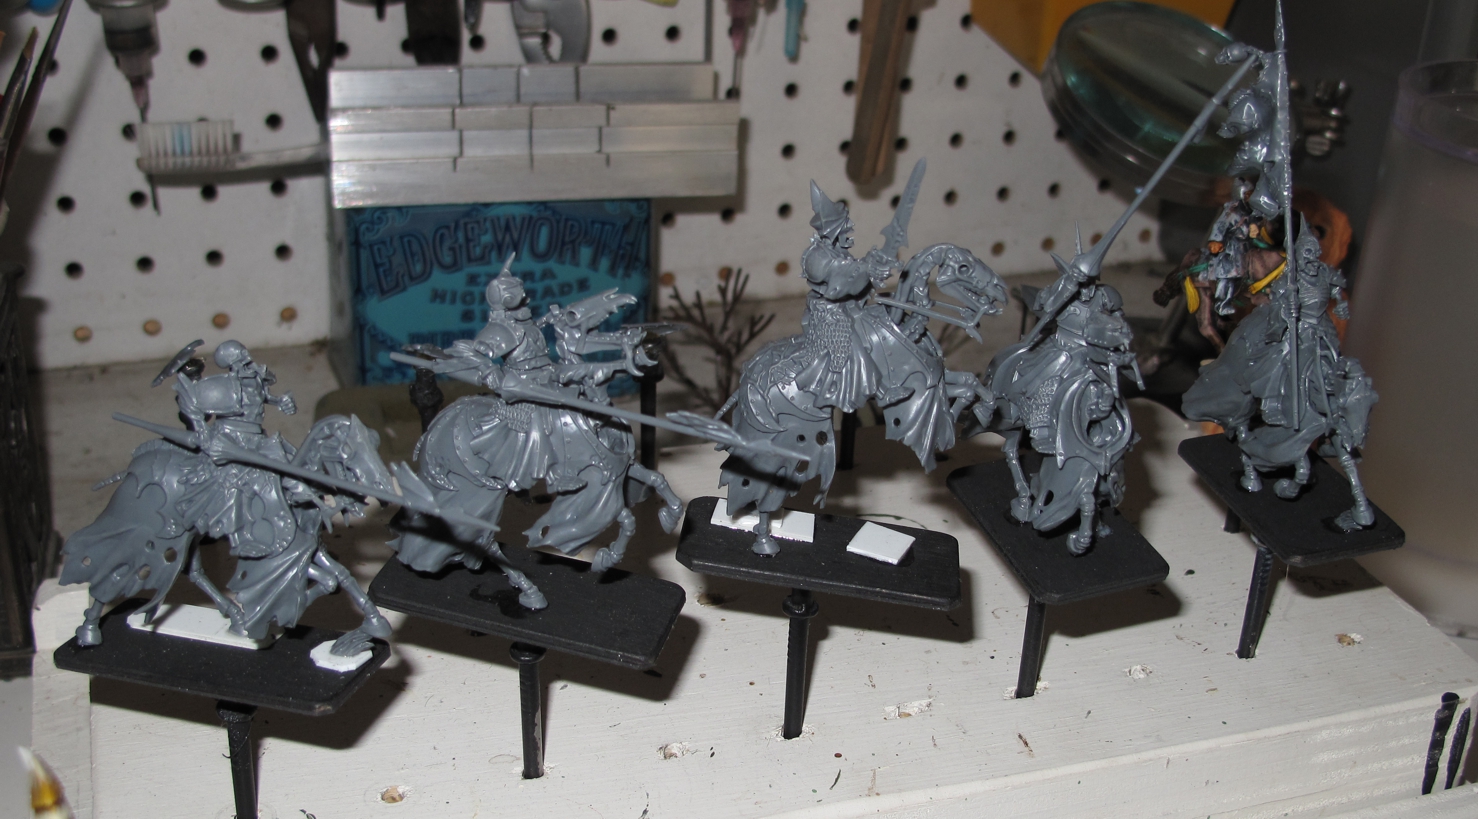 I really like the sculpts on these figures especially the horses. They do give you a bit of choice for variety when building them and they fit together easily with little flash. I was a bit apprehensive looking at all the detail and every-time I looked at them it seemed I discovered more! I let them sit on the bench for about a week while I thought about and worked out the color/paint scheme. This always helps me to avoid choosing colors/combinations that don’t work, ends up with a better looking miniature, and actually saves time when the painting starts. Even then I was a little apprehensive about painting these guys but once I started and got into it was actually fun .
I did some re-posing of the horses to give them a bit more dynamic look to them.
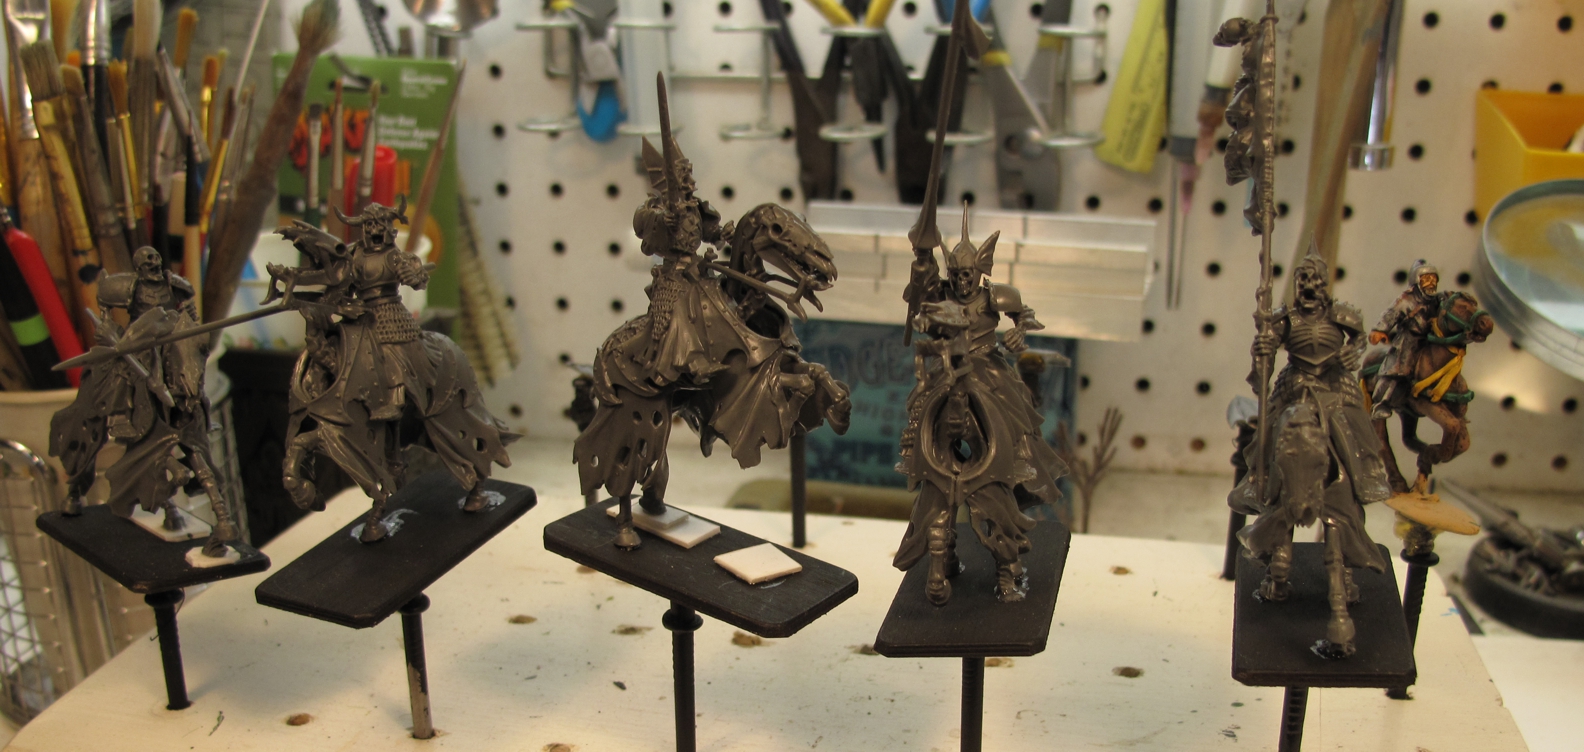
The more I use plastics the more I like them because of the ease of conversion. These looked great out of the box but I still did some things to make them different, like creating a rearing horse pose on the leader horse and a leaping pose on another. I also cut out some of the plastic “grass” support points to make them look less like models. Make sure though when you do this the model still retains its strength overall on the base. This means you may have to ad or strengthen other supports. Being plastic helps as drilling and placing “hidden” brass or steel pins is much easier than in pewter.
Pro Tip: a light coat of QUALITY super glue over a possible weak section creates a hard reinforcing “shell” strengthening the area.
Plastic polystyrene pads are placed to level modified poses or help in creating variations in the basing.
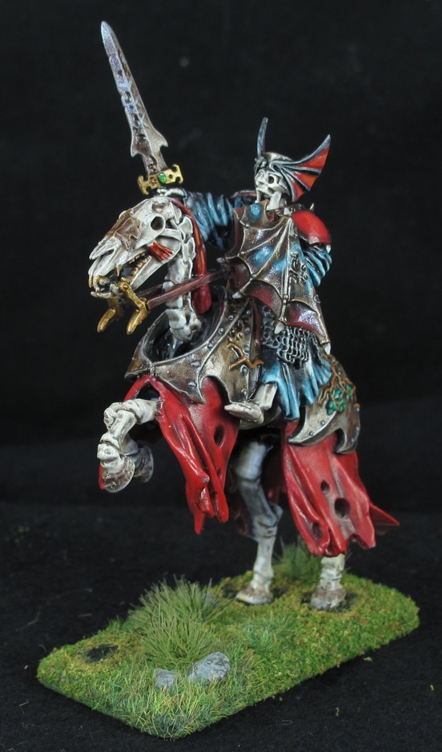
After building them and taking time to work out the color scheme and what part would get what treatment painting began. I had already decided that the over all color scheme of the army would be bone (obvious right) with Black, Rust, and a bit of Bold Red tying it all together. Accents would be Gold/Brass, and a mix of ghostly un-dead green/blue shades mixed in where appropriate. This ghostly color really helps offset the black and red as well as contributing to that feeling of strange magic This army would be sort of “clean” compared to some other un-dead army’s I’ve seen. I wanted the details to show and the army to “pop” and not just blend into a indistinguishable mass of rotting figures that I’ve seen in other army’s. I have added some rust, rot, and decay, but I have kept it to a minimum and balance it with the cleaner look of an army that has been magically “restored” well at least partially!
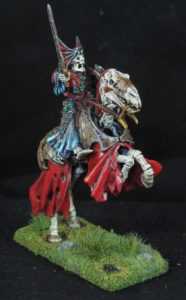
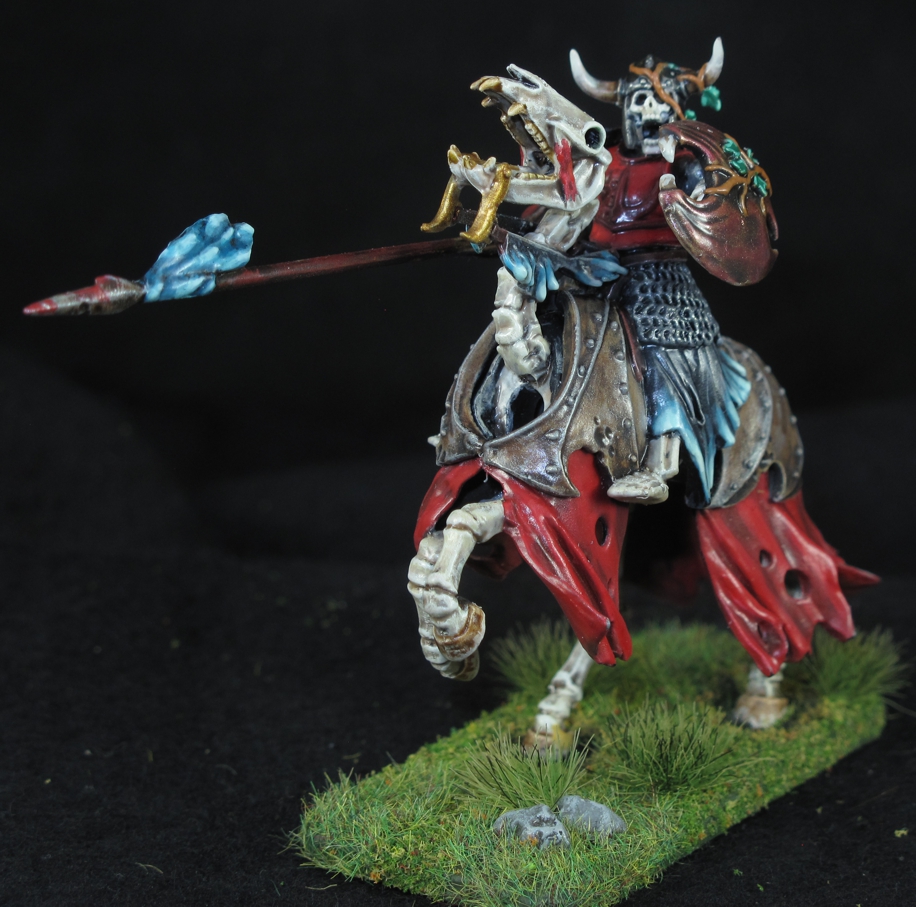
This horse was selected to convert from a normal galloping horse to a rearing horse like in the movies where the hero rears up his mount and brandishes his sword just before he charges. The figure also requires a bit of work to now sit properly on the mount.

These were fun to paint, although the detailing is more time consuming the way I picked it all out. Options for different styles and having them paint up much faster is easily found searching the internet. I have seen entire armies painted in a “ghost style” with a few colors, washes, and highlights painted in less than a week! They looked good as well but not my “cup of tea”. I was not concerned with time and really wanted to push my level of painting up and into new territory, I went slow and had fun with it.
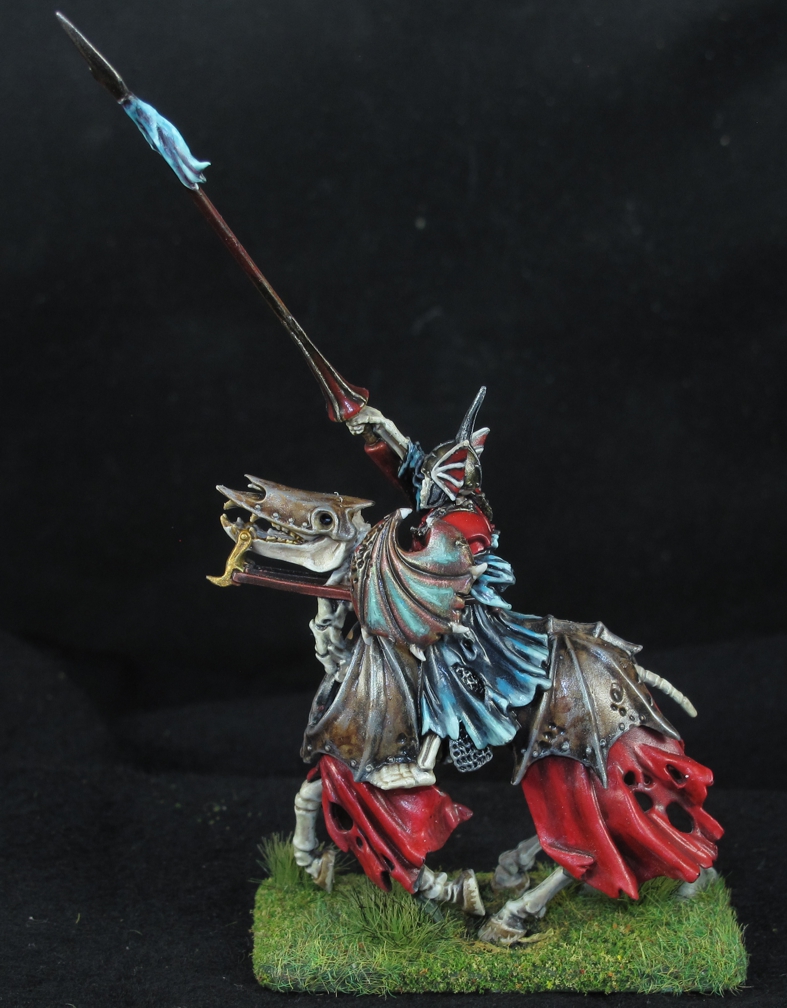
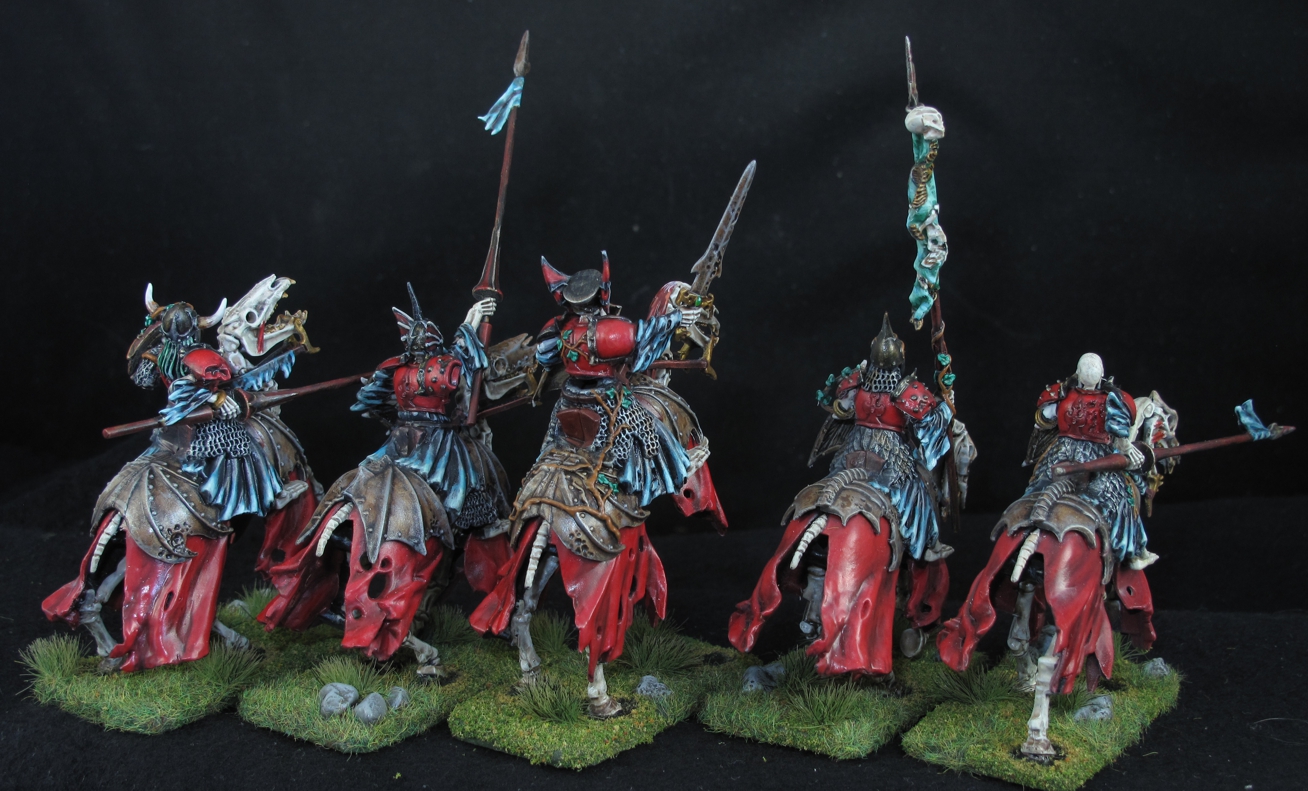
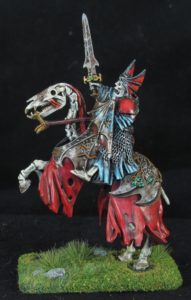
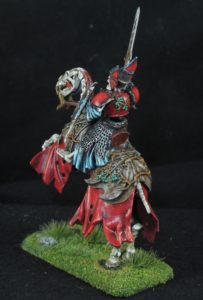
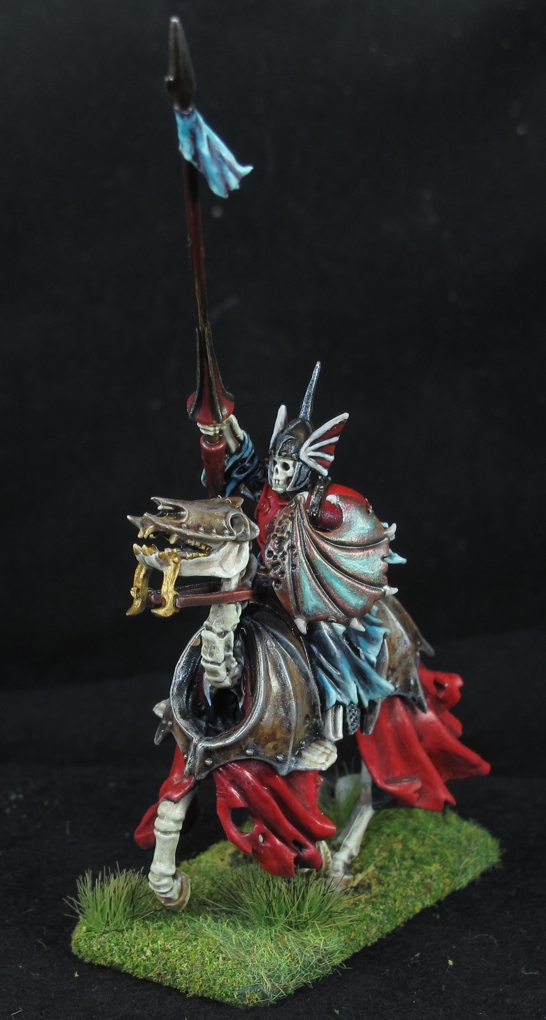
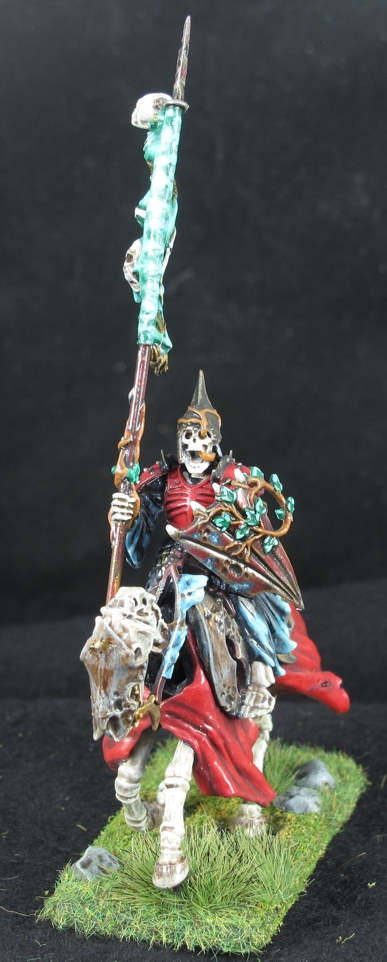
I really like the dynamic pose’s on these figures and the sculptor really did a great job on conveying a sense of movement to them. I also love that if look you will see that each figure while having a similar “horse armor” on, each has it’s own pattern and that is carried over loosely to the shields the figures carry.
I also pushed into new territory with paint and for really the first time started using quite a few of the Games Workshop paints. I had used a few in the past but just special things like washes or blood and everything else would-be Vallejo paints. I have to say that they do make some very cool colors and technical or special purpose paints that work very well but on the other hand their paint is over priced and the paint pots suck (my opinion). Nearly twice the cost of Vallejo for less paint and their paint pots do not seal well. I have taken to transferring the GW paint to “drip tip” bottle such as Vallejo and other companies have gone to, but again this adds to the cost and time factor!
I made some strides in improving my blending technique on these, lots of blending is something that is difficult to justify time wise when painting large numbers of figures as opposed to just 1-2 figures, leaders, or specials. The shields were at first just a plain brown/rust and I didn’t want to ad any designs as I thought the figure was “busy” enough already. After some thought the ethereal glow was added to try and show some “dark magic” was present.
About 6 months ago I started using a different primer for my plastic figures (requires airbrush) called Alclad II Lacquer, it comes in Black or White and has a very fine micro filler in it. It’s used by model plane builders mostly but was recommended to me by one of the guys down at Burbank’s House of Hobbies. I have come to love it! It’s very thin and sticks well to plastic giving a excellent bonding surface for following paint layers. To simplify things and speed the paint process up I used the white version as my primer and also the first coat for the skeletal “bone”. After this a wash of GW “Agrax Earthshade”, a heavy dry brush of GW “Ushanti Bone”, and finally a light dry brush/spot highlight with Vallejo “off white” make a very convincing old bone look. Yes the GW paint line has goofy names that I cant pronounce or remember but they are invaluable for some effects.
Pro Tip: Burbank’s House of Hobbies is an “old school” type hobby shop run in a very modern way! Very knowledgeable, great service, tons of stuff, great prices, and excellent mail order serving the whole country! The store is always well stocked!
The poses on the figures and the way clothe on both the horse and figure are done really give the impression of movement, something not done as well by some other manufactures. Ive used a “tuft” of grass to cover the support under the front hoof while the other hoof had it’s support removed, it really gives the impression now that the horse is galloping over it.
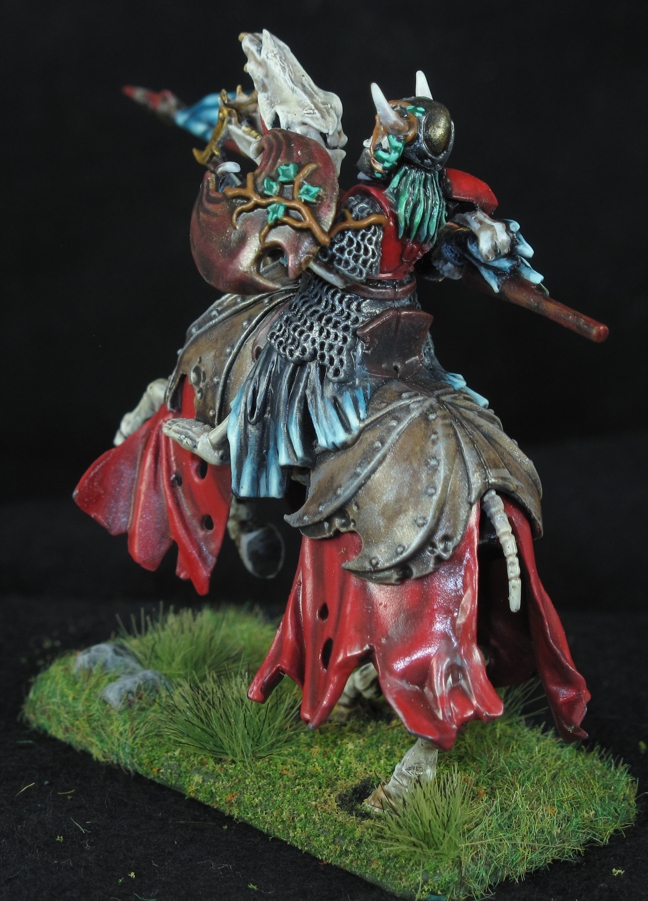
That effect of carefully thinking and planing of colors and layout can be seen here where the two large areas of red are separated by the rusty armor and the black cloth/metal armor on the figure. This allowed me to then paint the top armor red and have it stand out, something that would not have been the case if there was no color separation. One of the plans for this army was to have a bit of “red” on every figure to tie it together but the amount of red on the figure is directly related to the figures importance in the army.
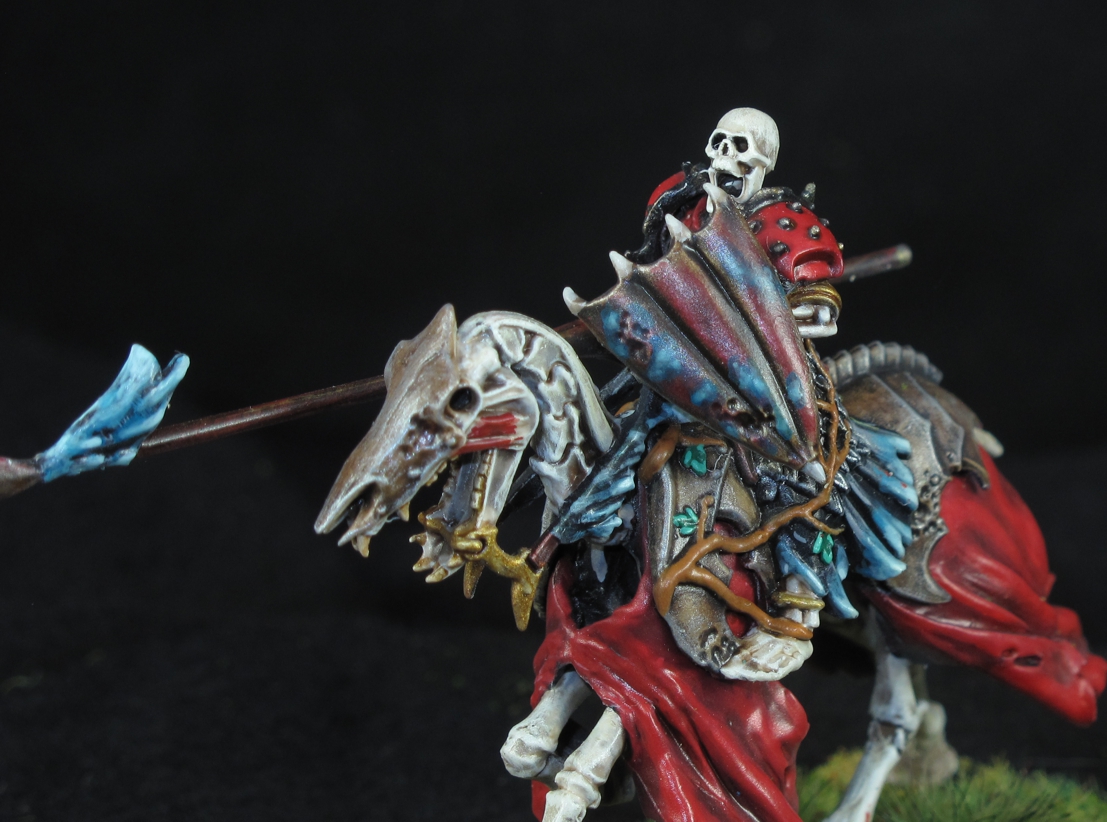
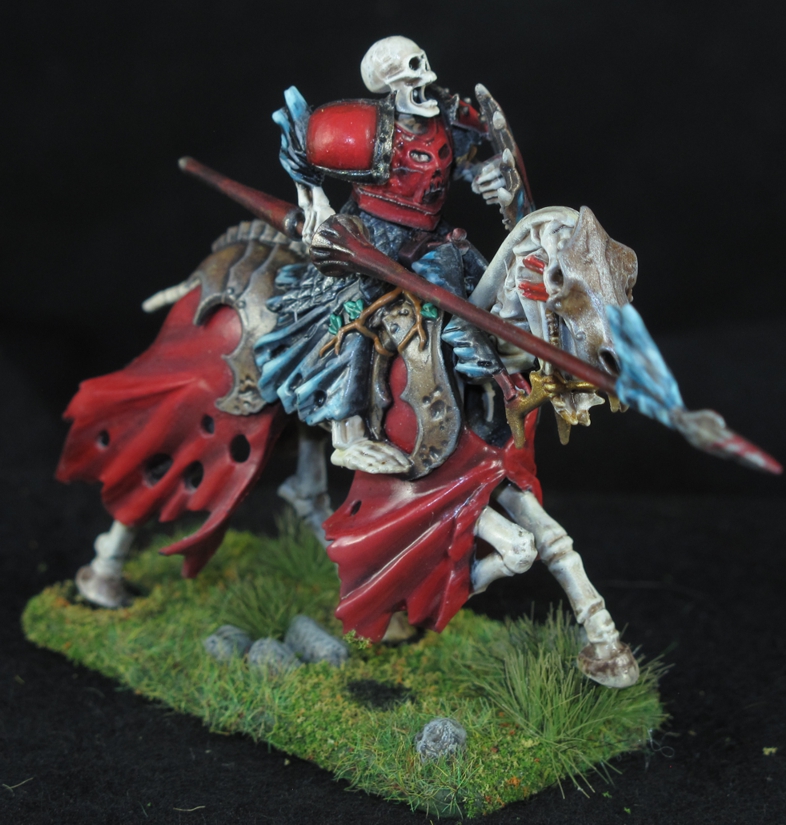
The opposite side of the previous figure. The sculptor has vines growing on various parts of the figures, something that at first I was not a fan of and almost tried to grind it off. Coming to my senses I went with it and now very much like the effect of something that came out of the ground.
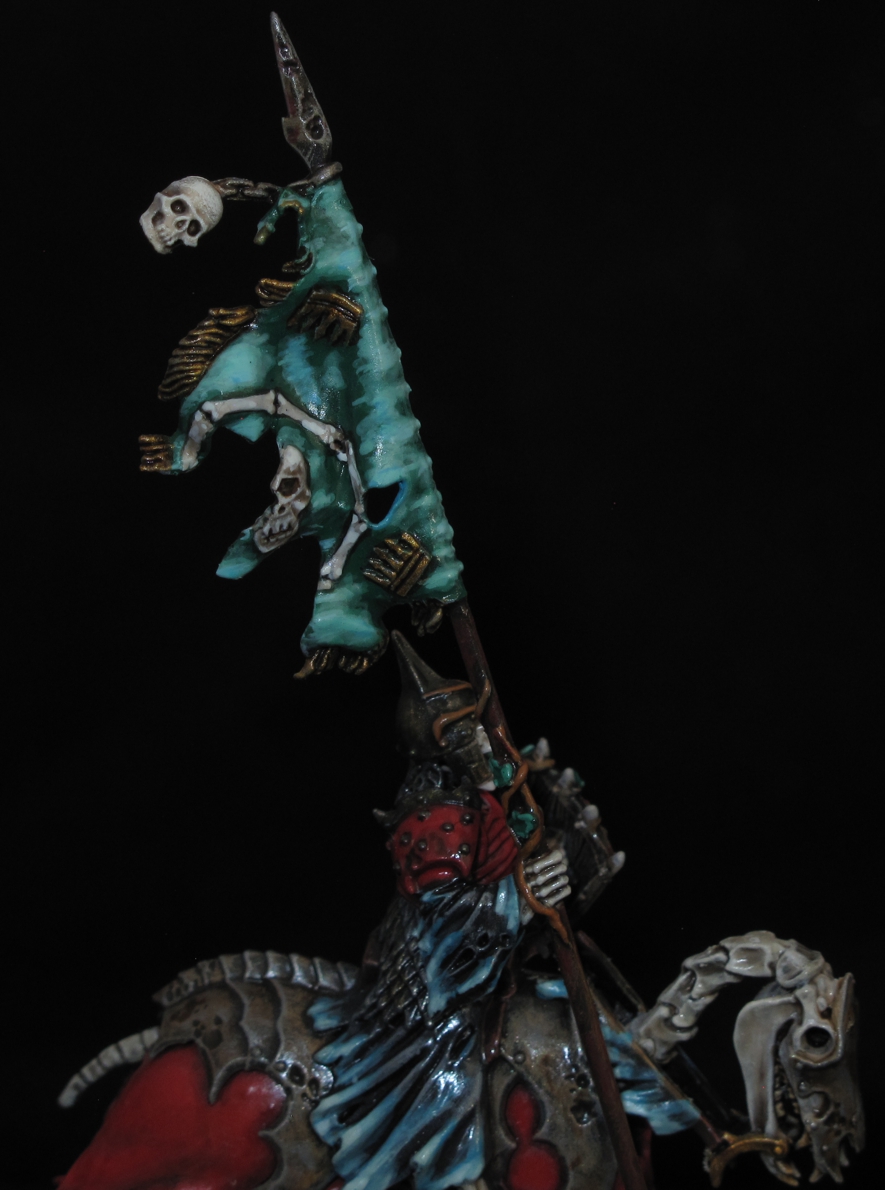
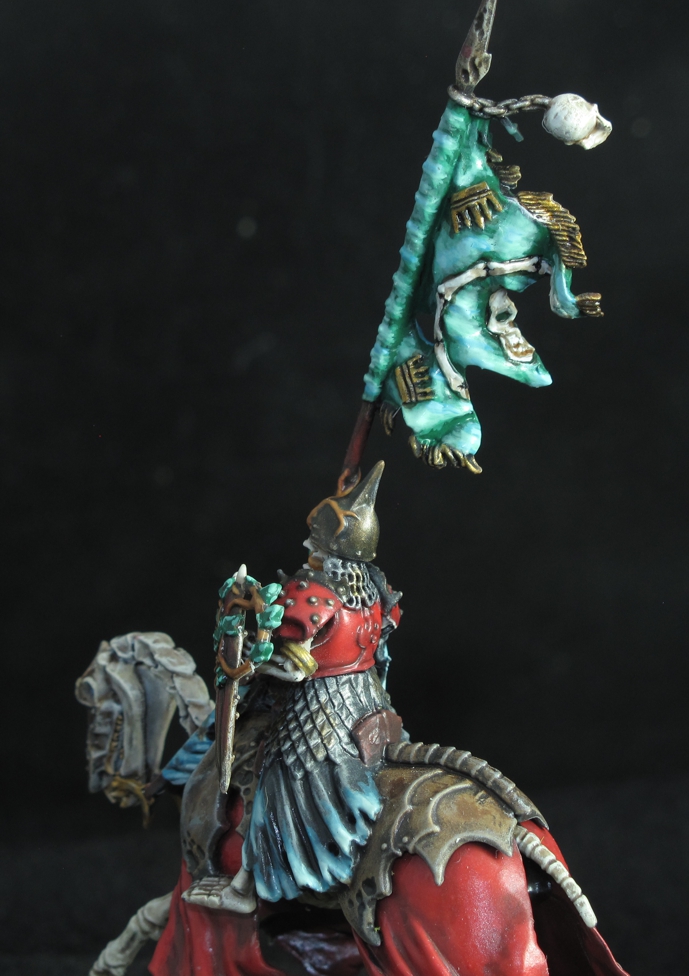
 Normally I make my own banners out of other materials but I decided to go with the one provided and once painted really liked it. I did it using the ethereal colors for a more ghostly magic effect. This figure had extensive vines growing all over the figure, shield, and out onto his lance. To me it gives the feeling that the earth is trying to drag the warrior back into the ground, prevented only by the magic of the sorcerer who raised them from the dead!
With this entire army my choice of very plain grass and rock bases was deliberate to not draw attention away from the figures. I have seen some very nice army’s where this happens. Basing should be complimentary but not over powering to the figure. The green grass here creates a nice contrast in color and “living” verse “un-dead” look. The effect of dead/burned grass where the figure touches the ground was also used here to show the life force being sucked out of living things and used to give temporary “life” to the un-dead. The effect can be seen in some of the shots above.
On this figure you can see more of the sculptors use of vines and how it does work. These cross from his torso to the shield and also wrap around into his mouth.
This was another one of the mounts I altered from a lower galloping pose to a semi-rearing stance often seen as a horse rears upon impact with an opposing battle line! The horses head was also slightly altered to enhance the effect.
I hope you like this episode of the “Secret Warband” project and please leave a comment if you do as that motivates us to do more. Oh and before I sign off an important note! Plastic figures may not fair well in heat and most people don’t realize how hot the inside of your car or storage unit can get! different manufactures use different blends of plastic and some sagging and deformation can happen! Even just leaving your box in the sun for long periods can do it. High heat can also affect paint, fading it over time! Take care of your investment and enjoy them for a long time…cheers!