Undead SAGA Warband episode #6 “Skeletal Giant”

Pretty intimidating to see this guy coming at you

So just a quick post up of more “UnDead” that should have gone up long ago but just been busy and posting is way down the list of important things in life…. trying to get in more post means less writing and just slapping up the pictures!

I absolutely love the sculpt and especially the weapons on this guy! Also the “repairs” to the bones from past battle damage.

I did this guy last year and he’s figured in a few battles. Very imposing at about 7+ inches considering regular 28mm is a bit over 1 inch! He’s a REAPER figure, the metal version, and was a joy to build, convert, and paint! In SAGA he’s a hard hitter being a 14/0 armor 4 or 12/0 armor 5 depending on how you run him.

It’s a big heavy figure and I took time to drill and brass pin all the joints. Legs, arms, and torso, joints were also epoxied with 2 part JB Weld as even quality super glue would not be up to the task! The JB KwikWeld is also very good at filling in gap and can be carved before full curing and sanded at full cure.

I used a semi-gloss coating on this figure just like the rest of the UnDead warband as it gives a bit more kick, deeper colors, and just looks great to me.

Worked on a few techniques that I do not normally do on historical figures, aged bronze blade, cats eye star sapphire jewel, and a Jade handle.

I love how the modified pose came out, much more dynamic and taller than the original hunched over pose the stock model has. This required cutting, bending, repositioning, and pinning of legs, torso, arms, hands/weapons, and his head.

I liked this figure so much I bought a second version, slightly different and made from that weird plastic and sold under the “Bones” division of REAPER miniatures as well as a second identical figure to this one. Both currently in the “lead pile” for future projects.

Detail on this REAPER figure is just right, not to little nor to much like many over done Games Workshop models.

This guy is always ready to”lend a hand” on the battlefield! He carries one on his belt just in case…..

A small amount of the tattered cloth hanging on him was painted with the same “red” found to some degree on all figures in the warband to tie them all together.

Riddle of the Sphinx

Being a guy who couldn’t cook to save his life and likely to starve with out my good wife watching over me you can imagine my wife and daughters surprise several years ago when they caught me watching the “Great British Baking Show”! I found the show fun to watch, interesting to see how these baked works of art were created, and frankly I could listen to the dictionary being read to me if it was done with an English accent! Little did I know that what I would learn watching this show would help me in the wargaming world….I make a lot of terrain and while making a damaged “Sphinx” model for a friend I thought about what a pain it was to spread out filler on the base while creating the underlay for the drifting sand. I use “Durham’s Rock-Hard” wood putty quite a bit and it can be messy and a bit troublesome when trying to apply in a controlled manner quickly. It spreads easy when very thin, gets into cracks, but wont hold shape well or stay put. When its thicker it is hard to spread out evenly, retains brush marks and starts to set up.I spent a few days on other projects, always though in the back of my mind thinking on a new way to apply the filler. Then bingo I thought back to the baking show and how they used “icing cones” when decorating cakes, would it work with wood putty?

A quick trip to the market and I had a dozen plastic “icing cones” for $6 US. Mixed up a fist size batch of filler, scooped it into the icing bag, rolled and clipped the bag end closed, cut the other end off creating about a ¼ inch hole, and I was ready to go.

To apply it you simply point the open tip where you want filler and squeeze the bag! Wow, just like a tube of toothpaste, it worked better than I had hoped for.

  • Varying consistency of the mix, thicker or thinner, helps in control and flow.
  • Roll from the “fill” end pushing material towards the tip. Like a tube of toothpaste!
  • Small clips are useful to close each end.
  • A few soft flat brushes and water can help in moving or smoothing out applied filler.
  • A small amount of PVA wood glue added to the mix makes the putty even harder!
  • Bags are reusable when cleaned out quickly.Who would have thought that watching “the Great British Baking Show” would make one a better painter… just goes to show you never know where that next “cool trick” will come from!

Bill Witthans


Japanese Monks for RONIN, the game I’ve yet to play!


While not a fan of most of the OSPREY rule sets this one really hit the mark in my book just based on reading through it. Cant wait to actually test drive it with game soon!

We all do it, get interested in a game or period, buy the rules, the figures, maybe even build some terrain, and never play the game! That’s me so far with RONIN one of OSPREY’s stable of rule sets. RONIN covers small skirmishes between Japanese Warriors during the late period of Sengoku Jidai or Warring States in 15th-16th century Japan. I’ve always liked the period and have two large 15mm Samurai army’s based for “Battles in the Age of War” by Peter Pig. I now felt the urge to paint some 28mm Samurai but since the amount of detail on Samurai in 28mm would rival Napoleonic uniforms and I did not have the urge to paint 28mm Samurai armies! However, a few handfuls of figures in a very detailed small battlefield setup that is RONIN sounded perfect.

Well, I have had the rules for nearly 5 years, figures for 4 years, and some terrain for 3 years, and still not played, but I have finialy painted my first “Buntai” or group for the game.  North Star Figures makes some excellent figure sets designed for the game and just to get my feet wet I painted up a group of 8 Monks.

REMEMBER… double click a picture to get a lager version.

A good start to my RONIN force! Eight monk figures from North Stars boxed set (metal figures).

Even though they are arguably less detailed than other Samurai figures the colors and getting the simple robes of a monk to look good and stand out is very challenging. I really liked the poses on these figures and the sculpts are very nice. I think the sculptor did an excellent job of getting the Japanese face structure right without it looking comical. The figures were sealed with a gloss coat but then I used a semi-gloss instead of a total matt finish as it gives a bit more depth and richness I like on Samurai figs.

This art work was an inspiration to paint and play a warrior monk force.

The warrior monks of feudal Japan were not much different from their sometime enemy, sometime allies, the Samurai. Politics and alliances in Japan during this period were in a constant state of change, sometimes even during the course of a battle. Dozens and dozens of factions all grasping for power or simply protecting their “piece of the pie”! The religious sects were generally peaceful but not afraid to fight when their interest were threatened, also very well trained, motivated, and fearless when doing it. Some of these monk sects power rivaled that of  Daimyos at the time. Often Diaymos tried to rally the monks to their side and some Diaymos were monks as well having taken the vows of the order. The conflict between Oda Nobunaga and some sects of monks lasted for years, producing some of the most vicious fighting of the period!


Warrior Monks used the same weapons and armor as the the Samurai. They tended to specialize in some weapons like the Tetsubo (club) and the Naginata (polearm). If you took off the priestly robes worn over their armor you might be hard pressed to tell them apart from the Samurai.

Painting these figures was fun and with less sculpted detail on the figures allowed me to concentrate more on the method I used when applying it. Blends, washes, glazing, dry brushing all contributed to the depth and richness in the cloth. I went very simple with my base treatment’s as I did not want it to detract from the figure. I used a style of long grass and crushed stone, common to Japanese gardens.


Undead SAGA Warband episode #5 “Mindless”

Well just like the Star Wars franchise, the story of my undead or as it started the “secret” warband doesn’t appear in the exact order it was made in, or posted in. The reasons for this are many, my mood, time to write verse time to paint, time to take pictures, and other things all factor in to when I do a post.

DOUBLE CLICK pictures for a bigger picture!

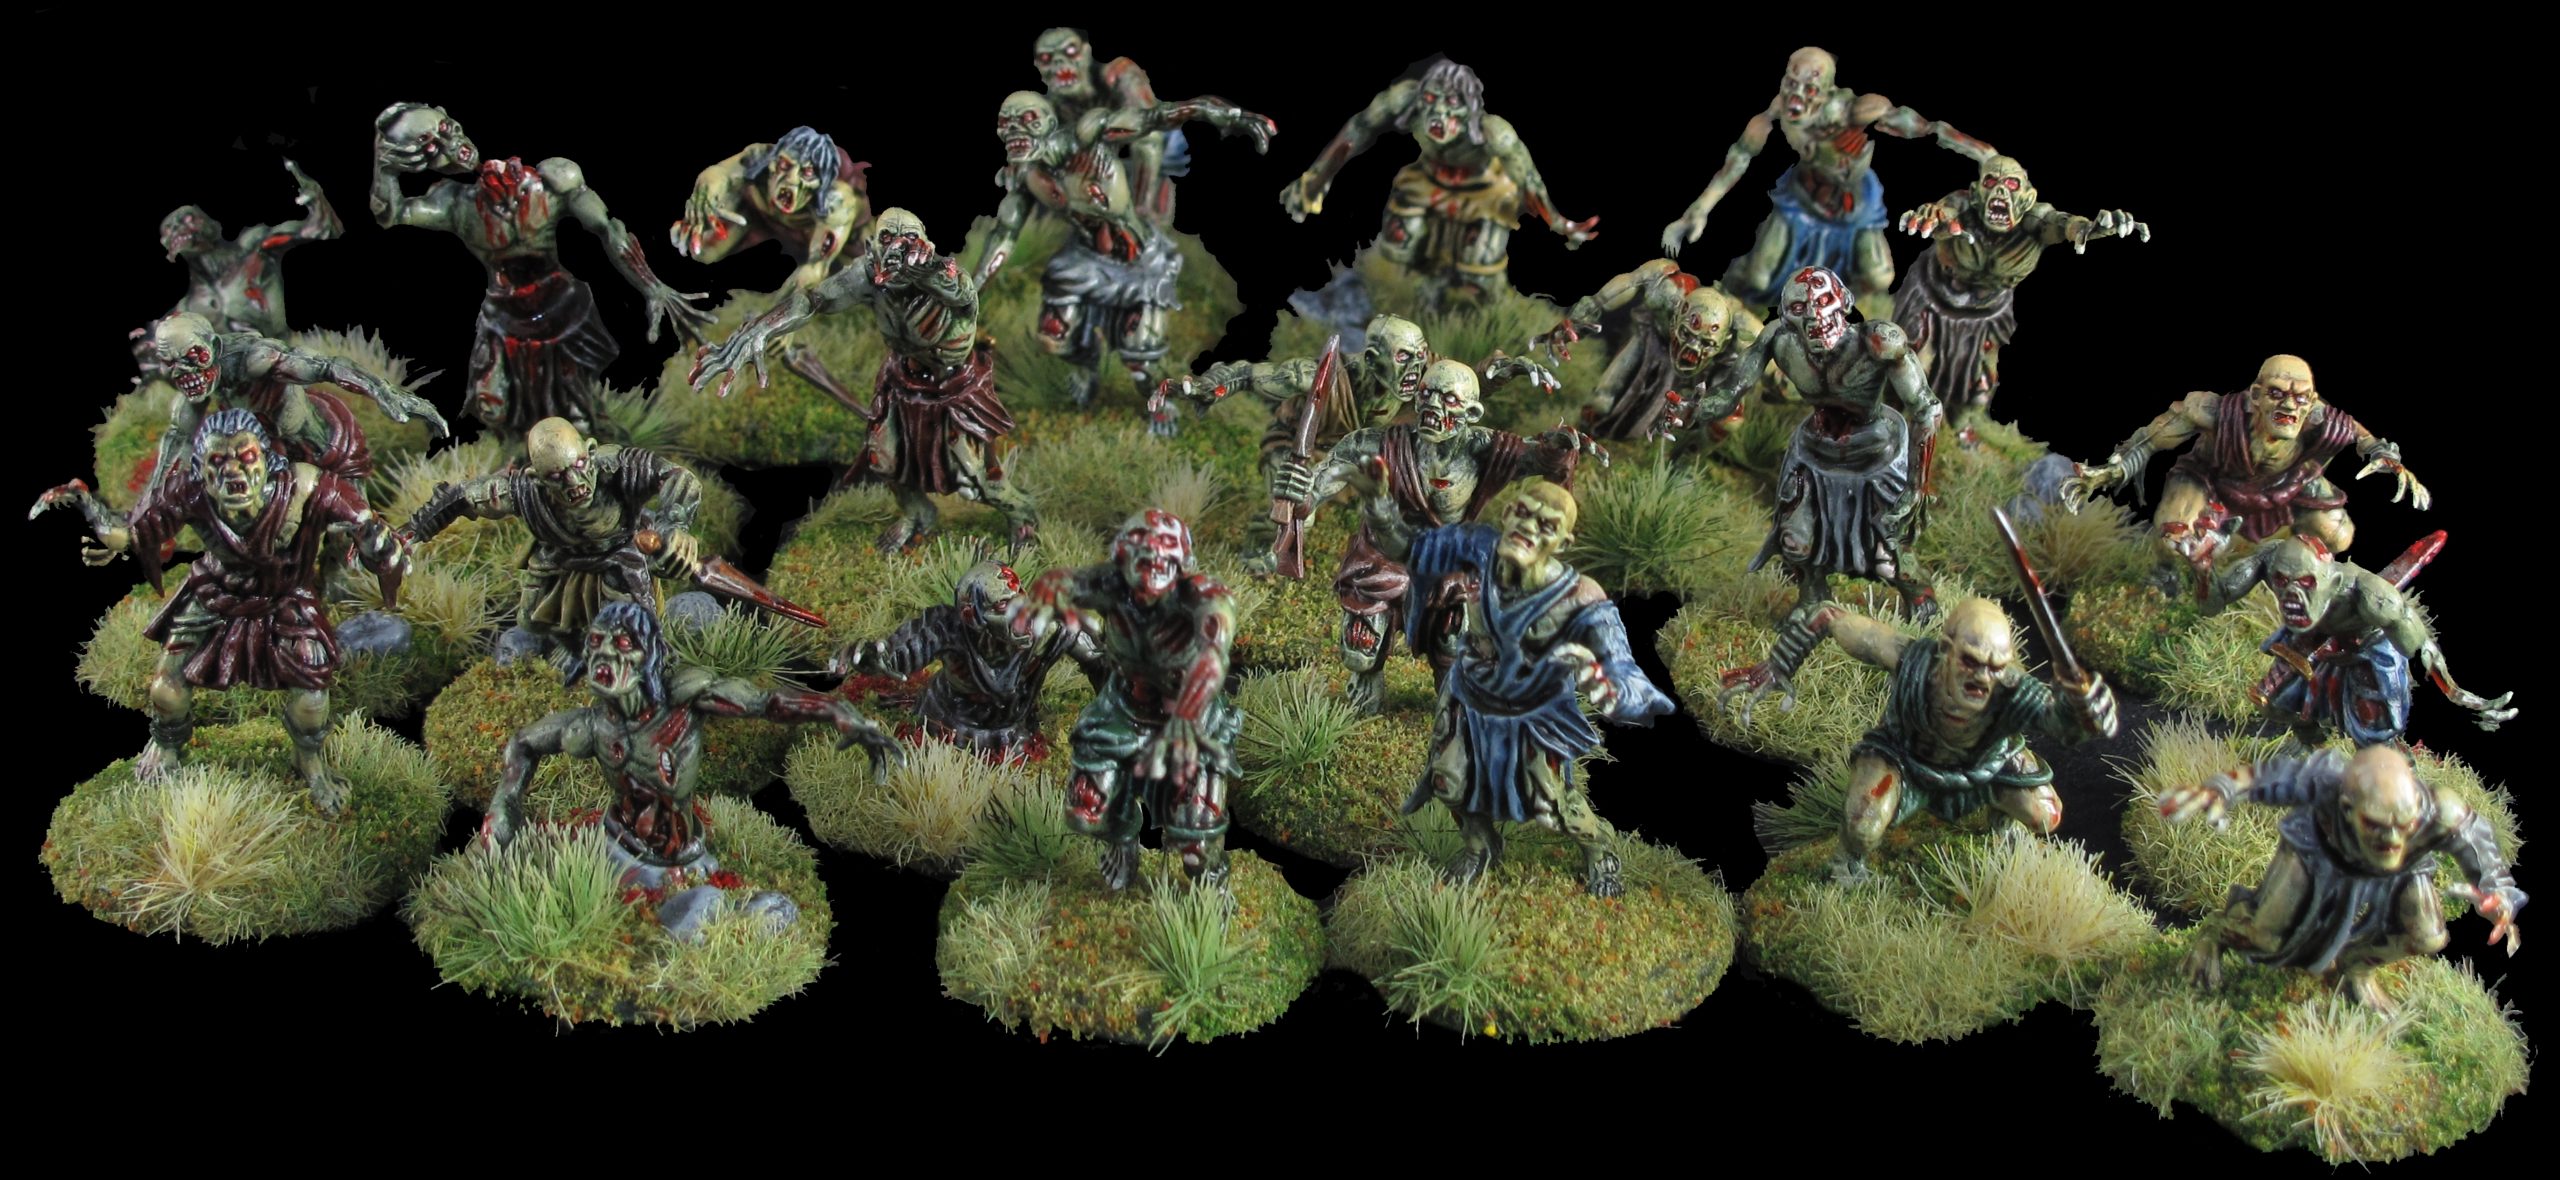
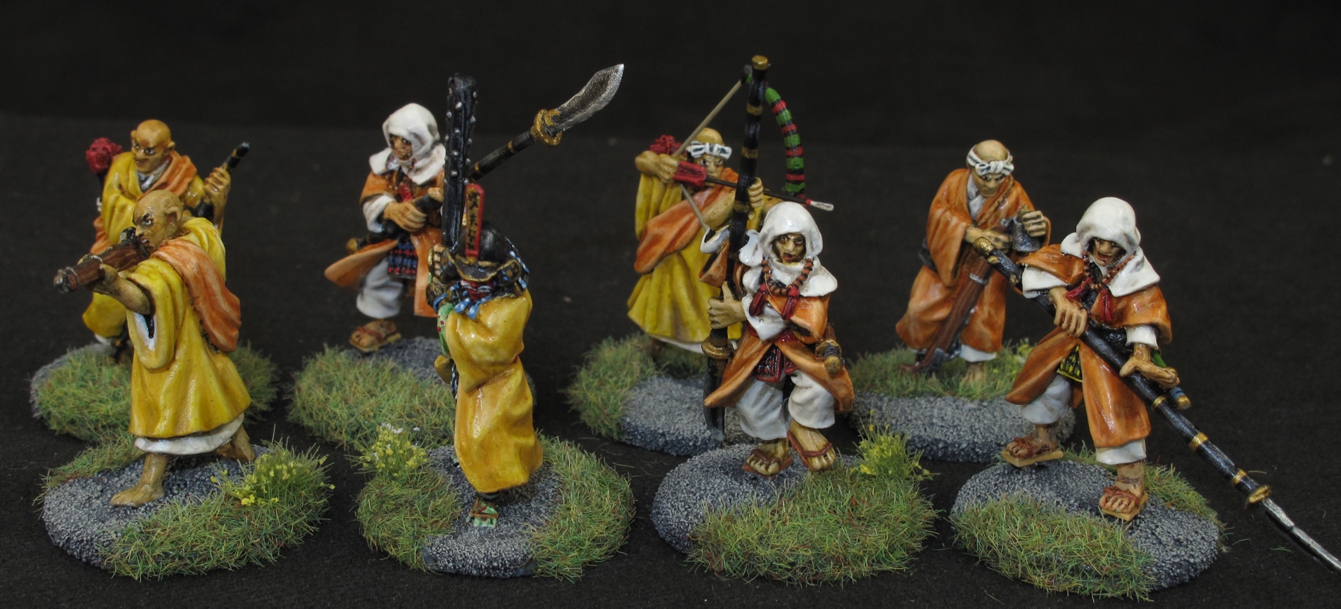
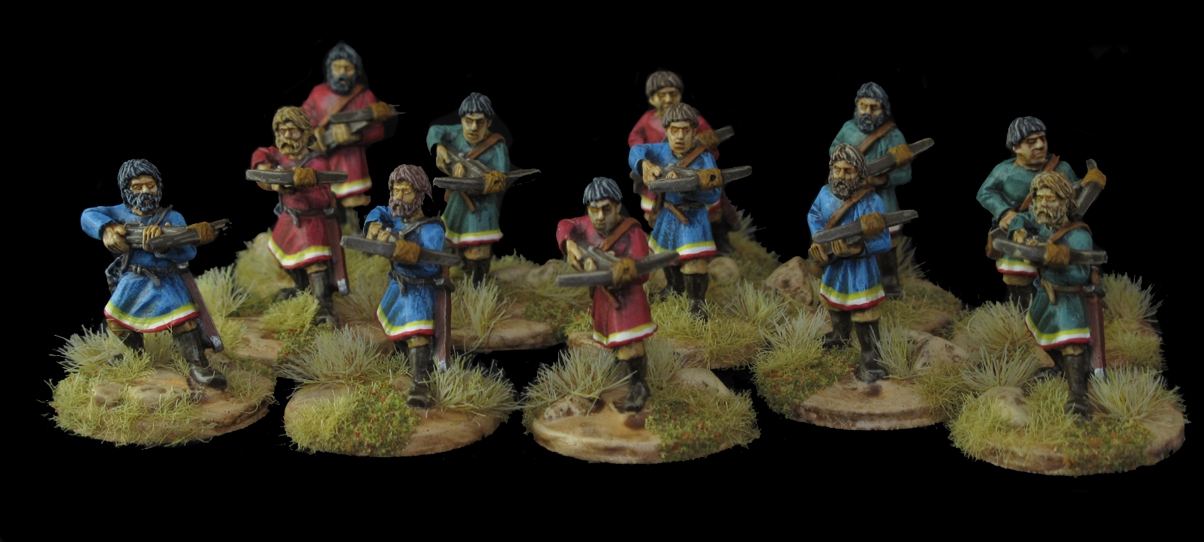
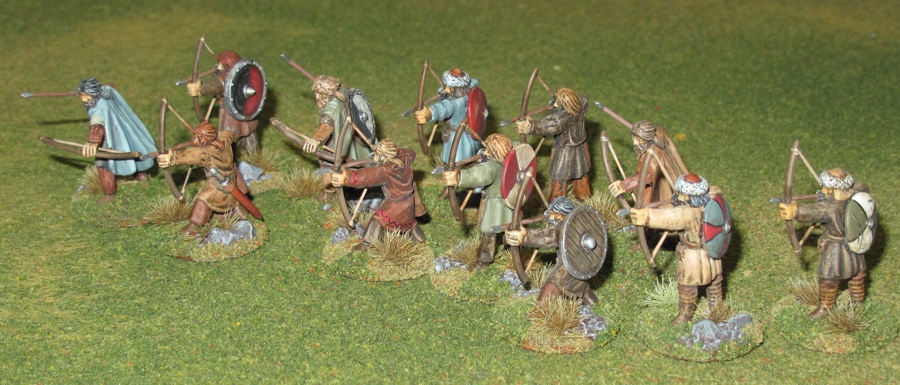
I did these fast and used all the tricks I know to cut corners while still having them look good and match the rest of the Warband. Painted all at once I think they came out pretty well for a “mass o figures”

This episode #5 “the Mindless” has figures that are painted sort of far into the project and figures I was frankly not that interested in painting as I thought they would be simple and uninteresting. Heck how interesting is the paint job on a mass of putrid, rotting, flesh going to be? I thought they certainly wouldn’t stand out on the battlefield like the Skeletal Giant” or a group of charging mounted Un-Dead Knights, and I was right they don’t. I approached this build and paint with an attitude of “let’s get this over with”

Mantic has both Ghouls and Zombie sets and I figured this would allow quite a bit of body part/head swapping to create even more variations. Also being plastic a good deal of figure modification was possible (sharpen up the xacto knife!)

I had chosen to use the Mantic Games “Zombie and Ghoul” figures that appear in the SAGA age of Magic book as part of the “Undead Warband”. I looked at lots of other manufactures, many with great looking figures but soon realized that most manufactures had a very limited range of poses when it came to the look/style required to fit into my warband. I kept coming back to the Mantic line since I liked the very dynamic style and look. Their range while still a bit limited but by being plastic “parts” offered more possible variations than the others. As I have said in the past “Plastic figures have grown on me”, yep from hating them to almost loving them sometimes! Mantic Games offered a combo deal on these figures at the time so with a few extra sprues from ebay I was set to create my 24 Mindless!

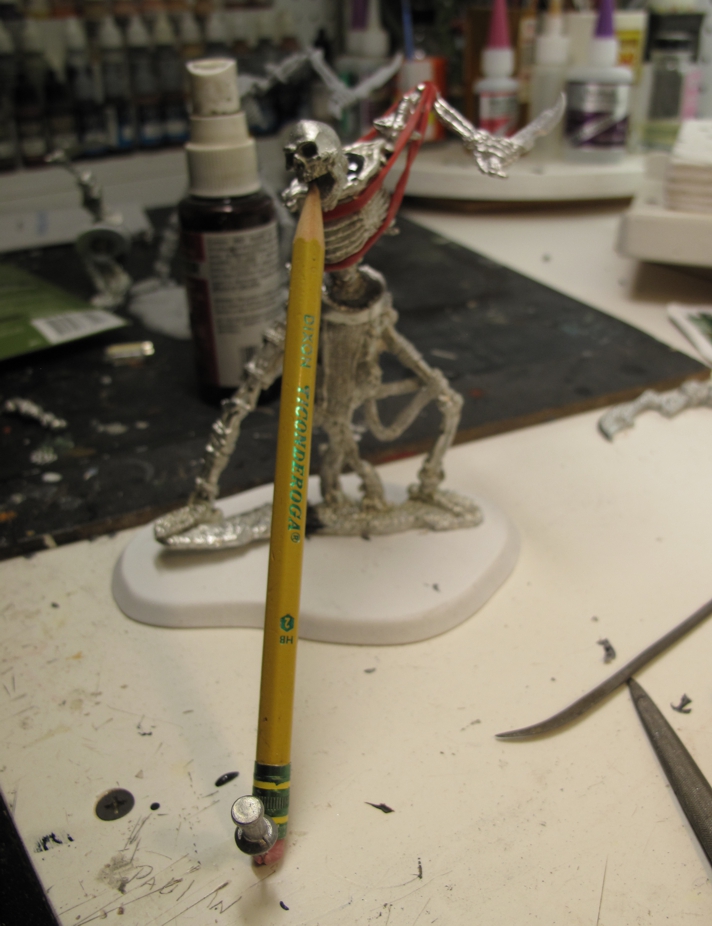
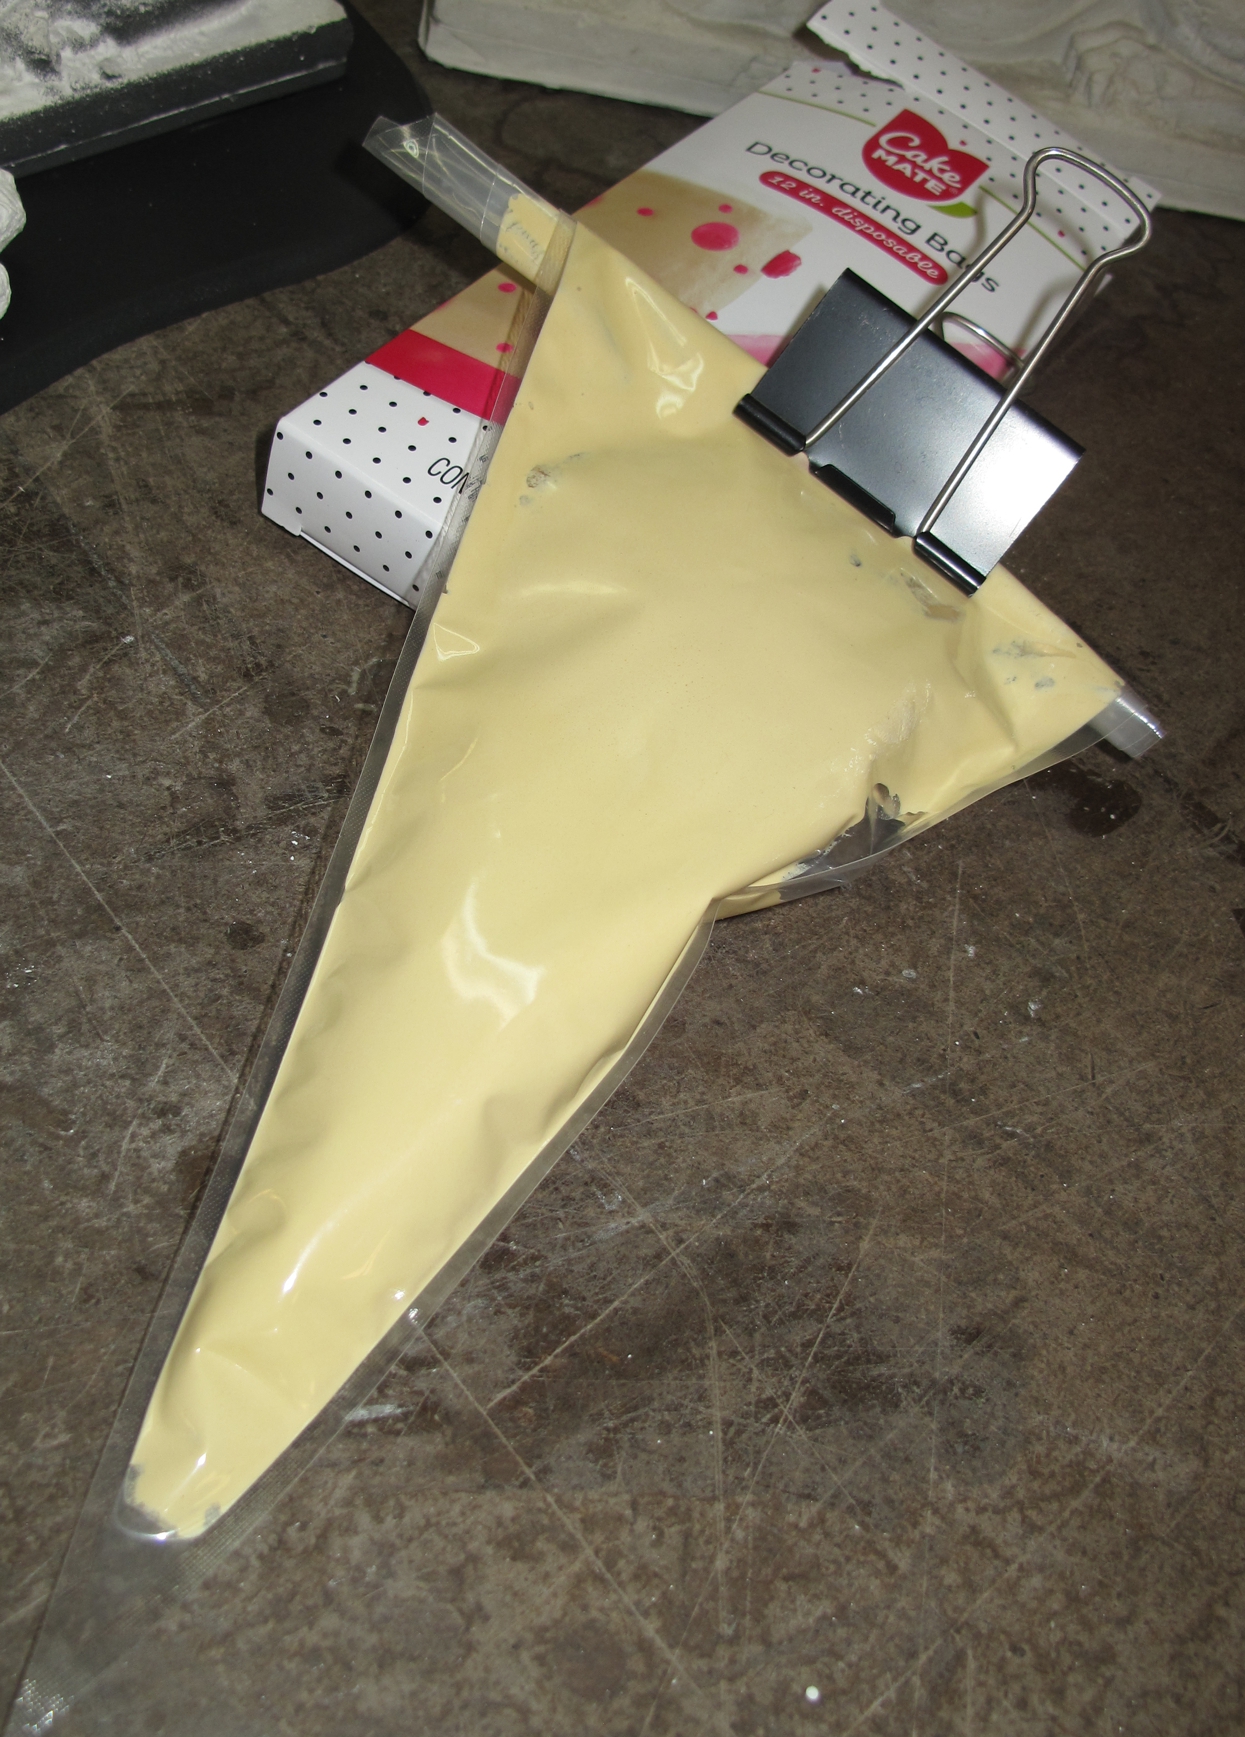
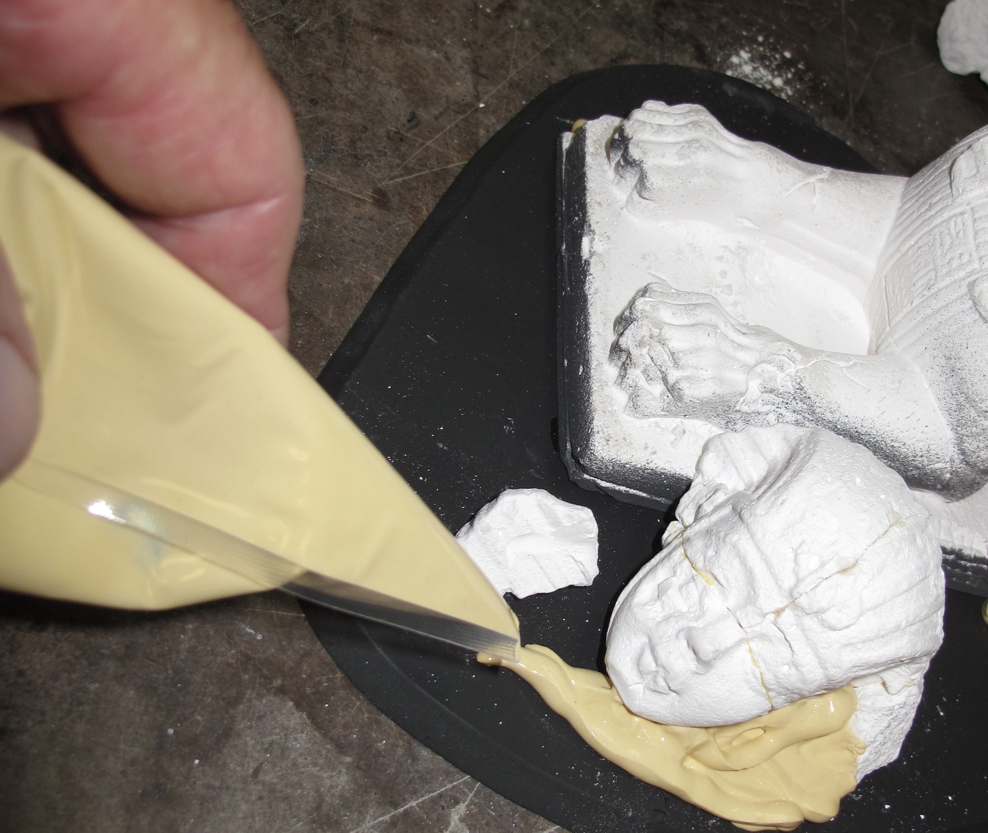
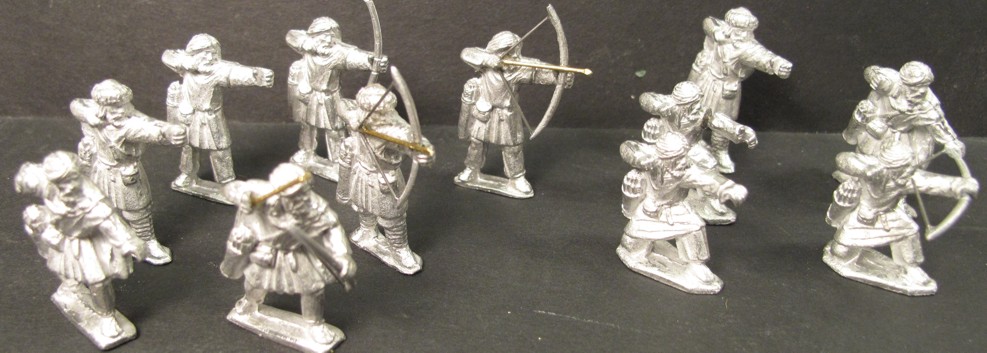
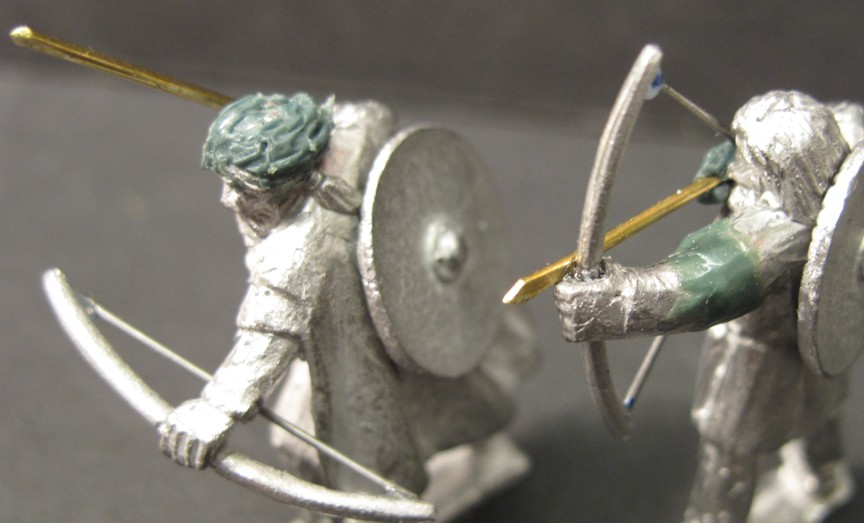
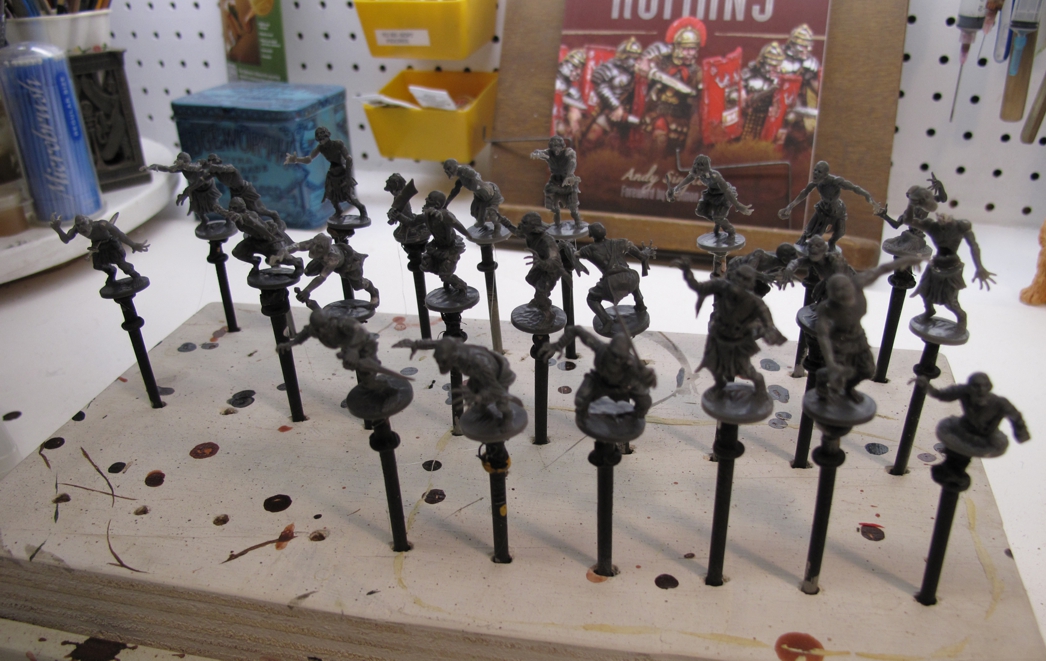
Primed and ready for paint. I usually use a black primer Krylon spray can primer for metals but for plastics my new “goto” is Alclad black primer with micro filler. It works very well but must be applied with an airbrush.

With all of my paint jobs I spend some time thinking about the look I want as well as WHY that look, and why that look works. Last, I decide how to paint them, style, fast, slow, detailed, blending, washes, etc.… although often all this will change as the build/ paint progresses.

A lot of Ghoul and Zombie figures have clothing or weapons that “date” them or tie them to a theme, the MANTIC figures a generic enough to allow them to serve almost anywhere.

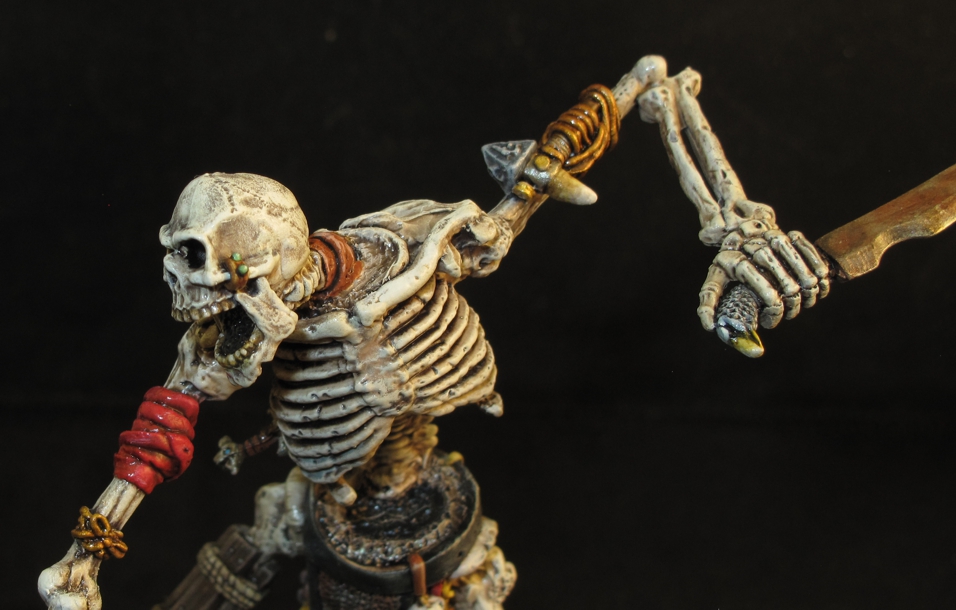
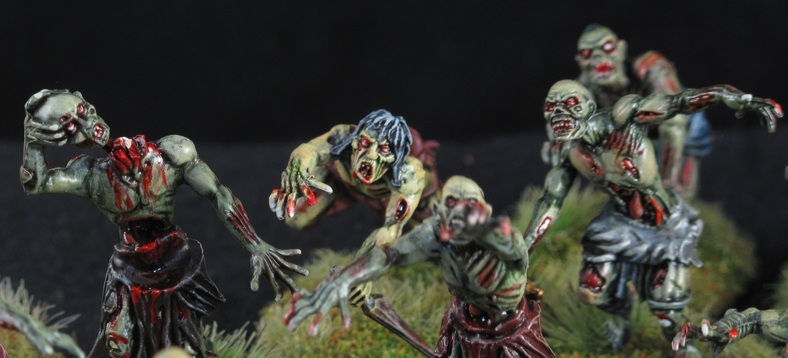
Their flesh is is always in a constant state of deterioration or restoration so my color palette reflected this. I went from near living flesh down to a grey/green rotting look. I loved the exposed bone on many figures and the anguished looks!

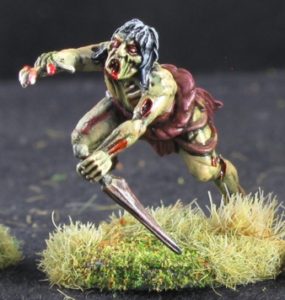
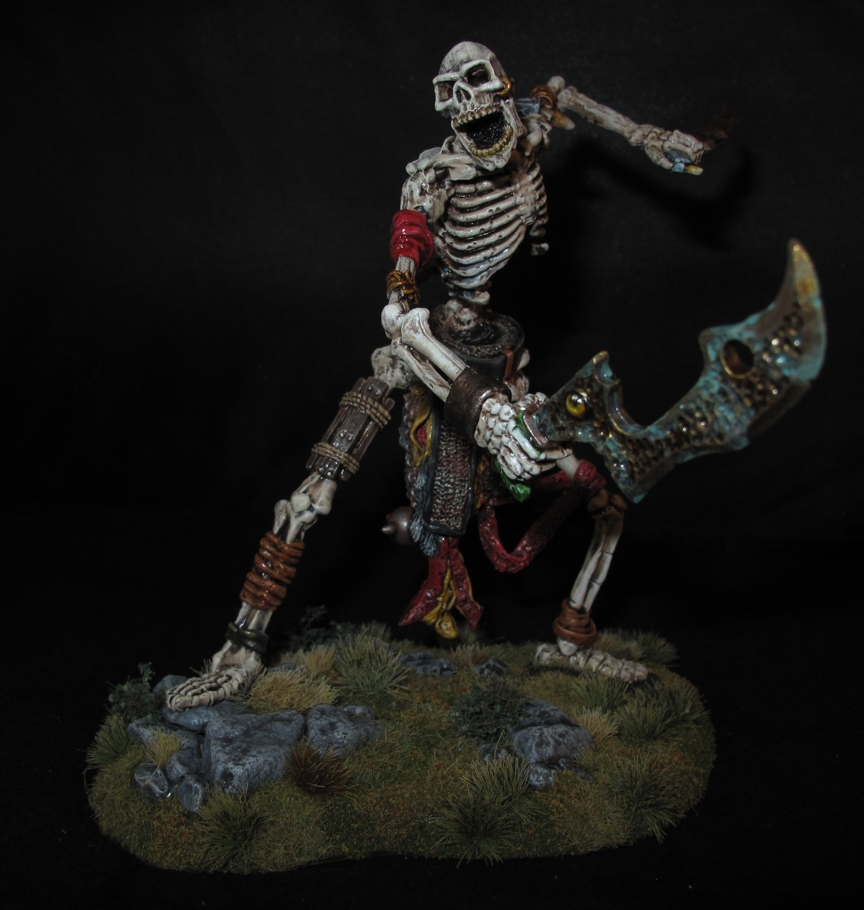
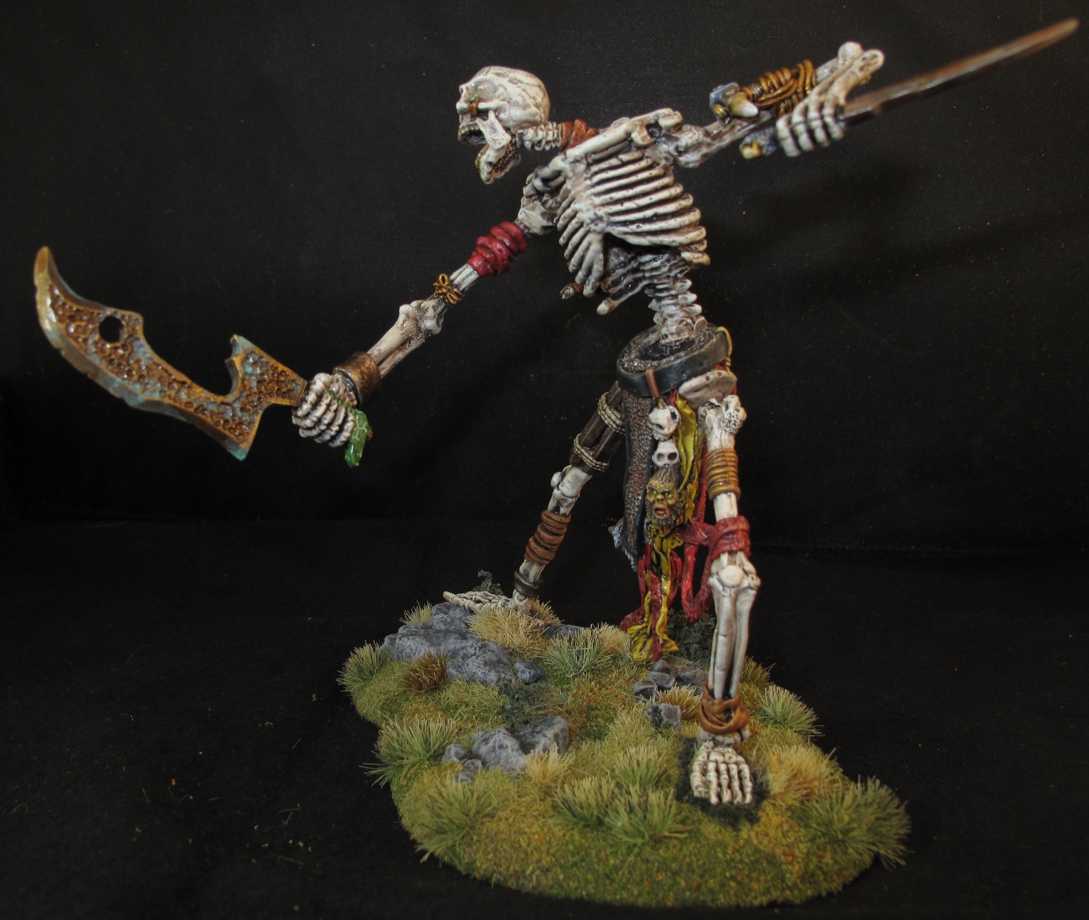
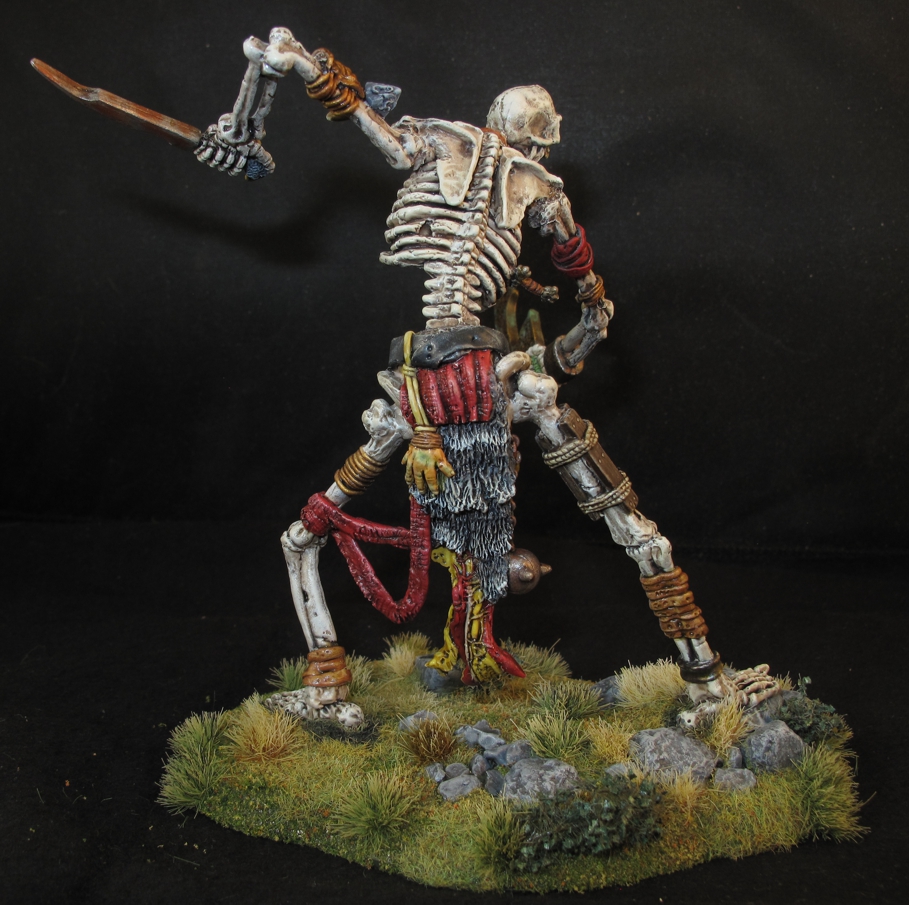
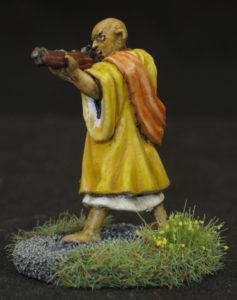
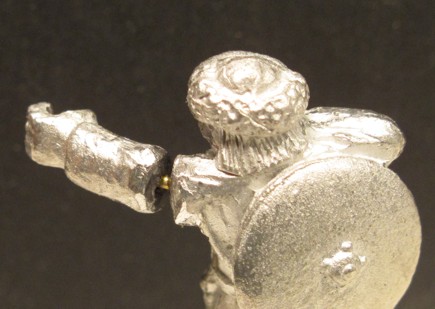
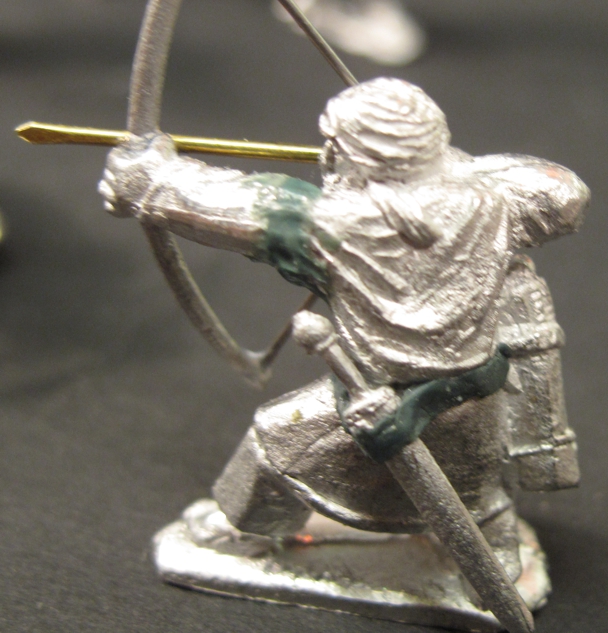
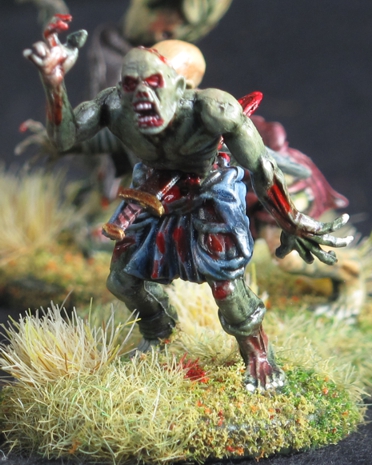
The advantage of plastics is invaluable when doing conversions! This pose would be impossible in metal. The figure was originally a squat pose but by cutting, bending, and use of certain arm combination, creates this dynamic leaping figure.

The first thing I noticed when I began to cut the pieces off the sprues and assemble them was that the majority of the figures are bent over in squat, crouching positions, to much so for me, but the trusty Xacto knife, some glue, and a bit of putty soon had them looking a bit more threatening! About this time I realized I was actually enjoying this build and growing to like the figures more and more. The plastic is high quality and easy to work with, flash was very minimal, although mold lines were pretty bad. I figured that the look and the way I was going to paint these guys would hide a lot of them. Building them was fun and I think I got some great poses often swapping pieces from both figure types.

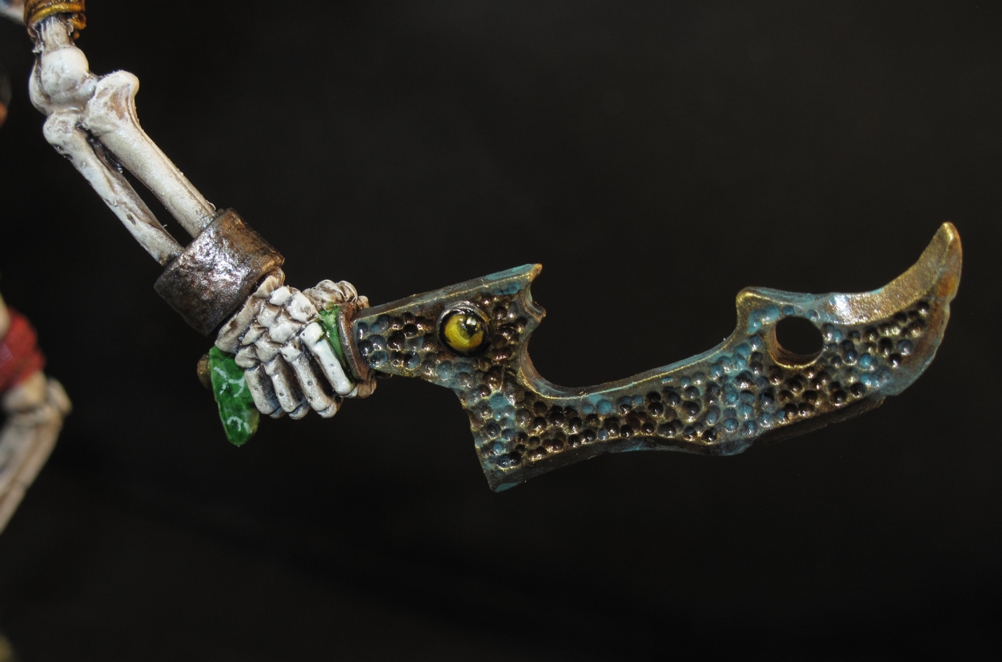
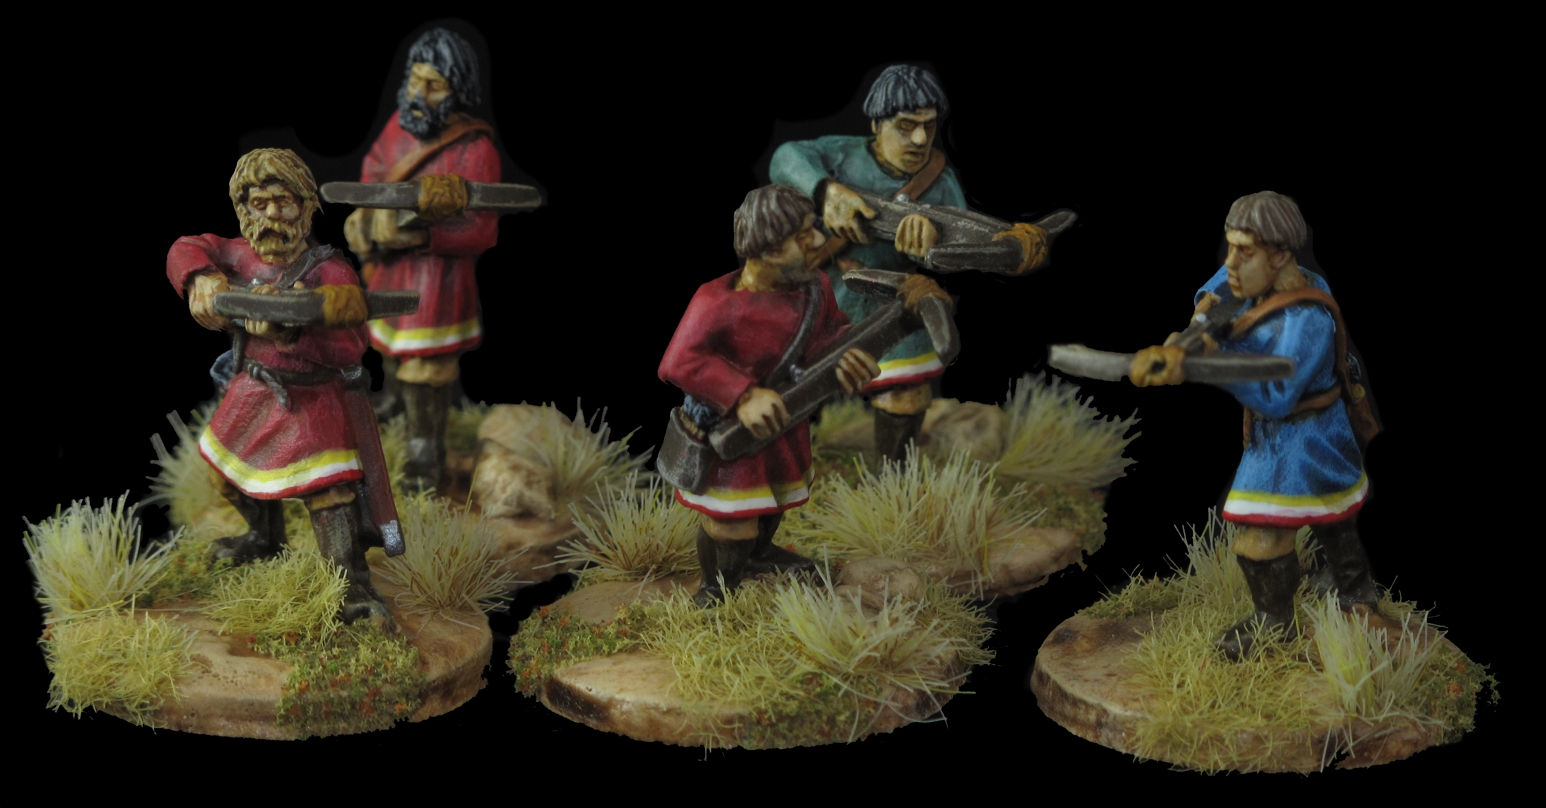
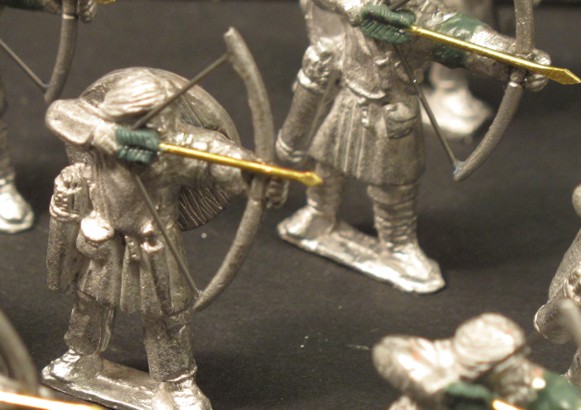
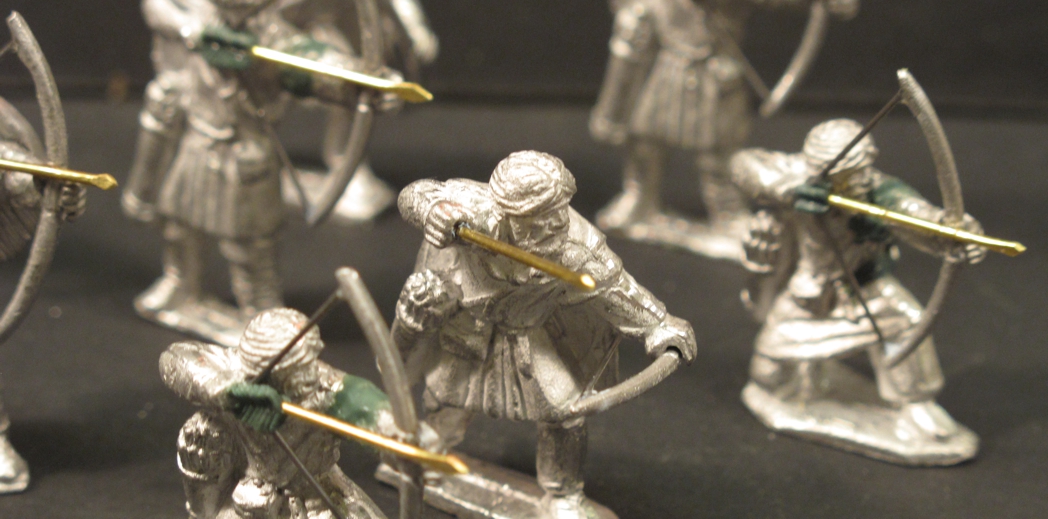
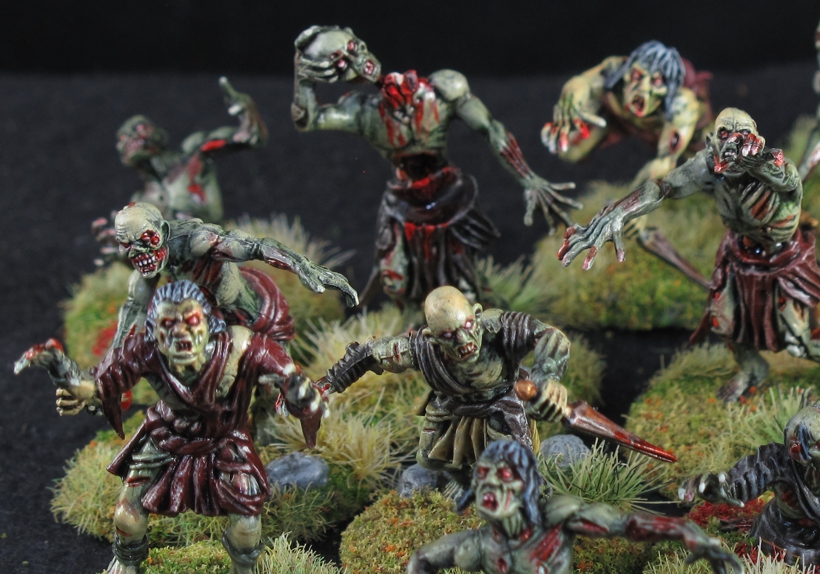
Mold lines like you see on the flesh colored figure at center right were common. I removed some but left many as you don’t really notice them in a group. The sword through the belly was created by me with help from the “bit’s box”

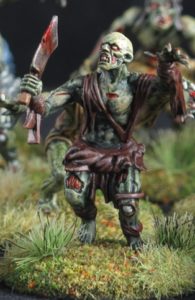
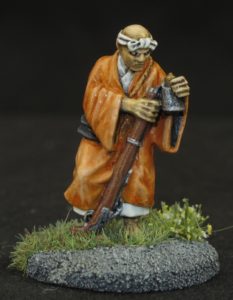
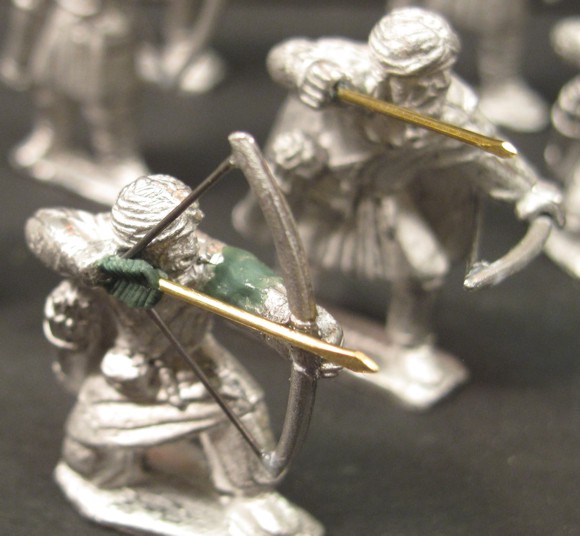
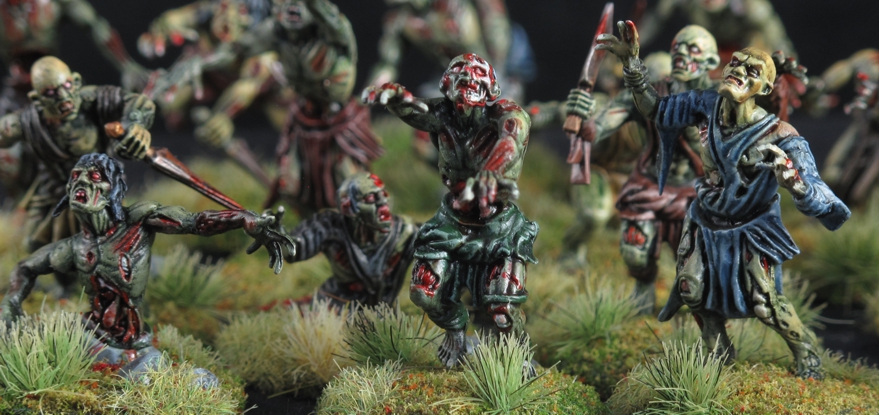
Another favorite pose with a meat cleaver, the camp cook! Clothes were intentionally left drab and nondescript to avoid drawing your eye from the rest of the figure.

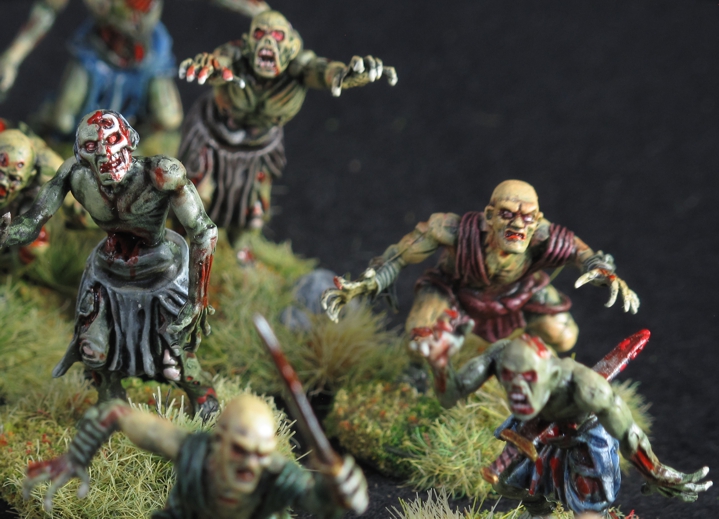
Now on to painting. This is where that “why that look” comes into the process in figuring out what “that look” will be. In my mind (a very dusty, cramped, and often dangerous place to roam) Zombies and Ghouls are powered by a dark evil force back into the world of the living, but that initial force can only restore and sustain them for so long. The creatures need to consume the living to continue on and grow stronger, just like a vampire needs fresh blood from the living, Zombies and Ghouls need flesh and brains. So, this governed my thinking when painting them. Individual figures would be built and painted to reflect their current state of re-animation so to speak, some would be just re-animated, in bad shape and wildly looking for more flesh while some of them would be “better” looking more fleshed out and human looking, better fed! Some would be deteriorating, grey-green, falling apart, from lack of food!

Funny how a building and painting session I was not looking forward to ended up to be so enjoyable (really most do!) and I think the final result came out better than I expected! Enjoy and if you do please leave a comment!


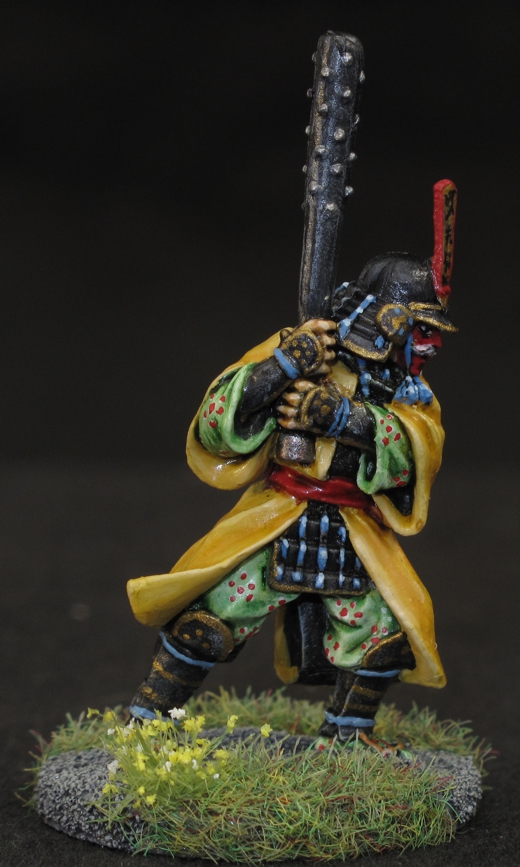
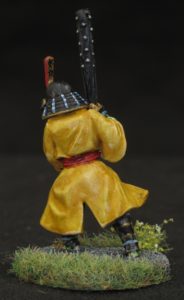
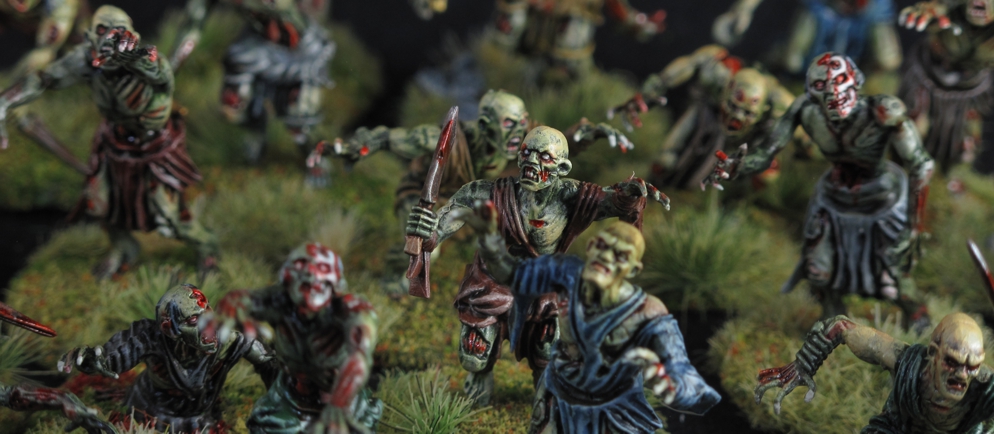
“Scabbard? my sword don’t need no stinken scabbard!”

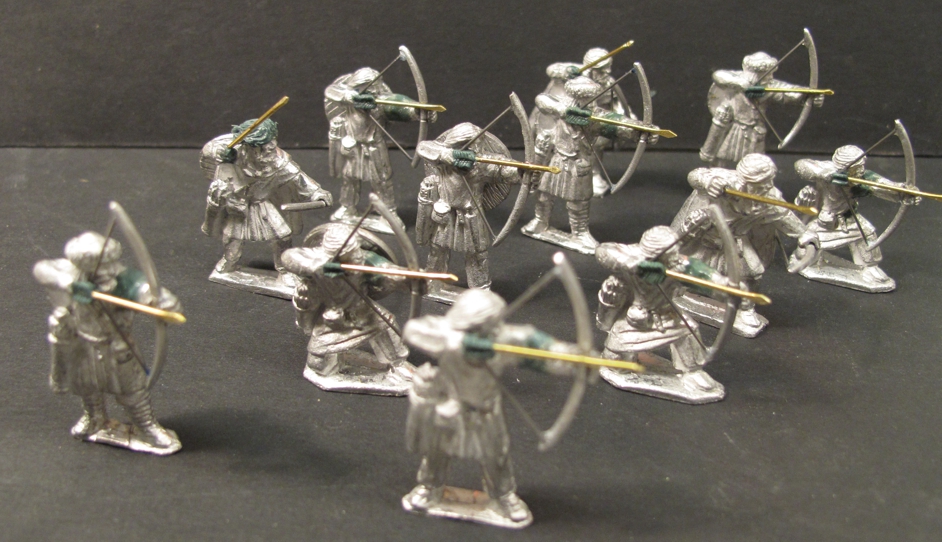
24 figures and every one different! By keeping a consistent palette it allowed me to keep the group look and build/paint quickly as a group even though they are all different.

Several other units are already done and Episode #6 will soon be here!

Byzantine Crossbowmen ready for SAGA action!

Just short little post here but wow two in about 24 hours! A record for me! These are some Gripping Beast Crossbowmen painted for Chris A’ Byzantine SAGA warband. Yep Chris wants all the possible options and since I had already done some work on this war-band he commissioned me for these. These are the last of 4-5 extra units I did for expanding the original War-band he bought from Stevie G. It must be up to 12 plus points or more!

I think they painted rather well and hope Chris likes them, but I sure wish he’d let me upgrade them with bow strings and bolts! They would really be an eye catcher on the table!

The figures actually paint up nice and were not to bad flash wise. I didn’t like that there were 12 figures in the unit and only 4 variations to the figure. I worked hard to make them look individual as possible but still have a unified appearance, does that even make sense, you get it, right?

I love the “bowl” haircuts on some of them and I gave a few the “5 o’clock” shadow.

I liked the heads on these guys, some having a distinctly roman look while others more barbarian looking, right for this period at what might be said was the close of the Roman Empire. With my working on the house and finishing up projects preparatory to moving out of state, I have been trying to clear my shelf of partially completed paint projects. Both these last posts were projects off that self, finished yea!

Gripping Beast 28mm Viking Bowmen conversion.

Steve Gausche life long gaming pal! We had just re-based his ACW troops on magnets!

For most of us the current situation has given us a change in schedule, for me working at home equals no commute time, less shopping trips, dinners out, visiting, trips, and gaming with my friends (booo!). When I saw this coming I vowed to try and use all the unexpected time to do things that have been put off in the past. If you have been following the post here (please subscribe! top right home page) you will know that one of the goals was to organize my website better and post more often! So while going through files I found several partially completed posts and articles that for one reason or another never made it onto the site. One of them was the “second half” of Stevie G’s “Byzantine Birthday Bash” article. Remember it was when I painted up some Byzantine Cataphracts for him and he accepted them with “wow great! but…I would rather have some plain old Viking archers”. Well I never finished the article “Stevie G Birthday Bash part two!” so here it is, finished.

Byzantine Birthday Update! In the last post “Byzantine Birthday Bash” I talked about Steve not being totally enthused with my gift of the Byzantine Cataphracts and while loving the figures he just felt he would not use them much. It was decided that I would keep the Byzantines and instead paint him up a 12 figure unit of “Viking archers” since his Viking war band was currently using a unit of spear-men to represent archers. I had gotten a pack of Gripping Beast archers from Steve months ago and was going to give them some custom additions to make them look a bit “cooler” on the battlefield. This would be the addition of bowstrings and arrows that are normally missing on molded figures. I have a very nice Viking Warband (even if I do say so myself) and I took great care to make my bowmen look realistic, like they were really firing their bows. My Viking warband uses all “Foundry Vikings” as I regard them as some of the best ever produced! The adding of bowstrings and arrows to figures can be tough since many sculptors have never shot a bow, or figure that the end user wont care about the missing parts.
When I opened the Gripping beast package of 12 “bowmen” I was somewhat disappointed in the poses and sculpts. First the poses are really only three, Standing firing, kneeling firing, and moving / drawing arrow. There is a bit of fiddling with the basic pose to try and make them look different but in my opinion it fails. I felt when finished  this unit would look very much like a unit of “toy soldiers” no matter how it was painted.

The GB figure with just a bit of preliminary modification to see what was possible.

The GB figures with just a bit of preliminary modification to see what was possible.

Well me being me, I decided to do something in an attempt to remedy this by trying to give some uniqueness and variety to the figures. As I pondered how to do this I started to prep the figures for bowstrings and arrows. I quickly found that this was not going to be easy given the figures current poses. Many of the arms were at wrong angles, resulting in the bowstrings having to pass through the figures face or body.

Arms were at the wrong angles or to short making major modifications a must!

Arms were at the wrong angles or to short making major modifications a must! Three of the same figure. The second one shows original position with out bow, arm pulling back an imaginary arrow. First figure shows the bow installed and the attempt at adding the bow string. I would have to cut off his head to make it work and archers rarely held a bow in this position except when on horseback. The third figure shows how I corrected this by cutting off and repositioning the arm.

A small bit of reach was added to each arm to correct it's proportion.

A small bit of reach was added to each arm to correct it’s proportion and angle. A brass rod pin holds it in position while filling and sculpting as well as adding needed strength!

Simply bending the arms would not work either since the arms were a bit short in the original sculpt. I resigned myself to the fact that to make this work I would have to extend all the shooters arms as well as change the orientation of the knelling shooters arms by cutting / pinning/ filling them for every figure. Even the moving figure had a raised arm and hand that made one wonder what he is supposed to be doing. I solved that by putting an arrow in his hand as if he just “drew it” from the quiver and was about to nock it up.
As I delved into the project I also decided on other small modifications to “individualize” the figures from one another with additional shields, weapons, and hair styles.

Pro Tips: To avoid damage to figures when trying to bend arms, legs, or other thick parts use a good quality pair of needle nose pliers BUT lay a small wrap of leather in between the pliers and the figure to avoid marring or damaging the casting! The compression of the leather will give you a better grip and allow more force to be used. Also the area is thick, hard to bend, and to avoid distortion, try making a few cuts with a hobby knife or thin blade saw on the side you will be towards. removing a small amount of material there will make the process easier and look better. Fill the tiny cracks with gap filling super glue.

VK9

A bit of a change in hair and a shield creates just enough difference in the figure that combined with different paint schemes makes the group look much more realistic. The lengthened arm now works to create the right balance of dimensions between the arrow, bow, and arm. The first figure now clearly gives the impression that he has fired one arrow and is getting ready to fire a second.

The “Bow Strings” were made of steel wire, cut, and super glued. I thought I might add a wrapping around were the bowstring is connected to the bow but decided that in this scale I could just paint that on and get the “effect” without all the work.

The arrows are made of thicker brass rod and “arrow heads” made by gently hammering tips flat then filing. I also sculpted “flutes”, the feathers you see on the end of an arrow that makes it fly true. They are a bit big perhaps but I think they will look right after painting.

VK10

The “fletches” or feathers on the arrows are rough and would be historically as arrows had to be made quickly and cheaply in time of war, they were also not expected to be used over and over. There were better arrows made but those were rarer and used more for hunting or when individual accuracy was needed. Dark Age bows in warfare were more of a massed effect weapon than a specific target weapon.

I wished that the figures were arching up a bit, they are all shooting straight and level. Most archers would have been used as a group and be kept back to use their range so their aim would be higher.

VK8

I have used thick industrial thread for bowstrings at times but it can be fiddly to do and not look that great. Using small steel wire is much easier and sturdier. Brass wire is used for the arrows as it is easier to shape and work with. Two part sculpting epoxy “kneadite” was used for the feathers.

The other side of the figure shows where a sword out of the “bits box” was added and a belt sculpted on to make it look right! Shields and swords were added to many of the bowmen as they would have carried them for defense or when called upon for melee support!

The easy addition to the center figure of a arrow in his hand and the bow string make a huge difference!

Probably 3 or so hours of extra effort was put into modifying these guys prior to paint but the results are well worth the effort in my opinion.

These guys were actually rewarding to do and not that hard especially since I have done this for fifty to 70 others before in my warbands. It just makes archers sooo much better looking that for me it’s a must do!

Yea! Now these bowmen look like a proper threat! Well worth the effort!

with the modifications, additional weapons, shields, and a some paint they look a cohesive yet individual unit.

Martian Flyers in 28mm

These were really cool flying craft, sadly I think no longer produced. I made a few mods to this one as I remember.. Certainly the “Guardrails” were copper wire and craft beads. I also think I did the rear tail area scalloping with a Dremel rotary tool to fancy it up a bit.

Sorting through pictures and found these so up they go for a bit of “eye” candy. These stuck out since I was about to sell a bunch of RAFM “space 1889” figures and they got snapped up by one of the “dogs” (you guess who!) so we may see battles on Mars in the future! I painted these years ago for Chris S. London War-room as I recall and for “Space 1889” or any Victorian Sci Fi situation.

I think I might have been working on Star Trek DS9 at the time and used some “Klingon” lettering for the tail ID! The scalloping I added in the rear tail section now ties the original models scalloping in the front together and improves the look tremendously in my opinion.

There was another control station that never got added since I had misplaced it at the time. found it years later in a “bits” box… I should paint and ad it! I see negotiations in our future Chris…..

I just love the design, so retro 1930’s Flash Gordon! I could just see “Ming the Merciless” cruising over the planet Mongo in this!

This flying “gunboat” was by the same manufacturer but done for the earth-men’s or colonial powers. Again a very nicely done model. I wish I would have picked some of these up but it was one of those times when you think “oh I’ll get them down the road” but then they go “out of production! I guess this justifies our large lead mountains! Get it while you can. I remember buying a bunch of models  for a line called Maschinen Krieger once again because they looked cool and I had some grandiose plans to use them in a project that never happened. I bought them for around $6 to $15 apiece and perhaps 12-15 kits, 10+ years later I sold the now “rare” original kits for 10 times the purchase price (and all to one person in Australia) with people literally fighting to get them, go figure!

Looking at this model I realize I didn’t really finish it with as much detailing as I planned, I did add the smoke stack and a few flag receptacles. Perhaps Chris would like me to finish it out a bit more? Part of the smoke stack was from another project and not used but kept in the “bits” box…came in handy for this modification.

I think this would look great with some German WWI style Submarine type markings!

Being as the boat is very monotone I used the trick of a splash of color (red prop) in the rear to draw the viewers eyes along the entire model.