
Most commanders have a battle plan, a plan that they hope will unfold and work according to plan. This seldom happens in the Napoleonic period since once a battle commenced there was little a commander could do except to decide where and when additional forces were committed.
Commanders in the Napoleonic period spent much of their time preparing for the battle by arranging their forces to their best advantage based on what they thought the enemy commander was planning. Trying to figure out what the enemy commander was going to do was a daunting task requiring many hours of careful thought. Unlike modern battlefield leaders, commanders in the Napoleonic period had very limited resources available to them. No Aerial photography, no spy satellites, very slow communications, no radios, TV’s, computers, etc…. maps were many times lacking in detail, wrong, or just not available. General staffs were just being thought of! They had spy networks which were sometimes good, sometimes bad, and always slow! They could try and predict an enemy’s move based on what might be his immediate and long term campaign goals, go over past performance of the enemy commander, and try to get inside his head. Finally as the battle approached a commander used his Cavalry for determining enemy strength, moves, and to try and screen his own moves, strengths, and intentions.
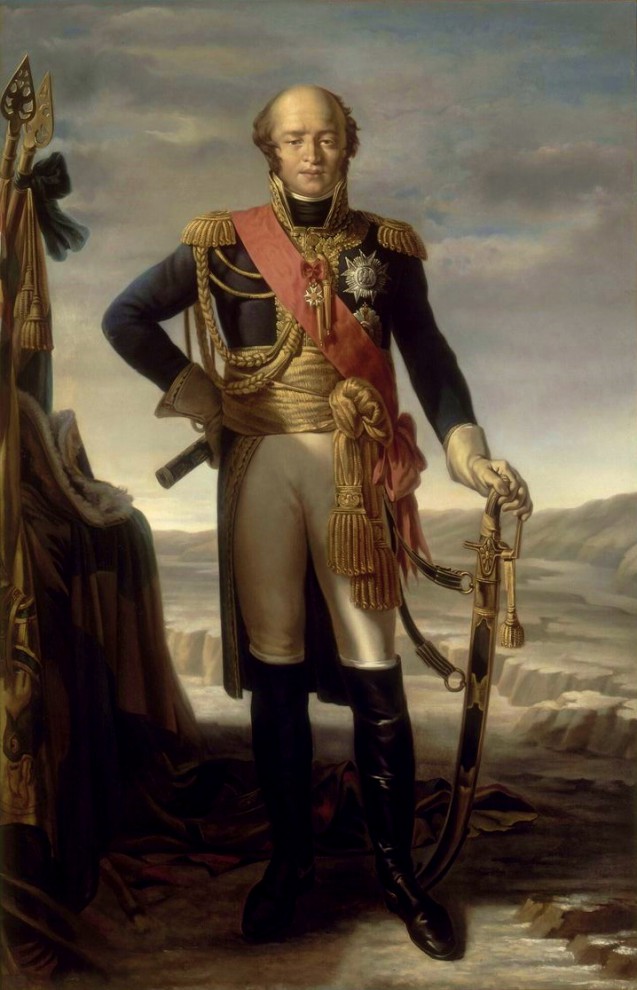
Louis Davout was one of Napoleons ablest commanders. I has been often said that if he had been present at Waterloo the outcome would have been very different.
Our Saturday battle was based on this type of action where a large cavalry force has been sent out to both scout ahead, secure, and possibly be the beginning of flanking action against an important area on the Austrian army’s flank. The area consisting of a road and village network. This force also had an infantry force intended to hold the area after the cavalry has moved on.
I played the “Iron Marshal” Louis-Nicolas Davout in command of the French right and Davout has decided to personally ride with this force to make a timely assessment of the area. The Austrian commander Archduke Charles has planned to do almost a mirror image of the French move! (The Austrians are learning!) To mix this up a bit and introduce the effect of battlefield intelligence during the period, scouting, spies, and information gathered locally, would be simulated by modifying the way and time troops would be introduced to the battle field. I invoked a rather simple method to simulate this. Each commander would roll a D10 and high roll would be allowed to decide whether or not to place a unit on the battlefield one move in. Placement in this way gives an advantage to the winner by being able to make his opponent place his troops first or second and then being able to react to that placement later, or place some troops hoping to deceive the enemy into thinking that would be an area of deployment. The winner is not required to place any troops on the field thus
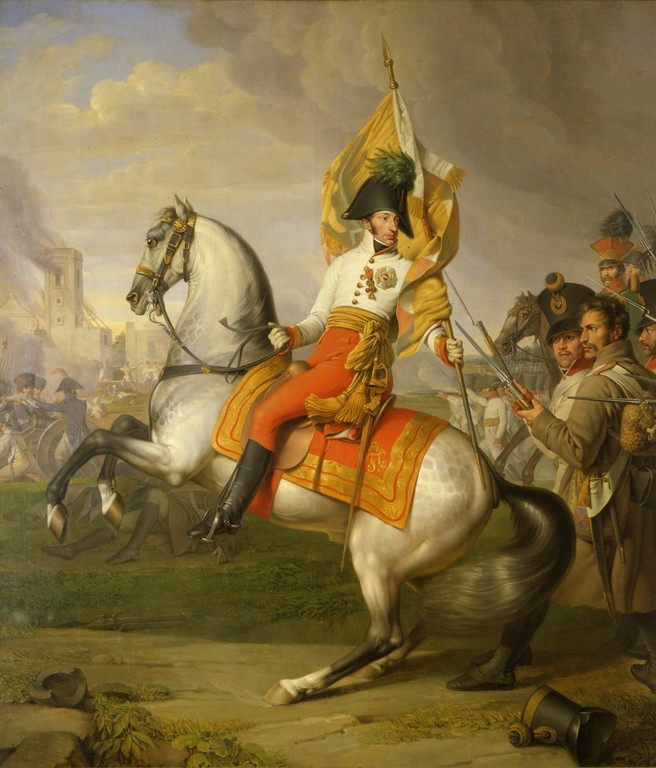
Archduke Charles the best of the Austrian commanders was always hampered by the commanders and politics around him.
can save any un-deployed troops to the end of the deployment phase(very powerful!). The Archduke (Steve) rolled badly and this resulted in Marshal Davout (Bill/me) being able to deploy almost 2/3rd of my force after Steve! The French clearly had the better scouting/intelligence this day!
My plan was to pin/feint on one side where (Steve) had deployed much of his Cavalry force. Then because of my better “scouting/intelligence” use my ability to hold off deploying much of my force until I saw where his forces were deployed, allowing me to concentrate more of my troops against his weaker flank. This would be an advantage for the French provided they were to act quickly, fight well, and have success before the Austrians could effectively react. The Austrian force was a bit larger in Infantry, Cavalry, and Artillery, not huge but enough to make it hard on the French should they make even small mistakes.
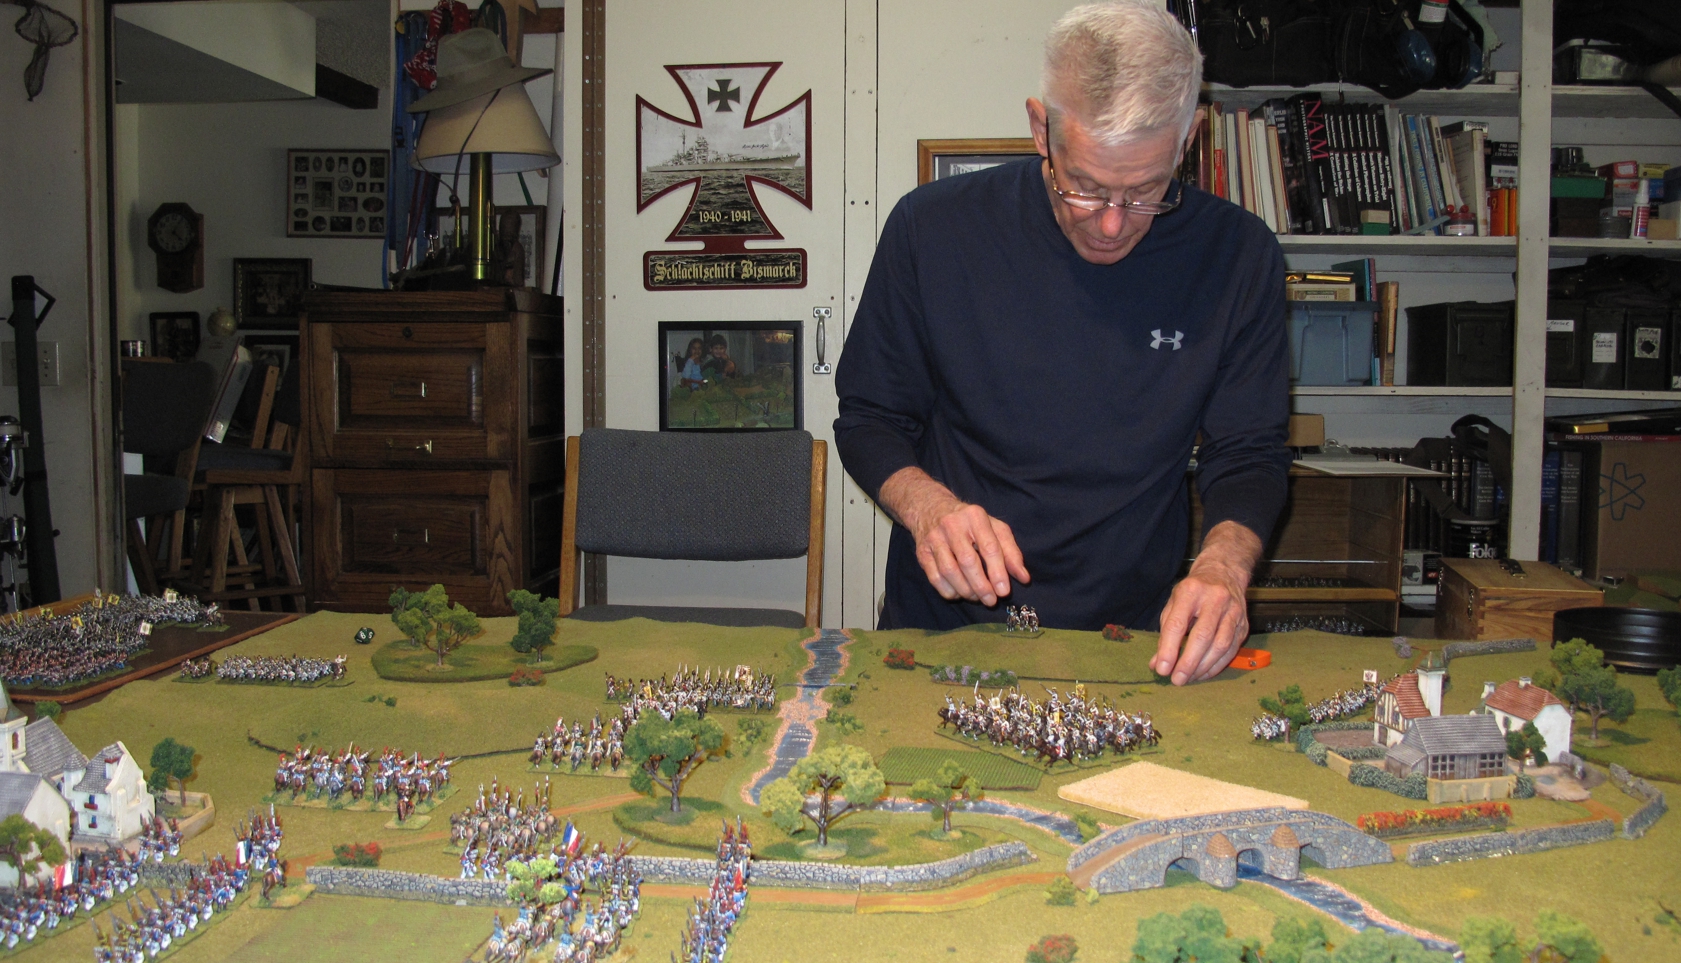
A familiar sight on Saturday mornings on my gaming table…. Steve and a general overview of the battlefield from the French side look towards the Austrians.
My initial plan was to hold the road and village on my right pushing my cavalry down the open area on the of the village, but after the deployment rolls this strategy was changed to an all-out attack on the left and center based on “new” information and I deployed much of my remaining force to accomplish this. This simple process for deployment worked out so well in creating a more interesting battle that I’m at a loss as to why I never thought of it before!
There are several things that I like about it;
- It eliminates the “I go u go” deployments that leads to the same old boring heads up fight.
- Presents challenges to both commanders other than “roll well and live”
- Makes commanders pay much more attention to initial setup and terrain effects.
- Makes players think link commanders and consider the abilities of their troops carefully.!
I’m also now toying with a “strength roll” to have a force “weakened, strengthened, or remain the same” and possibly then a secret roll for the opponent to know this fact.
So on to the battle! I have recently painted a lot of French Napoleonic cavalry and wanted to get them into it, many games have Cavalry in them but normally in a supporting or breakthrough roll. I wanted a battles where Cavalry was the main focus.
The forces would reflect his;
French, 28 stands infantry (10,080), 32 stands Cavalry (5,760), 3 Artillery Batteries (16-24 guns).
Austrians, 36 stands infantry (13,680), 42 stands Cavalry (7,560), 4 Artillery Batteries (28-32 guns).
We used “Age of Eagles” rules by Bill Grey (Excellent!) and figures are 15mm primarily Old Glory (French) and AB & Old Glory (Austrians)
The Austrian force was larger for several reasons, Steve’s rolling of dice is less than “stellar”, and I know the rules better! I figured this would give a bit better balance, it did! (and actually, Steve rolled better than normal during the battle) but his roles for initial scouting were abysmal!
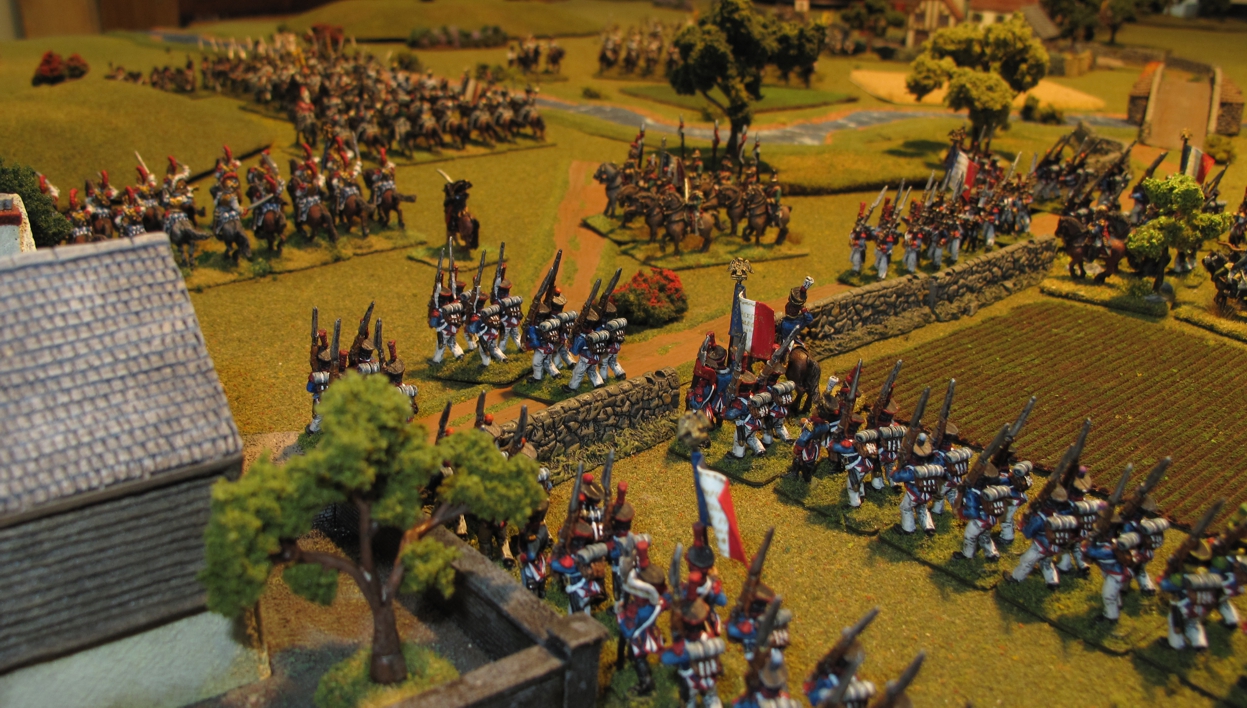
French infantry on the French left flank get new orders and goes on the attack!
Half of the the French infantry on the left goes into the attack while the other half supported by a battery of “12 pounders” moves to support the French Cavalry in the center.
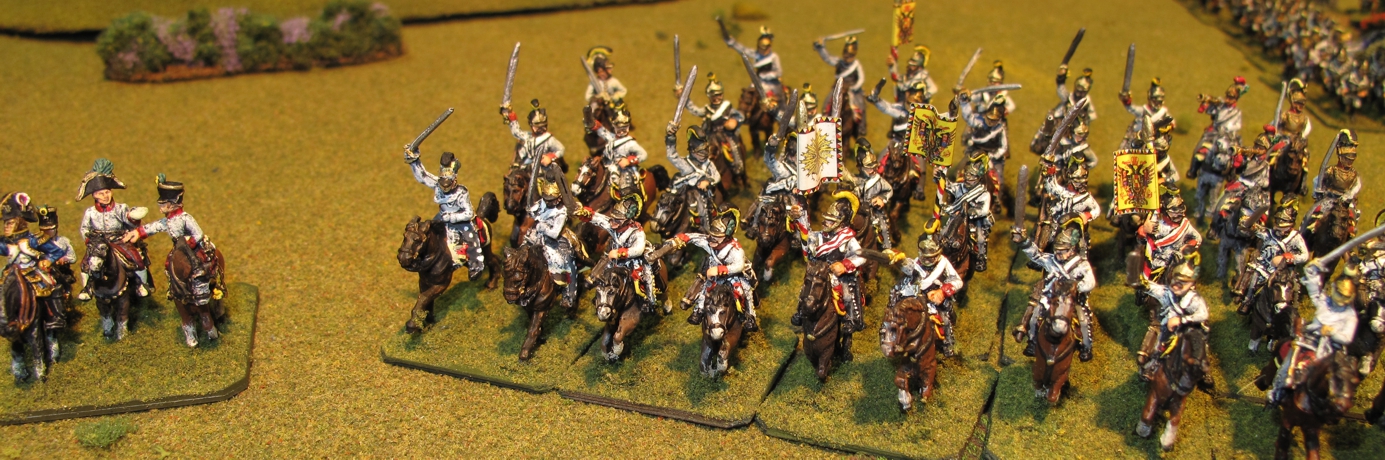
Archduke Charles and his staff quickly recognize flaws in their plan and issue orders to strengthen the center and ad weight to stem the French push on the Austrian right! Austrian heavy Cavalry thunders to the attack!
The “French” plan was simple and very much as Napoleon himself liked to do, threaten the flanks, weaken the center, strengthen your center, crush one flank while your strengthened center prevents or slows their reinforcing the flank under attack. I won the first few initiative rolls allowing me to choose to move first or second and instead of occupying my right flank as the original battle plan called for I pushed my infantry hard on through the town on the left and into some woods in the center, my battery of 2-12 pound guns also moved into the woods. On the French right flank my Hussars and a Horse battery acted as a decoy/blocking force drawing the bulk of the Austrian cavalry and some of their infantry away from the middle.
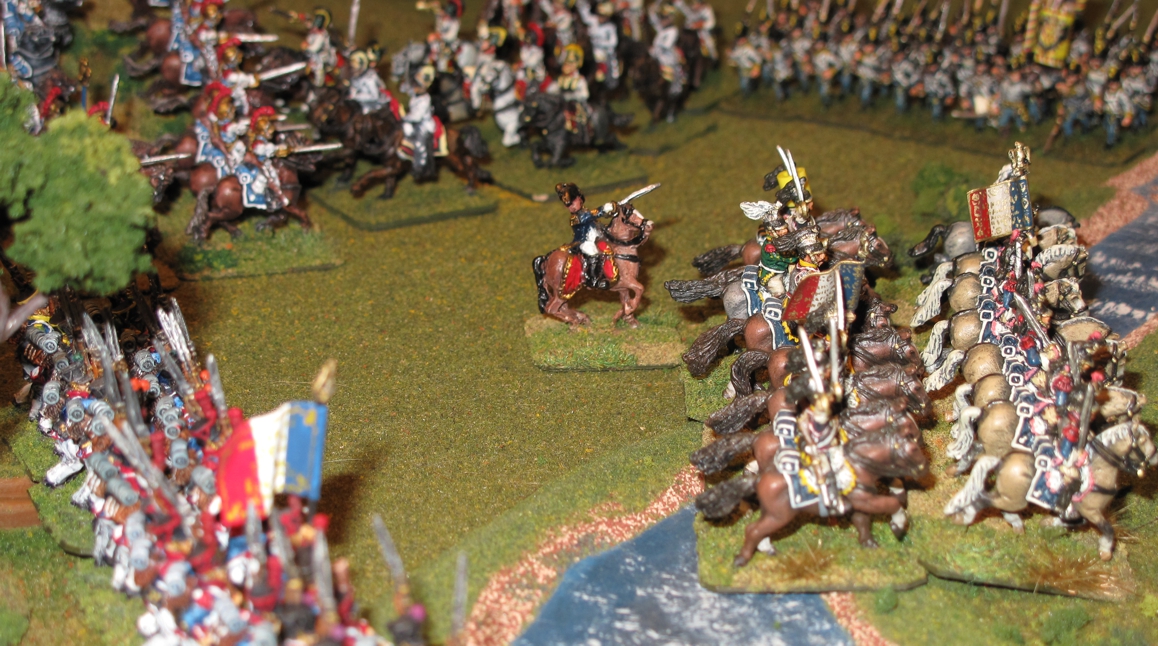
Because of some poor activation rolls on my part I have to send in my French Cuirassier early to prevent the Austrian cavalry from charging my still deploying infantry and artillery. Realizing the importance of this charge their commanding officer goes with them! In the upper left you can see the French Carabiniers already engaged with the Austrian Dragoons, a fight that would see saw the entire game!
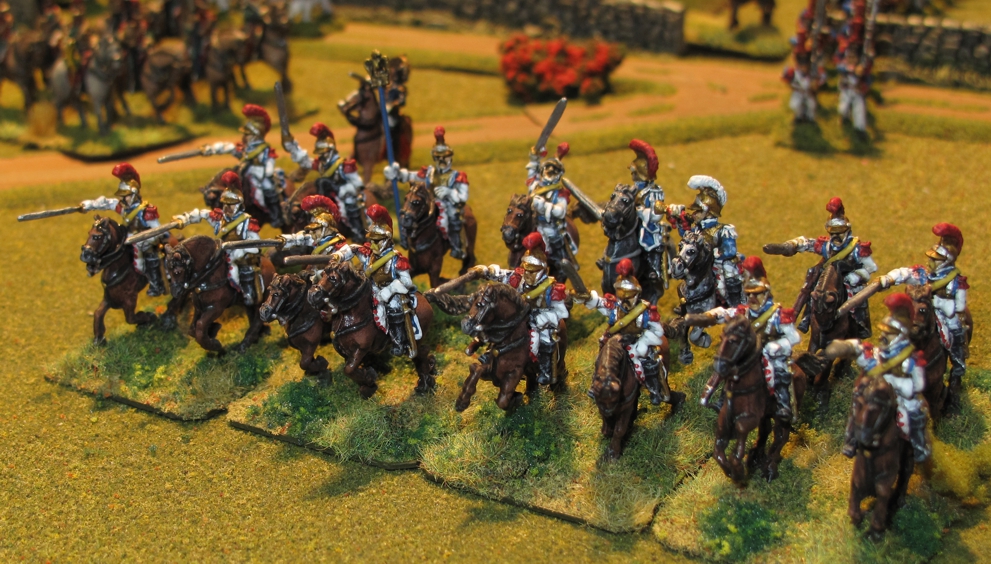
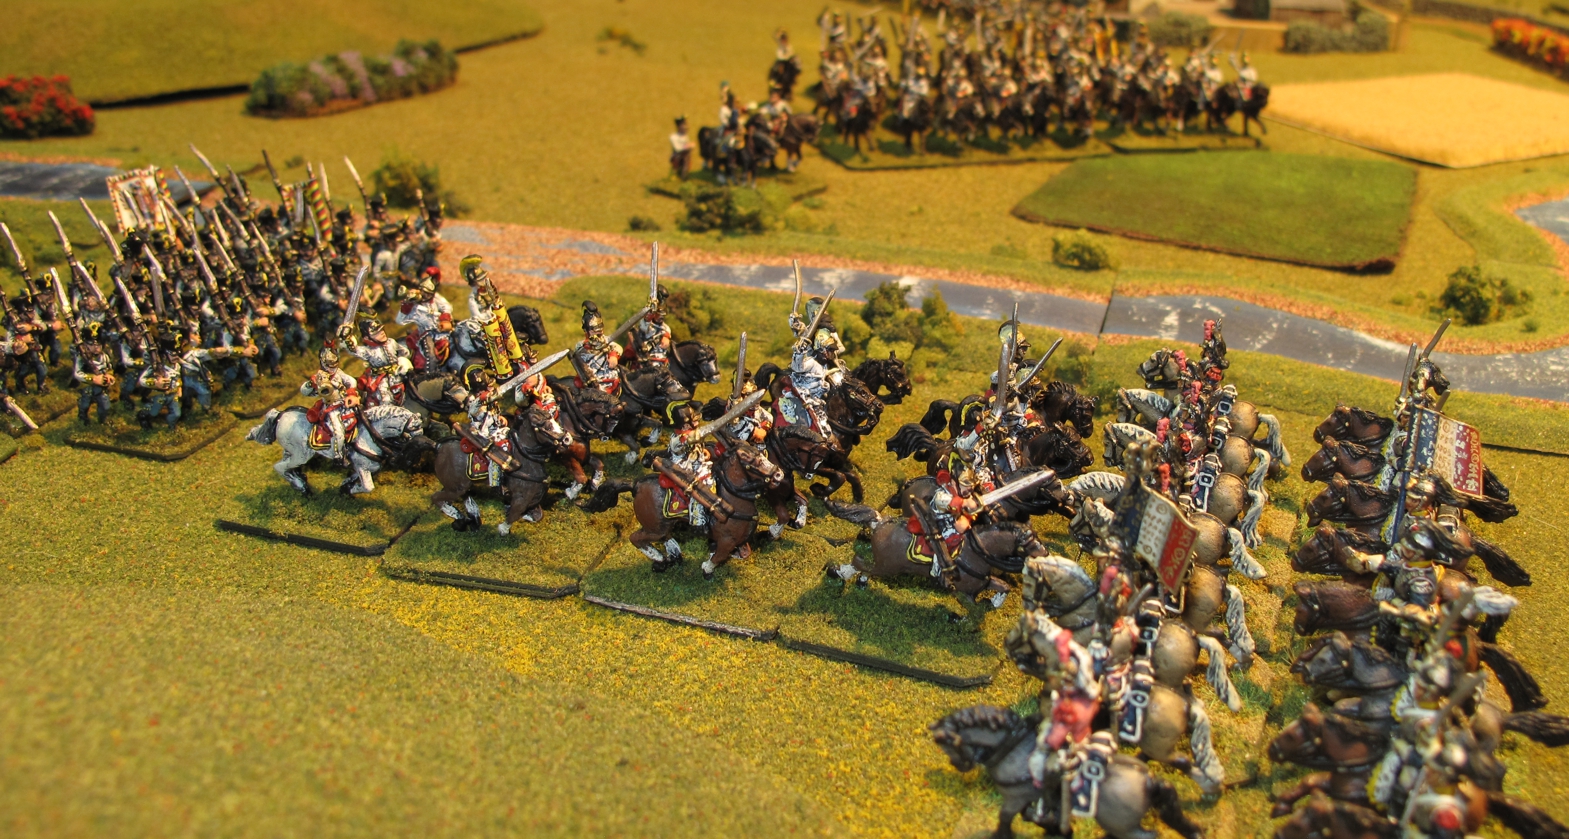
My French Carabinier fresh off the paint table make a great showing in their first battle…well they held their own stemming the tide of Austrian cavalry just long enough, and finally shattering the Austrian Dragoons! That fight went at least five rounds with the Austrians giving a great account of themselves until the end.
The battle went pretty much along those lines but was touch and go many times. Archduke Charles made several timely adjustments to his forces and rolled his dice rather well while I as Davout, had a good plan but rolled more 1s and 2s than usual resulting in my forces being a bit sluggish in getting to their positions. The battle that followed was just dam fun with a large cavalry fight occupying the center of the map for the entire game. Austrian Dragoons, and Cuirassier, exchanging charges and counter charges with French Carabiniers, and Cuirassier. The number of charges, counter-charges, retreats and reforming were amazing and made for a very exciting game with neither side getting the upper hand until the last turn when what was left of the French Carabinier routed the Austrian Dragoons.
The French left flank had all the infantry and the heavy foot artillery. These four brigades pushed into the town and deployed on both flanks of the cavalry battle to their center. Two brigades and the Heavy artillery deployed along some woods where they could threaten the Austrian Infantry and Cavalry trying to reinforce their right flank. The other two French infantry brigades supported by a small unit of French Lancer Cavalry pressed on to attack and crush an Austrian Infantry brigade and Artillery battery holding that flank.
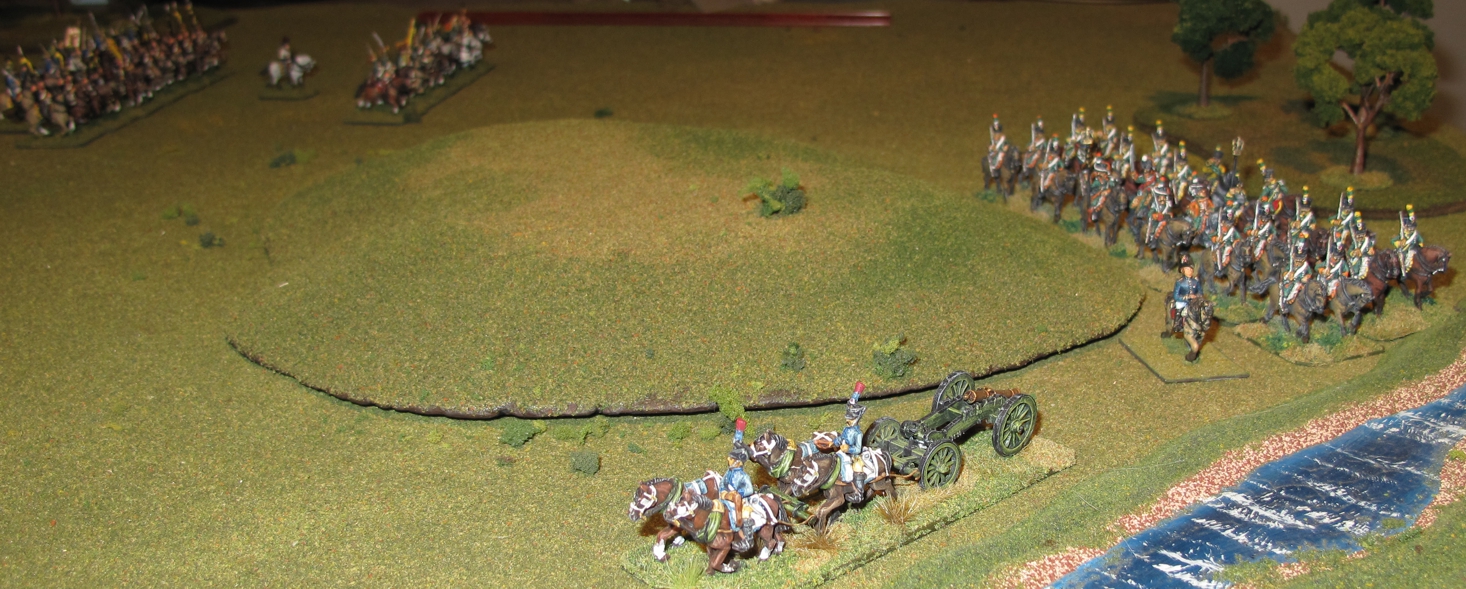
The French right flank (Austrian left) was held by two French Cavalry units, the 5th Hussars and the 13th Chasseurs a Cheval, along with one battery of horse artillery. Opposing them were two Austrian Hussar units, a unit of Austrian Dragoons (these Dragoons were almost immediately sent towards the center) and a horse battery. The French put on a brave front and let the Austrians get just close enough but not within charge distance before retiring behind a small hill. The Austrians followed for several turns finally splitting their Hussars around the hill in an attempt to cut off the Hussars retreat. Once the Austrians split their force the French 13th Chasseurs a Cheval about faced and charged one of the Austrian Hussar units badly mauling it, Killing some, capturing others (as well as their commander) and routing the rest! (Bill rolls well!) The Austrian hopes of flanking the French in the center were dashed as now French had their horse arty and the 5th Hussars covering the bridge in the center while the other victorious French Chasseurs pushed back around the hill the threatening the remaining Austrian hussar unit from the rear.
The French Hussar and Chassuers move off refusing battle further splitting the Austrian forces a turn or two later they would turn on one of these separated Austrian Hussar units and shatter it!
On the Austrian right the French infantry crushed the unsupported Austrian infantry killing or capturing hundreds, some standards, and a battery of guns. The center battles also ended in the favor of the French with over 1,000 prisoners, and an Austrian Cavalry general captured, the rest routed or were unable to press the fight any longer. At this point Archduke Charles realized the battle was lost and ordered what remained of his Cavalry to cover the infantry and guns retreat. The French Cavalry pursued the Austrians until nightfall when both sides bedded down for the night wondering what the morning would bring. Marshal Davout looked with satisfaction at the lines of Austrian prisoners filing past his headquarters and the standards lying at his feet while writing his report to the Emperor, Archduke Charles rode on into the night once again wondering where and how he could turn the tide……
The French Cavalry General shouts to the slowly forming infantry “Quickly comrades! We will make time for you!”

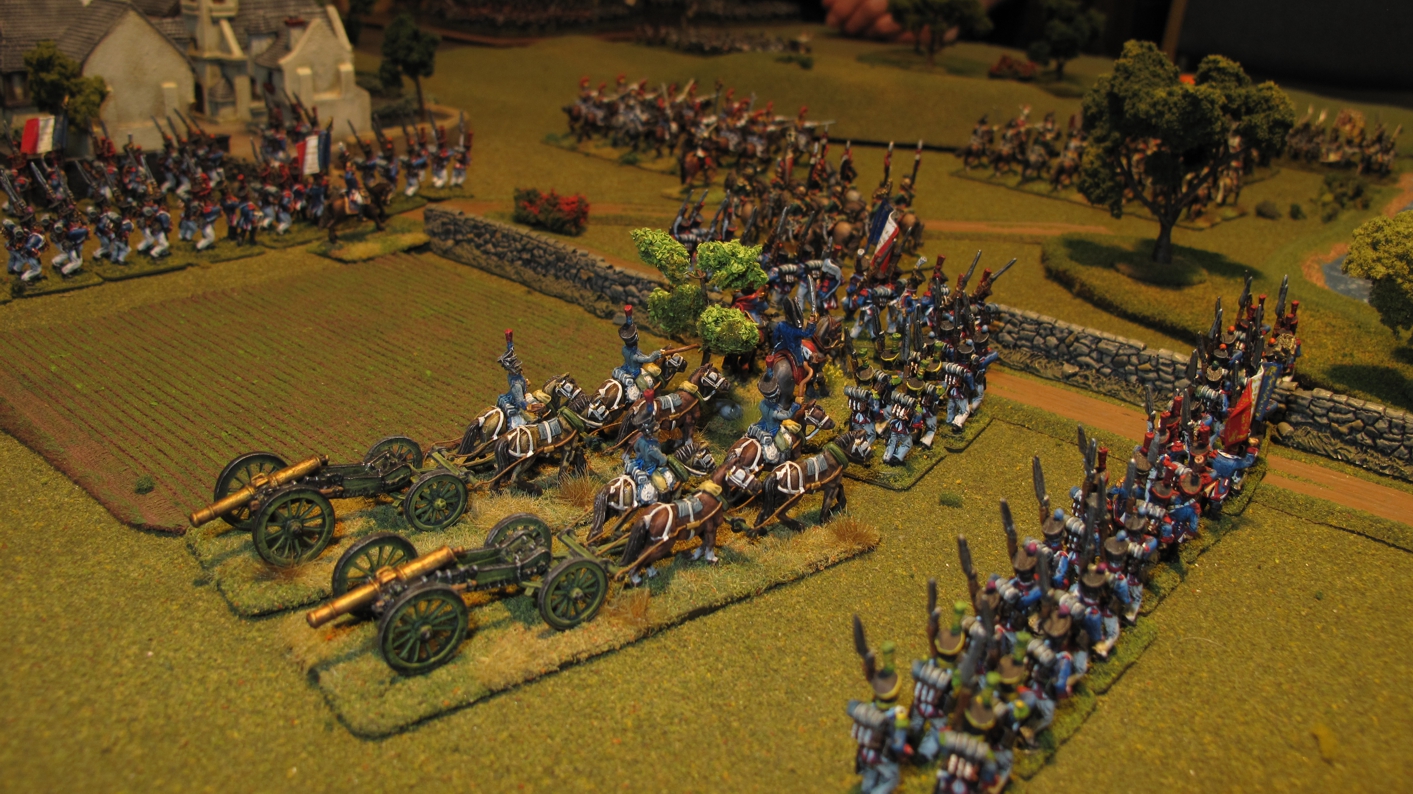
French infantry and guns deploy.
This battle found roles reversed, infantry now playing the supporting role to cavalry! This is the first clash of Cavalry early in the battle the Austrian Dragoons (the heroes of the battle on the Austrian side) take on the French Cuirassier, briefly defeating them and causing the French cavalry to retreat (they later take on the French Carabinier! who finally defeat them)
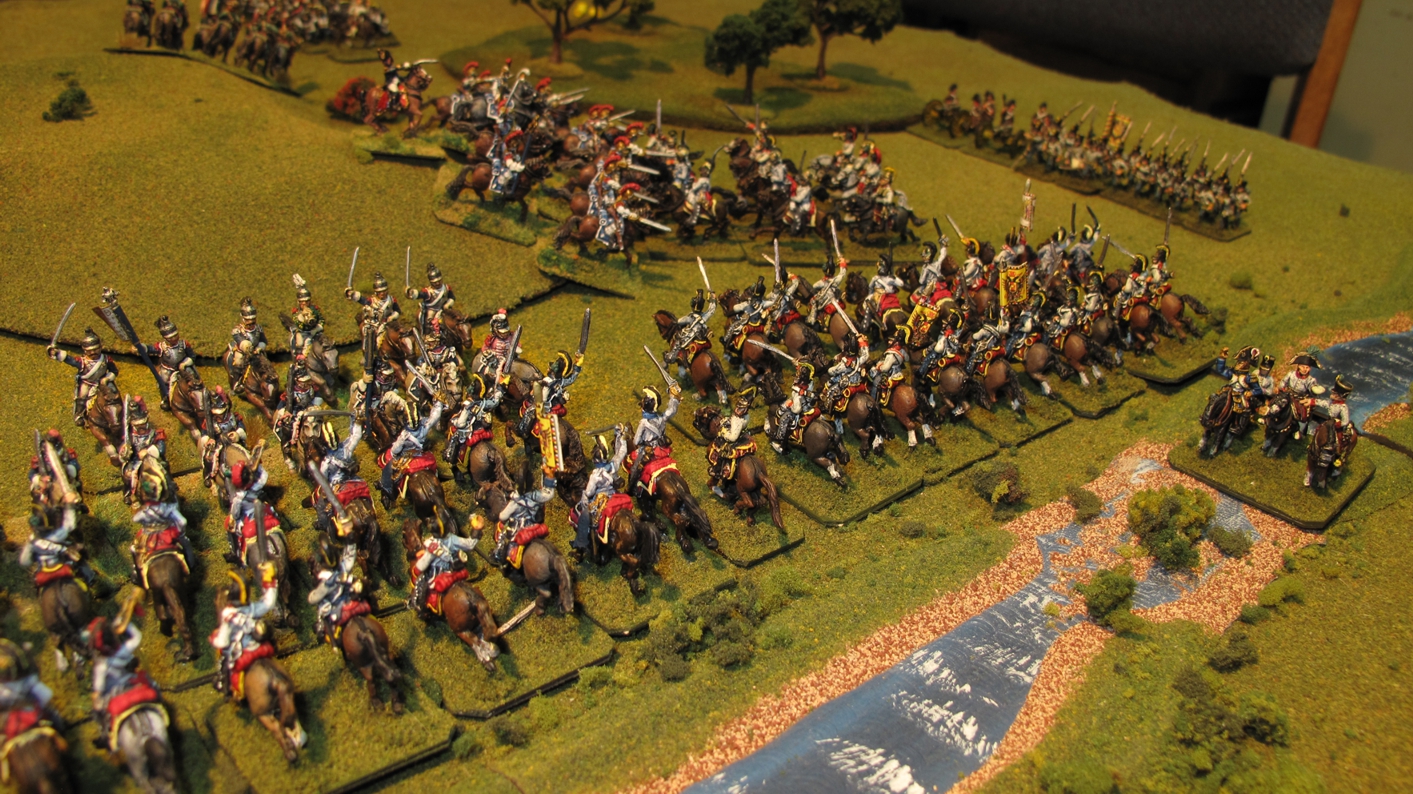
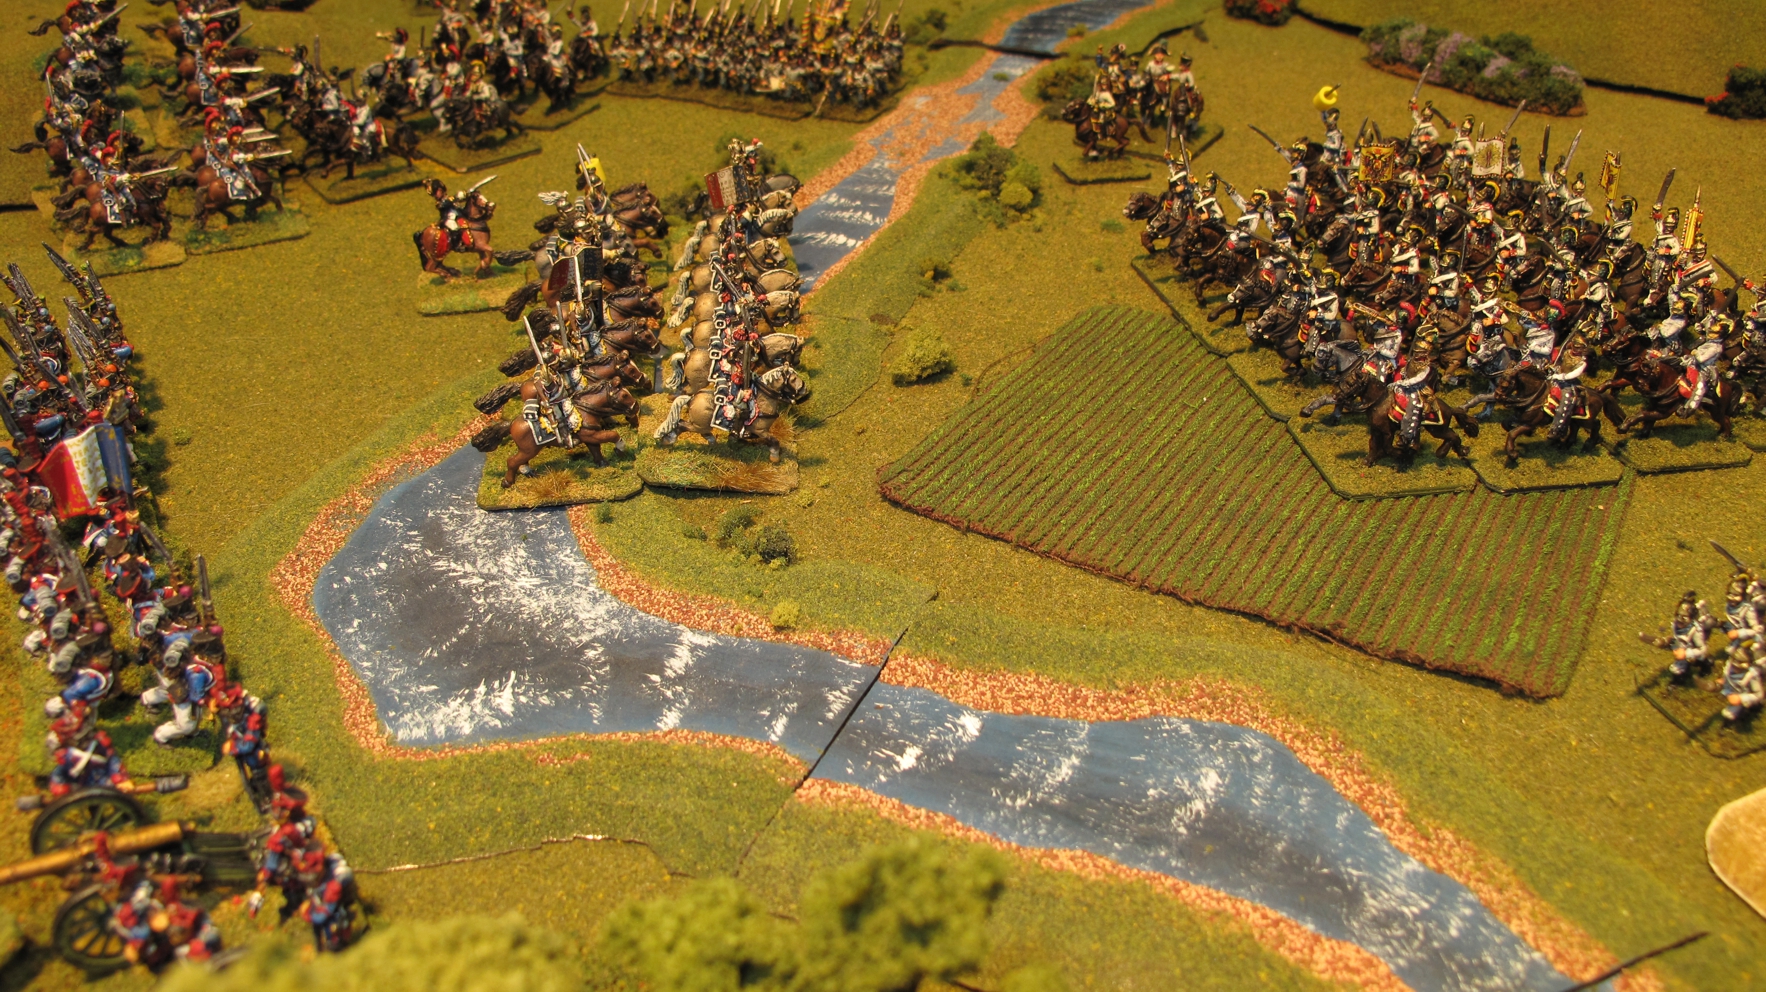
The high water mark for the Austrians with their cavalry crossing the river and pressing the French hard!
Lovely game! I recognize the excellent Wizard Kraft rivers in use, too!
Thanks Pete, I sure wish I could get more of the Wizard Craft but it seems they are long out of biz….I bought a ton of stuff at a Historicon years ago but cant find any after that.
Ah Grasshopper, you evidently missed the Wizard Kraft Kickstarter, which I promoted heavily on TMP and my blog:
http://blundersonthedanube.blogspot.com/search/label/Wizard%20Kraft
Some of the new stuff is really nice!
The plan was to ramp up his production to a more retail operation. This turned out to be far more challenging than he expected, and it took him a lot longer to complete his commitment than he planned. Overall, William found it more stressful than he wanted dealing with customers who were understandably worried about getting their product. After that, he more or less resolved to stick to just selling at local conventions. However, he has been known to sell to selected former customers, as long as they don’t mind being patient about getting their stuff. Jared, to whose gaming club I donated a large river set, did so, and got everything he ordered. If you are interested in getting more, I can give you William’s contact information .
Peter
Yep, missed it since by that time I had given up searching… I bought my stuff and quite a bit of it 1″,2″, and 4″ river sets as well as large 1″ and 2″ road sections. I got them way back in 2000? They had a website but it was only around for a few years and by the time I wanted to expand my collection they were gone. So yes I would love to have contact info as in my 30+ years of wargaming minis they are the top drawer as far as “produced” standard type terrain.
Bill,
email me: GonsalvoATaolDOTcom