“Escort Service” part 2

These will make a great unit for the “Escort” scenario in SAGA

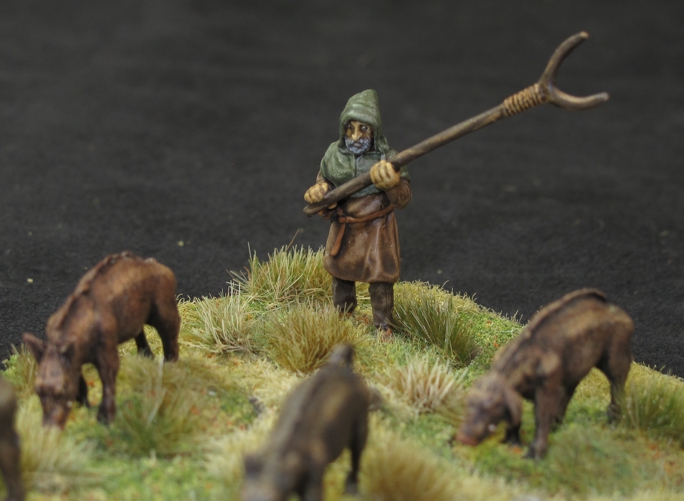
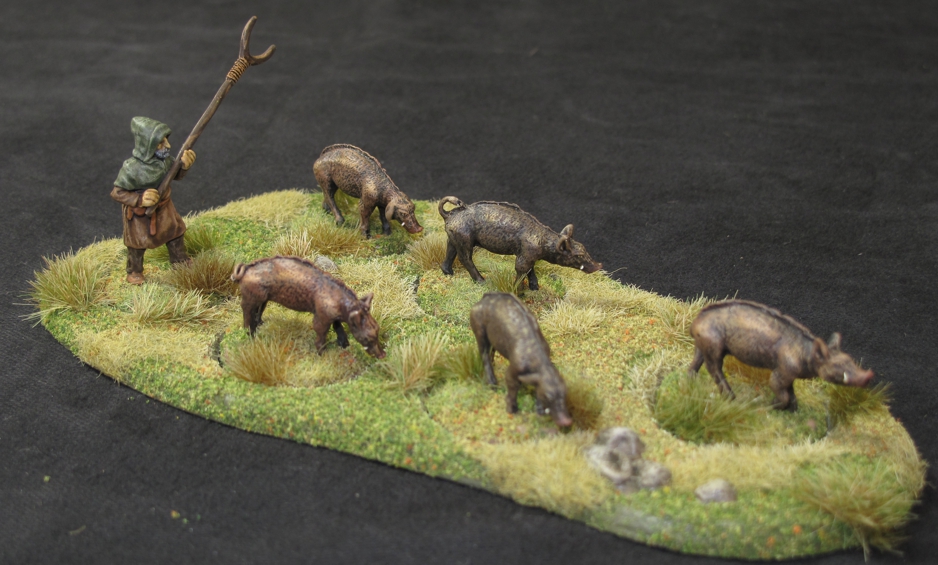
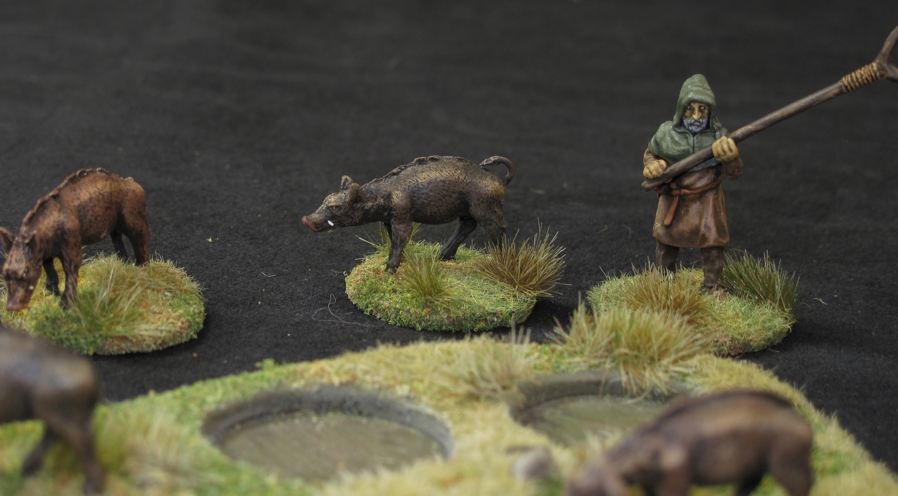
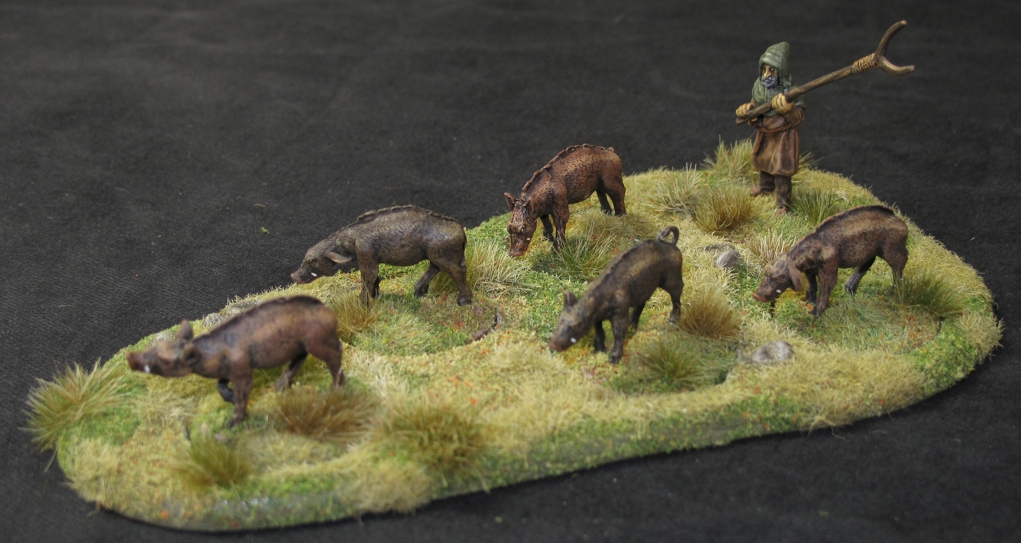
So for Part 2 of my “Escort Service” I finished up my pig herder and his swine. I also based these guys for ease of movement but tossed in a bit of a twist in that I did it like a movement tray. I did this because I wanted the ability to use these figure singly in other situations.

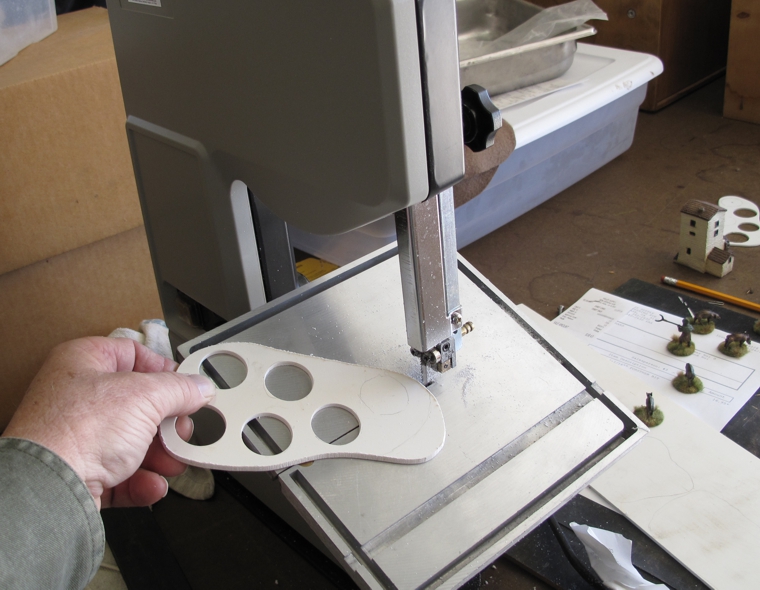
To make the base I used some sheet polystyrene the same thickness as my “LITKO” bases used for SAGA infantry, about 1/8 inch. I arranged the figures to my liking and then traced onto the polystyrene the area that would be the base. The base was cutout using a hobbyist sized band saw from Micro Mart.

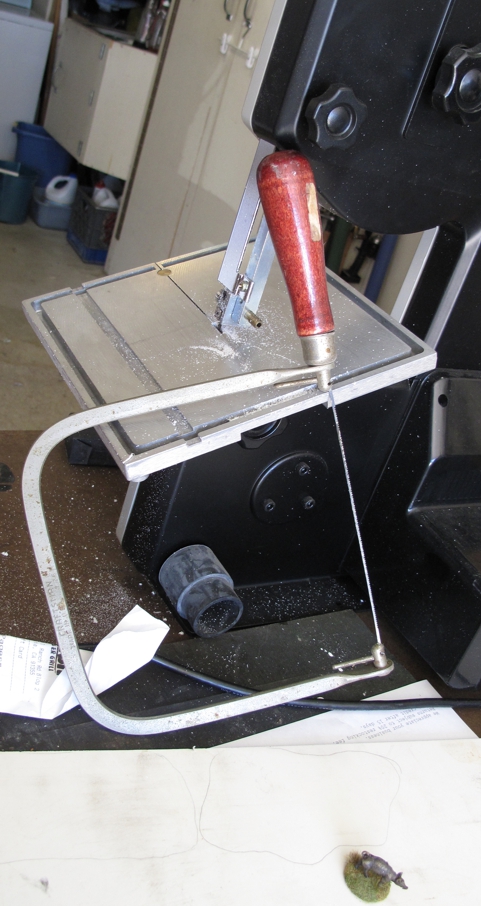
This is a great tool to have in anyone’s tool arsenal! If you do not have one a “cooping” saw will do the job as well, well almost as well! The cut was done with a sloping angle edge to make it blend better with the terrain.


Next a sheet of thin magnetic sheet stock was cut in the same shape. This will later be contact cemented to the styrene base to both hold it to the storage drawer’s metal lining and help hold the figures in because of their magnetic bases.

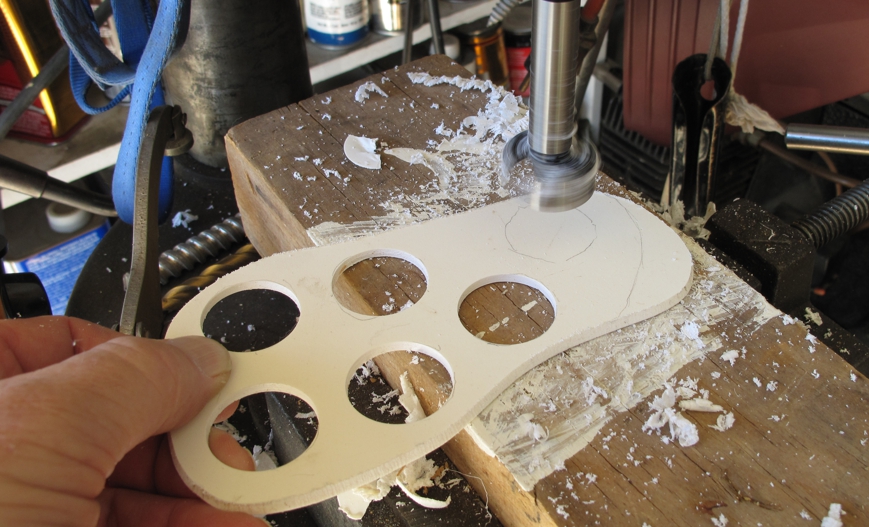
I arranged the figures on the base again and this time traced their out lines onto the styrene in preparation for cutting the holes the figure will sit into later. My figure bases are round and 1 inch or 25mm. I used a 1 ¼”  “Fostner” bit in my drill press to cut the holes. A “Fostner” bit cuts perfect round holes not possible with a regular drill bit. Not cheap but you will only ever need one and used for cutting plastic will last your lifetime!


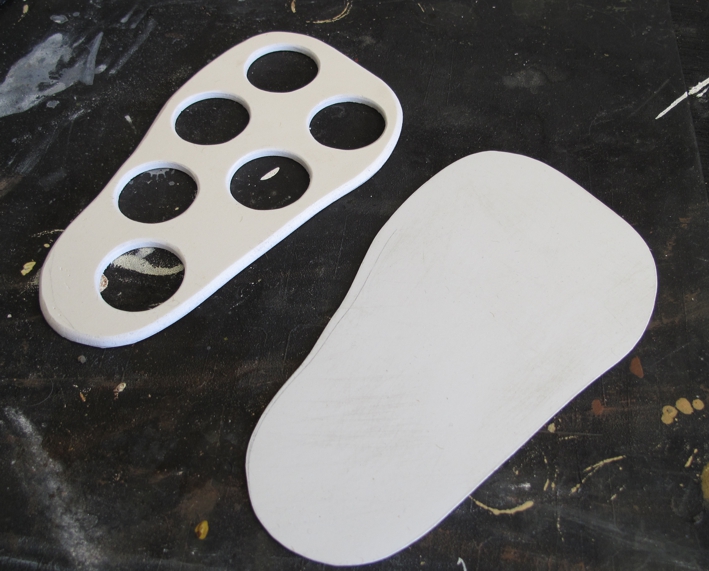
Once the holes are cut the pieces are assembled using contact cement and with a bit of finish sanding is ready for finish decoration. I use a recipe of Durham’s “Rock Hard” as a base material in landscaping and in 20 years found no problems. Mix it 80% with 15% white wood glue and 5% water. Just experiment with this formula until you get it right. It should be the consistency of porridge, easily spread on and a bit flowing. As it dries u can push it around for a natural unevenness. The glue is important since without it the “Durham’s” may chip or flake with table use.

Even though the individual figures are removable with a little effort you can make it blend very well and hardly noticeable in the base.

Once again I get wrapped up in the building and forget the pictures but I think you get the idea and feel free to ask question in the comments. I think it came out great and this now finishes 2/3rds or the “Escort Project” so see you soon for the last installment!


Building units for an “Escort Service”

I always like to set “my” minis apart from the rest of the pack, go the extra mile. I enjoy when gamer’s say “are those so and so manufacture?” because they look a bit different. I do this in a couple of ways, painting, basing, and customizing the figures themselves. I like variety in my figures and sometimes a line doesn’t have enough different poses for me so I’ll grab some sculpting putty (two part green stuff) and have at it. Now I’m no sculptor, I don’t do whole figures, but I’m pretty fair at cutting models up and customizing them.

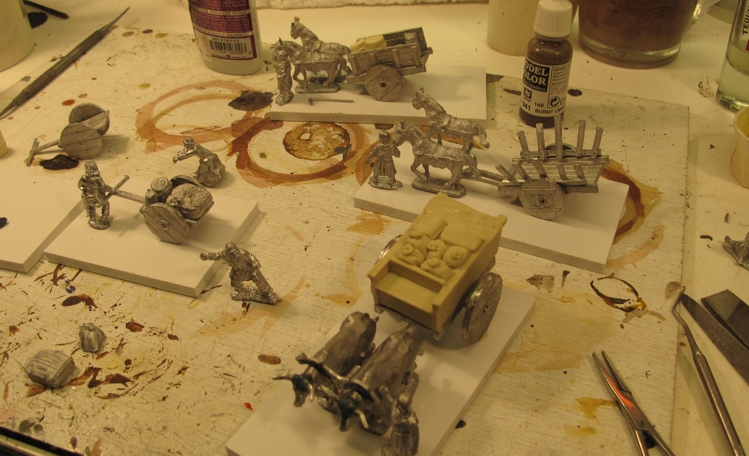
I’ve been trying to clean up some lose ends on the work bench and one of the projects sitting on the shelf for a while has been some Dark Ages civilians for SAGA scenarios. For the “Escort” scenario I needed three objective units and I had the minis for several carts, and a pig farmer and his pigs.

The collection of figures and carts getting prepped for “Escort” duty!

Most of the minis were from Gripping Beast and they are great figures BUT I was not satisfied with the way they would appear around the carts. I just didn’t think the poses were quite right; I wanted them to really appear as if they were pushing/pulling cart. There was also no wagon driver…. This led to them sitting half done on the shelf.

After looking at the project for about a year while I painted a few other SAGA warbands (Normans, Vikings, and Anglo Danes) I decided to do something about it. I decided that there was no way around it I was going to have to create a sitting driver. Now I’m no sculptor but I’m not bad at taking one figure and modifying it to be what I want, in fact that’s one of the most enjoyable aspects of this hobby.

I have nearly all the Foundry Vikings and consider them the best Viking line available. I have quite a few still unpainted and after going through them I soon found a likely candidate for customization. I wanted to have;

  1. One arm using a whip.
  2. One arm holding reins
  3. Legs easily modified to sitting position.
  4. No armor.

I found a great candidate and prepared for “surgery”

Arms were almost right to start with but the legs would be a lot of work.

The Figure was wearing a sword and that would have to be removed.

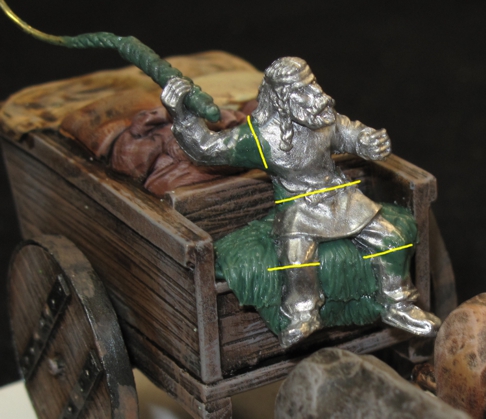
Foundry uses a good quality metal in their figures and cutting and filing are very easy. After studying the figure for a bit I determined where and what kind of cuts were needed. Some cuts like the arm were completely through but most were wedge type allow removal of a section to allow bending of the figure into the proper pose. After the cuts and bends the areas were made to look right with Kneadite “Green Stuff” sculpting putty. Cutting, bending, and lots of filing were done to the rear buttocks and leg area to create a sitting figure. To help “blend” the figure into the seat a sheepskin seat cushion was sculpted from more green stuff

Yellow lines show cuts made.

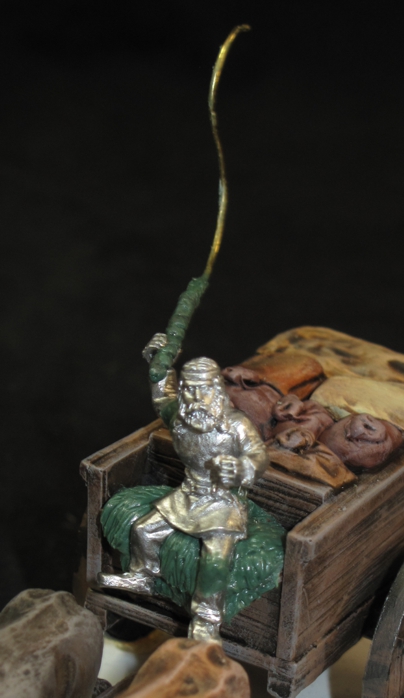
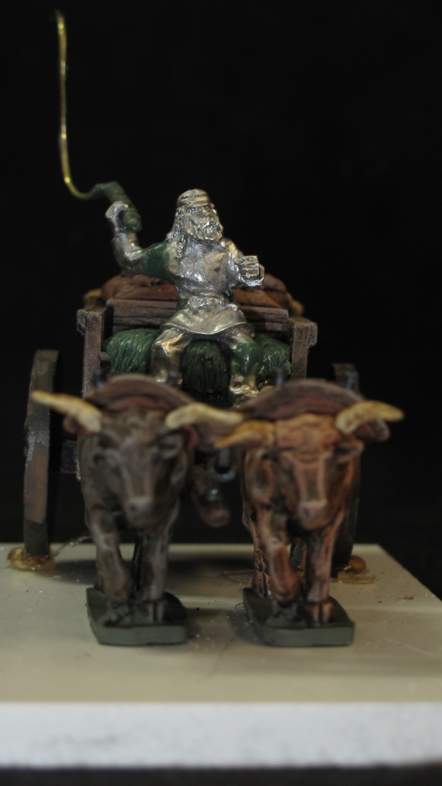
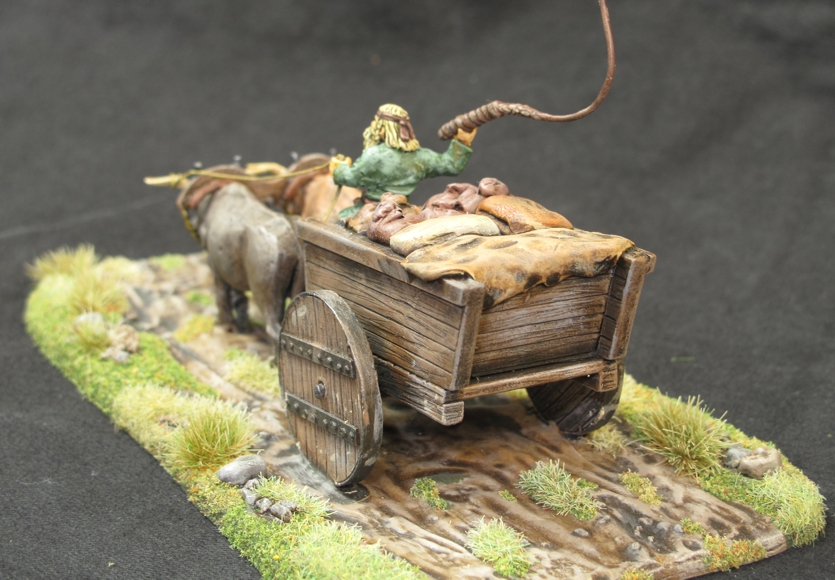
The figure also got a whip made of brass rod and a “Greenstuff” handle in the arm that normally held a spear. The green stuff was give a day to cure and primed and painted.

Brass whip really gives life to the figure!

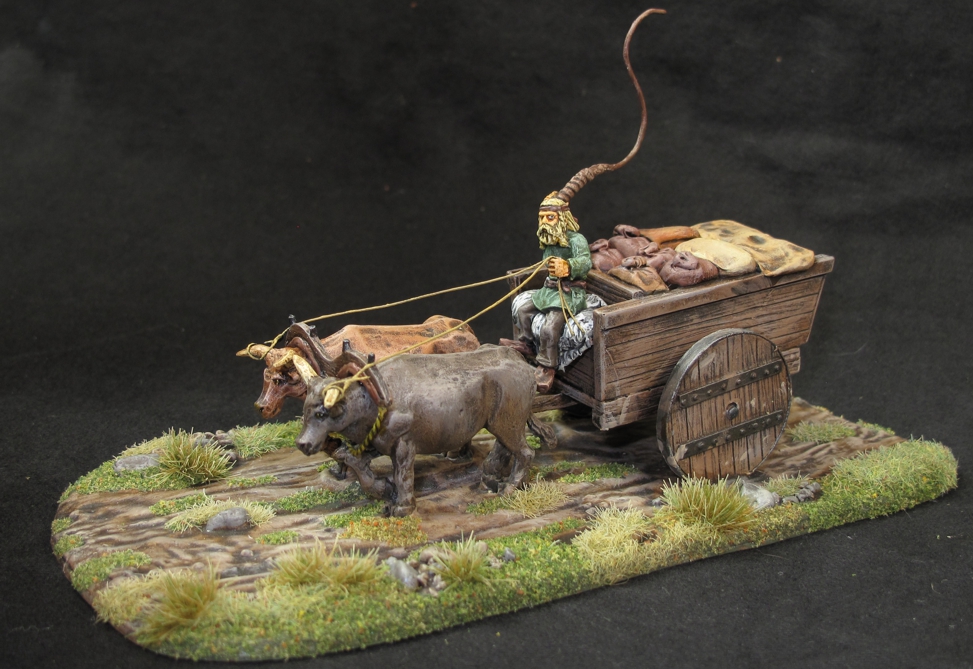
The cart itself had already had work done to it to make it look better and have more detail. Since I wanted to have the driver holding some reins I wold have to create them and make it look believable. Very little real evidence on rigs from the period really exist but ox carts still in use today use much the same systems so a believable modification was worked out.

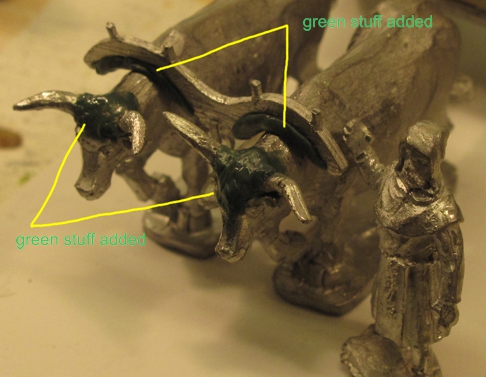
Sculpting putty was used to create pads on yoke as well as blend in the area where the horns were glued on.

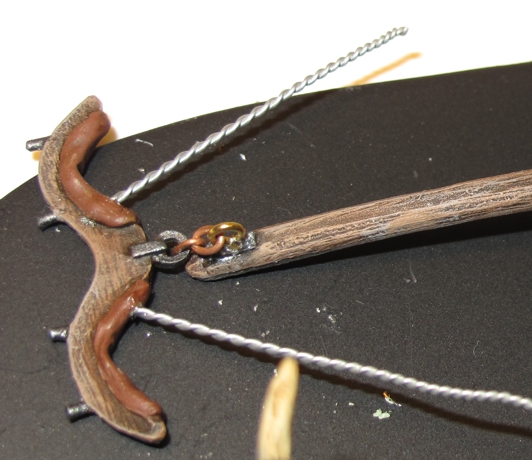
I keep a lot of small cheap chains bought at a local craft stores “bead” section and used a few links to create the “iron work” as well as some small aluminum wire twisted and painted to look like rope.

Do you need this kind of detail? “I do!” it’s eye candy! The rope wire will be bent under the oxen’s necks, cut to length, connected, primed, and painted.

The white “centra” board is a thick plastic stock that later will be carved and customized into the base

Well it’s about here in most of my projects that I just get sucked to finishing them and forget to take pictures but its mostly done anyway. I did the reins, the base, and few little touches. There is still another figure to do but he will come later. Here’s a few closing shots of the finished project….enjoy! If you like it please leave a comment, it keeps us going!

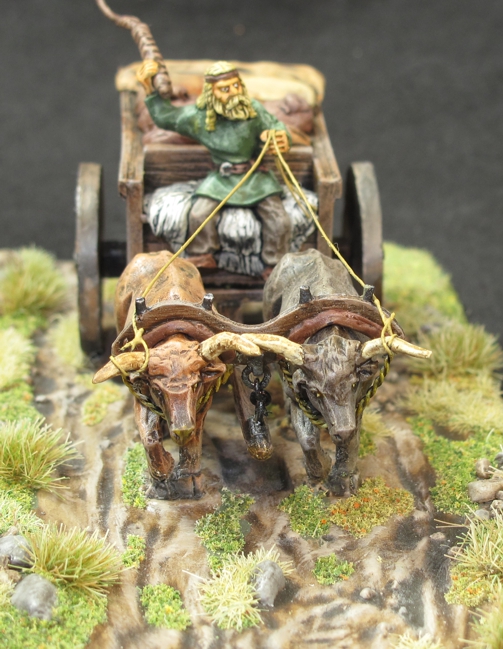
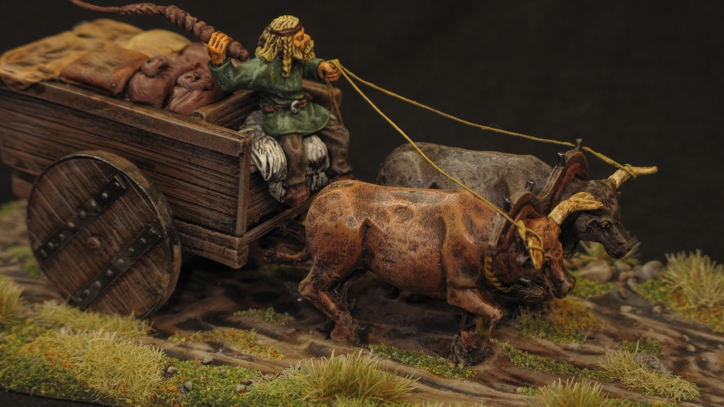
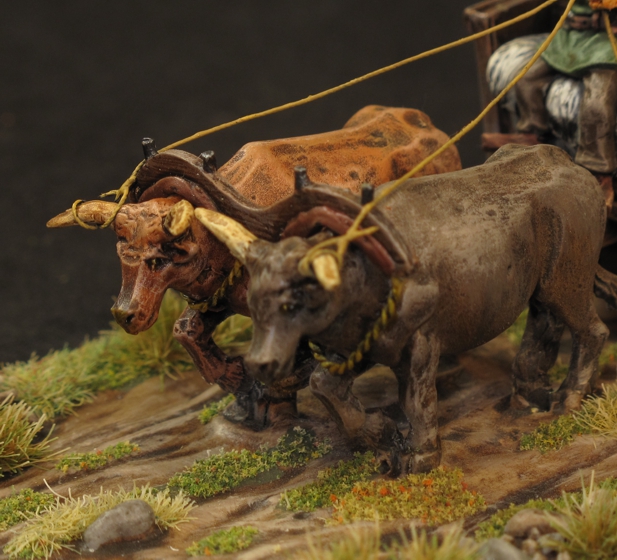
The iron yoke work shown earlier can be seen here in it’s finished state as well as the base work. Ancient dirt roads looked much different than the ones used by cars today.

I think the finished yoke work came out nicely. the reins are simplified for project, but most just involved turning an animals head in the direction you wanted to go.

Much of the baggage was created from “Sculpy” modeling clay, as well as the tarp.

The reins are thick thread painted as rope and a hole was drilled in his hand to allow pass through. I really like how the figure came out. I not sure how the figure feels being taken from “warrior” status down to “cart driving farmer”?

Well it was a fun project and one of those pieces of “eye candy” that makes the battlefield come alive! I have several more projects in the “Escort” series and they will follow shortly.

Table ready!


“Dogs of War” battle reports coming

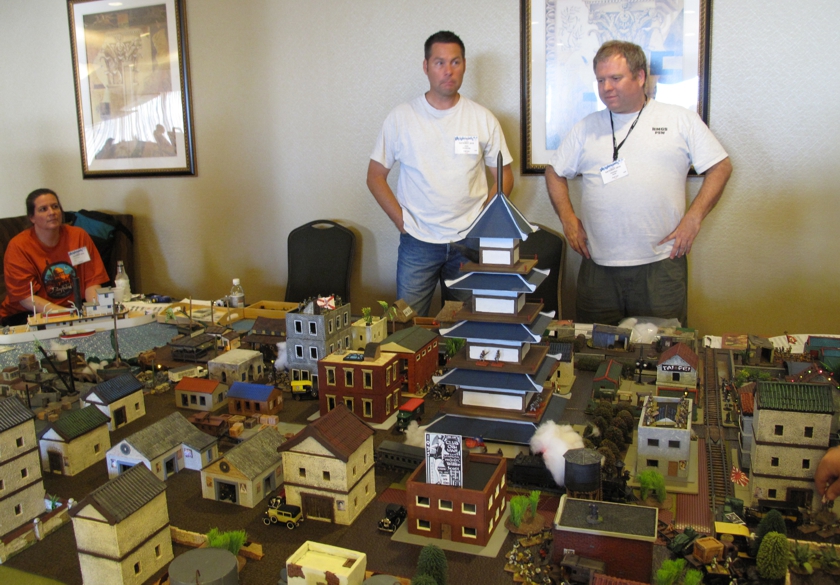
Chris A (left) and Chris S (right) running one of the “Dog’s” mega convention games “SHANGHAI”

My “Primary” gaming group the “Dogs of War” will soon be posting their Battle Reports here on my site. Chris Snell the great patron of “The Dogs” (he devotes part of his house to us) has for many years sent out weekly emails covering what has gone on and what is coming up at the club. Over the last year we have been refurbishing the club and I thought it might nice to also have the weekly battle reports Chris does get a facelift as well and giving Chris the ability to post them here with pictures would be a great way to do this.

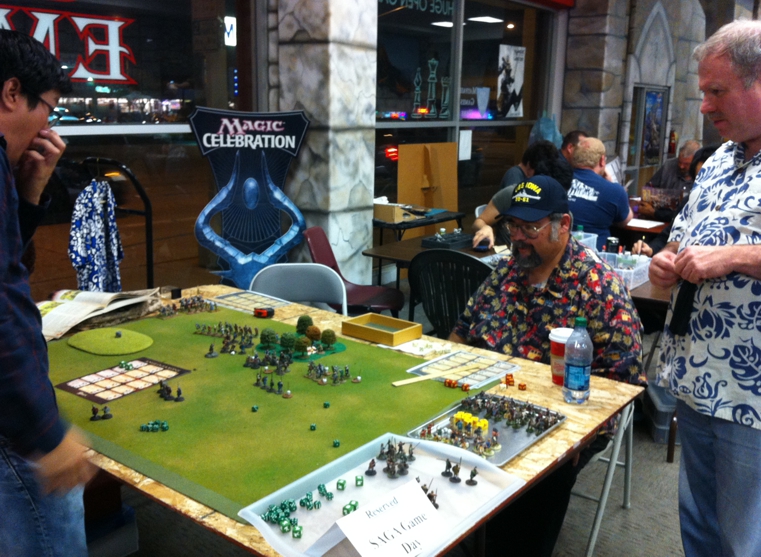
Chris Snell (standing right) helps run the SAGA event at Games Empire. Seated is another Dog, Frank V.

A little bit about Chris…. Well Chris has been one of the original “Dogs of War” since the beginning and also probably the most active. In fact I can’t remember any “Dogs” game or activity that he has not been at!!! Chris has put himself in the forefront of all the projects and his efforts contribute mightily to everything the Dogs have ever been, done, or hope to do. Without Chris’s patronage the “Dog’s” may well have dissolved long ago. The “Dogs” are a great bunch and they all contribute much to the whole, but in any group there are always a few who provide the backbone that others build on, thanks Chris.

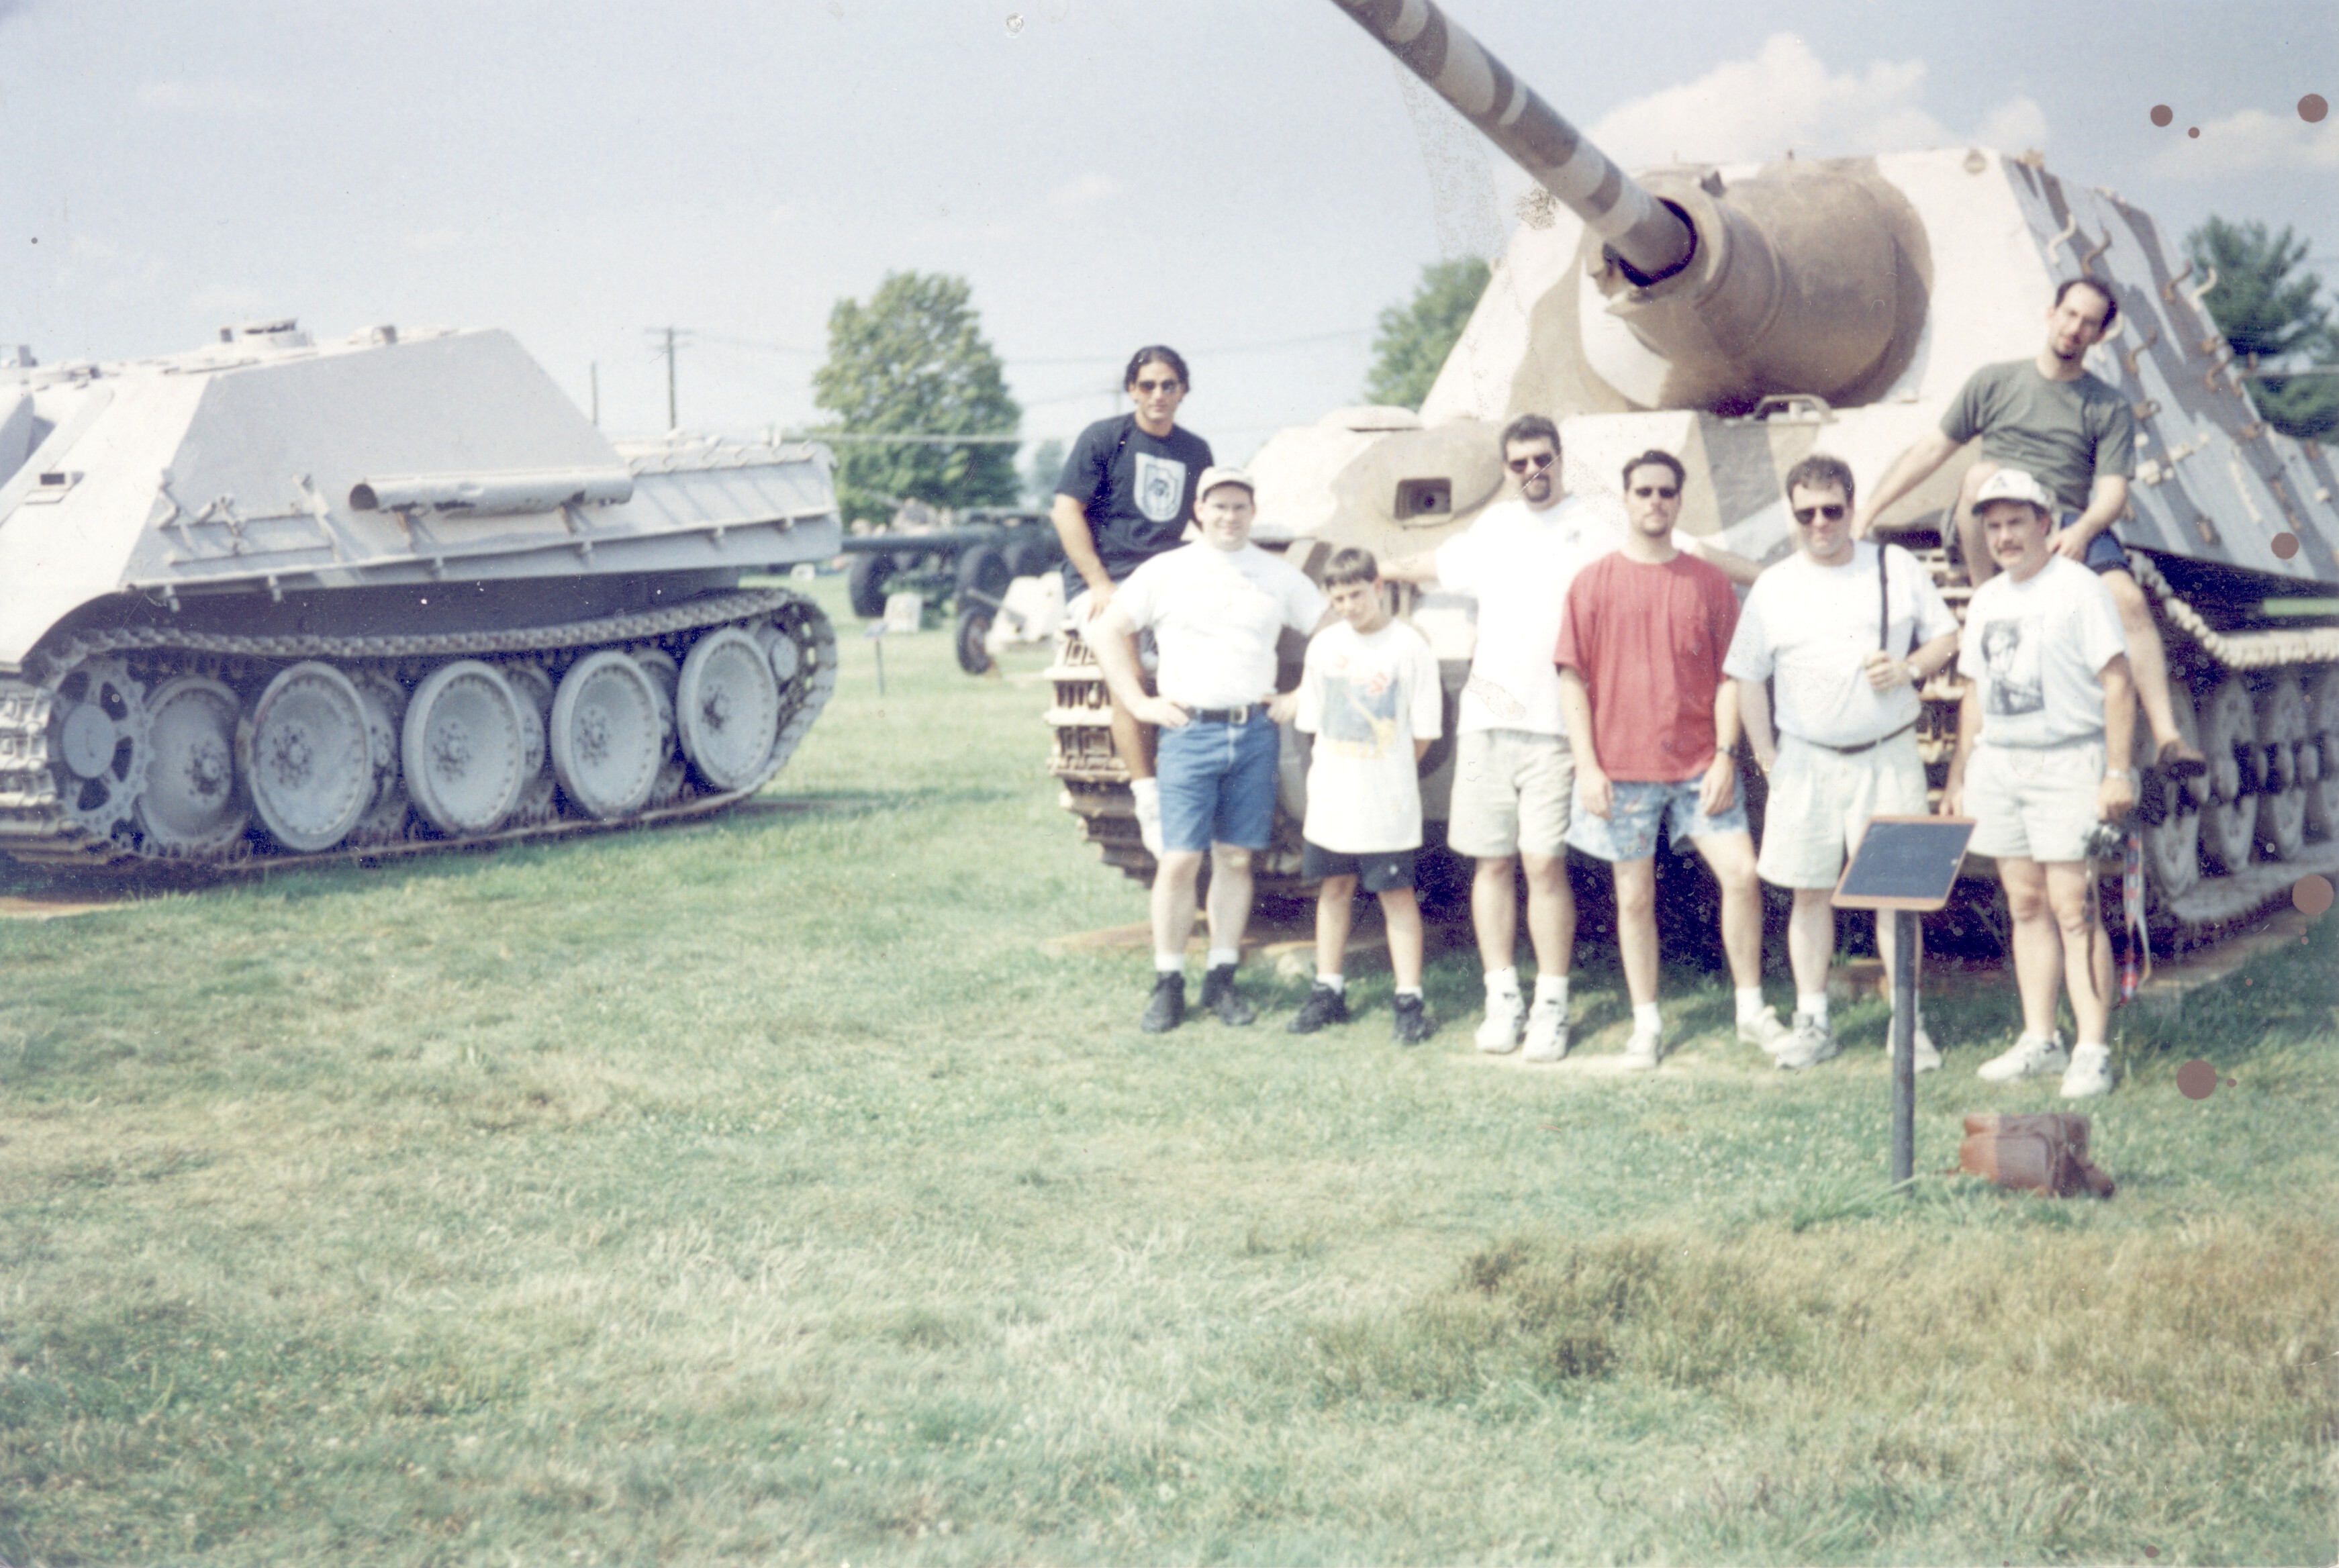
Side trip to Aberdeen Proving grounds, Historicon 1999? Joe, Dave L, Joe’s nephew, Tim D, Chris A,Chris Snell, Bill W (me) and sitting on fender of German Jagd Tiger is Ron Green.

So you will soon see Chris’s weekly reports appearing here! Yea Chris! I encourage all the “Dogs” to subscribe to this site and receive notifications when these reports go up. You can simply scroll down the main page and towards the bottom of the right side column you will see an option to enter your email and receive notification of new articles and updates on the site.

So welcome Chris and “Reports from the Pound”

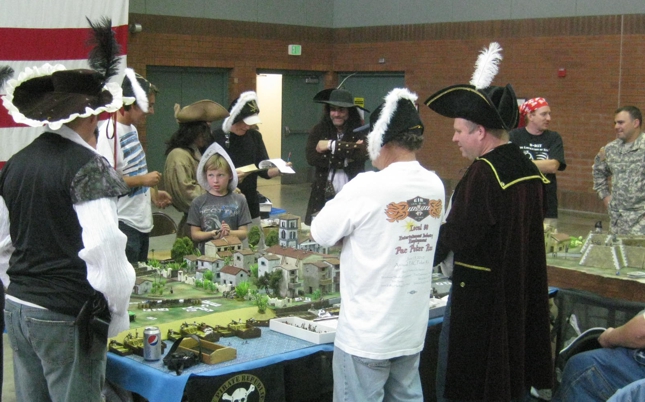
Chris S (in tri-corner hat and long coat) helps run the Dogs pirate game “Maracaibo Mambo” at a past HMGS/PSW convention.

Storage Wars

Over the years my local gaming group in Southern California the “Dogs of War” have amassed a huge collection of miniatures, terrain, mats, and all manner of gaming material that when not in use has to be stored somewhere! When we moved from our long time clubhouse in Burbank (thanks to Danny’s garage) to our present digs (the bottom floor of Chris’s house) we found out just how much stuff had accumulated!!! well in the years since that move it has grown by leaps and bounds. Some of it ended up in a few storage units but most went into Chris’s garage and got to the point that it was near impossible to find things or get a car in it. The main gaming area had reached gridlock and the place was being suggested for an episode of “Hoarders”

The group put its collective head together and decided that it was time for a massive clean out and refurbish! I came up with a bit of a plan and this started with organizing the garage and building proper shelves for storage. The current shelves were plastic and groaning under the weight of several tons of lead! When newcomers visited the club and were asked if we had figures for such and such period the response was always “sure what scale do you want to play in” So it was decided to build strong shelves that would both hold the weight, provide additional space, and survive the earthquakes our area has from time to time!

Since I have built and out fitted trucks for the “Movie Biz” for many years the task of organizing this was my job, labor was pulled from all the core club members, and the material bought and paid for by selling off un-needed miniatures and terrain from the clubs pile.

The first stage of the project was to clean out and redo garage and this is a short video done over one of two weekends this stage took.

Storage Wars

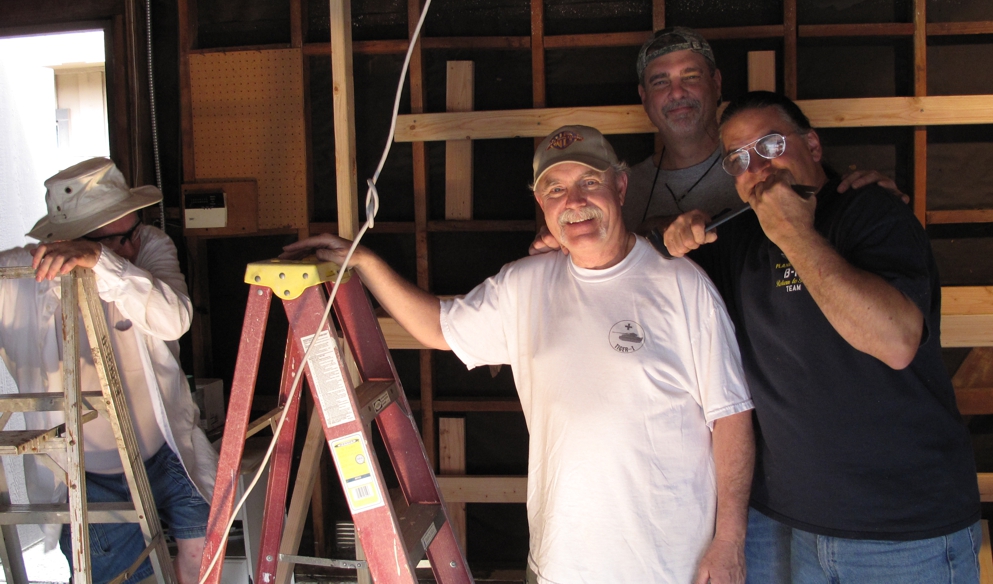
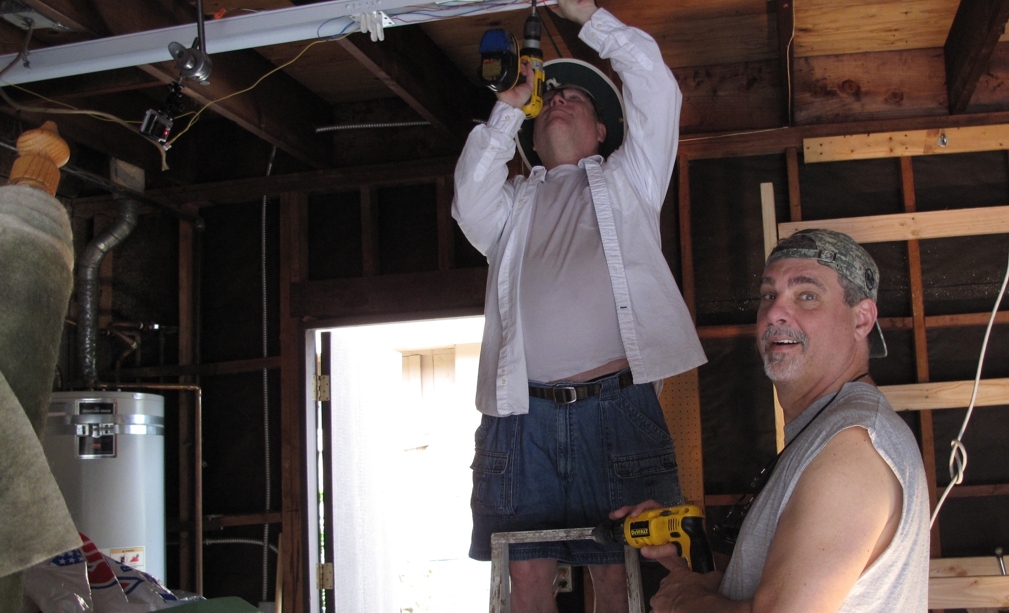
Chris S (on ladder) Bill W (me) Tim and Joe (adjusting my neck!)

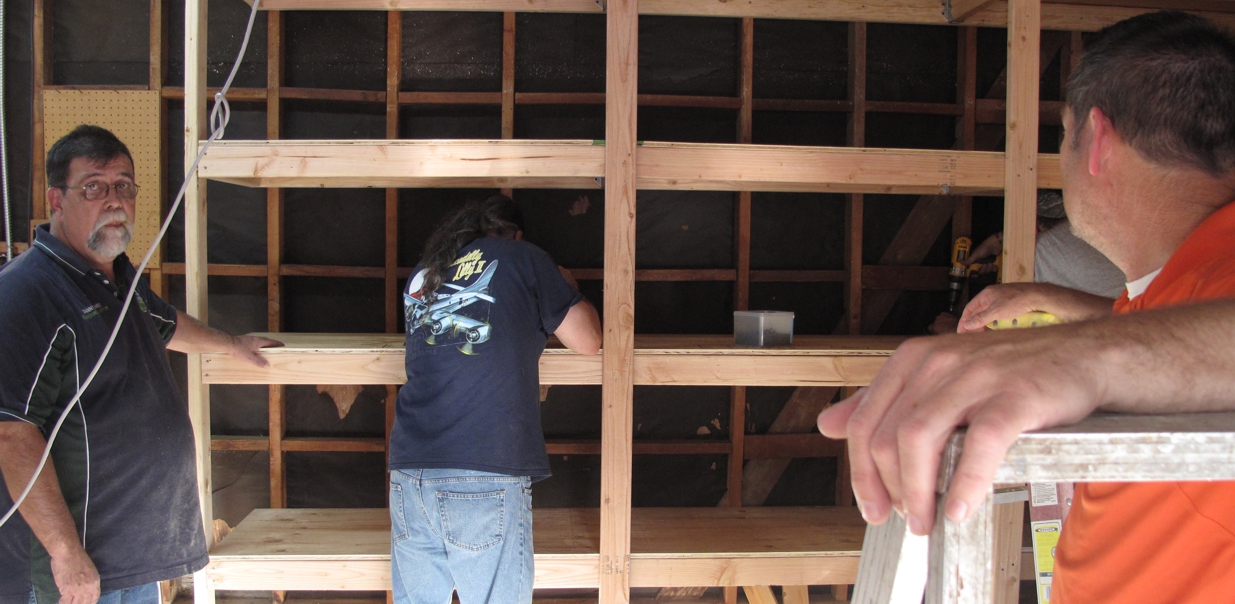
Are these really shelves? or bunk beds for Chris’s “indentured” painters?

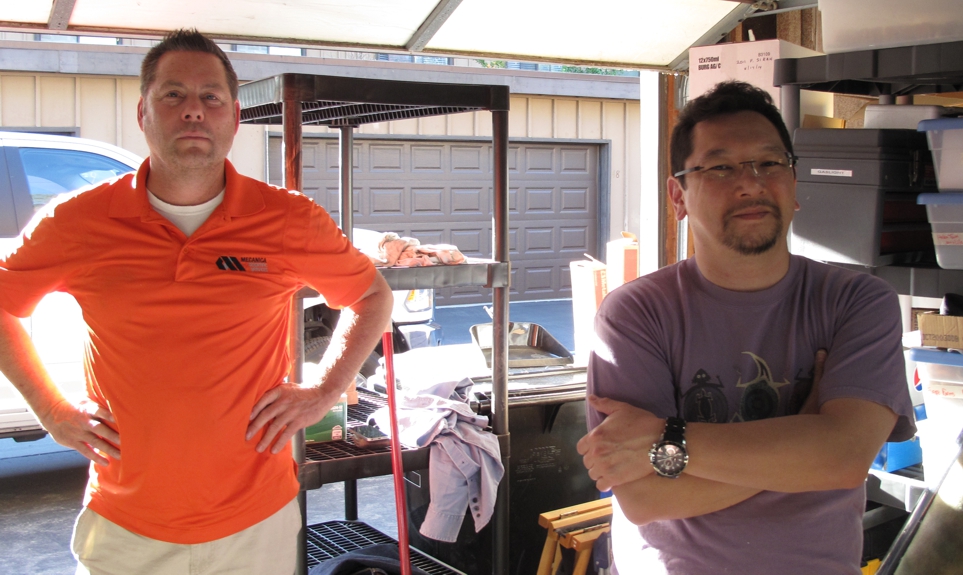
Danny,& Joe, and Chris A

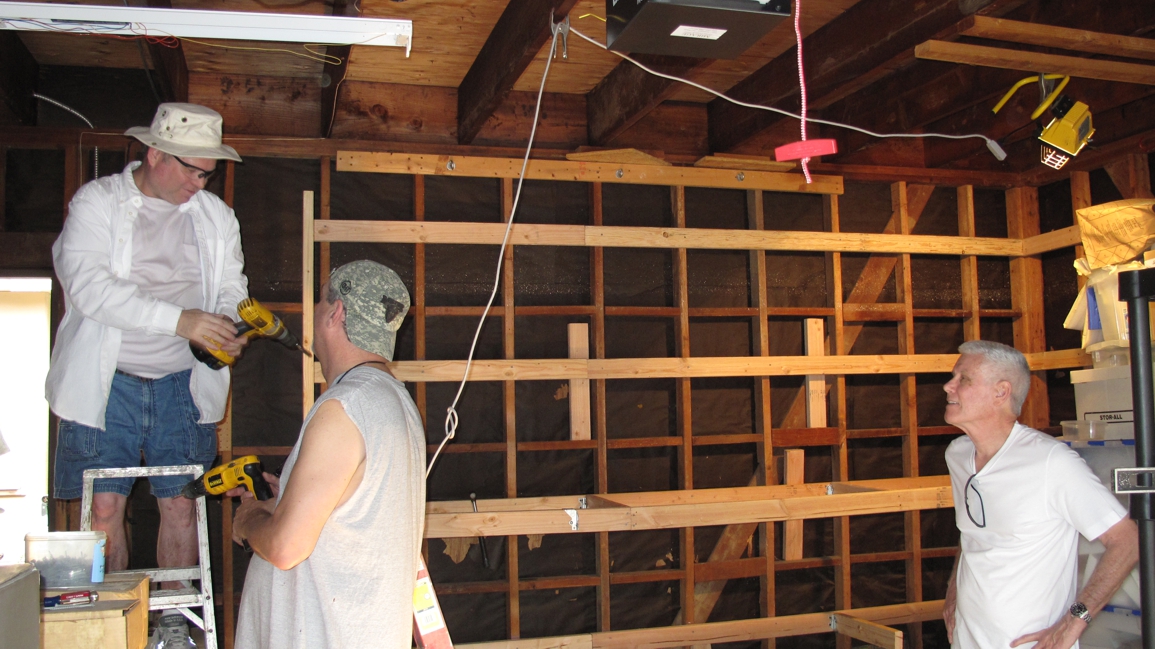
Chris and Tim bring new light into our lives!

Chris & Tim& Steve G

Chris A & Galen


Total Battle building project

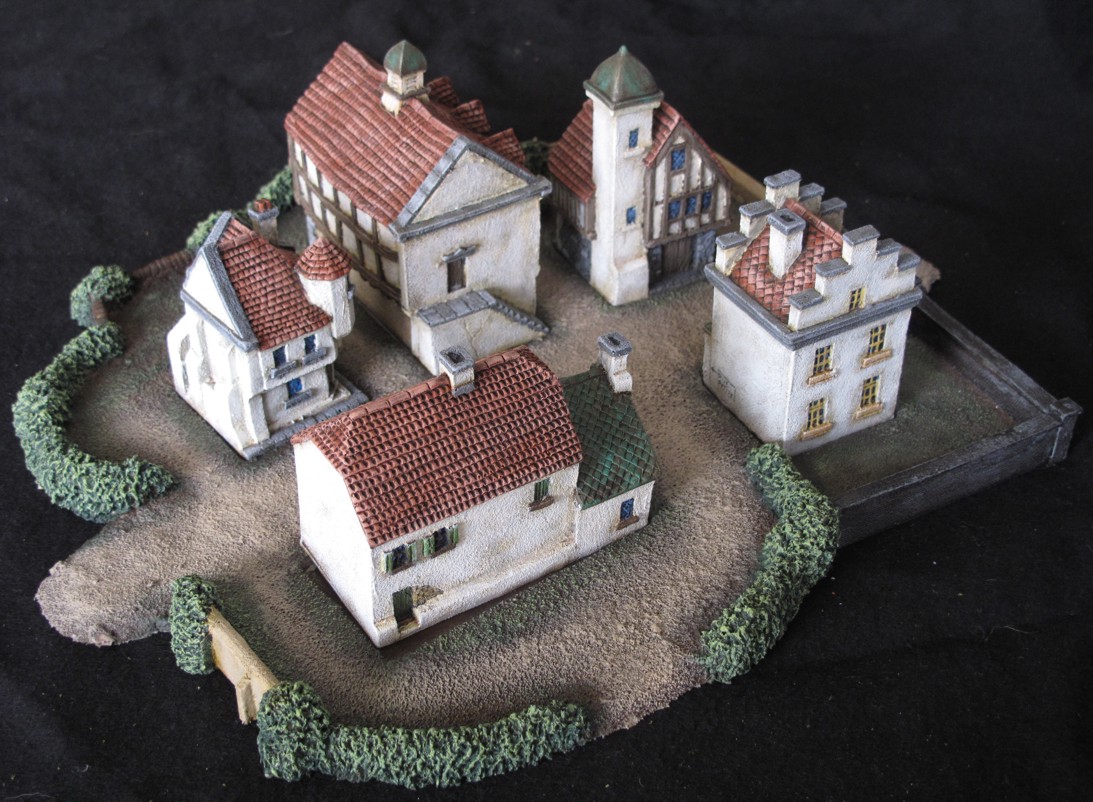
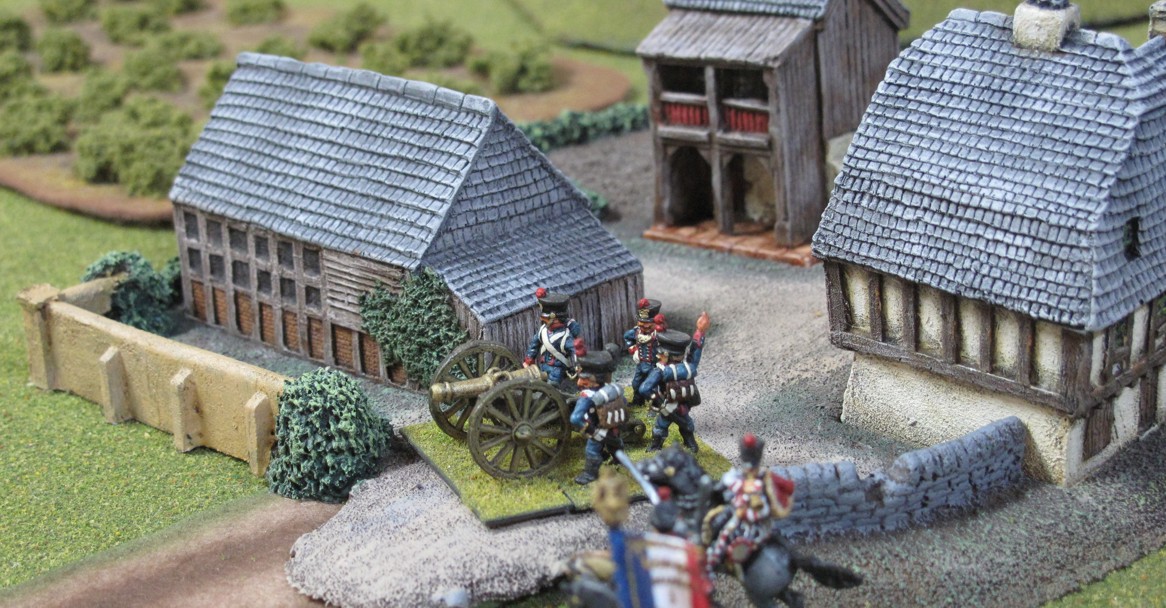
I have written a few articles on the TOTAL BATTLE miniatures buildings and how much I liked them. Well I still like them and everyone who plays in my battles echos that along with my decision to go with 10mm buildings in 15mm games for a better look when representing towns and villages.

The slightly smaller 10mm buildings allow more buildings using the space that would only allow two or three 15mm buildings

Over the last year in between other projects I have been painting these buildings and occasionaly transporting them to games not at my place. I quickly realized that to prevent dammage to them I needed to come up with safe and easy way to transport them.  For years I have made an effort to bring innovation to wargaming with miniatures, especially when transporting miniatures and terrain. I dare say some of the things that are common today in the miniatures world where developed by myself and a few others. Bold statement? Yes but when I started miniature gaming people were slapping 3-4 colors on mini’s, gluing them on some painted cardboard, and transporting them to games in old pizza boxes!  Times have changed!

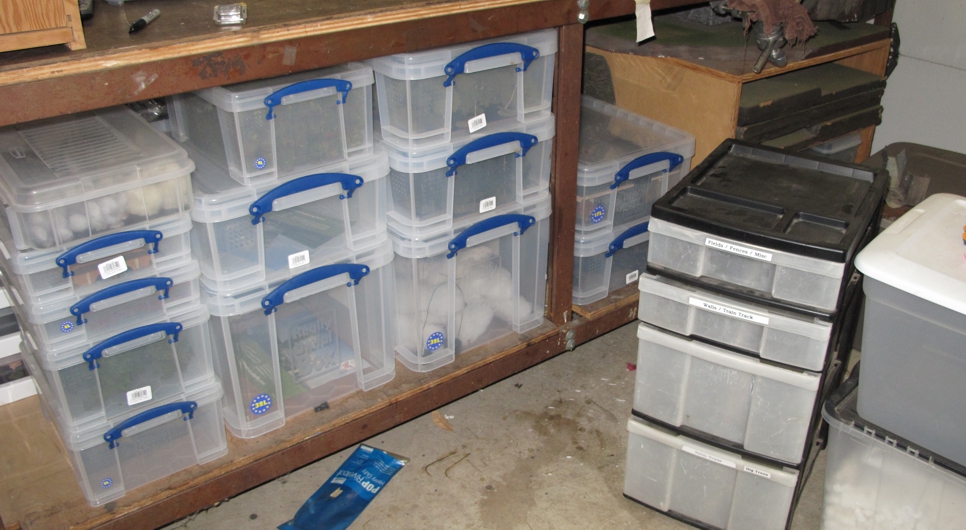
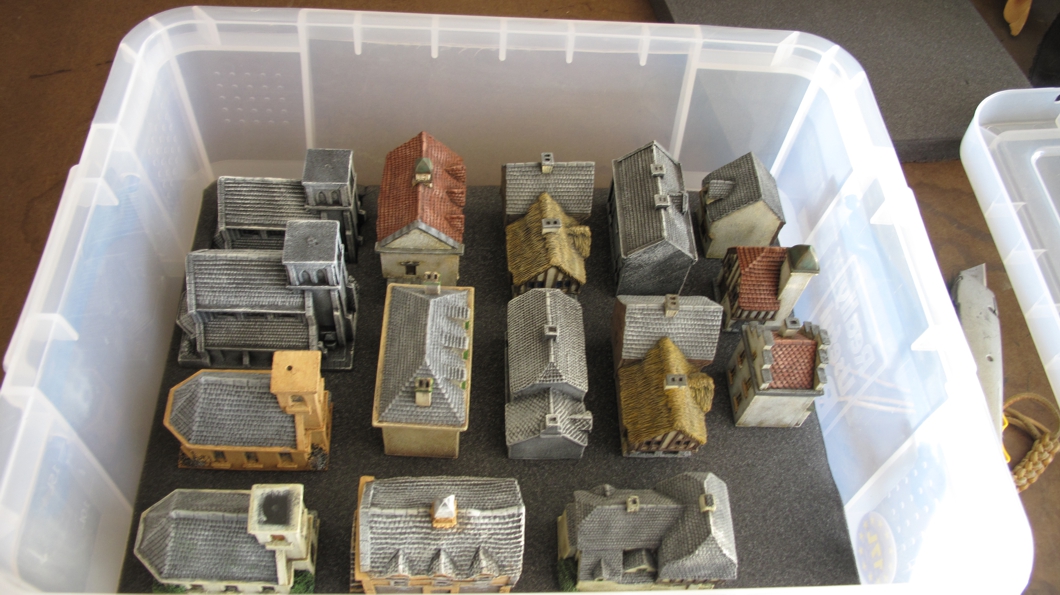
So this article is about finding a way to store and transport all my lovely Total Battle miniatures buildings easily and with out damage!  Recently I decided to change the way I store terrain at my place because overtime I found much of my terrain was getting dusty and dull looking even though it was stored in those multi level plastic storage drawers. The drawer system did a pretty good job but over time dust would still filter in especially since my gaming area shares the same space as my shop and terrain making area. The drawers were also not that convenient for transport. My career in the movie business had given me a lot of experience in storage and moving of equipment safely so I’m a bit of a stickler when it comes to this. I want a system that works quickly, easily, and most important does the job. I searched long and hard and finally settled on a plastic stacking box system from “the Really Useful Box” system. The system is readily obtainable, strong, and economically priced. In the US they can be found at Office depot and Office Max as well as tons of internet sellers, I’ll list the common sizes I use at the end of the article but the one used for my buildings box is the 17 liter box.

The beginning of the “new” system. Old drawer storage on right and new “Really Useful Box” system on left. Easy to see and grab what you need and the stuff stays clean!

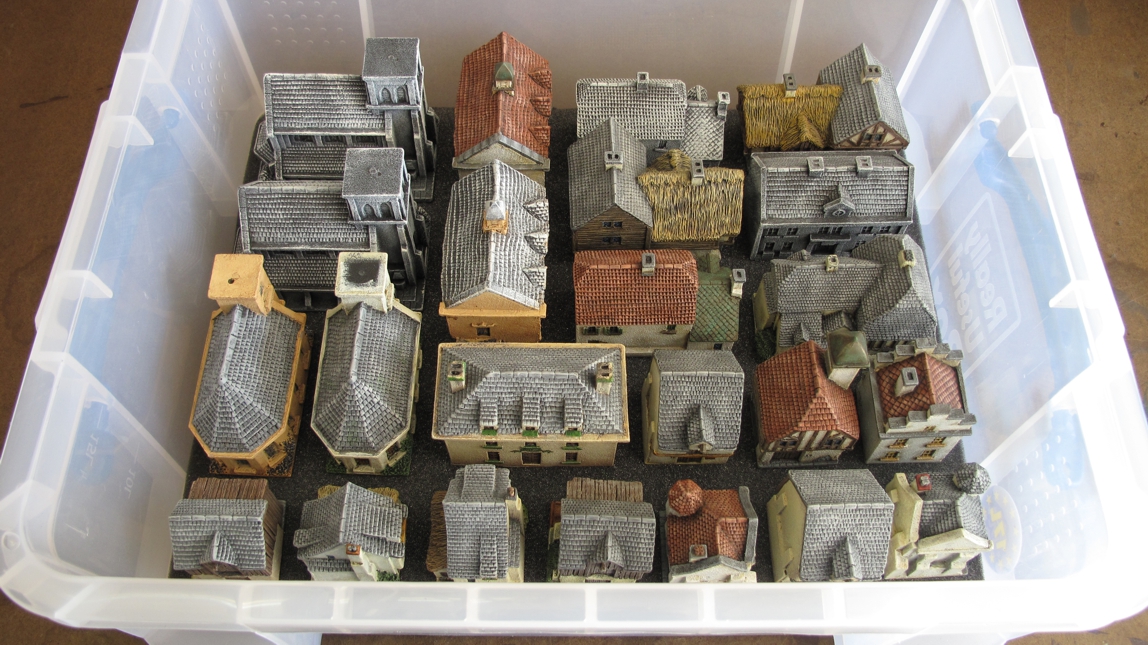
Over the last year or so I have been replacing my “plastic drawer” system with the “Useful Box” system and had reached the point of finding a good way of storing my Total Battle buildings in one. I wanted to keep all the buildings in one box but I also did not want to use too big a box (length & width) so I settled on one that was smaller but deeper. This box would to hold most of the buildings in it on one level but required me to “create” a second shelf in the box for the balance of the buildings with a bit of room left over for a few other terrain items.

The next step was to figure out how to keep the buildings organized and secure in the box so to prevent damage as well as easily see that everything was there (useful when picking up after a convention/away game when your tired and may miss something. My first idea was to use some powerful Neodymium Magnets in the base of each mini and then line the box bottom and shelf with thin steel. This required drilling the base of a building and then gluing a magnet or two flush in the bottom. It worked ok but not perfect. If there was a jar or a lot of vibration to the box the buildings could shift and it would be a bit of work to modify all the buildings….I didn’t like it. Next idea was to go back to another tried and true method we use for camera gear and other delicate gear, foam cut to size. This too required some work but in the end was a better system and not that hard, it was the way I went.

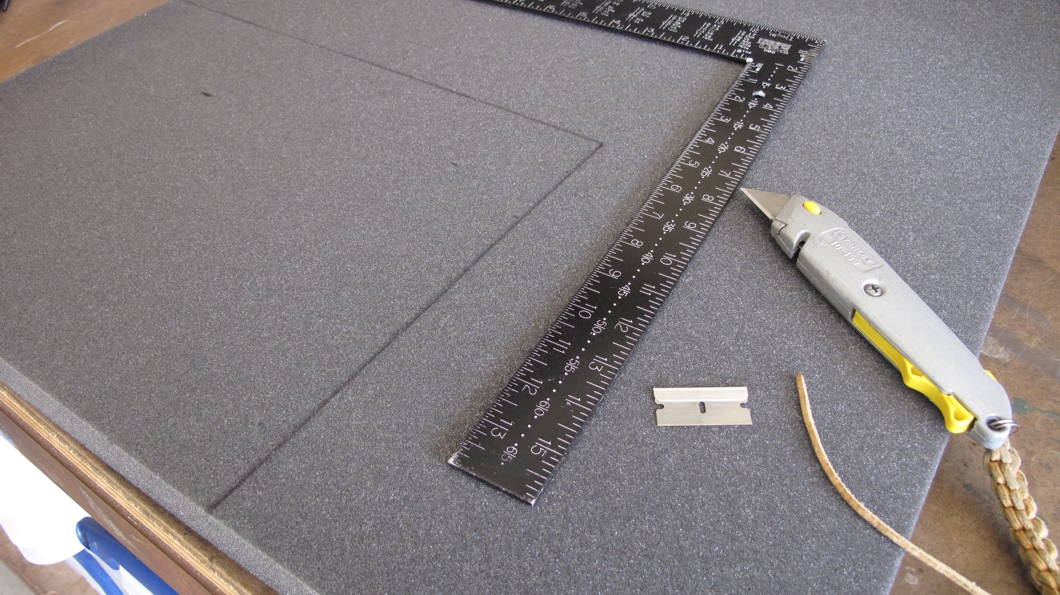
The right tools always make the job easier, safer, and faster. Note the single sided razor blade.

I recommend getting a good piece of foam not the white or tan soft foam found in chairs and couches as that foam tends to age and deteriorate when not sealed up in furniture. Use the grey packing type foam, it’s stiffer, last longer, and cuts easier. You can pick up this foam at any foam supply cheap. I bought a 2’ x 6’ one inch thick piece for $12. This project would only use around 2-3 feet so plenty left for other projects! To cut the foam a RAZOR sharp tool will be needed, utility knife, xacto knife, or even the razor blades made for single sided cutting. I used all 3 types and found the simple razor blade to be the best. Blades will dull up and this project took three.

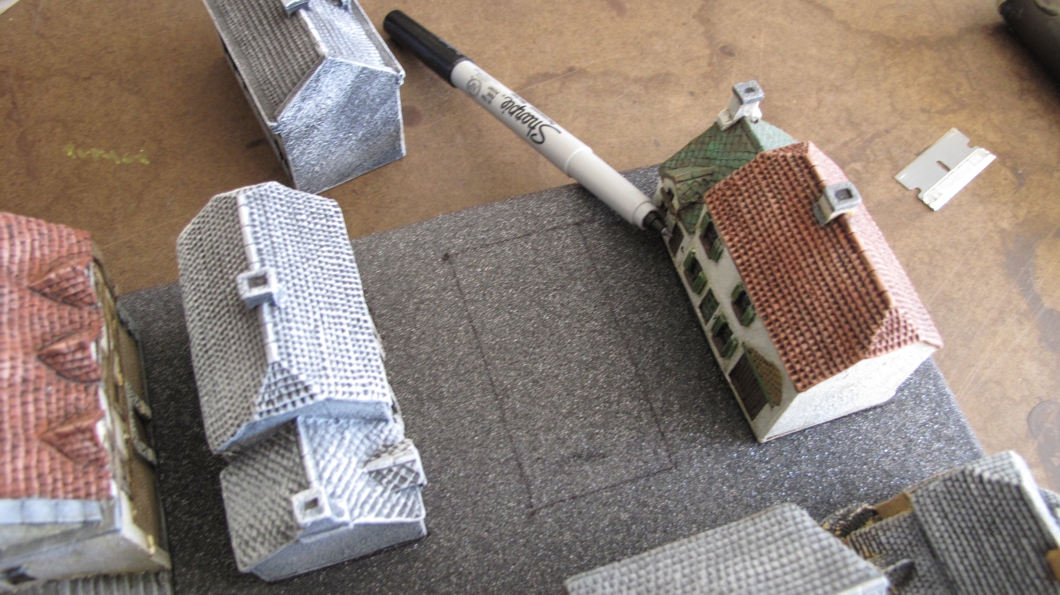
Measure the bottom of the box and cut a piece of foam to match. Make sure to get a tight fit. I cut a bit over size and then trim down. Next the buildings are laid out on it and using a fine tip permanent ink marker (this ink wont later rub off on buildings), one by one mark the buildings position on the foam. Turn on some music, take your time and cut out foam from where the buildings will sit. It’s important to make these cuts just right. Too tight and paint may rub off over time, to lose and your buildings will fall out. Take your time and watch your fingers.

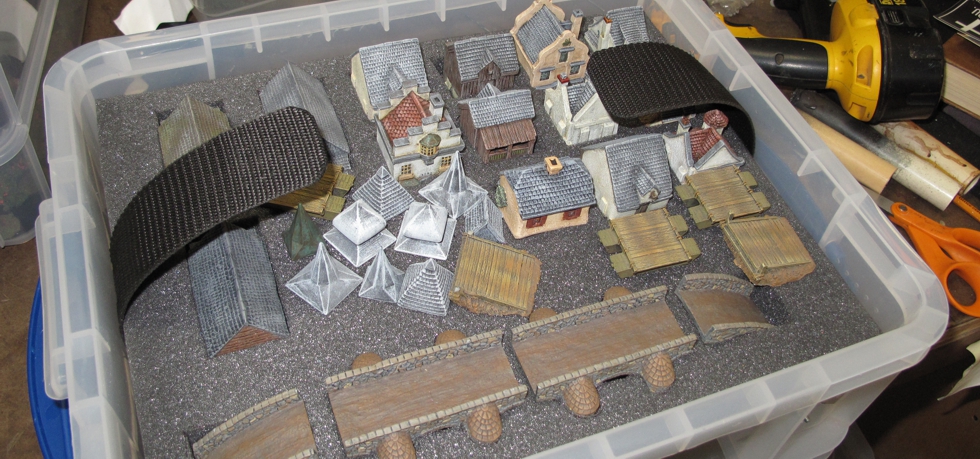
My first attempt at spacing was a bit to crowded and would have required the foam to be cut to thin and then lose needed strength so after a bit or rearranging the bottom layer looked like this.

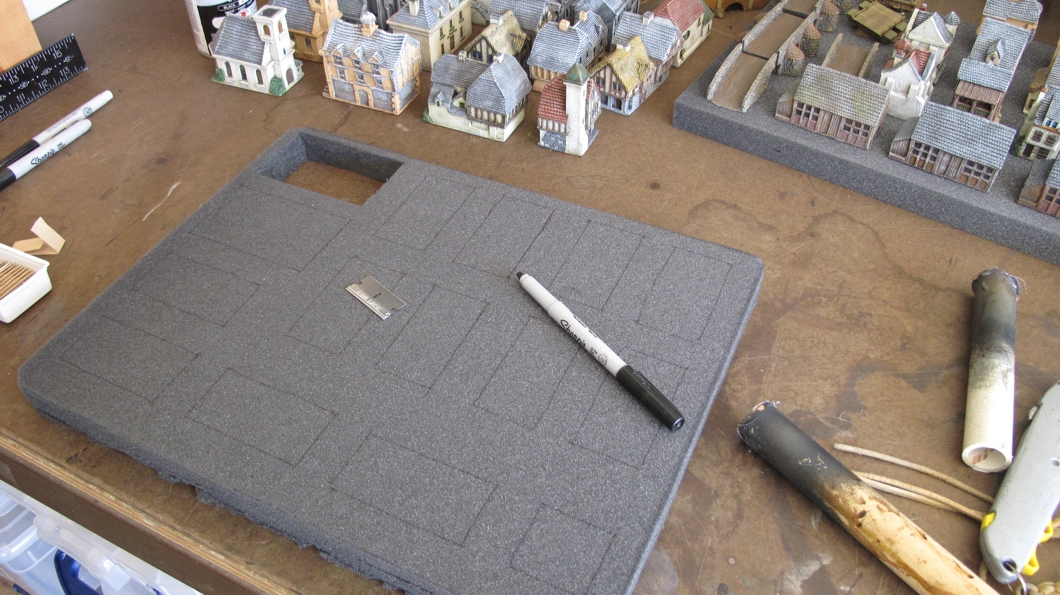
Now that I had the spacing to my liking it was time to cut the foam.

Check your arrangement several times and when you are sure it works its time to mark the areas that will be cut out. Use a fine tip permanent ink sharpie for this if you have one, other markers may have cheap ink that wont really dry and rub off later on your buildings!

Cutting foam or anything else requires careful attention to what you’re doing! First to prevent injury to yourself and secondly to make sure you get the cuts right! Take your time! There is an old saying about cutting “measure twice cut once, measure once cut twice!” and its always possible to remove more material but once a cut is too big your in trouble. I did all this building cutting and fitting with a single sided razor and used 3-4 blades since even foam dulls the blades.

When cutting I made sure I cut slightly on the inside of the line ensuring a tight fit and remembering I could always take more off if I needed to. Switching to new blades after abut 5-6 buildings made sure the blade was always sharp enough to be able to cut by simply pushing straight down using a slight side to side motion.

As with most of my projects and articles at a certain point I get so wrapped up in it I start forgetting to take pictures! When I finished the bottom section and started work on the second level that was the case for this project.

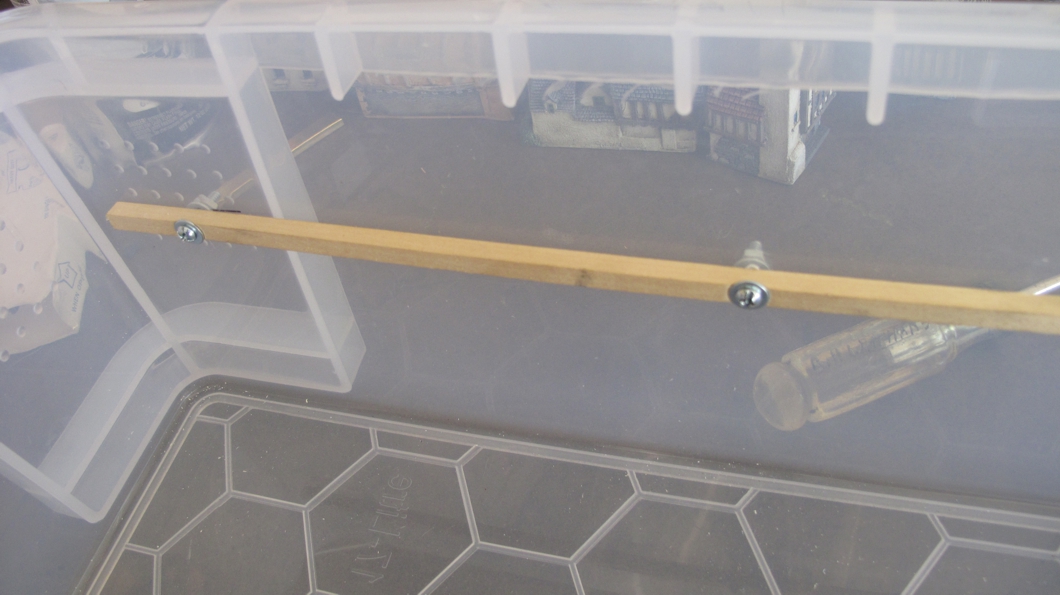
My top shelf will sit on these two wooden “runners” holding the top shelf just above the bottom buildings. For my project full length runners on each long side were strong enough to support the top shelf. Take care to make sure these are level and an equal distance off the box bottom on each side so the shelf sits correctly in the box.

The second level would be made of 1/8th inch plywood (luan) and sit JUST above the tops of the bottom level of buildings. The bottom level hold the biggest and tallest buildings, the top shelf the smaller buildings (height wise). Make sure you plan all this out at the beginning of the project!!! Be doubly sure that all the measurements and tolerances will work out!

The top shelf being 1/8th inch is easy to cut using a small power or hand saw, again cut oversize and trim to fit. A second piece of foam is cut for it and the process of layout and cutting in the buildings happens just like the bottom shelf. I haven’t yet but I may use some spray contact cement (3M 77 spray) to bond the foam to the top shelf.

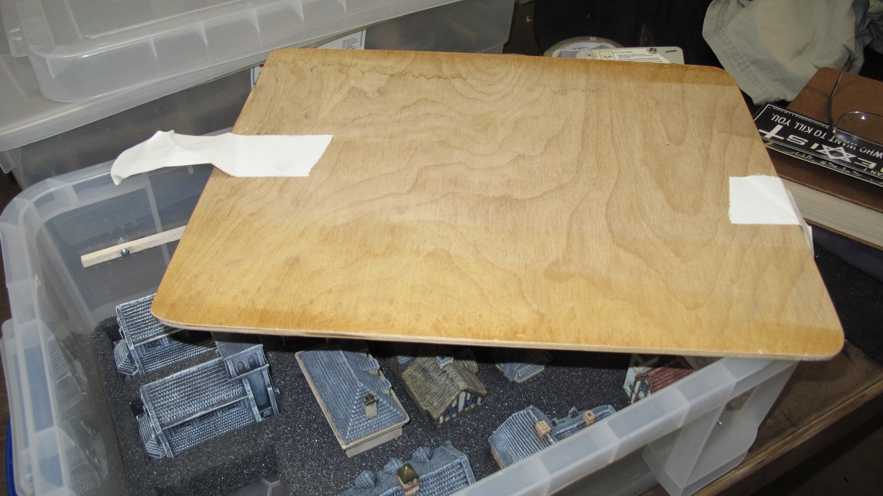
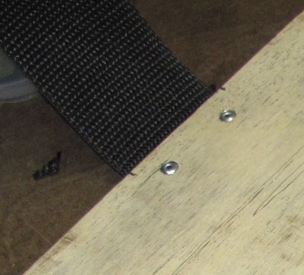
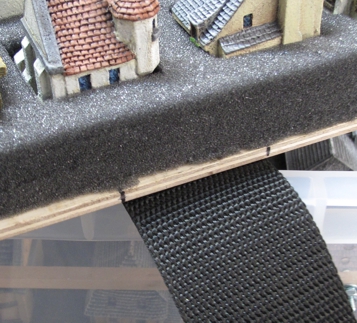
As a final step I put a couple of flexible “tabs” on each end of the top shelf so I could lift it out and get to the bottom section. I started with couple of temporary tape tabs to allow me to get the correct spacing and balance for the tabs. Later I used some 2 inch webbing material pop riveted in to create a strap for this purpose. Don’t complete this step until you have arranged and cut in your buildings since the weight may not be balanced meaning your straps may need to be off set so you get level lift out of the box! Find the balance and center of gravity and adjust the straps to match this ensuring a level lift. Pop Rivet guns are cheap and a really useful tool to have around the house! Holes are drilled in the shelf insert and the strap where the rivets will go. I used a hot wood burning pen (a small heated nail will do!) to burn and seal holes in web strapping and a lighter to melt and seal edges of strapping after cutting.

Top shelf in and tabs just lay across the top. Some lose stuff has still not been cut in yet.

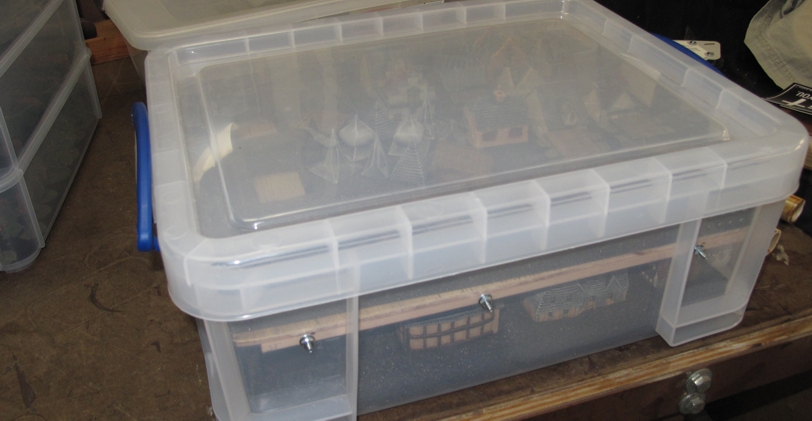
Finished box. You could drop this setup from several feet and have no damage to the buildings! the box may be damaged but the mini’s will not be.

All in all I think this project came out very nice and made my hauling these buildings down to a game easy and safe from any damage. It’s also going to do a much better job of keeping my terrain looking good for years to come!

The only fault I could find with these boxes is they do not give dimensions on the box except to list capacity in liters. Their website does give the dimensions as well as a picture that does a fair job of letting you see which ones match for stacking.
I’m currently using:
64 L, 33L (both stack) Big
32L, 17L (both stack) Medium the 17L was the size used for the building box.
9L, 4L (both stack) Small


Visiting Old Friends for the Holidays, Crossfire WWII!

There’s a lot to be thankful for and blessings to be counted over the Christmas Holidays but one of my favorite parts of Christmas is the extra time off that I can sometimes devote to my hobby of Wargaming with Miniatures! This year is no exception, in fact I took a few extra pains over the previous few months getting other projects finished up so to have no interruptions during the Holiday Wargaming season (ok, who knew the shop / den sink would overflow!)
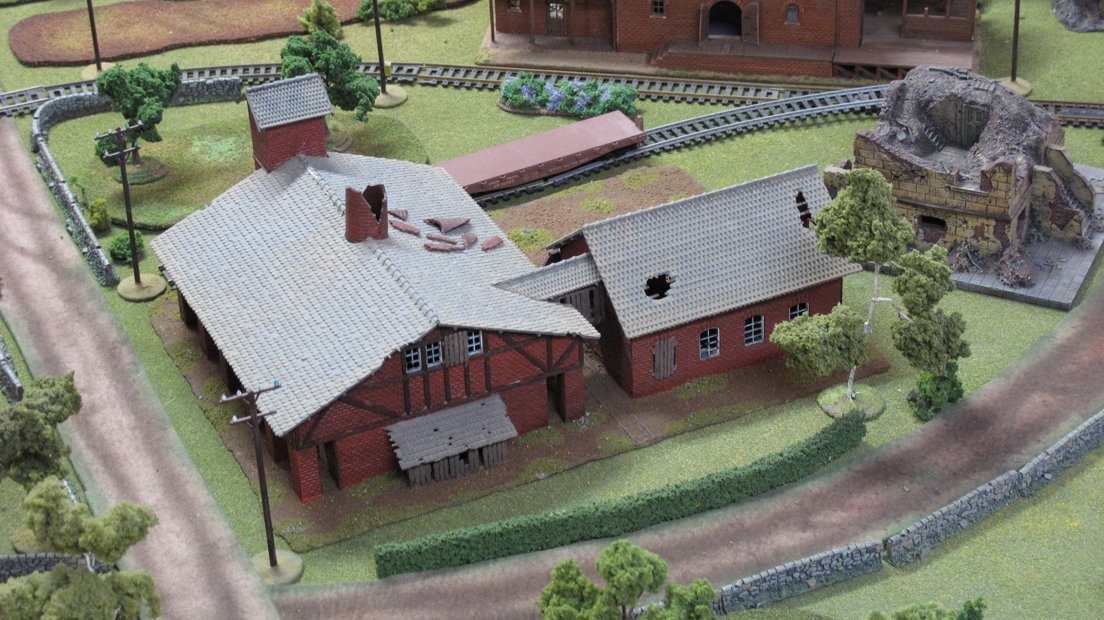
The “Machine shop” a central point of the evenings battle.

The first game I’ve managed to play over the holidays was a “Crossfire” WWII game in 20mm played with my longtime wargaming buddy Steve Gausche at my place. I have been doing WWII for near 30 years in some form or another, Micro Armor with Brian Stokes original Tank Charts rules then Steve Lorenz’s Panzer War. We then moved on to 20mm WWII trying several rule sets, Combined Arms, Battle Front, Overlord, Soldat and several others without really settling on one we liked. I and a few friends even developed our own set, “Frontline”. Now when I say developed our own set I mean we took as all rules writers do our experiences with other rules, things we liked, things we hated, and produced our version. Some mechanics had been done before, some were new. They played exceptionaly well with many players asking for me to publish them but I never did and after awhile we moved into other games and periods leaving WWII behind. Years later the WWII bug began to infect me again and I thought I’m either going to play or sell my stuff! I found however, as many of us have, that I had less time, and patience for rules heavy, slow games. I also was never one to buy into the “newer” rules types that are based on wargamers basically subscribing to a rule set full of ad on’s, updates, modules, and an official line of mini’s ala Flames of War or Bolt Action.
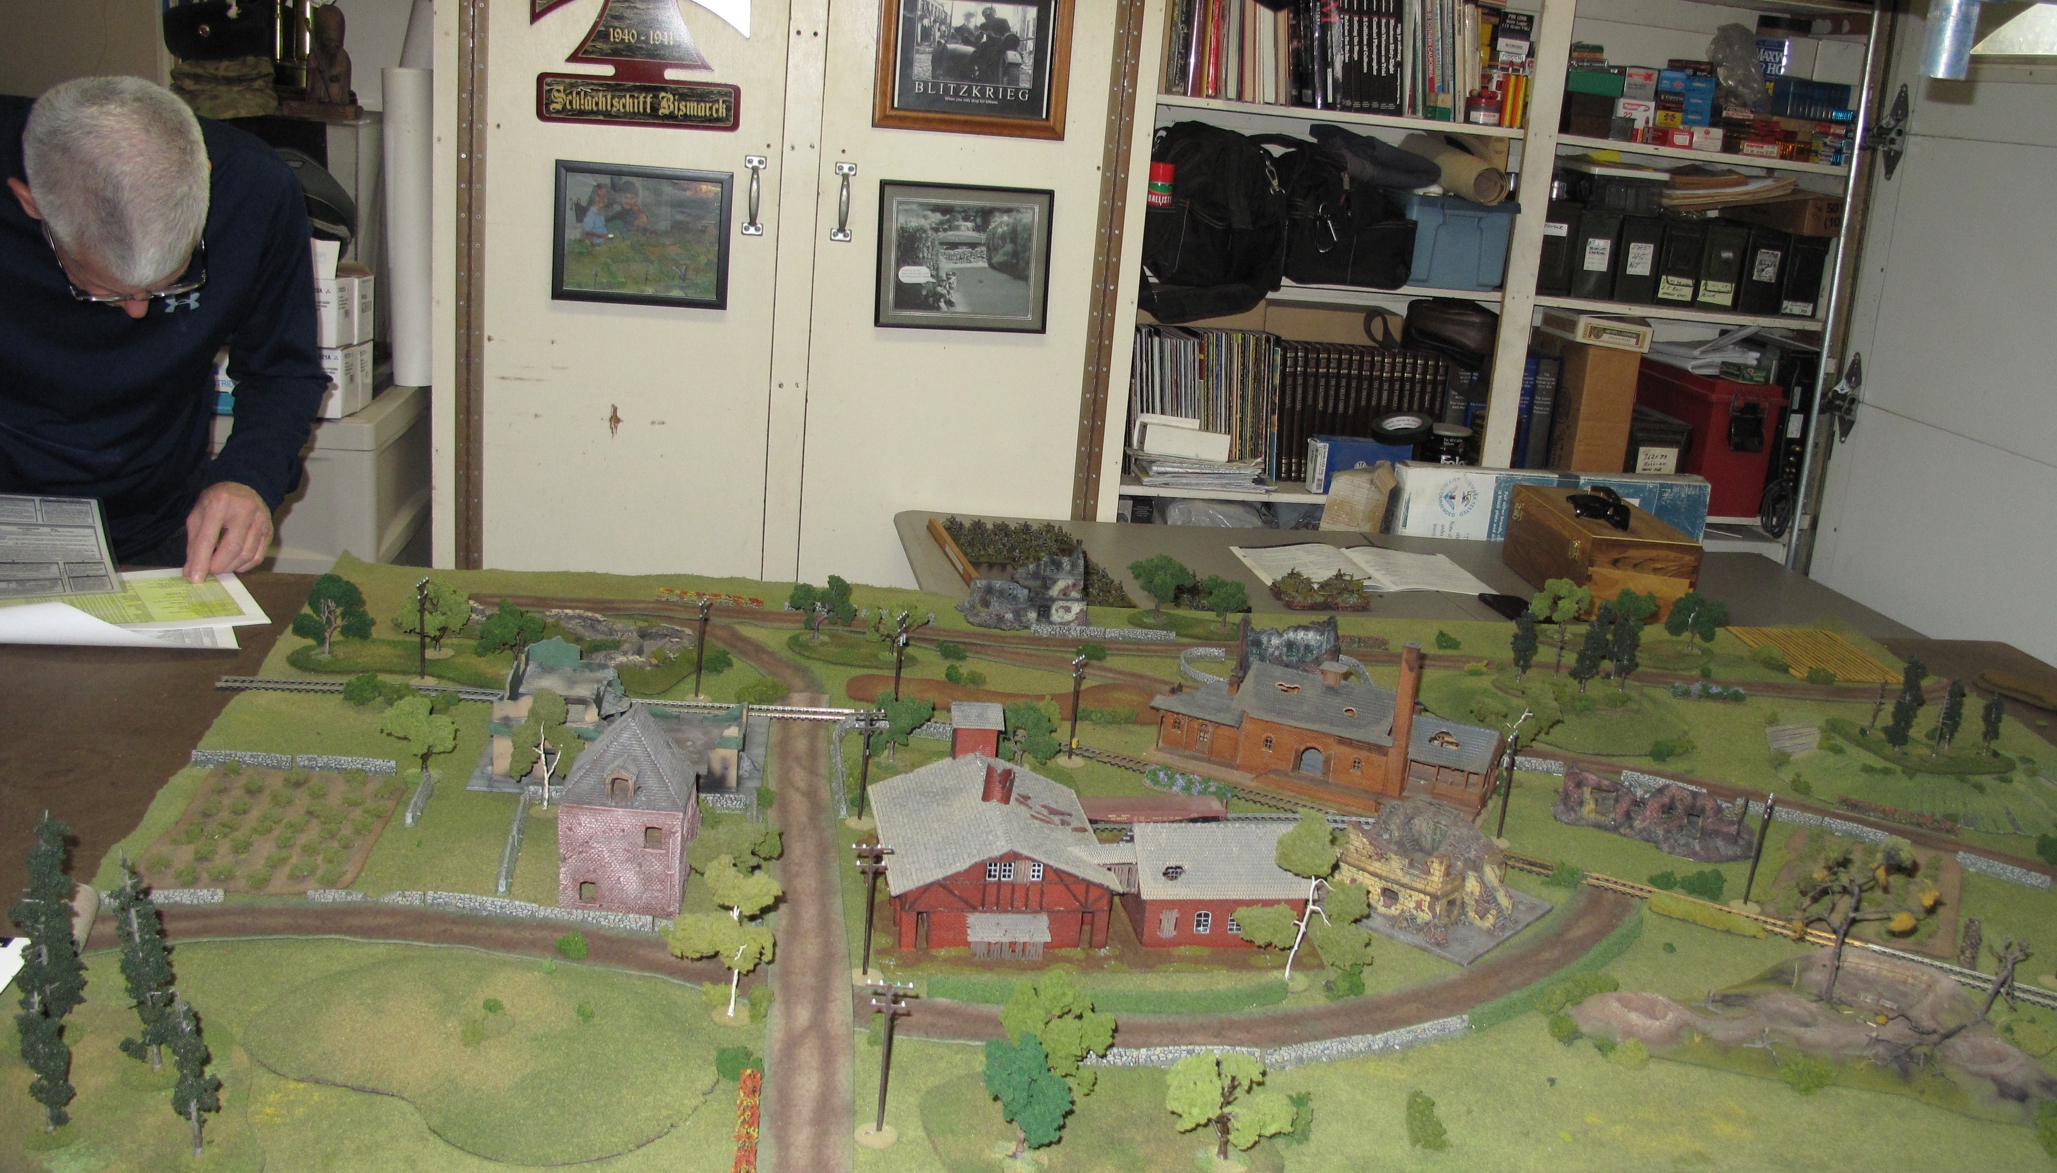
Wargaming Central at my place. Oberst vonGausche readys his men

I had played and purchased Crossfire years before but never given it a fair chance, I decided to try it again, the rest is history! Hands down in my opinion the best representation of the ebb and flow of WWII mid level combat period! (read my first CrossFire article)

As with most of our games when we don’t play a period for awhile there is that part about remembering how the dam game plays, rule sets typically have some overlap in rules and remembering rules for the game your playing verses a rule from another game can get confusing. We like to always do a “small game” first to help remember and sort things out….do we? Hell No! Get it all out! LOL!!! Yep instead of just remembering the basics we had to look up lots of other smaller less used rules as well. Crossfire is great because it has very basic, simple rules that apply overall to every army so picking the game up mechanics wise is easy; the strategy of using these rules to achieve victory is not!

If you talk to Miniature Wargaming folks many will say that miniature wargaming has been hurt by the advent of computers and PC gaming, I find that to not be the case at all. In fact I find that computers have increased the gaming community by allowing us to put our passion out there for all to see, certainly the computer has allowed us to do things to make our hobby much cooler and taken a bit of the drudgery out of it. One of the things I do for Crossfire is take an overhead picture of the battlefield (our playing table) on then print it out as a monotone map for players to use to record hidden deployment and battle plans. The map is placed in a plastic sleeve that can be drawn on with china makers, or better yet colored “overhead transparency pens” This ads a great deal to games and certainly removes the having to do the map making by hand! I keep the maps to use again and again.
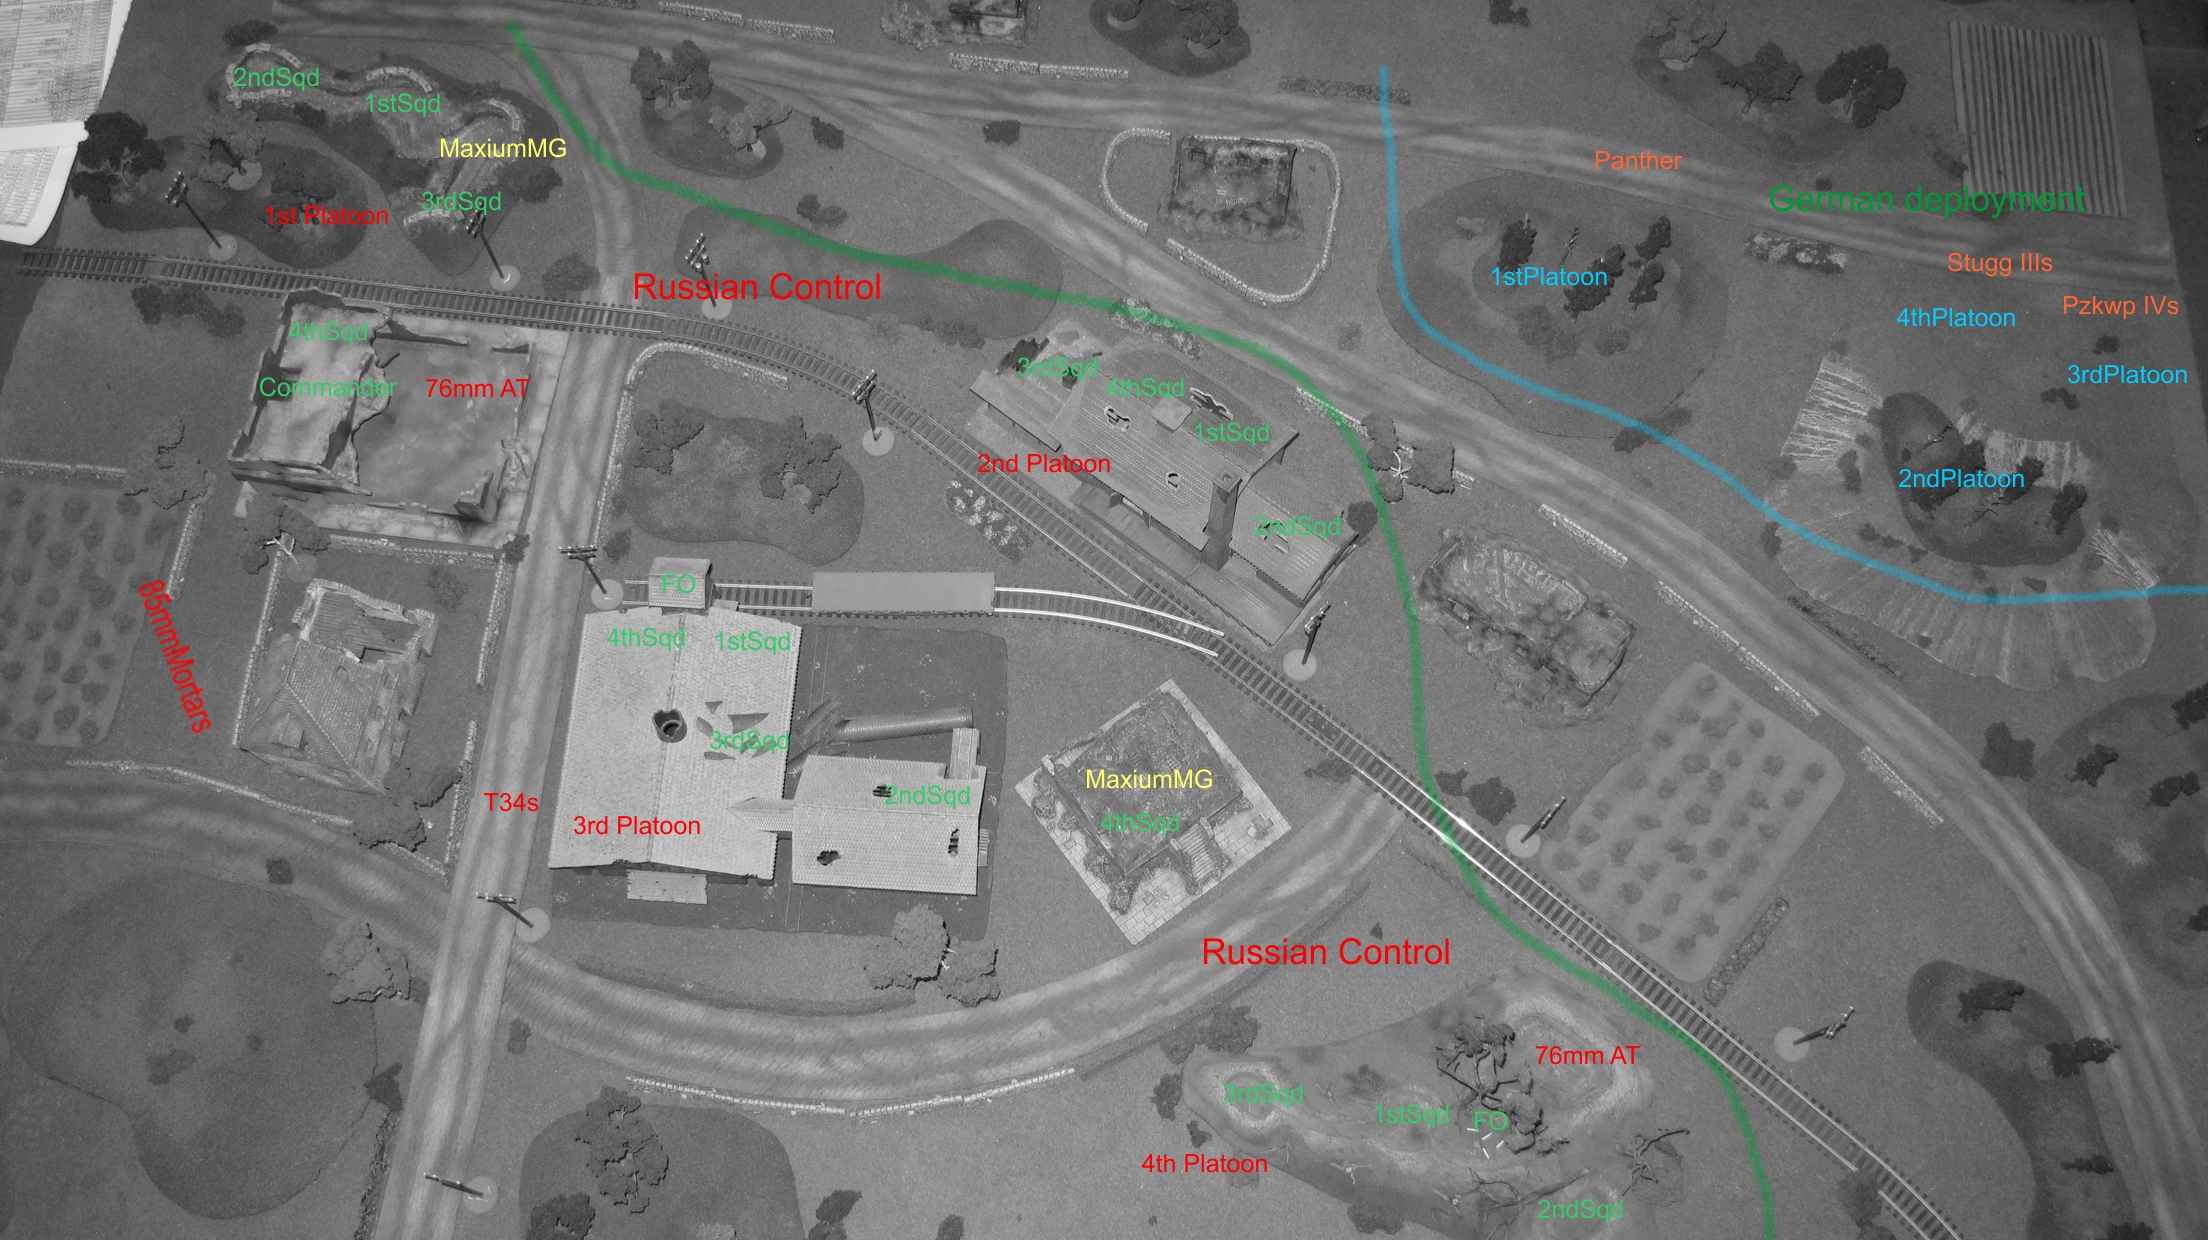
Taking and printing a map for players is a great game aid allowing hidden movement and speeds game play.

I set up the battlefield to represent Russia during the 1943 summer offensive and a German push to secure a small urban area somewhere in Russia.

The forces would be fairly balanced numerically,German force, Panzer Grenadier company, 1 x Company commander, 3 platoons, each with 3 squads, 3 platoon commanders, 2 Heavy Machine gun sections (MG 42’s), 2 x 81mm mortars, 2 forward observers, reinforced by 2 Stug III’s, 2 PanzerKampfwagen IV’s, and 1 PanzerKamphwagen V “Panther A” and a fourth infantry platoon.

The Russians had a similar force, Russian “leg” infantry company, 1x Company commander, 4 platoons of 4 squads each, 4 Platoon commanders, 2 Heavy Machine guns (maxims), 2 x 85mm Mortars, 1x forward observer, additional resources included 2 x 76mm Anti Tank guns, and two M43 T34 with 76mm guns.The Russians might seem at first to be weak but they have the advantage of setting up and playing defensively as well as being “hidden” at the beginning of the game, very powerful factors in Crossfire! They were led by me…I’m a good player…but “they” have poor leadership in their on the table commanders as well as a troop quality of “regular’s” on the field. They also have limited counters to German Armor.

The Germans have what seems to be a powerful force but being on the attack they will need it since plans in Crossfire can go south very quickly, mistakes can be punished hard by your opponent! The Germans while not hidden have the advantage of being able to move and concentrate their forces, probing to find weak spots and exploit them; this is where Crossfire excels at duplicating the nature of WWII land combat. They also have excellent leaders at both Company and platoon level. The German troops are also “Veterans” giving a significant edge in morale and recovering from “pin” and “suppression” effects.
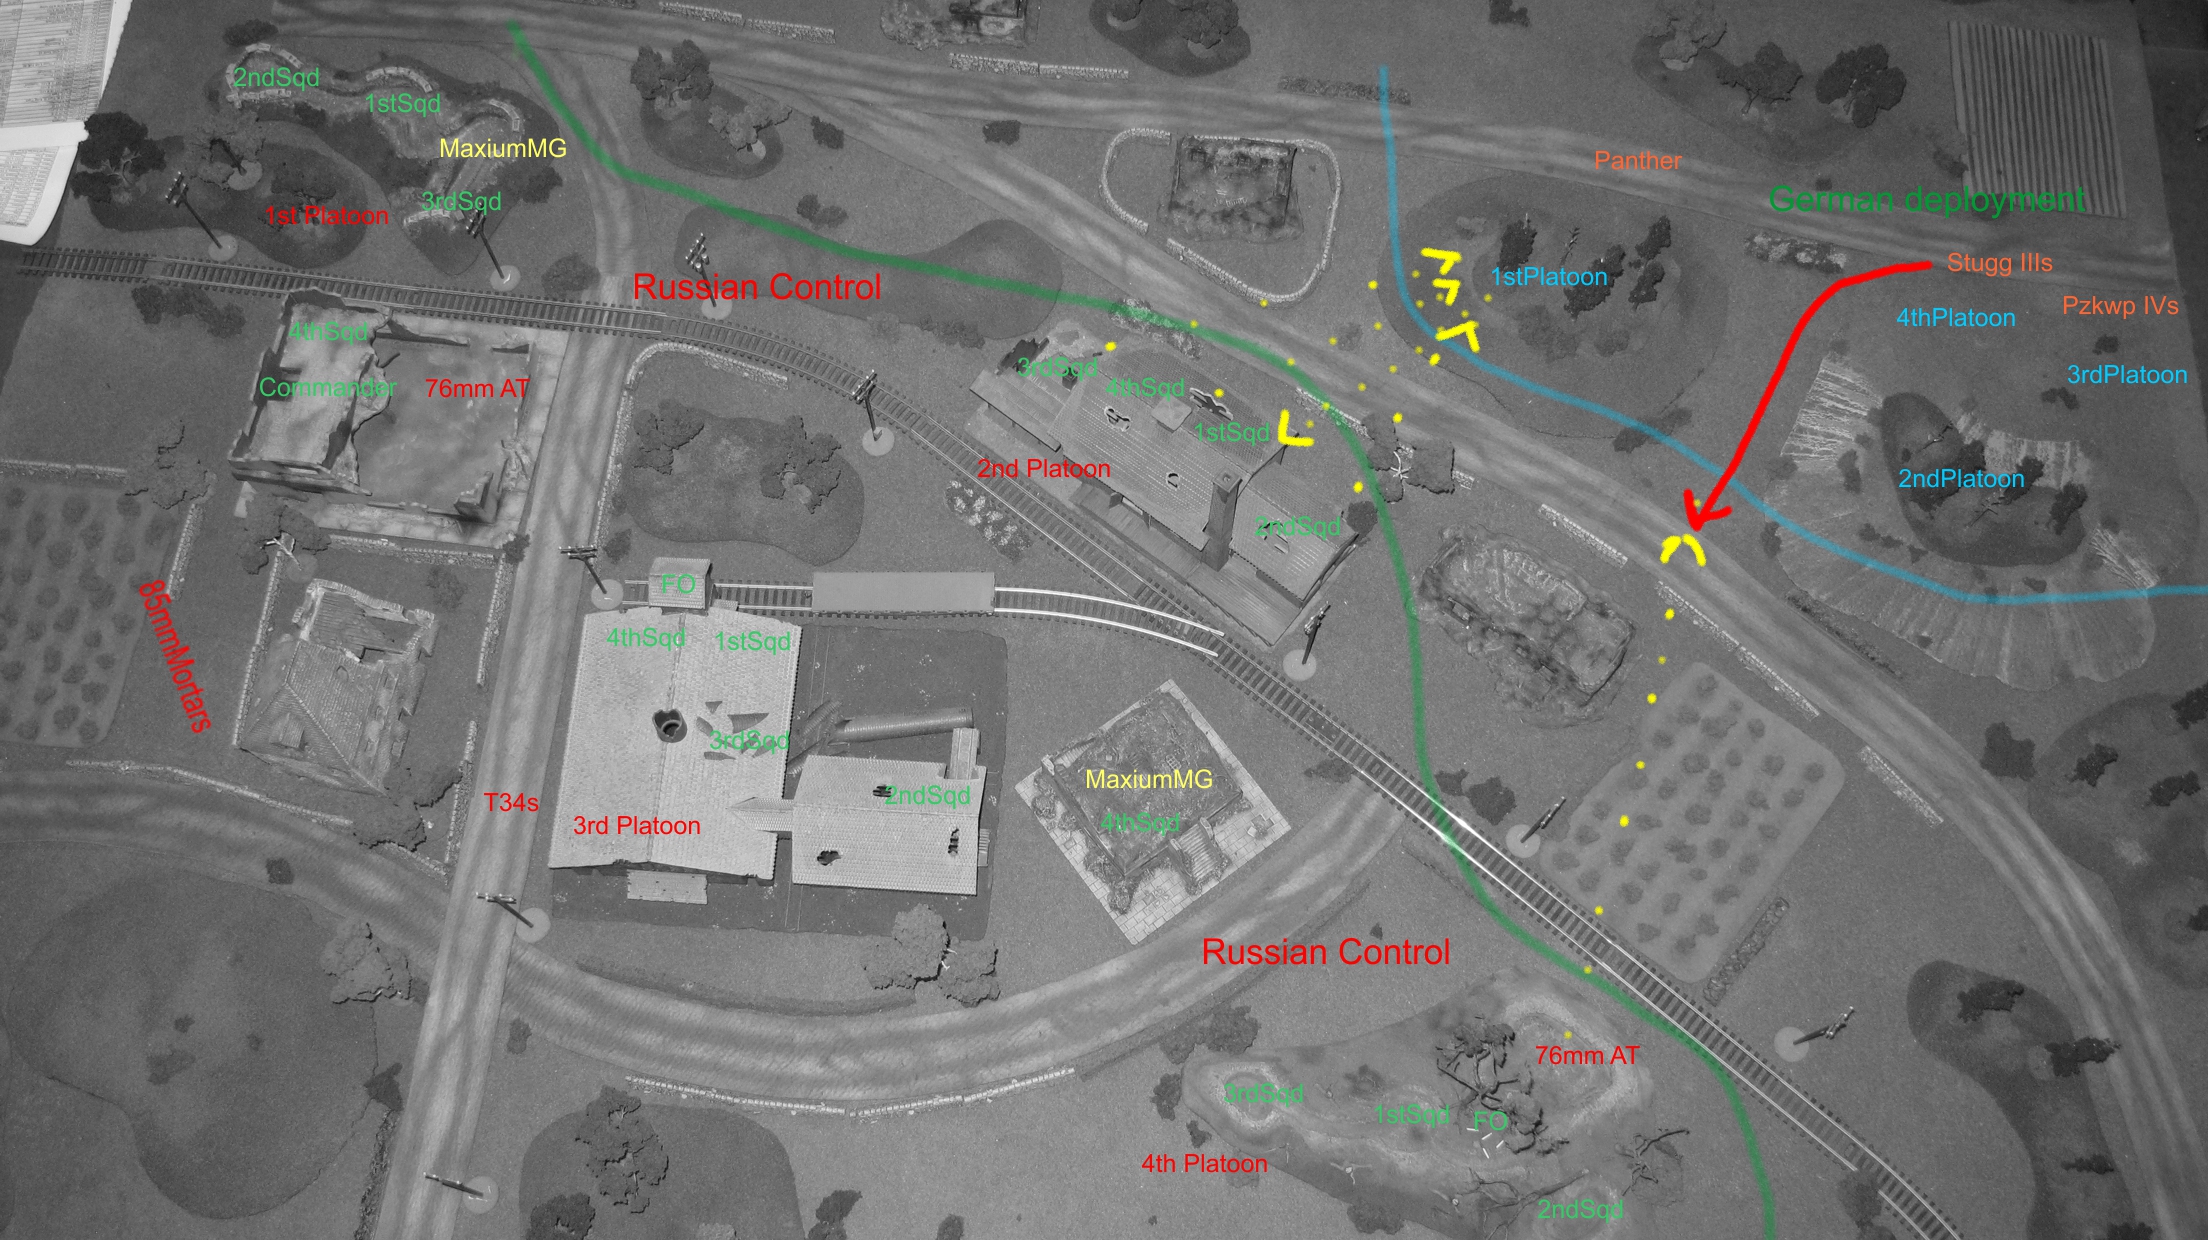
First moves and combat!

I played the Russians and laid out my “hidden” deployment on the map, situating the two Anti Tank guns to cover the most open of the approaches. My 4 platoons held a diagonal line running across the battlefield occupying to main buildings and then trench works on either end. The Mortars were at the rear of the headquarters building, this building also held one of the anti tank guns. The two T34s were hidden in town center as a mobile reserve to provide support in case of a breakthrough with the last anti tank gun dug in south west of town.

The German player deployed in the open with a 2 foot x 2 foot table corner as his entry point. Steve edged his two squads up onto two wooded hills where one immediately came under heavy fire from a Russian platoon holding the train station. His second squad held on the hill to the south.

Crossfire plays very differently than your typical “I go, you go game” with the action tending to localize in different areas of the battlefield, getting white hot while other areas do little. To me this is very realistic although it might take some time for players of traditional wargames to adjust to. Russian fire from the train station was getting the best of the Germans in the woods so the German commander brought up some armor in the form of two Stug III assault guns and prepared to ad their fire power to the fight. As soon as the Sturmgershutz III’s lumbered into position they came under fire from a hidden Russian 76mm anti tank gun that along with a platoon of Soviet infantry held that flank of the Russian defenses. The Russian gunners were in top form and after a brief exchange both German assault guns became burning hulks. This kind of ambush is the kind of action possible through use of Crossfire rules and hidden deployment rules and for me is the crux of WWII platoon/company combat in WWII.
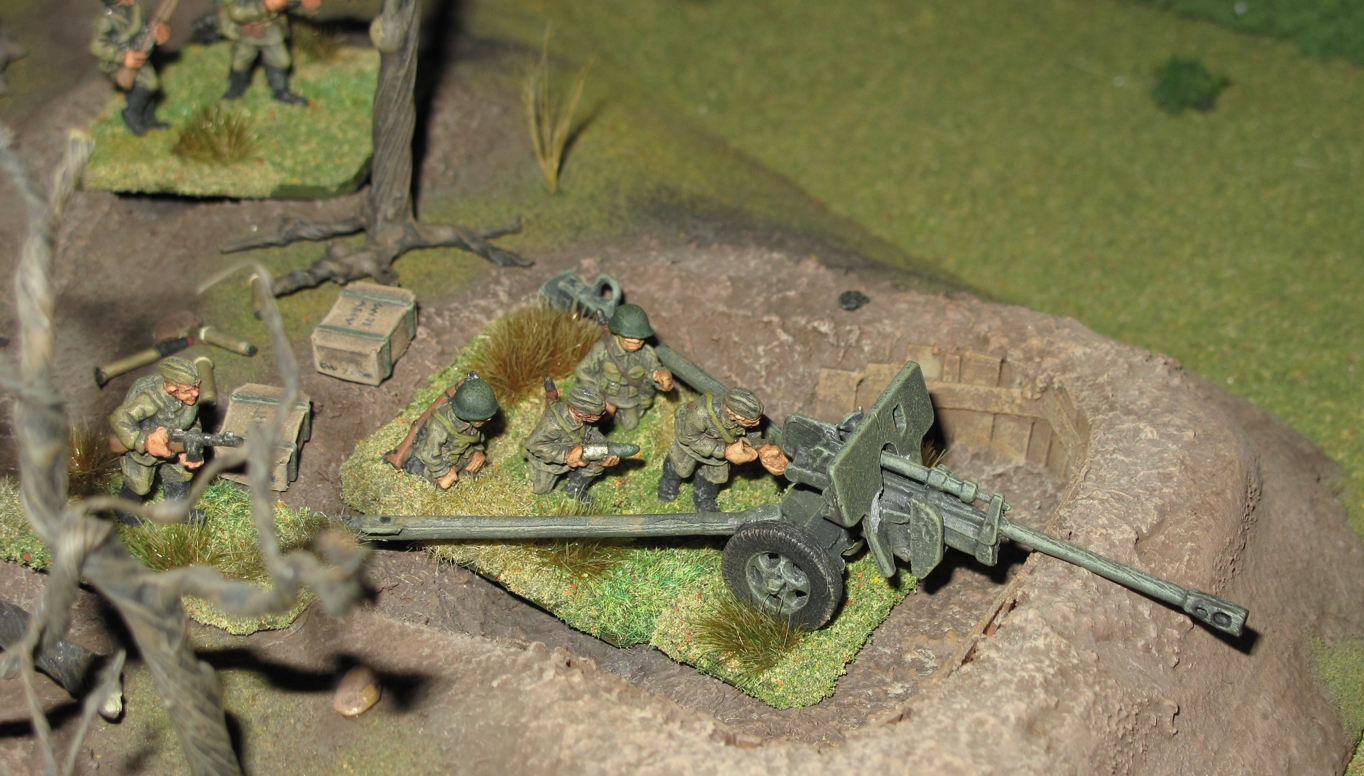
Russian gunners take careful aim!
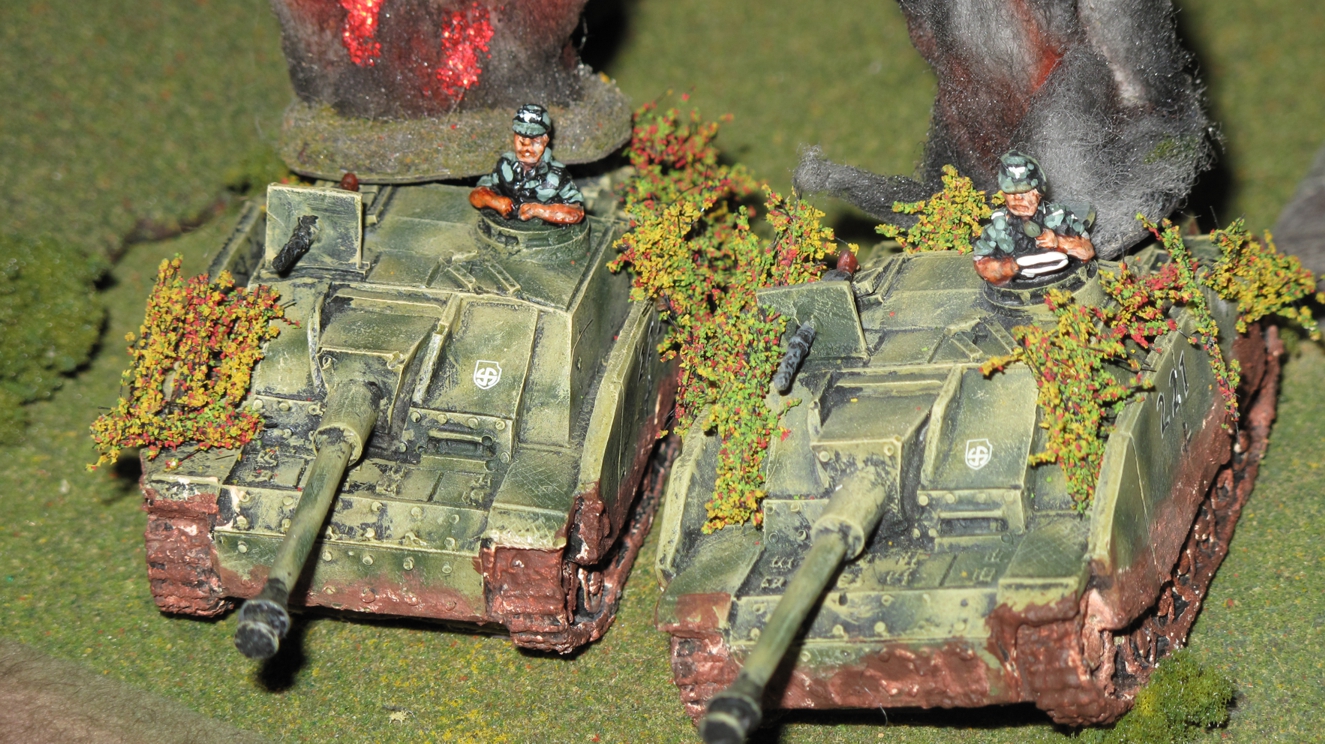
German support armor gets stopped dead in it’s tracks! Red Russian mud clings to the vehicles entire bottom half!

The Germans were becoming frustrated at this point as their frontal push and relying on force of arms was not working against the well laid out Russian defense. Clearly the Russians were well led and in greater strength than German intelligence had reported. Oberst vonGausche arriving on the scene held a conference with his platoon leaders and discussed a new plan of action, with the casualties already sustained and the loss of the two Stug’s the attack must well executed with minimum losses.
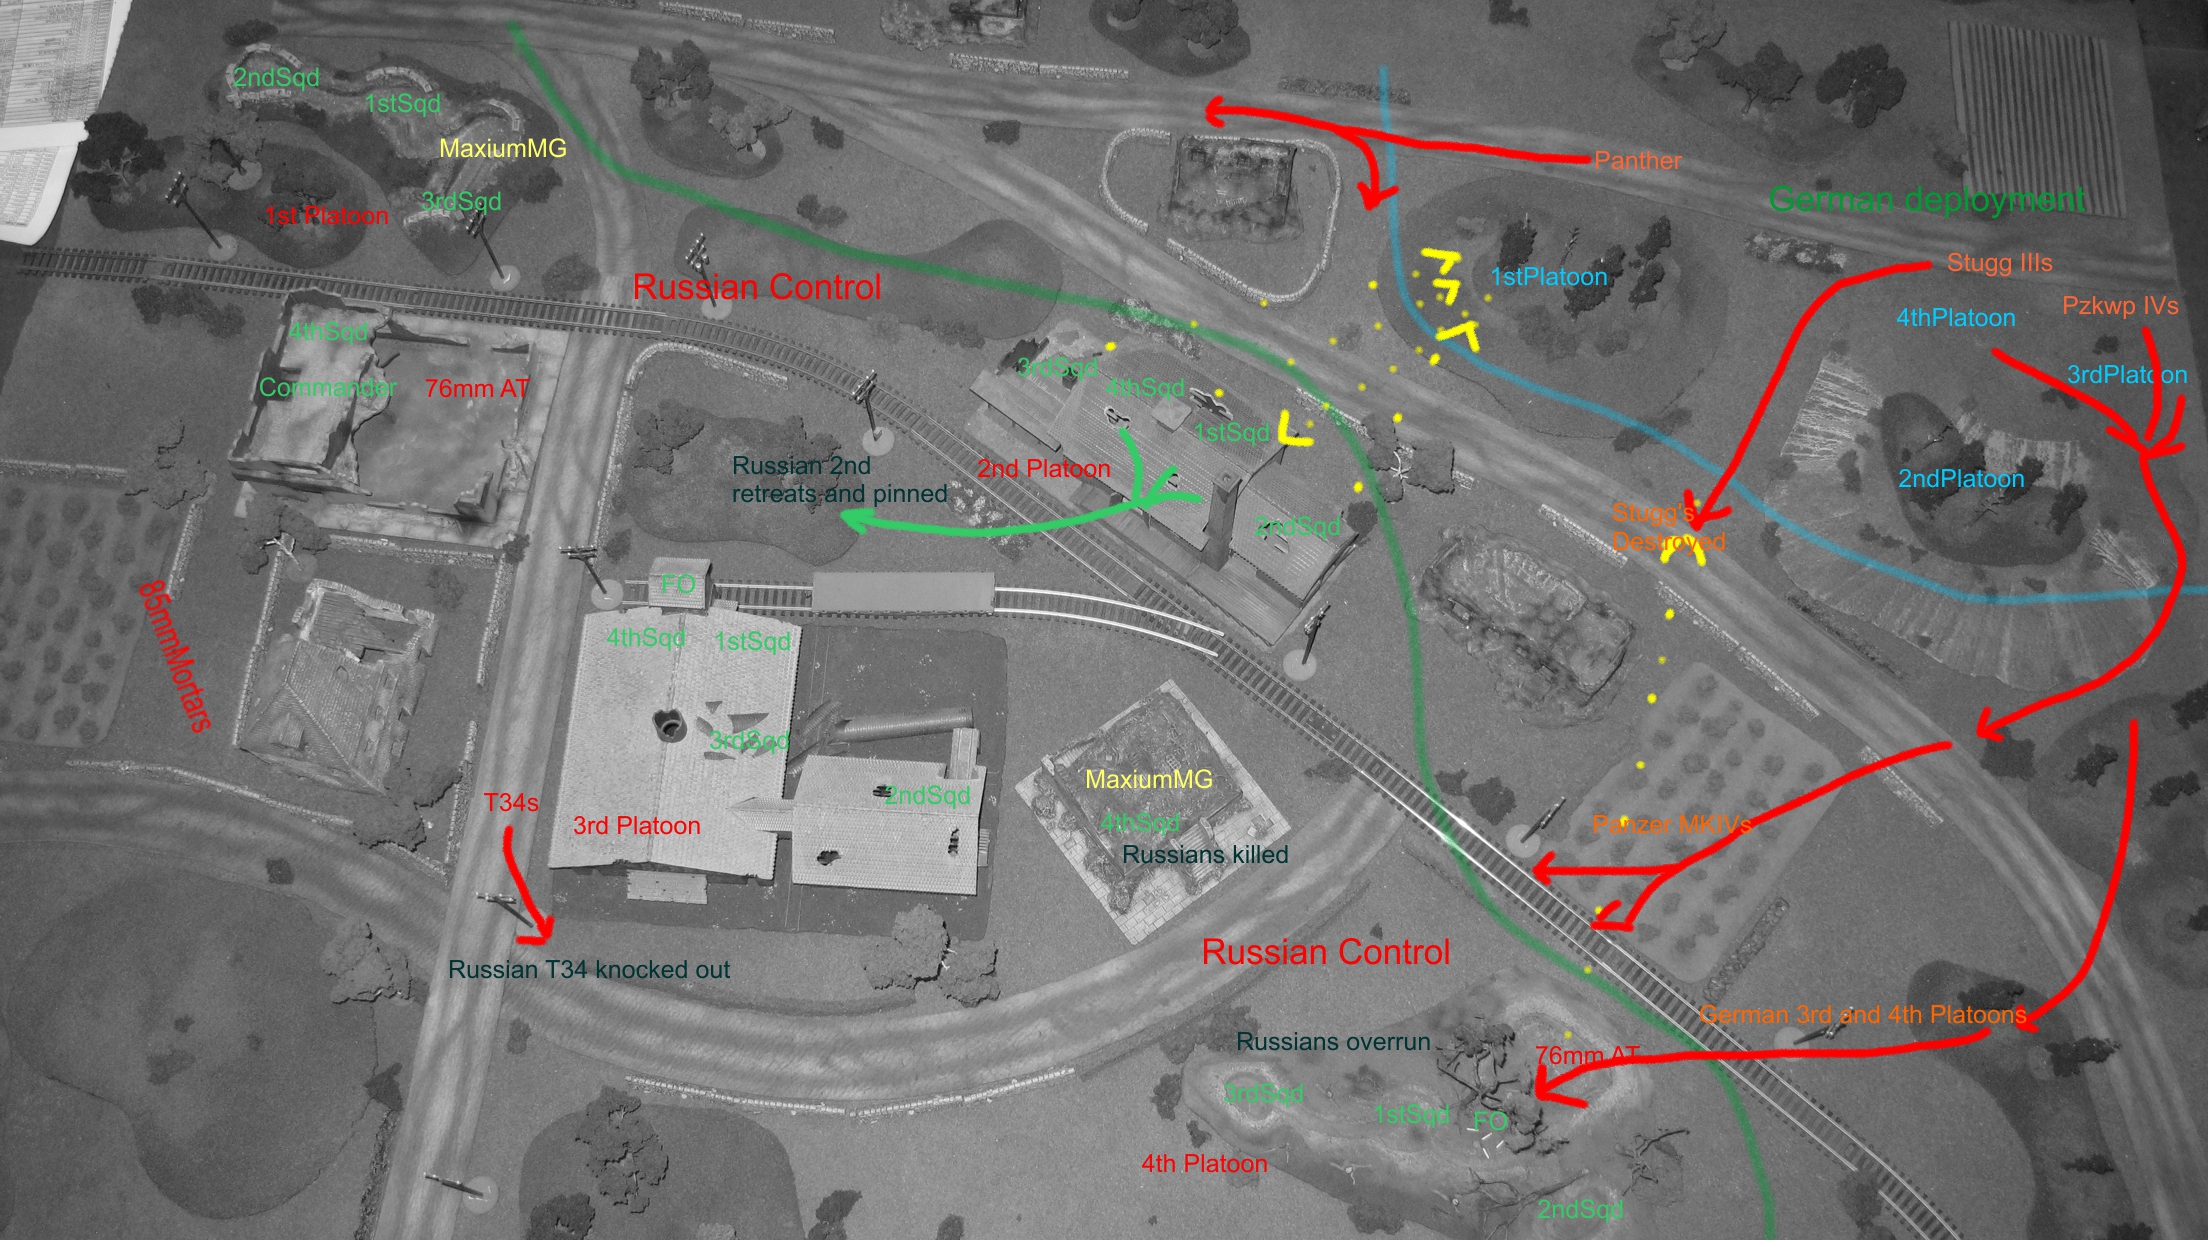
Mid game a final movement / combat.

The Germans decided to concentrate on the elimination of the AT gun and Russian infantry holding the south east flank and try to then apply pressure from the front, side, and rear of the Russian platoon holding the central train station. The German right flank was to regroup and hold, “just keep the Russian’s busy, prevent them from moving” said Oberst vonGausche.
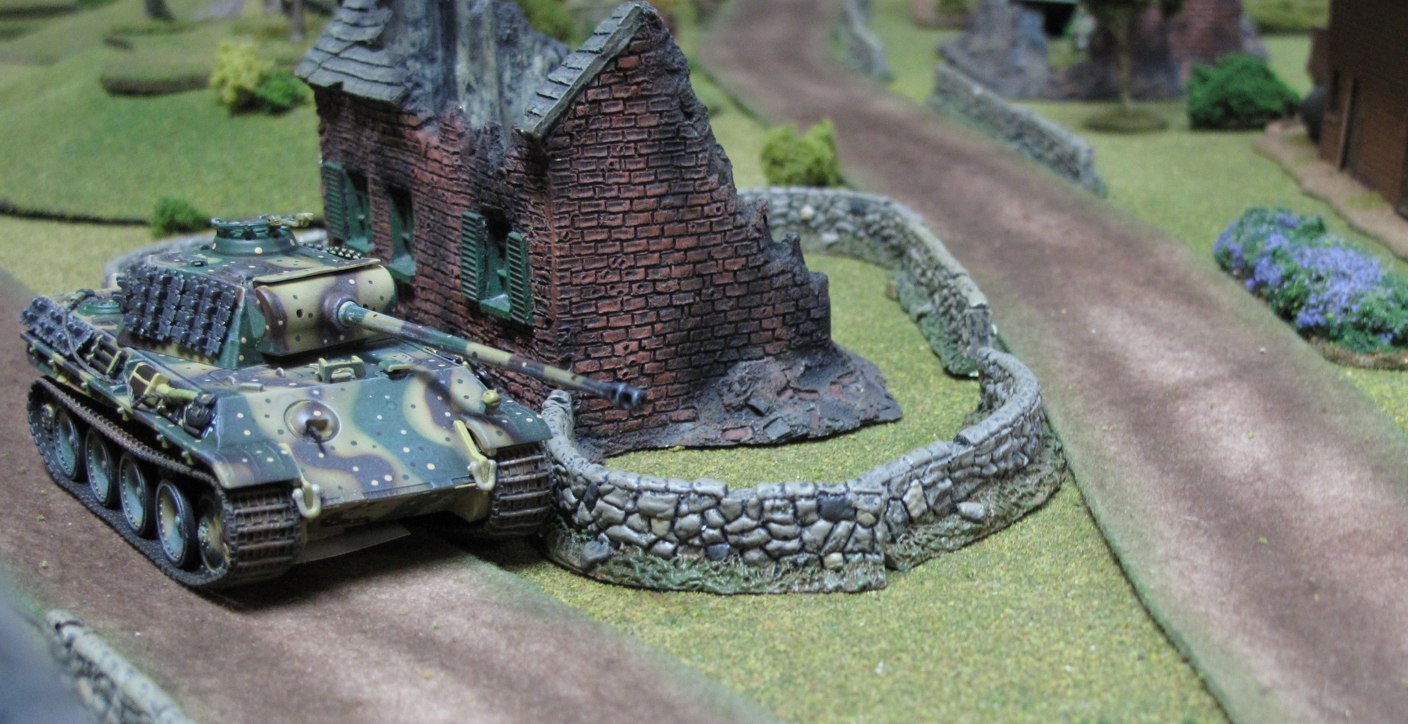
The “Panther” helps hold the German right flank, continually bouncing rounds from the Russian 7rmm AT gun.

A “Panther” tank was ordered to give support to that effort. Two fresh German platoons, German mortars, and a pair of PanzerKampfwagon IV’s Panzers were set for the attack. Their German 82mm mortars began to drop smoke on the Russian positions to cover the German advance and the Germans moved into position. As the smoke cleared the mortars switched to HE (high explosive) rounds and the German tanks added their fire in as well. The concentrated fire suppressed and then killed the Russian gun crew. Russian return fire was ineffective at this point and they had no way to counter the German tanks.
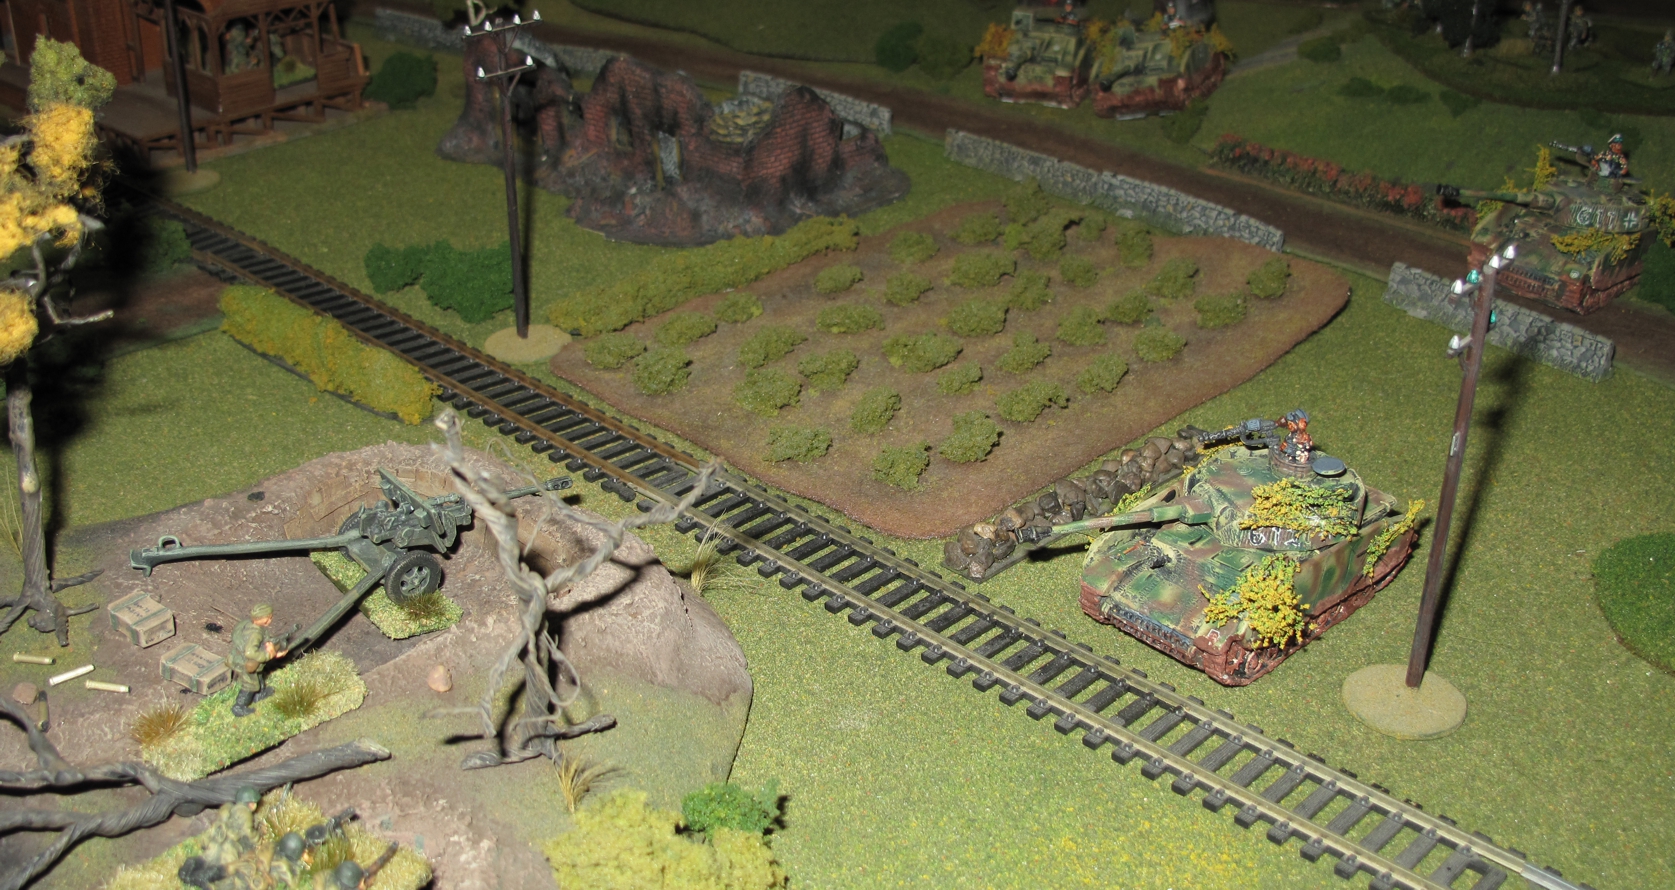
The German Panzers engage the dug in anti tank gun.

A Russian messenger was sent to request support as German infantry moved up to close assault the Russian trenches. The German Mortars and tanks belched death and destruction once again into the Russian trenches killing a Russian squad, suppressing another, and pinning the third. Sensing the moment vonGausche ordered the men forward into the Russian positions.
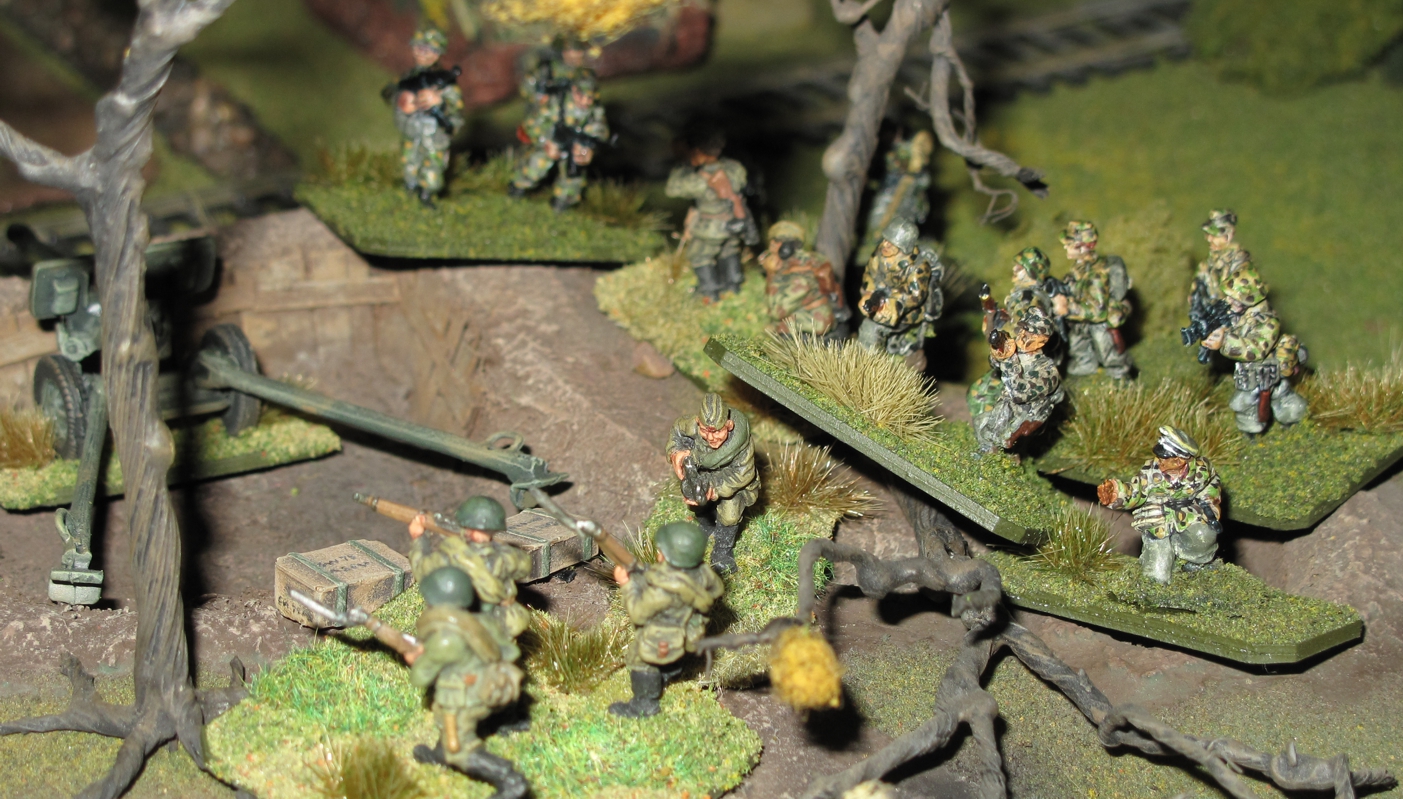
German squads break into the Russian trenches, very little “quarter” was given on the Russian front!

Weak return fire from other Russian troops along with the Russian troops in the entrenchments failed to stop the German attack and with the odds in their favor the Germans cleared the position. Russian reinforcements in the form of two T34 tanks now rounded the corner trying to engage the German MK IV’s…the first German rounds missed the Russians, Russian return fire bounced their first rounds, the next German round found its mark and one of the T34’s burst into flames, the second T34 reversed out of sight.
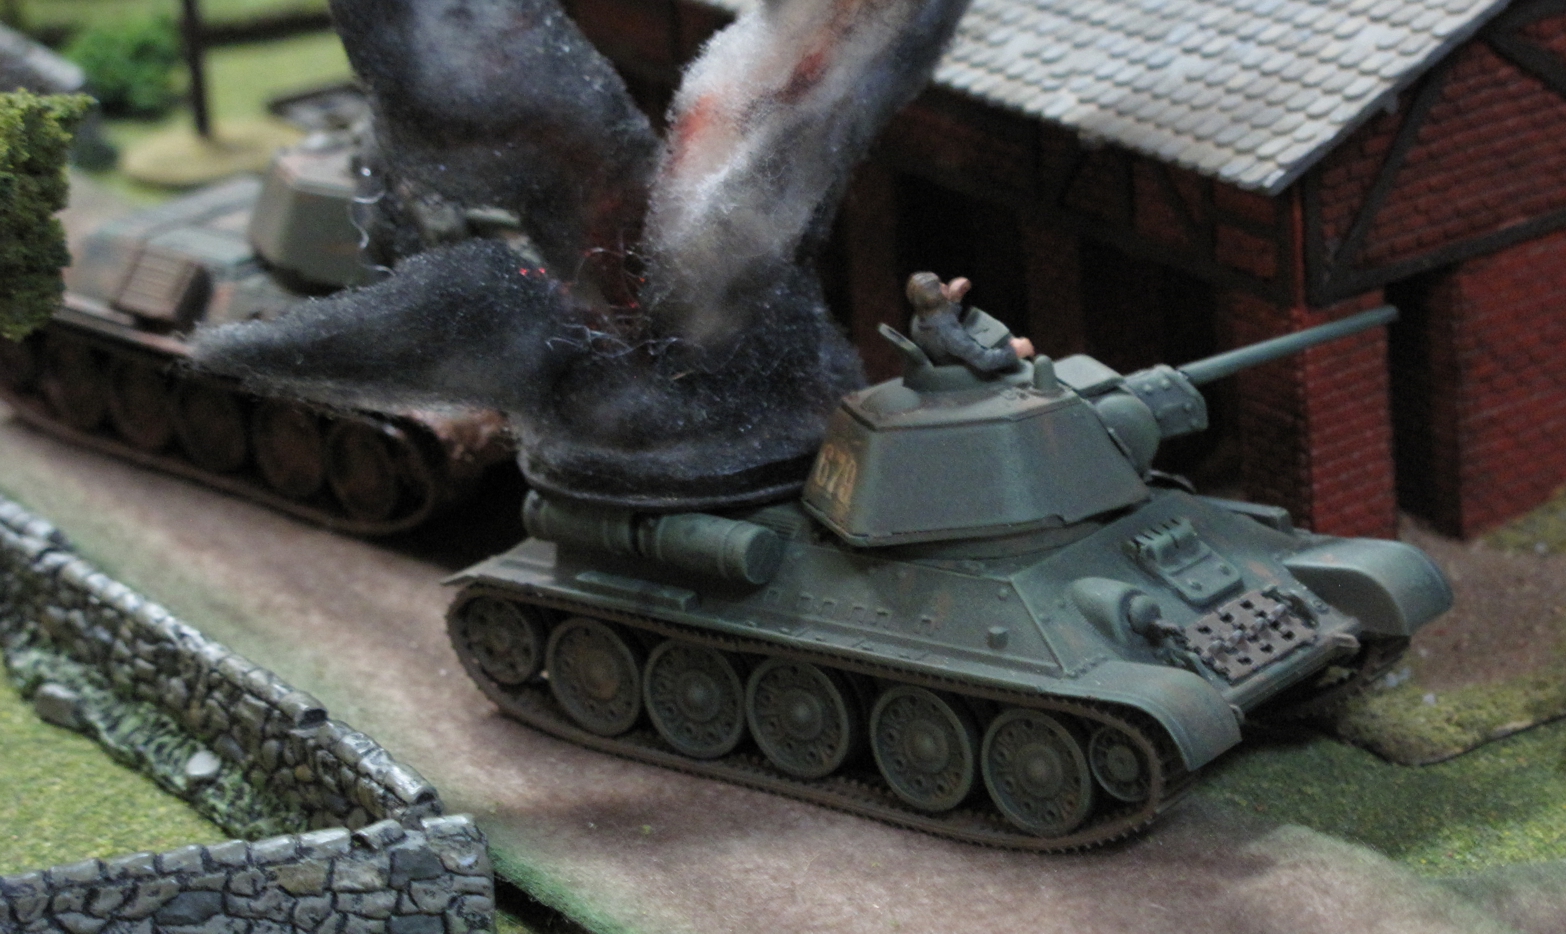
The first T34 burns at the machine shop corner….

Seeing my flank collapsing as the Russian commander I decided to try and pull back and redeploy. The train station troops were given a retreat order but while exiting the back of the building came under fire and pinned in some woods back of the station.
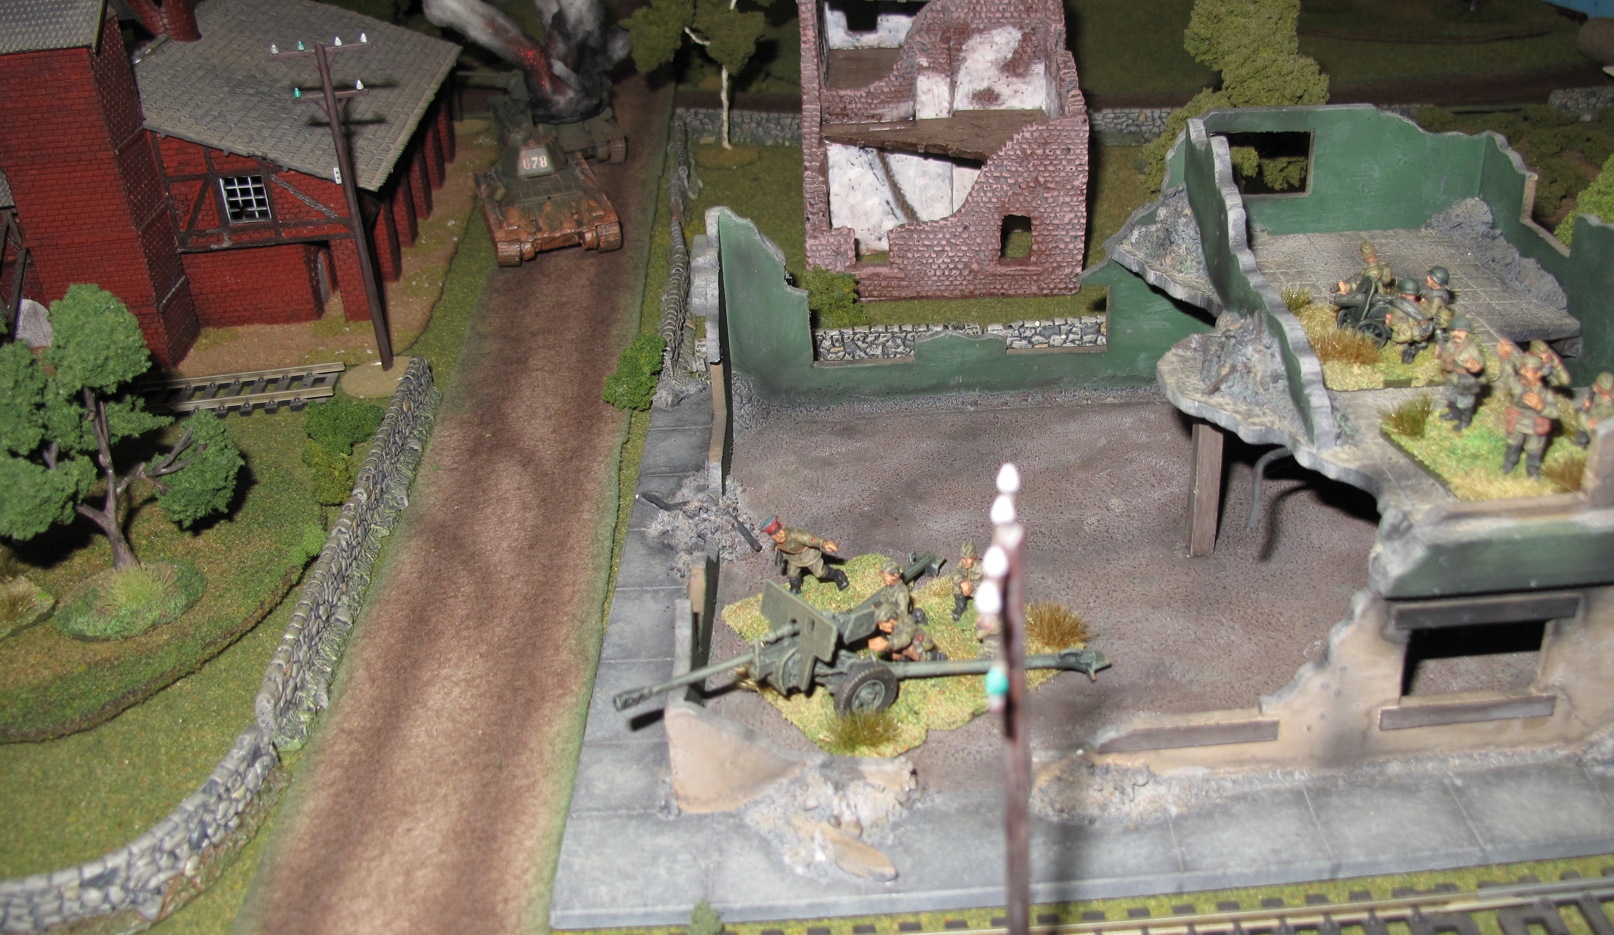
A second Russian 76mm anti tank gun in the burned out warehouse failed repeatedly to knockout or even damage the German “Panther” tank. A Russian NKVD officer exhorts the crew to do better in the name of “Stalin”

At his point the Russian commander (me) decided that the town could not be held and further struggle would only get valuable troops and equipment destroyed. I ordered a full retreat and congratulated my self on a good defense, inflicting sustainable losses on the Fascist Germans, and looked forward to being reinforced in the morning and given the opportunity to retake the railroad yard in the morning!

It was not to be….I was shot in the morning, on orders from the political officer for cowardice in defense of the mother land…”long live Holy Russia!”

A Thrusting we will go!

Bengal club members Bill and Doug convincing themselves that all this work will be worth it.....

Bengal club members Bill and Doug convincing themselves that all this work will be worth it…..

Space the Final Frontier, well maybe not the final frontier for The Bengal Club but the one some of us are going to be exploring for the next year. A few of us have gotten up the courage to do a Campaign using a combination of the tactical “Full Thrust Continuum” (FT) rules and the old Avalon Hill “Stellar Conquest” (SC) board game for the strategic portion of the campaign. I have been loosely thinking about this for over a year and with the help of fellow gamer Doug Kendrick and other Bengal Club members will now attempt to put this idea into play.
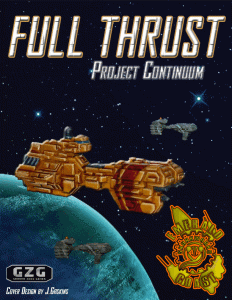
Full Thrust Continuum the latest and I feel the most complete and well structured version of the Full Thrust system. Follow this link to Down Load them!

Full Thrust Continuum the latest and I feel the most complete and well structured version of the Full Thrust system. Follow this link to Down Load them!

Using FT and SC is not new several others have done it and the results can be found spread out across the internet, I’ll give it my “touch” and will see what happens. The idea, for me stems from the problem of generating battles that have a real goal, purpose, or result because of them than the usual “we all get a 1,000 points and meet in the middle battle”. Now don’t get me wrong we do fight scenario type battles, many of them great fun, well done, but still there is no over all purpose beyond that evenings entertainment. Players will make decisions in those types of games that they would never make in a battle were the results had consequences on future games they would have to fight like in a campaign situation. In other words “will winning this battle lose me the next battle or even the war?” Those kinds of decisons make the battles a lot more interesting, and I think result in a much more “honest” and realistic game play on the table top!

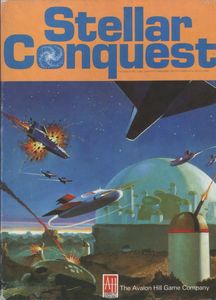
stellar-conquest-box-sml

You can find this great “out of production” game on the web for around $30.

There is also the great unknown factor in battles fought where players do not know exactly what they might be facing until the ships hit the table (sensor range). Play balance is never assured, options like, flee, fighting withdrawal, hold to the last man, start to mean something! Victories also become more sweet, obtaining objectives have purpose, and on and on. Campaigns also open a huge part of the gaming hobby that some of us find both interesting, rewarding, and just fun. The campaign mode will also give us a lot more opportunities to buy, paint, and use some of those great space stations, repair docks, and other space installations besides just ships. Planets, asteroid belts, and mine fields become much more integral parts of the gaming experience.


Explore new worlds! Conquer and exploit their populations, heck maybe just vaporize them!

Explore new worlds! Conquer and exploit their populations, heck maybe just vaporize them!

So over the next year watch the Stars (well this site) and follow along with us as we battle for the control of area RX7 or the “System of Seven Veils”

Bill W

This Campaign is being played out in the Greater Los Angeles California area (Valencia to be exact) and we would love to have any other local gamers interested in participating come join us! No requirements, one battle or all of them! No ships needed to just come and play. Give me a shout through the contact info or leave comment with your info. Check the Calendar section of my site to see what our schedule will be and get on our email list for timely updates.

If you want to follow this campaign or are involved in it please become a site subscriber or member. You will then be able to post, get into member only areas, and automatically receive notification when new material appears here. PLEASE if you become a subscriber or member, DO SO UNDER a name and email I will recognize or you may be deleted as a “spammer / scammer”

ft-old-school