Gripping Beast 28mm Viking Bowmen conversion.

Steve Gausche life long gaming pal! We had just re-based his ACW troops on magnets!

For most of us the current situation has given us a change in schedule, for me working at home equals no commute time, less shopping trips, dinners out, visiting, trips, and gaming with my friends (booo!). When I saw this coming I vowed to try and use all the unexpected time to do things that have been put off in the past. If you have been following the post here (please subscribe! top right home page) you will know that one of the goals was to organize my website better and post more often! So while going through files I found several partially completed posts and articles that for one reason or another never made it onto the site. One of them was the “second half” of Stevie G’s “Byzantine Birthday Bash” article. Remember it was when I painted up some Byzantine Cataphracts for him and he accepted them with “wow great! but…I would rather have some plain old Viking archers”. Well I never finished the article “Stevie G Birthday Bash part two!” so here it is, finished.

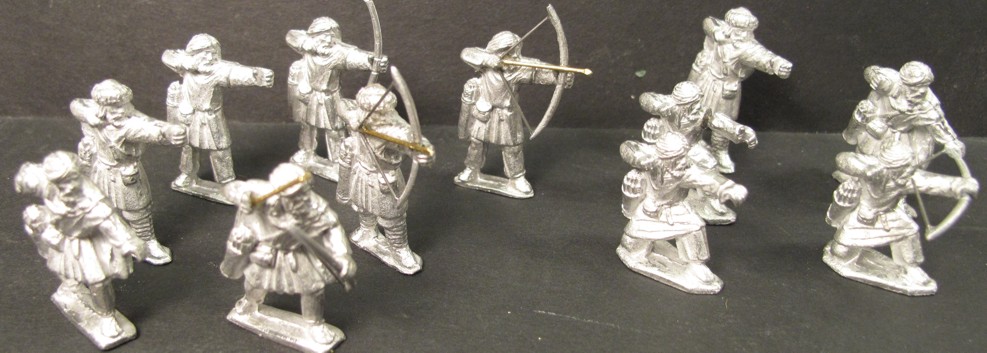
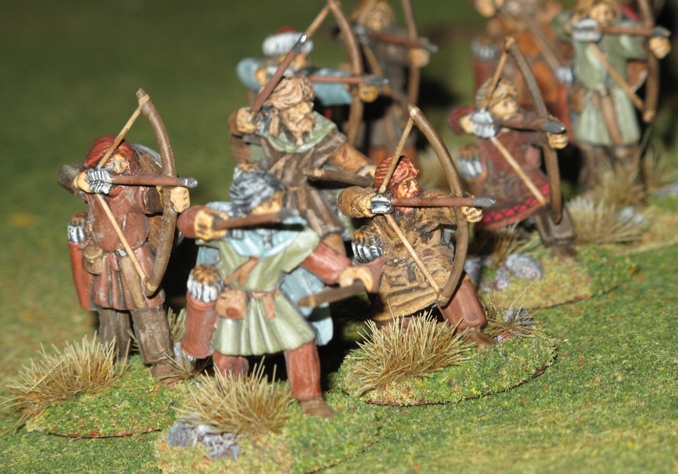
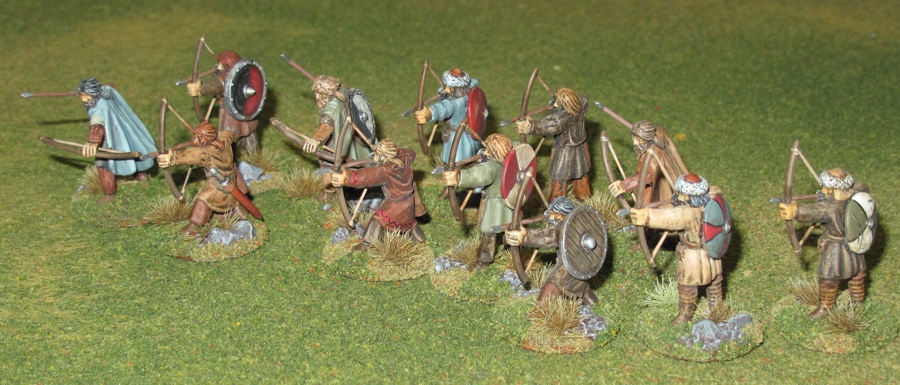
Byzantine Birthday Update! In the last post “Byzantine Birthday Bash” I talked about Steve not being totally enthused with my gift of the Byzantine Cataphracts and while loving the figures he just felt he would not use them much. It was decided that I would keep the Byzantines and instead paint him up a 12 figure unit of “Viking archers” since his Viking war band was currently using a unit of spear-men to represent archers. I had gotten a pack of Gripping Beast archers from Steve months ago and was going to give them some custom additions to make them look a bit “cooler” on the battlefield. This would be the addition of bowstrings and arrows that are normally missing on molded figures. I have a very nice Viking Warband (even if I do say so myself) and I took great care to make my bowmen look realistic, like they were really firing their bows. My Viking warband uses all “Foundry Vikings” as I regard them as some of the best ever produced! The adding of bowstrings and arrows to figures can be tough since many sculptors have never shot a bow, or figure that the end user wont care about the missing parts.
When I opened the Gripping beast package of 12 “bowmen” I was somewhat disappointed in the poses and sculpts. First the poses are really only three, Standing firing, kneeling firing, and moving / drawing arrow. There is a bit of fiddling with the basic pose to try and make them look different but in my opinion it fails. I felt when finished  this unit would look very much like a unit of “toy soldiers” no matter how it was painted.

The GB figure with just a bit of preliminary modification to see what was possible.

The GB figures with just a bit of preliminary modification to see what was possible.

Well me being me, I decided to do something in an attempt to remedy this by trying to give some uniqueness and variety to the figures. As I pondered how to do this I started to prep the figures for bowstrings and arrows. I quickly found that this was not going to be easy given the figures current poses. Many of the arms were at wrong angles, resulting in the bowstrings having to pass through the figures face or body.
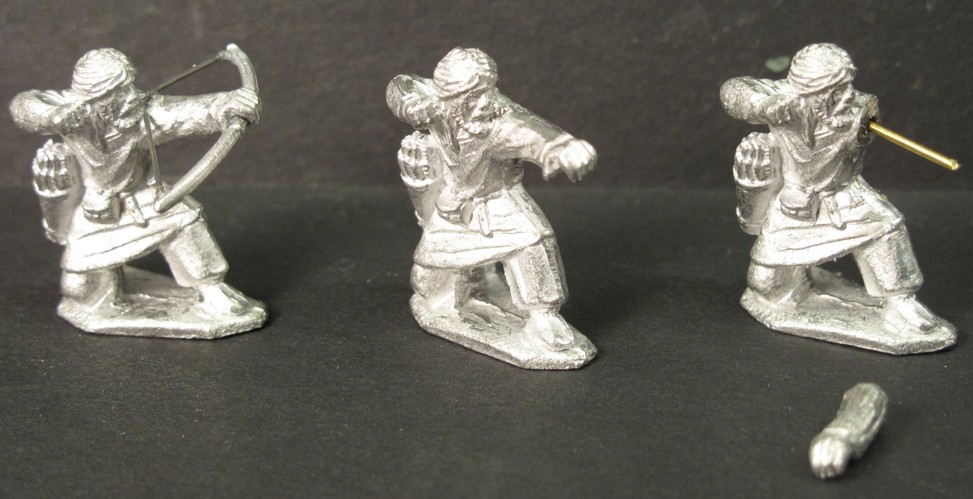
Arms were at the wrong angles or to short making major modifications a must!

Arms were at the wrong angles or to short making major modifications a must! Three of the same figure. The second one shows original position with out bow, arm pulling back an imaginary arrow. First figure shows the bow installed and the attempt at adding the bow string. I would have to cut off his head to make it work and archers rarely held a bow in this position except when on horseback. The third figure shows how I corrected this by cutting off and repositioning the arm.
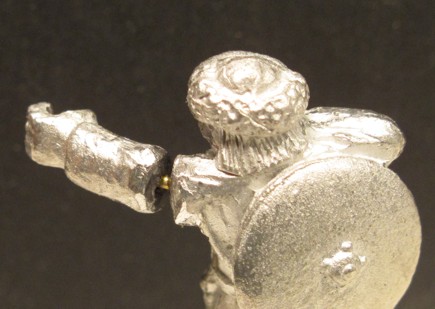
A small bit of reach was added to each arm to correct it's proportion.

A small bit of reach was added to each arm to correct it’s proportion and angle. A brass rod pin holds it in position while filling and sculpting as well as adding needed strength!

Simply bending the arms would not work either since the arms were a bit short in the original sculpt. I resigned myself to the fact that to make this work I would have to extend all the shooters arms as well as change the orientation of the knelling shooters arms by cutting / pinning/ filling them for every figure. Even the moving figure had a raised arm and hand that made one wonder what he is supposed to be doing. I solved that by putting an arrow in his hand as if he just “drew it” from the quiver and was about to nock it up.
As I delved into the project I also decided on other small modifications to “individualize” the figures from one another with additional shields, weapons, and hair styles.

Pro Tips: To avoid damage to figures when trying to bend arms, legs, or other thick parts use a good quality pair of needle nose pliers BUT lay a small wrap of leather in between the pliers and the figure to avoid marring or damaging the casting! The compression of the leather will give you a better grip and allow more force to be used. Also the area is thick, hard to bend, and to avoid distortion, try making a few cuts with a hobby knife or thin blade saw on the side you will be towards. removing a small amount of material there will make the process easier and look better. Fill the tiny cracks with gap filling super glue.
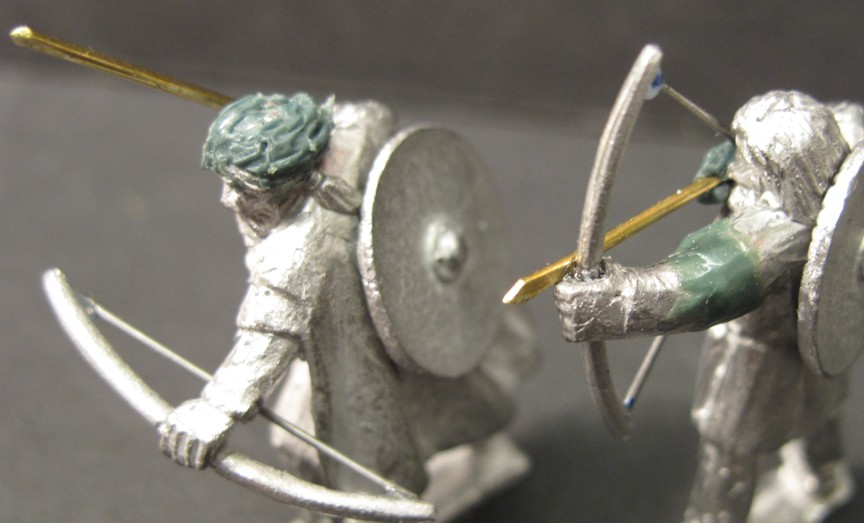
VK9

A bit of a change in hair and a shield creates just enough difference in the figure that combined with different paint schemes makes the group look much more realistic. The lengthened arm now works to create the right balance of dimensions between the arrow, bow, and arm. The first figure now clearly gives the impression that he has fired one arrow and is getting ready to fire a second.

The “Bow Strings” were made of steel wire, cut, and super glued. I thought I might add a wrapping around were the bowstring is connected to the bow but decided that in this scale I could just paint that on and get the “effect” without all the work.

The arrows are made of thicker brass rod and “arrow heads” made by gently hammering tips flat then filing. I also sculpted “flutes”, the feathers you see on the end of an arrow that makes it fly true. They are a bit big perhaps but I think they will look right after painting.
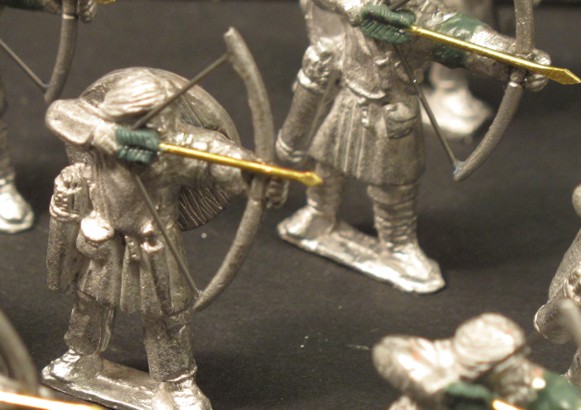
VK10

The “fletches” or feathers on the arrows are rough and would be historically as arrows had to be made quickly and cheaply in time of war, they were also not expected to be used over and over. There were better arrows made but those were rarer and used more for hunting or when individual accuracy was needed. Dark Age bows in warfare were more of a massed effect weapon than a specific target weapon.

I wished that the figures were arching up a bit, they are all shooting straight and level. Most archers would have been used as a group and be kept back to use their range so their aim would be higher.
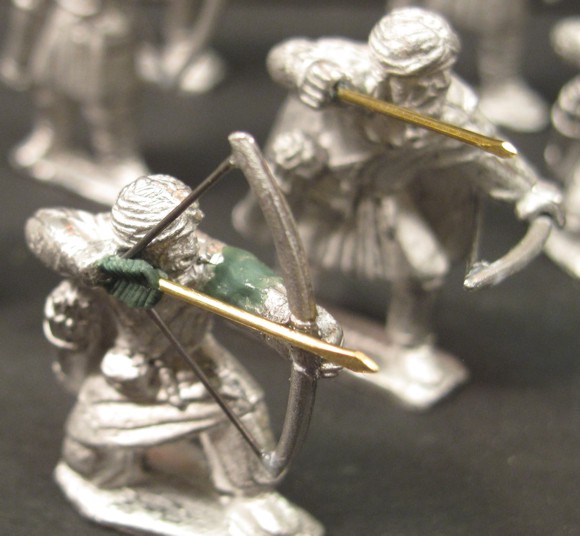
VK8

I have used thick industrial thread for bowstrings at times but it can be fiddly to do and not look that great. Using small steel wire is much easier and sturdier. Brass wire is used for the arrows as it is easier to shape and work with. Two part sculpting epoxy “kneadite” was used for the feathers.
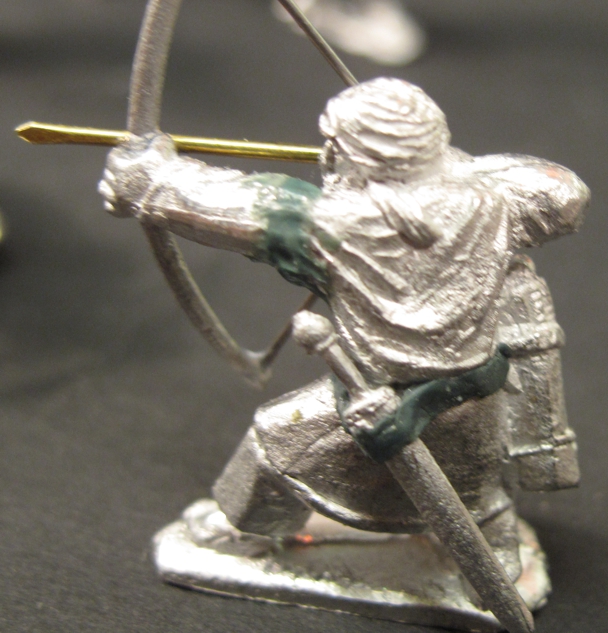
The other side of the figure shows where a sword out of the “bits box” was added and a belt sculpted on to make it look right! Shields and swords were added to many of the bowmen as they would have carried them for defense or when called upon for melee support!
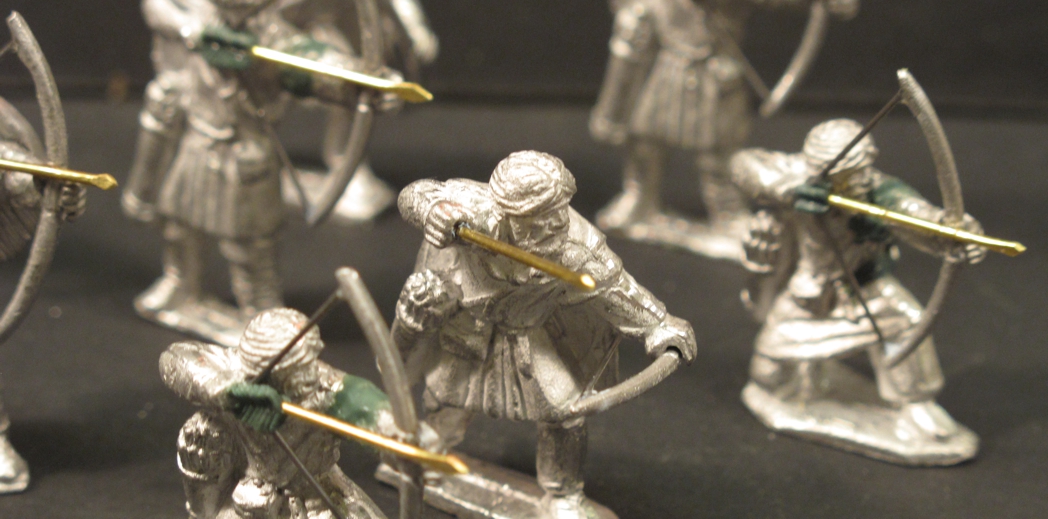
The easy addition to the center figure of a arrow in his hand and the bow string make a huge difference!
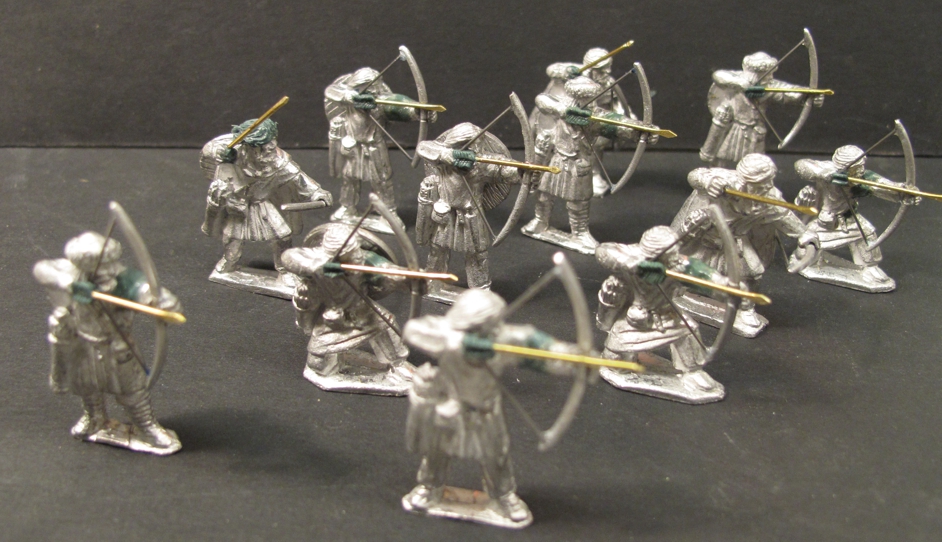
Probably 3 or so hours of extra effort was put into modifying these guys prior to paint but the results are well worth the effort in my opinion.

These guys were actually rewarding to do and not that hard especially since I have done this for fifty to 70 others before in my warbands. It just makes archers sooo much better looking that for me it’s a must do!

Yea! Now these bowmen look like a proper threat! Well worth the effort!
with the modifications, additional weapons, shields, and a some paint they look a cohesive yet individual unit.

“Norman?” is that you?

Wow two post in as many days! a new record! Well really just part of one of those resolutions you make to yourself around this time of year, to do something more, or do something less! Well one was to do more painting of mini’s, more playing with mini’s, and actually posting more about it! I also vowed to try and take pictures of and categorize my entire collection here…lol we’ll see about that, I will try. So here goes the first “mini post” of 2020.

It seems that my breaking from the tradition of never taking commissions for painting a few years back has led to more and more commissions, mostly for friends and many times to try painting figures that I would not paint for myself but I feel may be interesting or a challenge to paint.

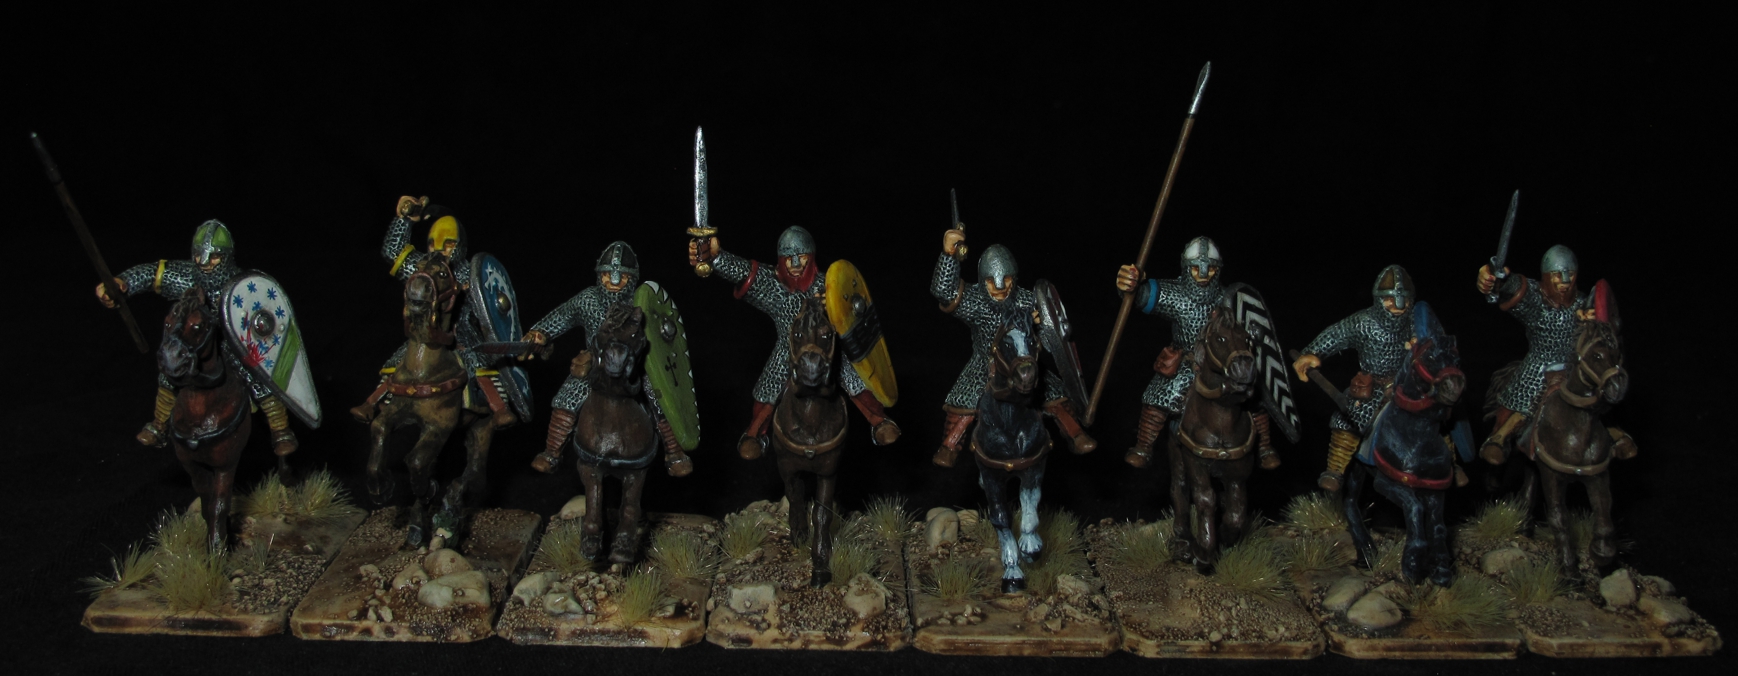
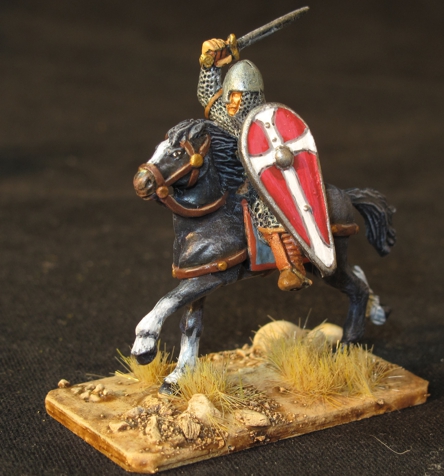
This is yet another unit for Chris Armstrong’s ever-growing Byzantine SAGA warband. This time it’s a “warrior” unit of 8 Mounted horsemen. They are painted as Normans in Byzantine service but I kept the paint job a bit more “generic Norman” so they can be used by Chris as mounted Medieval horsemen in many roles.

The horses and the riders are from Gripping beast and have had some modifications to their poses as well as hand made steel spears added. Shields are hand painted. The next unit up for Chris’s Byzantine army is a 4 horse Cataphract unit.

More mercenaries!

Quick little post to prove I’m still alive….. Lol! Been busy with life, work, and work, but still been managing to paint quite a bit, play a bit, and also working with Stevie G to reorganize and label our 15mm Napoleonic army’s!

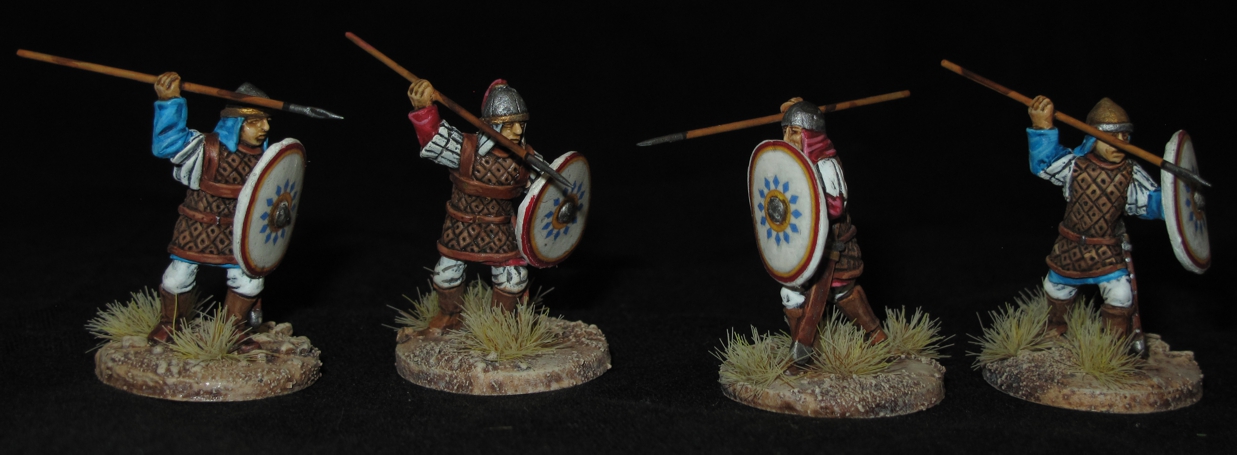
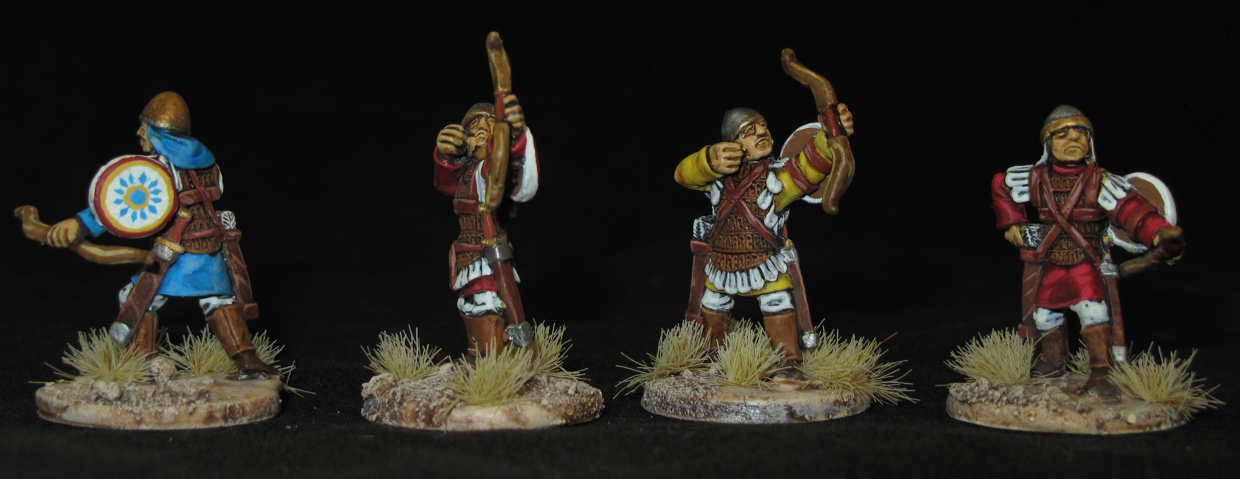
So, here are some more of those Byzantine troops painted up to match Chris A’s SAGA war band. 4 Skutatoi Archers and 4 Spear men. Not my normal painting style but they needed to match. I think I’ve done this pretty well and even made them a bit better but not so much that it’s a noticeable difference. Chris gave me transfers for the shields (something I’m not a fan of using on my stuff) so I tried them, on the spear men they worked ok and match the original army perfect but the ones for the archers were too big and I had to hand paint those. Matched the basing, coated, and done, enjoy Chris!

Click to enlarge.

Hand made Steel Spears and applied transfer shield designs.

With theses I had to paint the shields, not to bad I think.

Next?

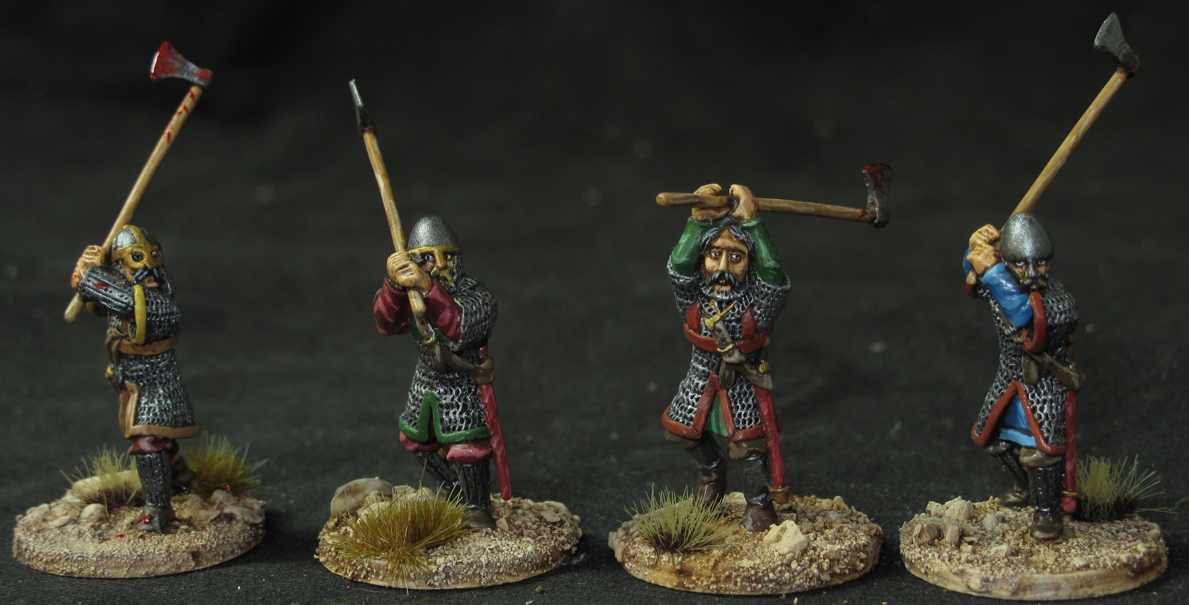
More figures for a friend…. well not the same friend! VARANGIAN GUARD

It seems that lately I have been doing more painting for others than I have ever done. I normally do not do commissions but it seems I’m starting to like doing it more for a couple of reasons, one it gives me a chance to paint thing I might not normally paint, periods, different conflicts, etc…. and I also fell better taking money earned from the hobby to buy more goodies for my hobby!

One of our group recently purchased a Byzantine SAGA war-band from another in our group and wanted to expand on the original forces. He asked me if I was interested because he wanted me to try to match the paint style of the original figures. Since I had considered painting one of my own Byzantine war-bands I thought this might be fun and a good way to really get a feel for the colors and style.

The first group: VARANGIANS

Dogs of War has a brighter future! Lights, Saga, Action!

Well just a few bits and pieces from “my world of wargaming”.

The family did a lot of last-minute shopping for me this Christmas and since “dad” likes weird stuff (wargaming stuff) many of my gifts didn’t arrive until long after Christmas. Not a bad thing since all through January the mail was full of great items to brighten the work week!

The first items were the “new” SAGA rules, meaning SAGA II, the basic rules, along with the Vikings and Crusaders supplements, and finally the Book of Battles. There are lots of game systems out there that redo their rules, some that do it with annoying frequency (and not always to make them better as much as make them money!) but Studio Tomahawk has done a good job with the “revamped” rule sets, tons of great reading and I believe an even better game justifying the expense in upgrading.

The rules do not really change in spirit or basic structure, its more a re-balancing, clarifying, and expansion of the first set. I have played 2-3 games using them and the transition was very easy and felt smooth.

I liked that the designers have continued to look at their product, the feedback provided by players directly, and through the active Studio Tomahawk forum then made the right changes to improve and expand the game without making original players of the game feel like their previous experience and armies were now useless (a common occurrence with several other well-known companies).

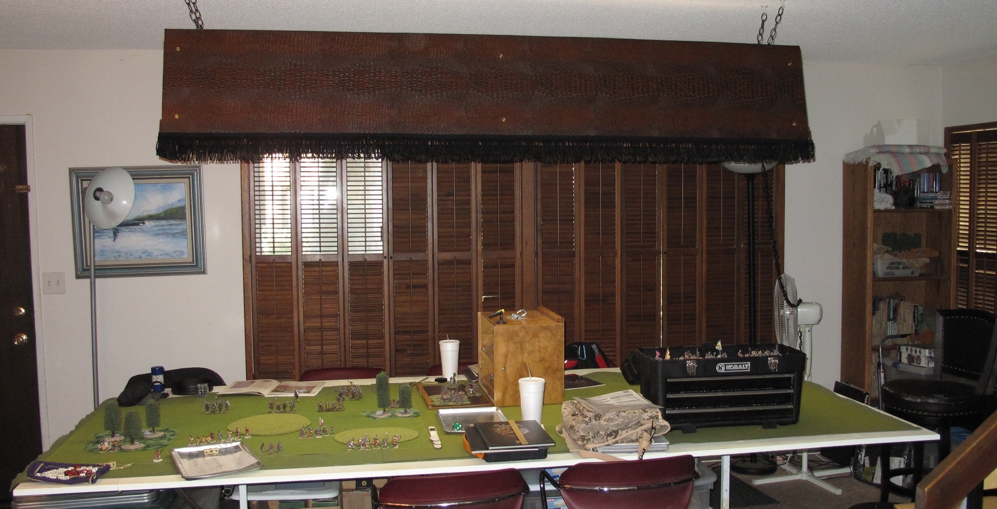
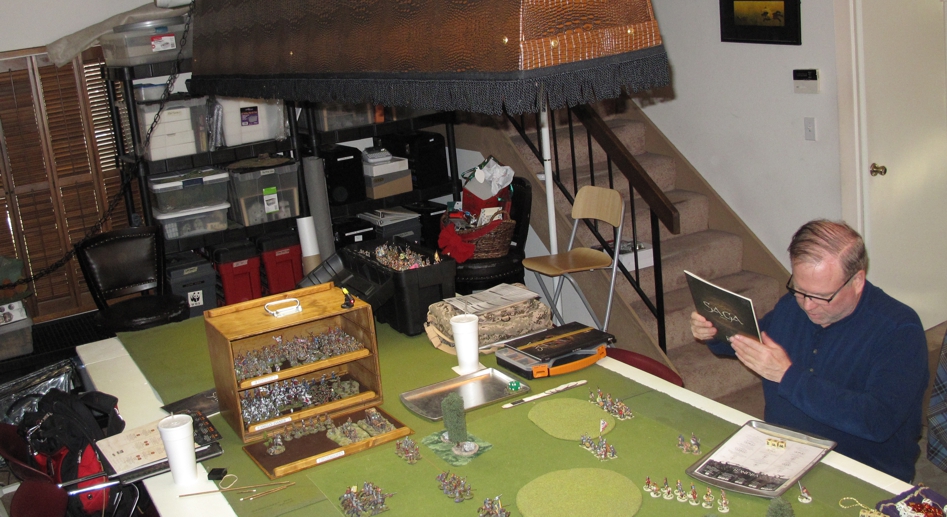
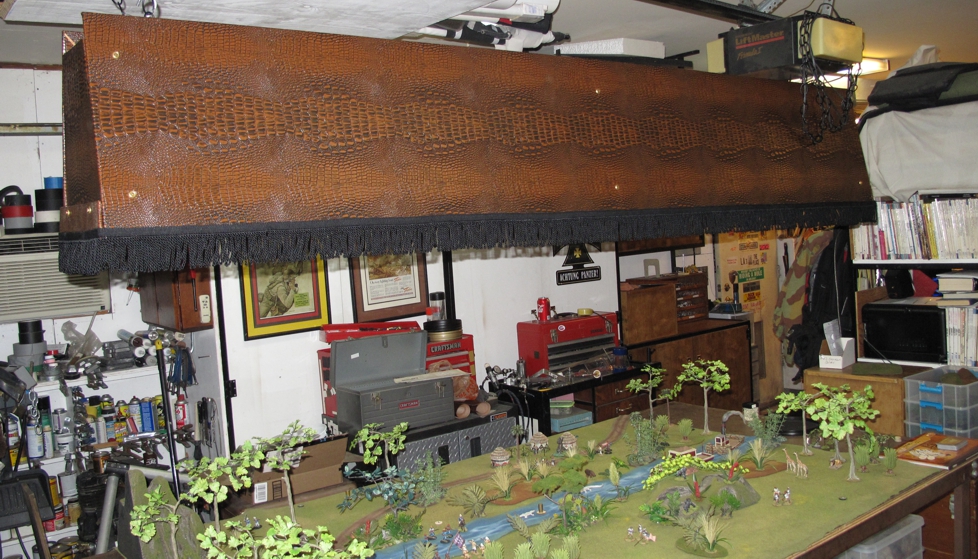
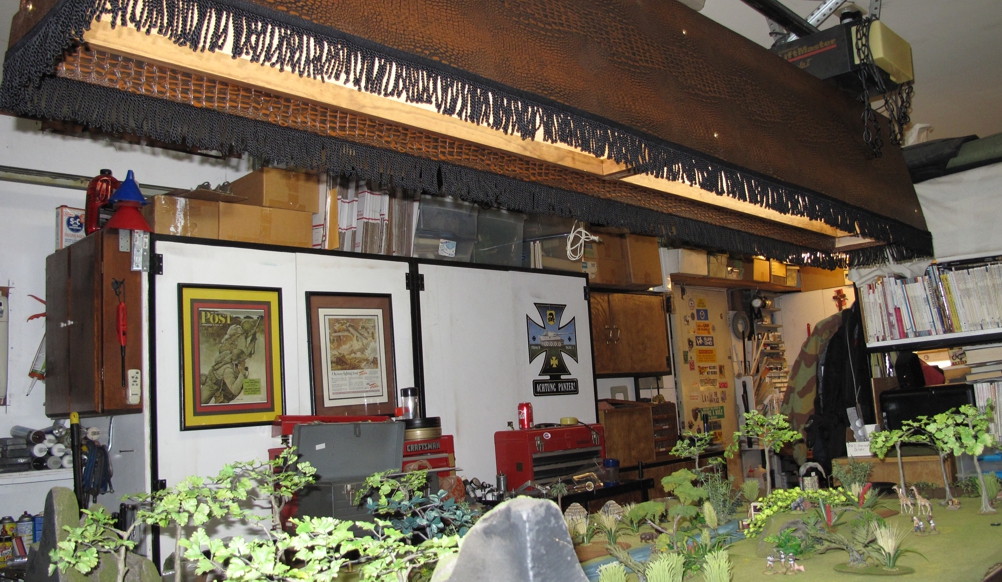
I’ve also been chipping away at my wargamers “to do” list and a big one on the list was to build some improved lighting for our game table down at the “Dogs of War” gaming group. Over the last year or so the “dogs” have been working to make the “Dog Pound” a better place to play, cleaning, building storage, tossing or selling unused / old gear, and one project was better lighting so we might better see all those beautiful miniatures on the table. This project took over a year of “thinking and research” to figure out just how and what would be the best way to do this. I / we wanted lighting that was easy to use and lite the table / miniatures without making the rest of the room look like an outdoor sports arena. I wanted the solution to look good, fit in with the club space, and not impact the members house much. Cost to build and cost of operation was also a factor. I wanted the unit to light our entire 10’ x 5’ table as evenly as possible so in the end I went with a 8’ long LED setup that would be dimmable as well! The unit hangs over the middle of the table and the design contains the majority of the light to the table exactly like pool table lights.

“Thar she blows” Lighting installed down at the “Dogs” above our 5′ x 10′ table!

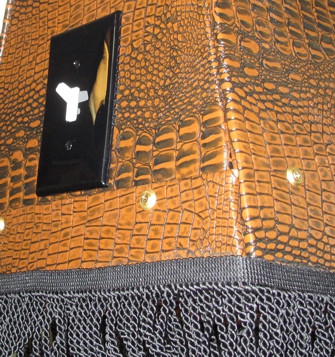
I wont go into the building of the lighting fixture now, maybe latter in a “how to post or “Workbench page” but here are a few pictures to let you get the idea.

A dramatic improvement in my opinion. There is still a lot of work to be done on our remodel (chain will be swagged up out of the way)

Switch allows quick on and off as well as dimming.

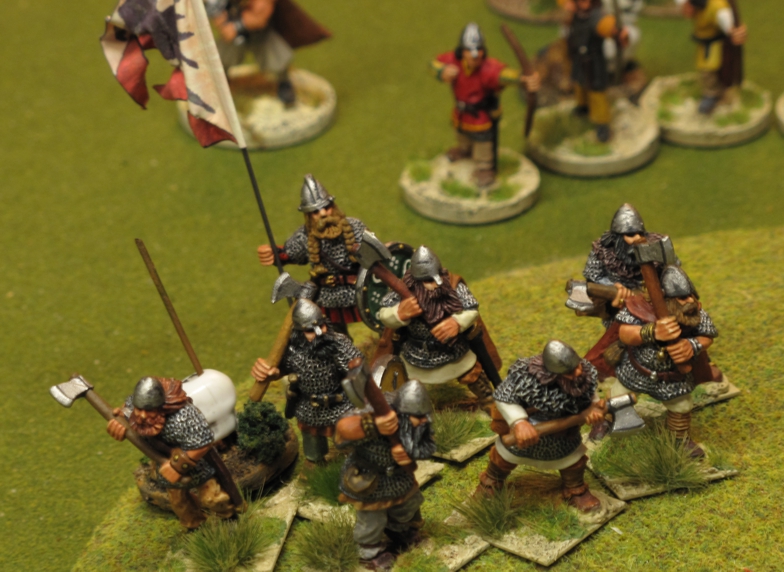
To break in the new lighting Chris and I played a game of SAGA II using the Viking supplement. Chris took Vikings and added a Banner man while I played straight up Normans heavy on cavalry. I didn’t take many pictures but the game was fairly even for the first few turns until his Hearthguard charged up the hill to take out one of my Hearthguard cavalry units only to be counter charged by another of my cavalry units and wiped out.

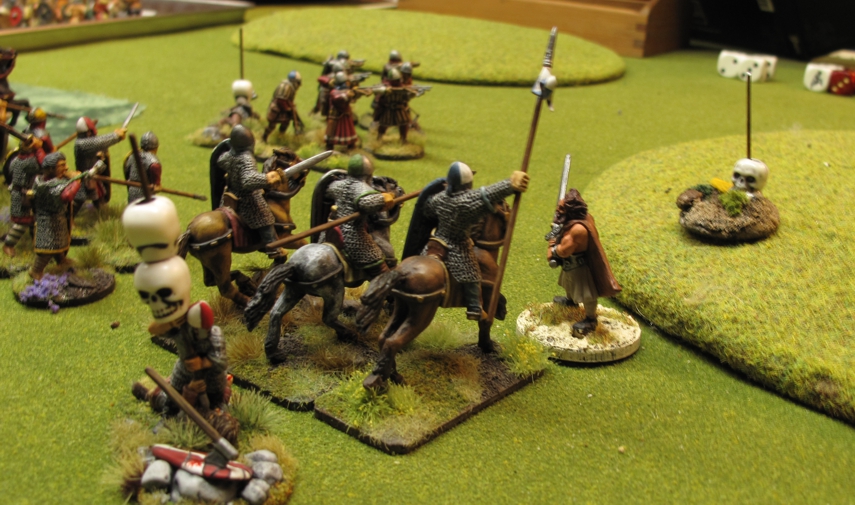
Chris’s Viking hearth-guard charge up the hill eliminating one of my hearth-guard units only to be charged and wiped out by another of my Norman hearth-guard units the next turn! With our old lighting set up the excellent paint jobs on these guys could hardy be seen! This shot was done with no flash and no tripod!

The battle for the top of the hill raged on with Chris’s Warlord entering the fray hoping to end it. My Norman cavalry used the “Gallup” Activation/Reaction” option and moved off leaving his Warlord standing there surrounded by angry Norman infantry. A finial charge by my Norman warriors sealed his fate and outside of a few parting bow shots by both sides ended the game with a Norman victory.

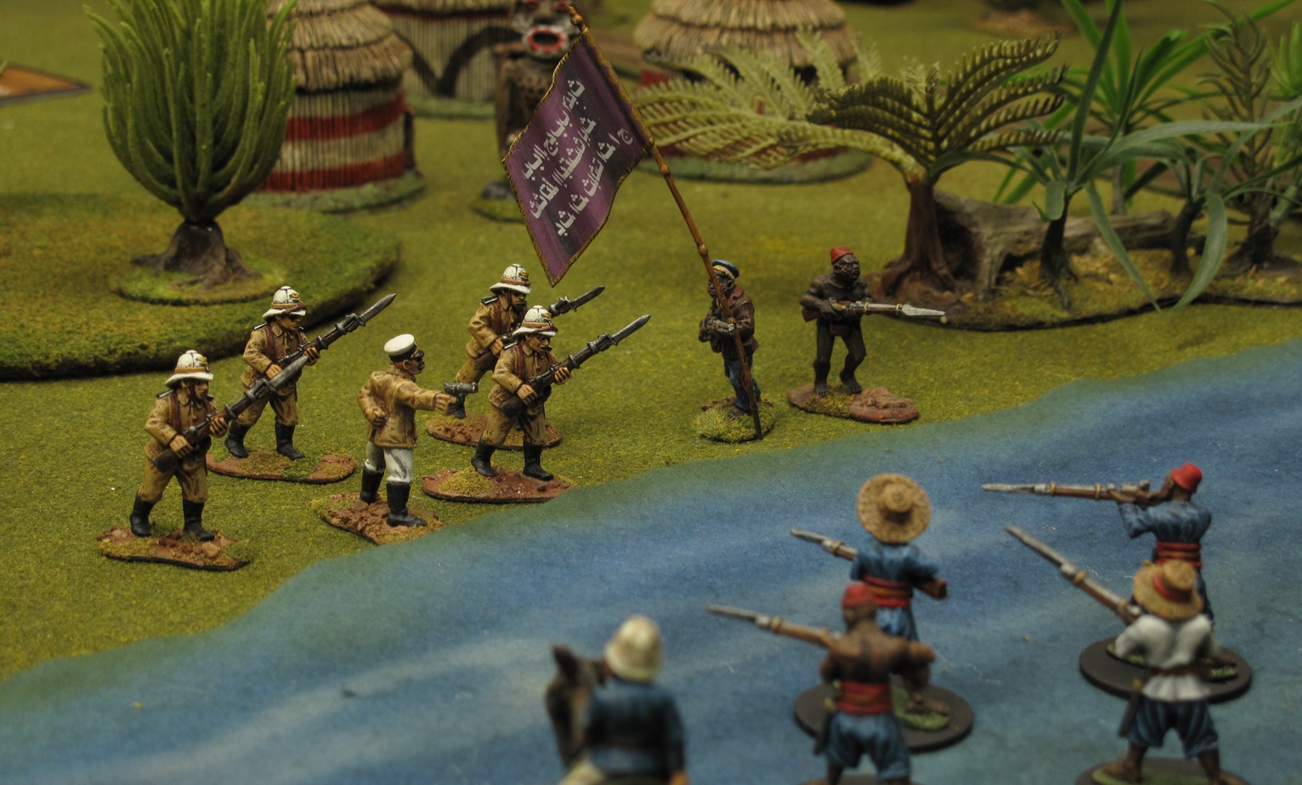
One of my other gifts was the Studio Tomahawk rules “CONGO” they look great and I’ve already played one “test” game that was quite a bit of fun. I’ve always had a great fondness for the Darkest Africa figures from Foundry, Coppelstone, NorthStar, and others! I think CONGO will be the spark to get me painting sore of the pile of Darkest Africa figure on the shelf! I have played lots of Darkest Africa games in the past but some of the rules are a bit dated and no-longer available. These follow some of the same concepts from Studio Tomahawks other rules so may be a bit easier and acceptable to players familiar with those rules.


The first game under the new light, Darkest Africa isn’t so dark!

We used a pre-made scenario, basically capture the flag. Of course to make it interesting the flags were in the middle of a crocodile infested river flanked by enemy figures trying to put hole in you!

More on CONGO in the future…..

The finished light being test in my shop with a game of CONGO.

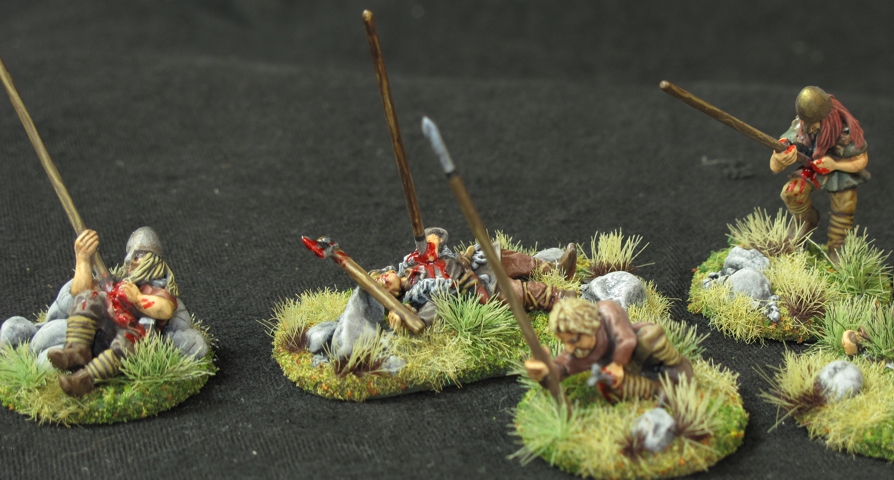
Custom SAGA Casualty Markers

A set of six should be plenty for a warband since 6 point armies are the norm and each unit is normally 1 point.

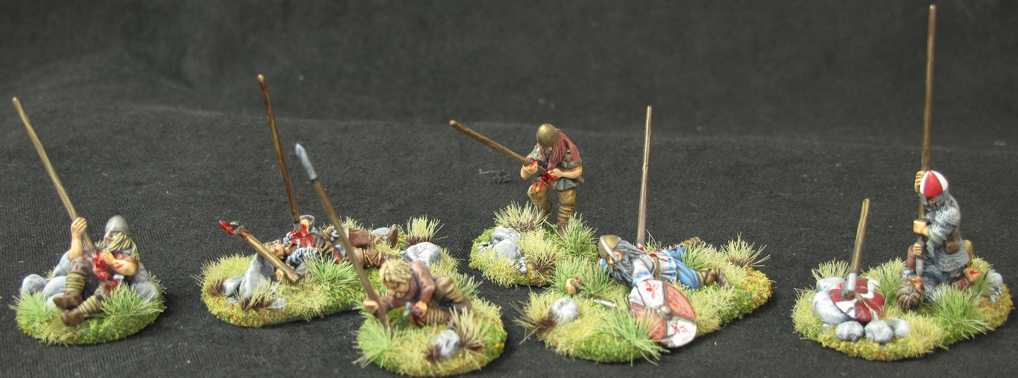
SAGA has been one of the games that has held my focus for the last few years and a lot of my painting and building has been centered around the game. I always like to make things better and improve if I can the look or play of the game. I never like game tables littered with markers, chits, or anything that takes away from the visual and SAGA is very good in this respect only requiring “fatigue markers” when a unit is tired out for one reason or another. I have seen all sorts of things used as fatigue markers, the original game produced markers in the form of shields, as well as coins, beads, small rocks, etc… Our group started long ago to use small plastic “Skull” beads as they looked cool. I think the first skulls where brought in by me after my buddy Stevie G bought me a pack at a convention. Another member of the group started making little vignette stands that used dice as part of the vignette to show the “fatigue” level. Rick Abbo then began to make some that used spear shafts in the vignette allowing the Skull bead to be slid on, they looked cool!

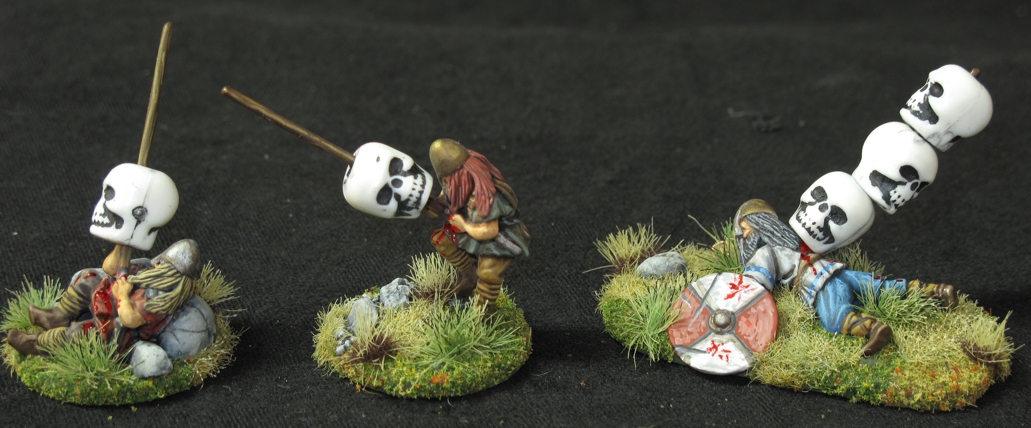
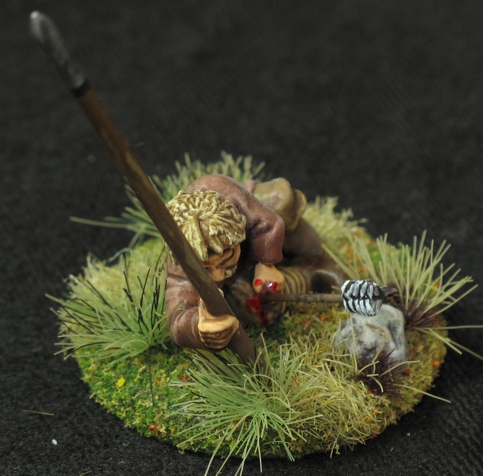
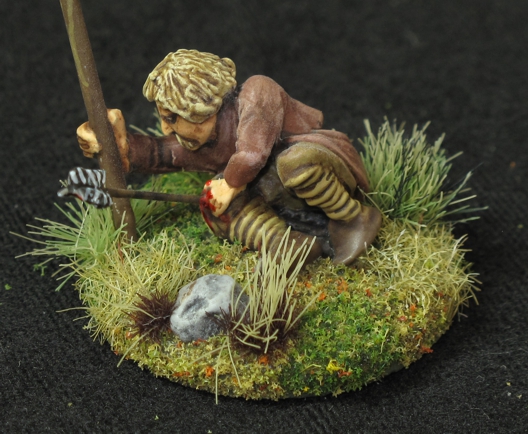
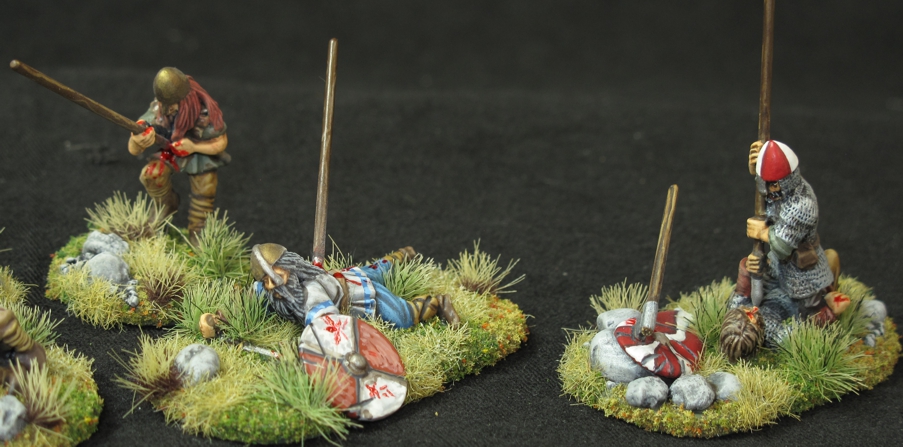
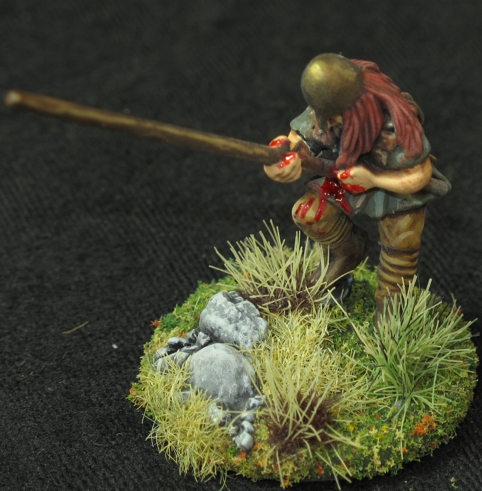
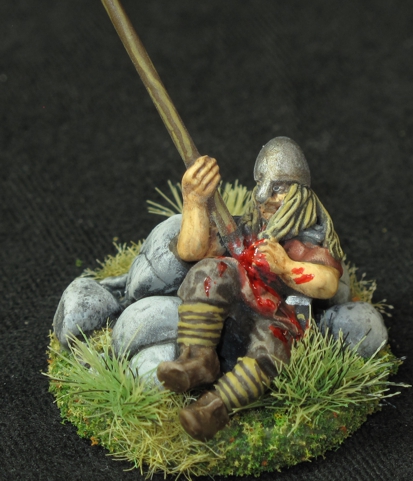
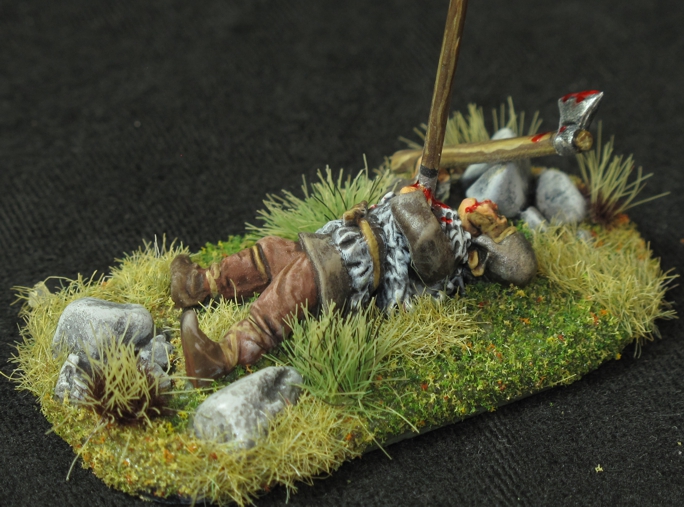
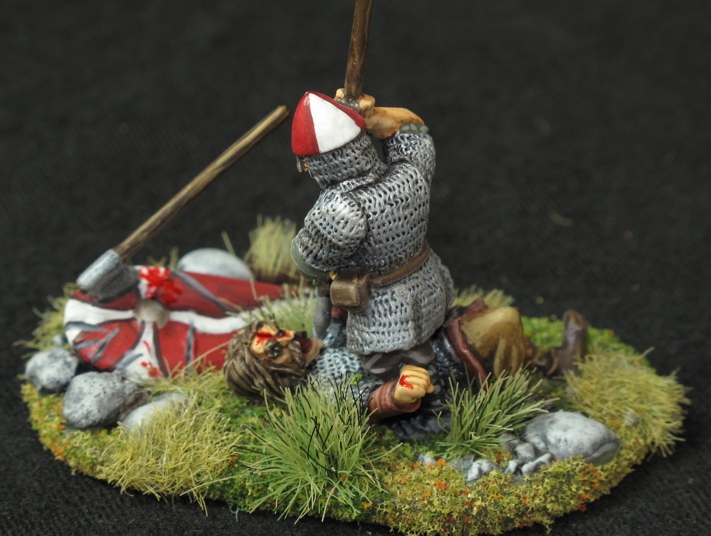
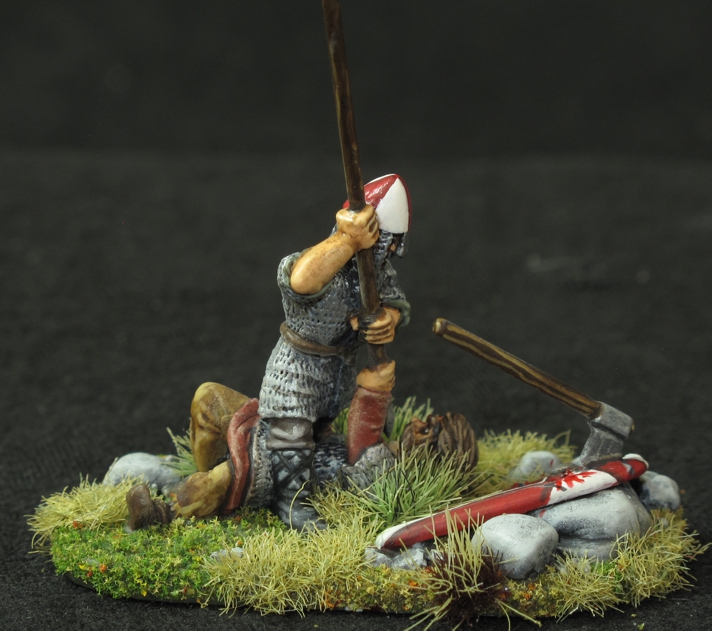
Well I finally got around to making my own and once again they are highly customized. This first set is based on wounded / dead figures that could be Vikings, Danes, Saxons, etc.….(sure they really work with any warband) I’ve added a hand cut steel rod for a spear to each one by drilling a hole in the figure to make them look wounded and hold the “skulls”. I have also added extra pieces from the “bits” box, real and “epoxy” rocks to give more life and character to the stands. If I can find the right wounded/dead figures, I plan to do this type of “Fatigue” stand for other factions as well.

The spear a just long enough to hold three fatigue marker skulls since the new SAGA 2 rules treat 3 fatigues as exhausted and excess fatigue is ignored. I like this since before you had to make the spears longer to get more markers on and looked not quite right.

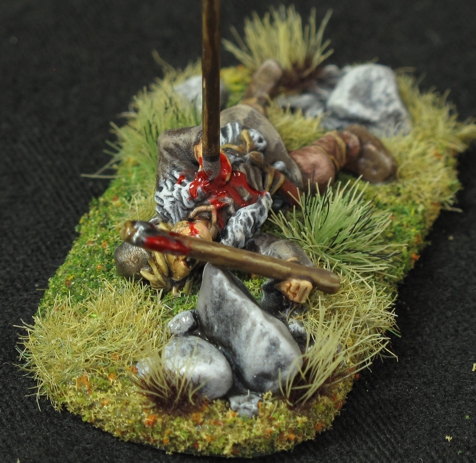
This figure got a hand made arrow of piano wire and epoxy feathers to show a wound. The “steel” spear was also added giving the effect that he’s trying to stand and get to safety.

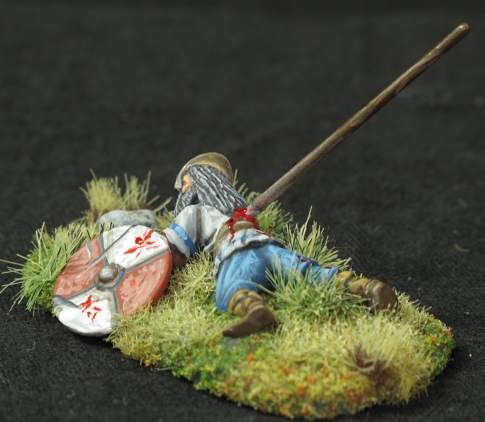
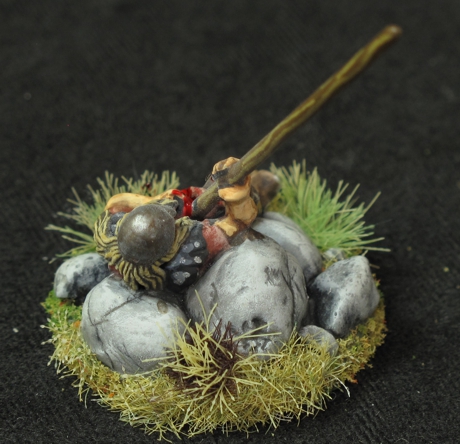
This is the same figure as the standing figure above but slightly re-sculpted to a lying down version. I sculpted some big rocks from two part epoxy in order to prop the figure up a bit and a better viewing angle.

A view of the additional sculpted rocks.

The fresh blood look is a TAMIYA color “clear red” over regular Vallejo red. It has to be applied after dull coating.

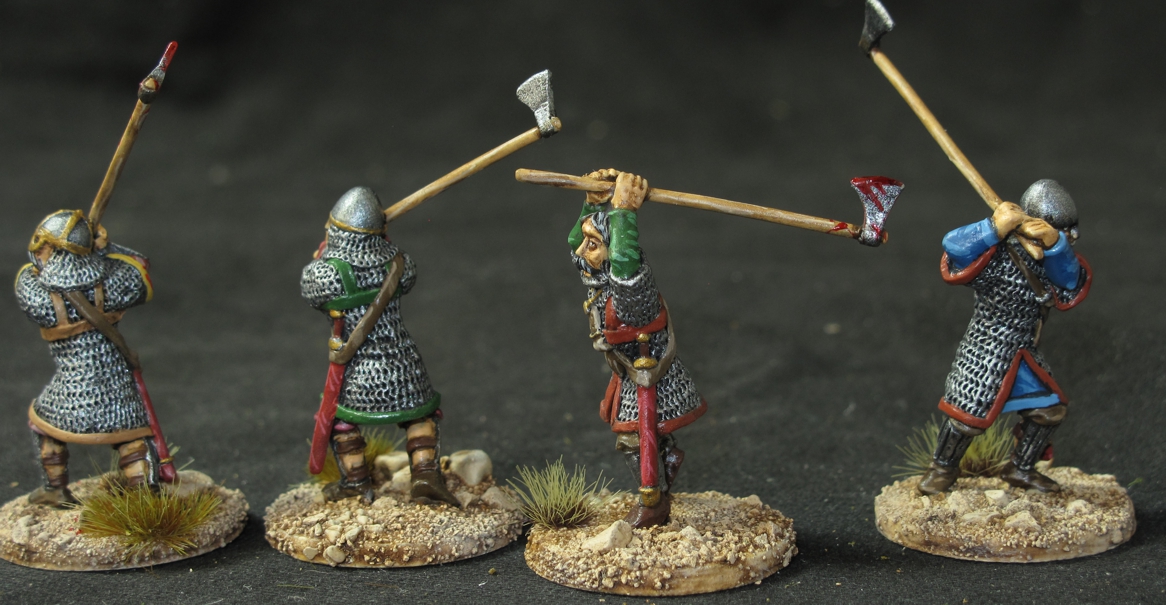
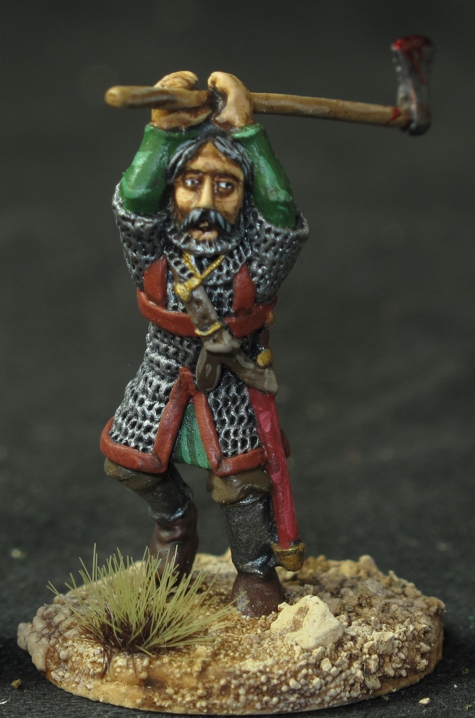
I put an ax in his hands to create that finial moment as a Viking dies when its so important to die in battle clutching a weapon to insure entry into Valhalla!

I love this one! I added some extra items, the shield with embedded ax to further the appearance of an on going desperate struggle!


“Escort Service” part 2

These will make a great unit for the “Escort” scenario in SAGA

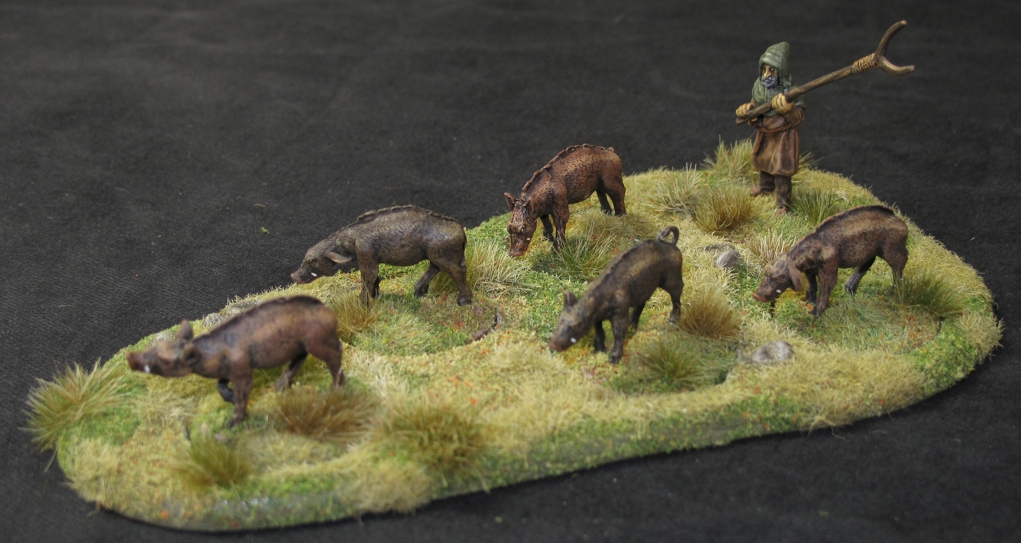
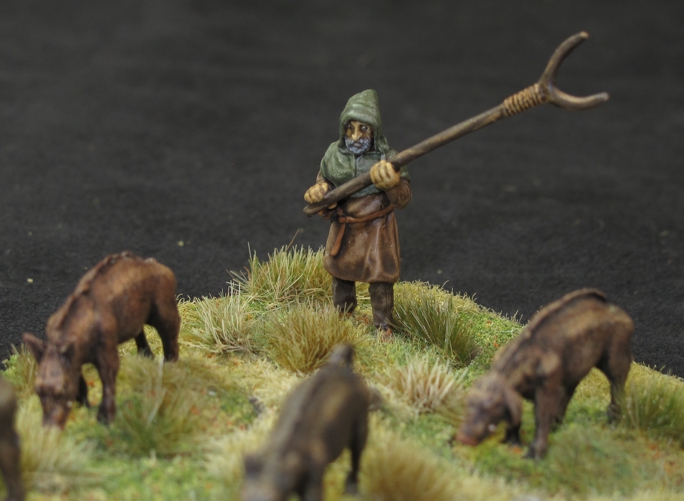
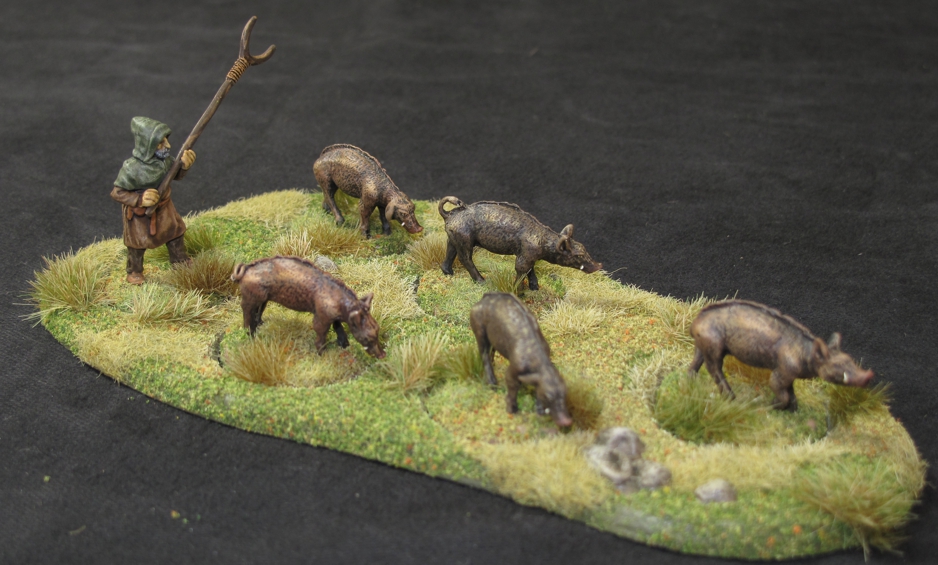
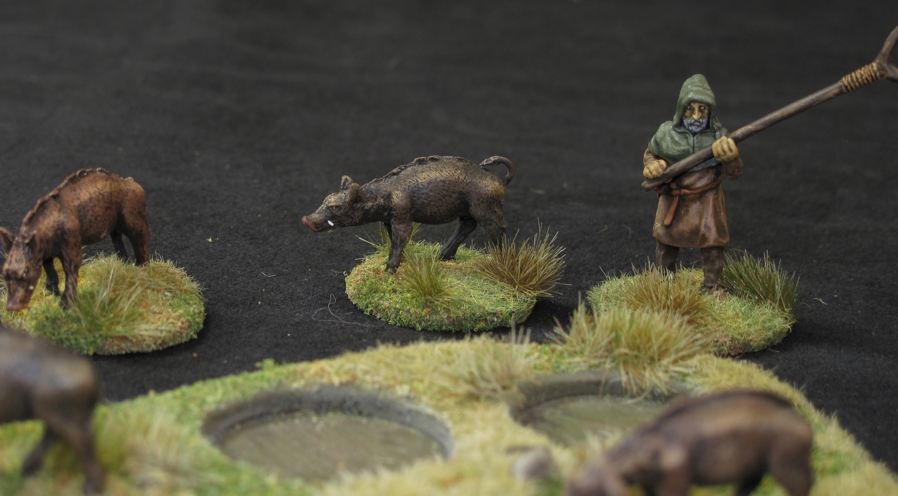
So for Part 2 of my “Escort Service” I finished up my pig herder and his swine. I also based these guys for ease of movement but tossed in a bit of a twist in that I did it like a movement tray. I did this because I wanted the ability to use these figure singly in other situations.

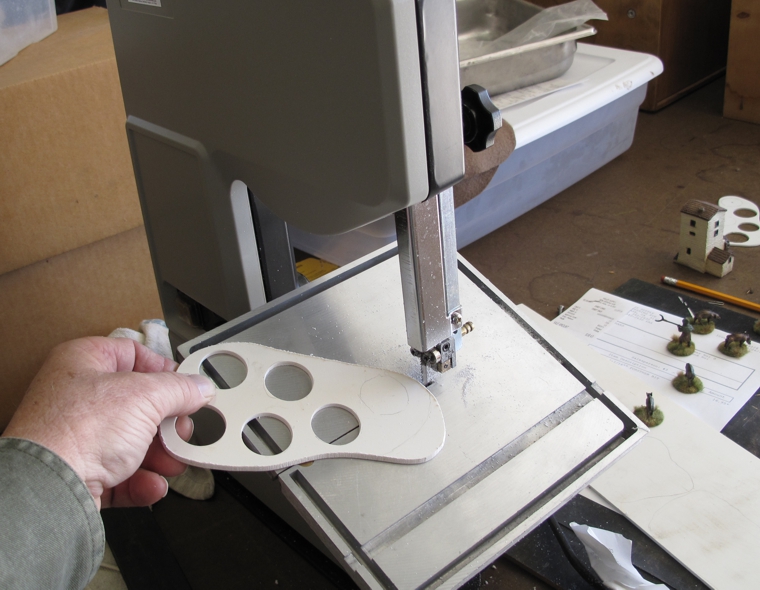
To make the base I used some sheet polystyrene the same thickness as my “LITKO” bases used for SAGA infantry, about 1/8 inch. I arranged the figures to my liking and then traced onto the polystyrene the area that would be the base. The base was cutout using a hobbyist sized band saw from Micro Mart.

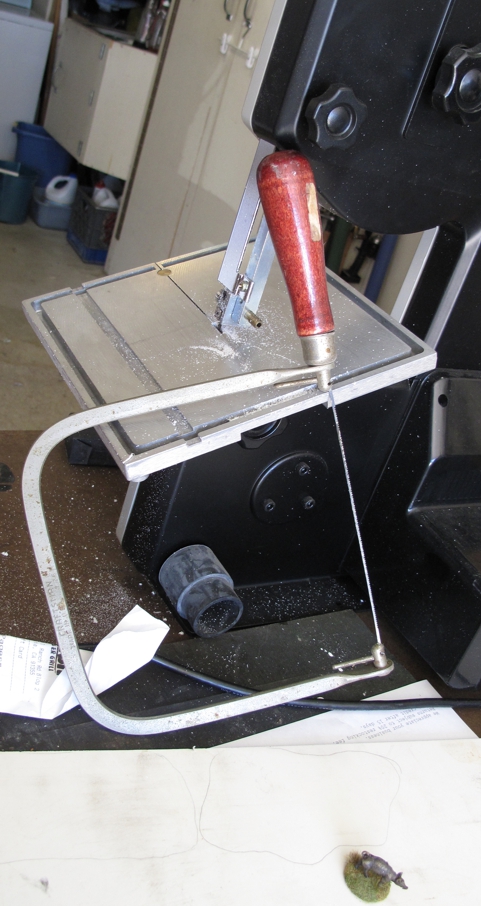
This is a great tool to have in anyone’s tool arsenal! If you do not have one a “cooping” saw will do the job as well, well almost as well! The cut was done with a sloping angle edge to make it blend better with the terrain.


Next a sheet of thin magnetic sheet stock was cut in the same shape. This will later be contact cemented to the styrene base to both hold it to the storage drawer’s metal lining and help hold the figures in because of their magnetic bases.

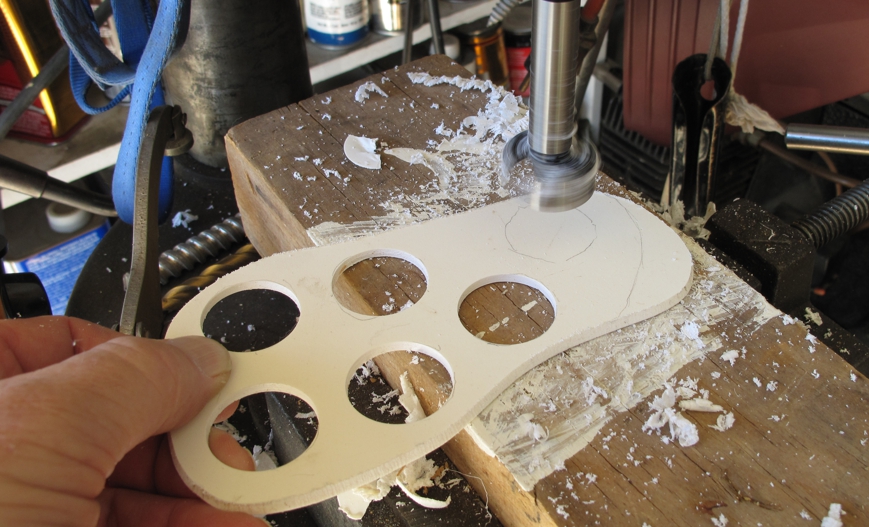
I arranged the figures on the base again and this time traced their out lines onto the styrene in preparation for cutting the holes the figure will sit into later. My figure bases are round and 1 inch or 25mm. I used a 1 ¼”  “Fostner” bit in my drill press to cut the holes. A “Fostner” bit cuts perfect round holes not possible with a regular drill bit. Not cheap but you will only ever need one and used for cutting plastic will last your lifetime!


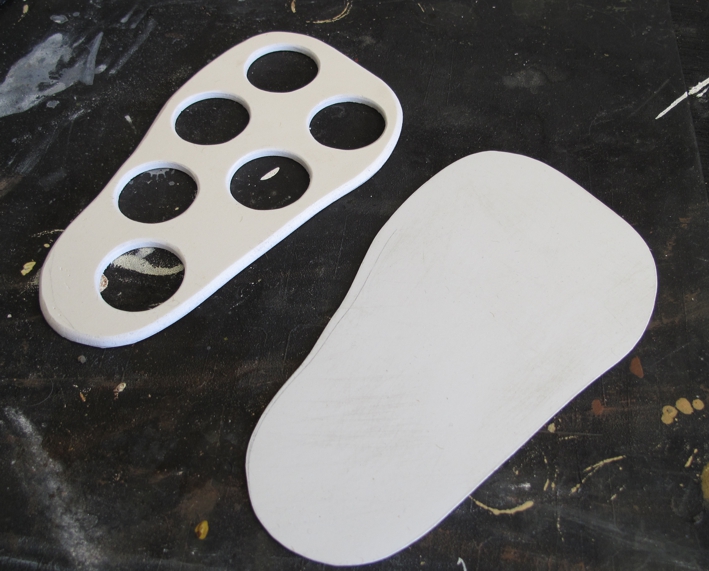
Once the holes are cut the pieces are assembled using contact cement and with a bit of finish sanding is ready for finish decoration. I use a recipe of Durham’s “Rock Hard” as a base material in landscaping and in 20 years found no problems. Mix it 80% with 15% white wood glue and 5% water. Just experiment with this formula until you get it right. It should be the consistency of porridge, easily spread on and a bit flowing. As it dries u can push it around for a natural unevenness. The glue is important since without it the “Durham’s” may chip or flake with table use.

Even though the individual figures are removable with a little effort you can make it blend very well and hardly noticeable in the base.

Once again I get wrapped up in the building and forget the pictures but I think you get the idea and feel free to ask question in the comments. I think it came out great and this now finishes 2/3rds or the “Escort Project” so see you soon for the last installment!