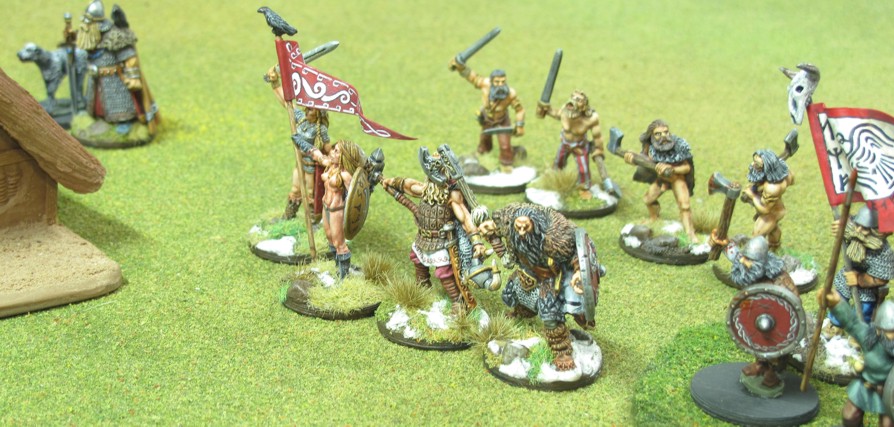
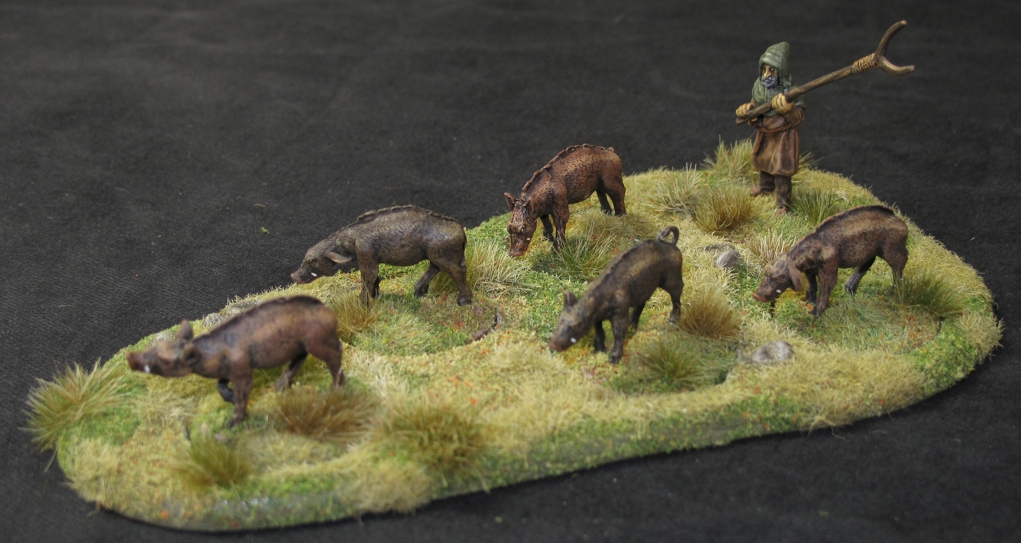
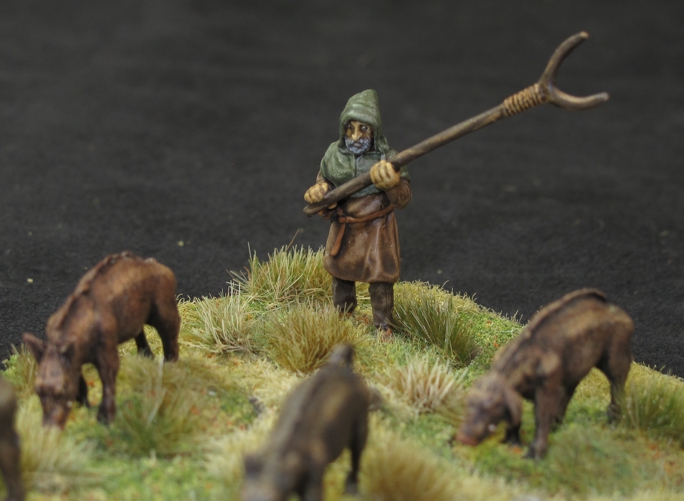
These will make a great unit for the “Escort” scenario in SAGA
So for Part 2 of my “Escort Service” I finished up my pig herder and his swine. I also based these guys for ease of movement but tossed in a bit of a twist in that I did it like a movement tray. I did this because I wanted the ability to use these figure singly in other situations.
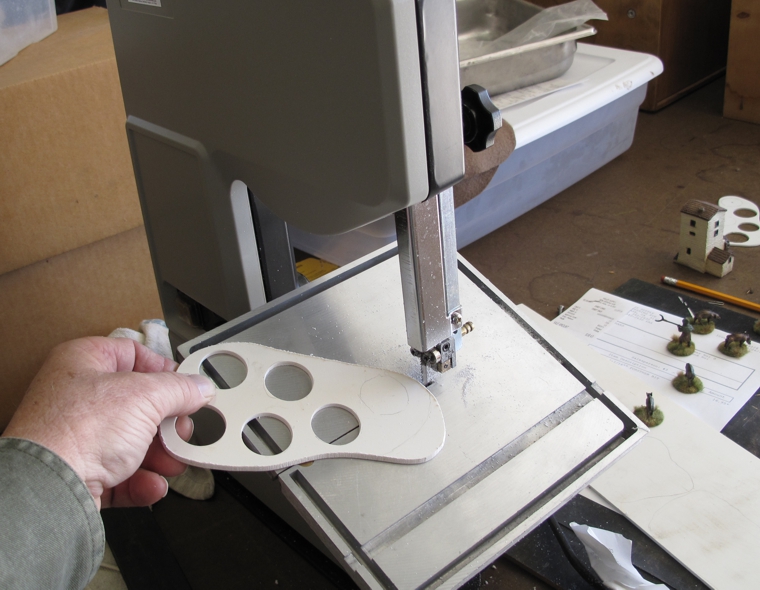
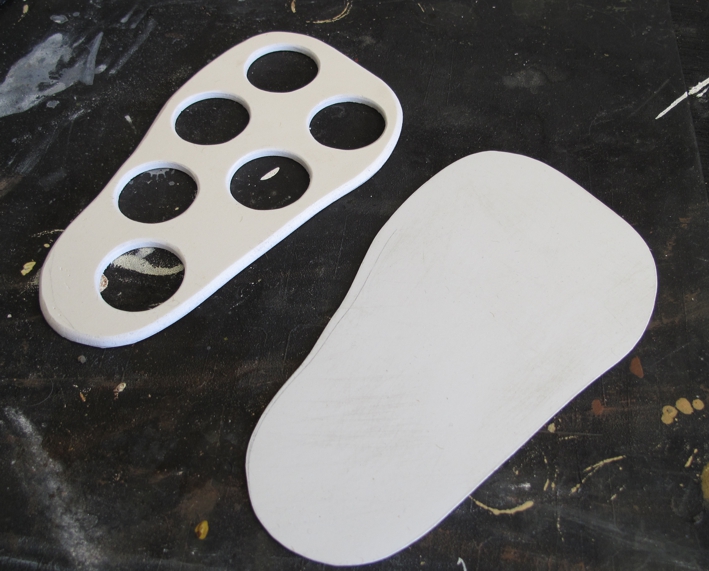
To make the base I used some sheet polystyrene the same thickness as my “LITKO” bases used for SAGA infantry, about 1/8 inch. I arranged the figures to my liking and then traced onto the polystyrene the area that would be the base. The base was cutout using a hobbyist sized band saw from Micro Mart.
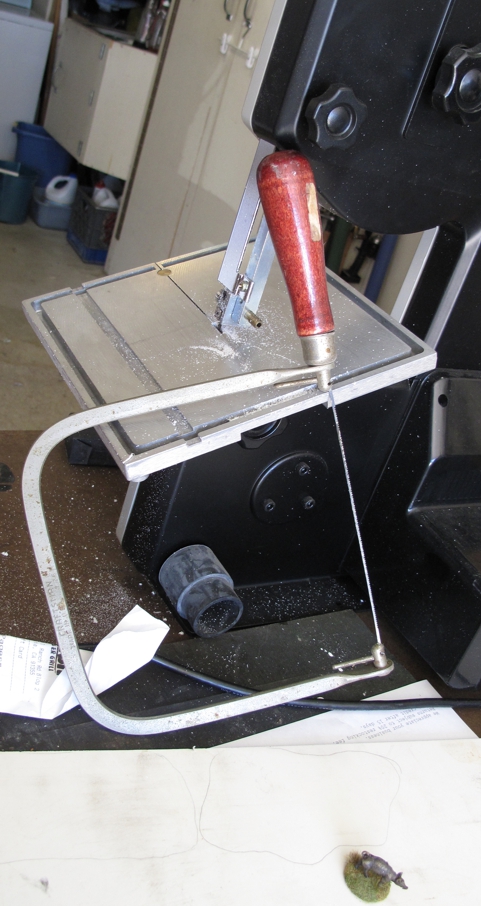
This is a great tool to have in anyone’s tool arsenal! If you do not have one a “cooping” saw will do the job as well, well almost as well! The cut was done with a sloping angle edge to make it blend better with the terrain.
Next a sheet of thin magnetic sheet stock was cut in the same shape. This will later be contact cemented to the styrene base to both hold it to the storage drawer’s metal lining and help hold the figures in because of their magnetic bases.
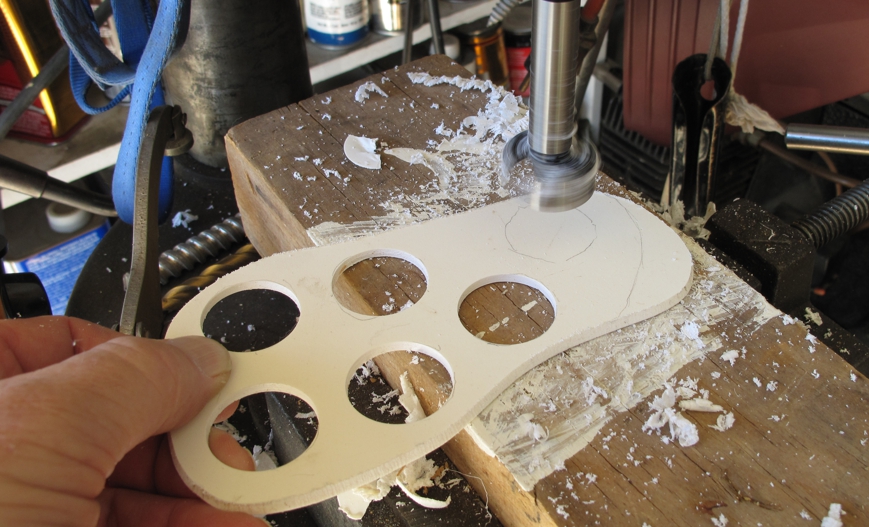
I arranged the figures on the base again and this time traced their out lines onto the styrene in preparation for cutting the holes the figure will sit into later. My figure bases are round and 1 inch or 25mm. I used a 1 ¼” “Fostner” bit in my drill press to cut the holes. A “Fostner” bit cuts perfect round holes not possible with a regular drill bit. Not cheap but you will only ever need one and used for cutting plastic will last your lifetime!
Once the holes are cut the pieces are assembled using contact cement and with a bit of finish sanding is ready for finish decoration. I use a recipe of Durham’s “Rock Hard” as a base material in landscaping and in 20 years found no problems. Mix it 80% with 15% white wood glue and 5% water. Just experiment with this formula until you get it right. It should be the consistency of porridge, easily spread on and a bit flowing. As it dries u can push it around for a natural unevenness. The glue is important since without it the “Durham’s” may chip or flake with table use.
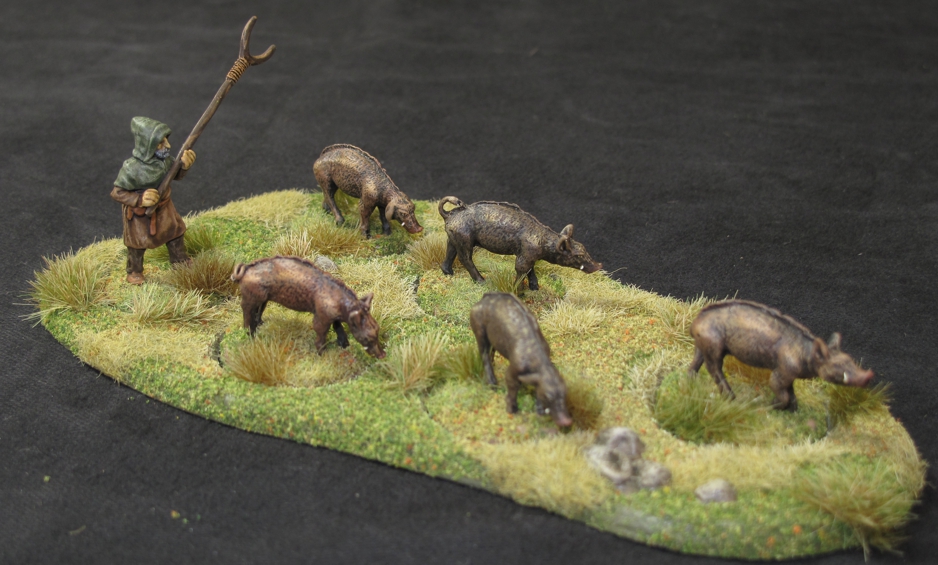
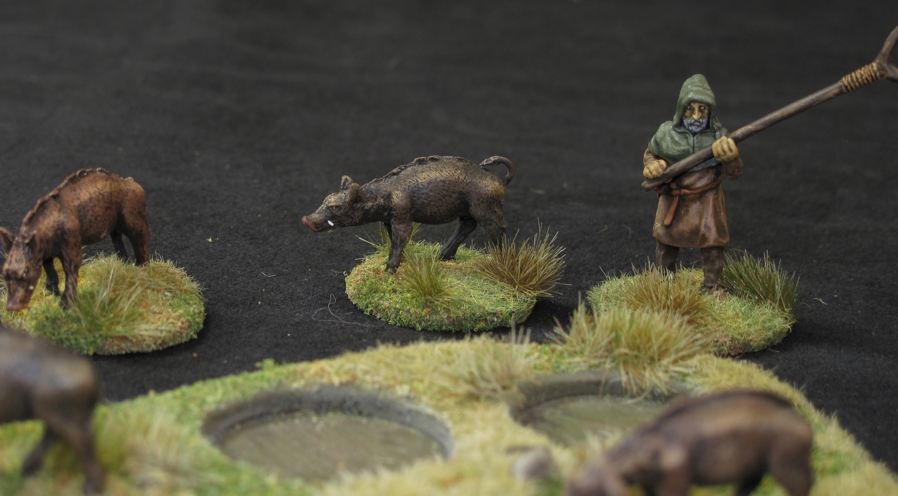
Even though the individual figures are removable with a little effort you can make it blend very well and hardly noticeable in the base.
Once again I get wrapped up in the building and forget the pictures but I think you get the idea and feel free to ask question in the comments. I think it came out great and this now finishes 2/3rds or the “Escort Project” so see you soon for the last installment!
I always like to set “my” minis apart from the rest of the pack, go the extra mile. I enjoy when gamer’s say “are those so and so manufacture?” because they look a bit different. I do this in a couple of ways, painting, basing, and customizing the figures themselves. I like variety in my figures and sometimes a line doesn’t have enough different poses for me so I’ll grab some sculpting putty (two part green stuff) and have at it. Now I’m no sculptor, I don’t do whole figures, but I’m pretty fair at cutting models up and customizing them.
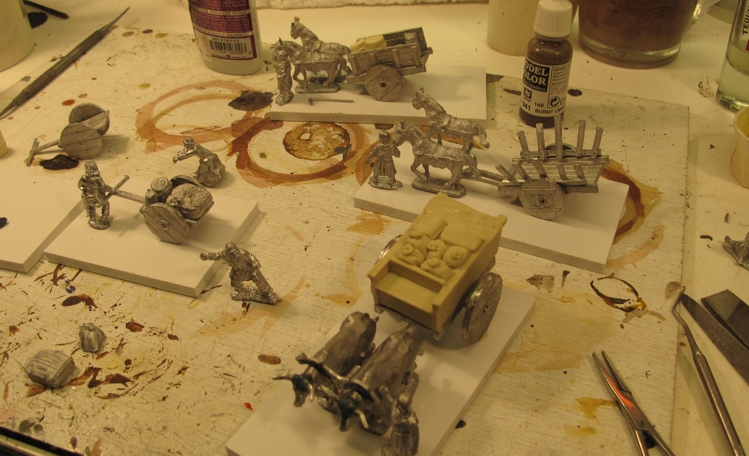
I’ve been trying to clean up some lose ends on the work bench and one of the projects sitting on the shelf for a while has been some Dark Ages civilians for SAGA scenarios. For the “Escort” scenario I needed three objective units and I had the minis for several carts, and a pig farmer and his pigs.
The collection of figures and carts getting prepped for “Escort” duty!
Most of the minis were from Gripping Beast and they are great figures BUT I was not satisfied with the way they would appear around the carts. I just didn’t think the poses were quite right; I wanted them to really appear as if they were pushing/pulling cart. There was also no wagon driver…. This led to them sitting half done on the shelf.
After looking at the project for about a year while I painted a few other SAGA warbands (Normans, Vikings, and Anglo Danes) I decided to do something about it. I decided that there was no way around it I was going to have to create a sitting driver. Now I’m no sculptor but I’m not bad at taking one figure and modifying it to be what I want, in fact that’s one of the most enjoyable aspects of this hobby.
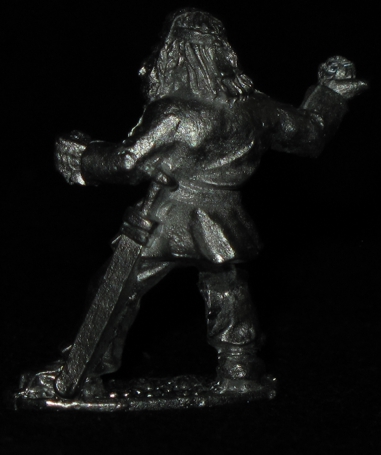
I have nearly all the Foundry Vikings and consider them the best Viking line available. I have quite a few still unpainted and after going through them I soon found a likely candidate for customization. I wanted to have;
One arm using a whip.
One arm holding reins
Legs easily modified to sitting position.
No armor.
I found a great candidate and prepared for “surgery”
Arms were almost right to start with but the legs would be a lot of work.
The Figure was wearing a sword and that would have to be removed.
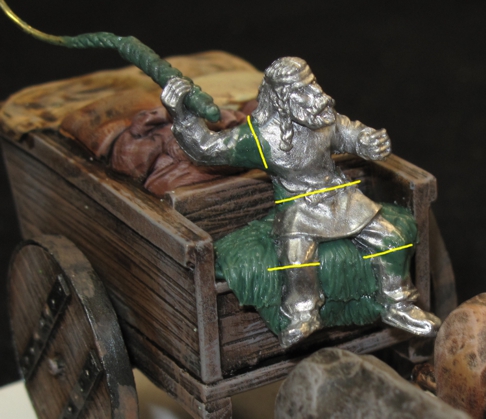
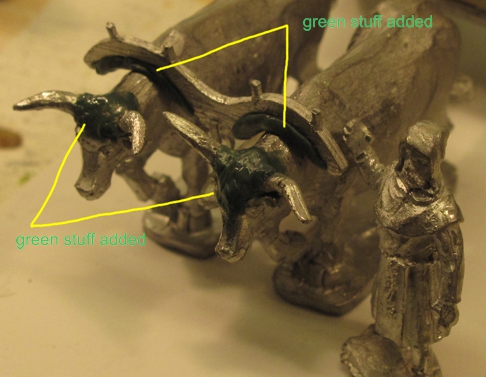
Foundry uses a good quality metal in their figures and cutting and filing are very easy. After studying the figure for a bit I determined where and what kind of cuts were needed. Some cuts like the arm were completely through but most were wedge type allow removal of a section to allow bending of the figure into the proper pose. After the cuts and bends the areas were made to look right with Kneadite “Green Stuff” sculpting putty. Cutting, bending, and lots of filing were done to the rear buttocks and leg area to create a sitting figure. To help “blend” the figure into the seat a sheepskin seat cushion was sculpted from more green stuff
Yellow lines show cuts made.
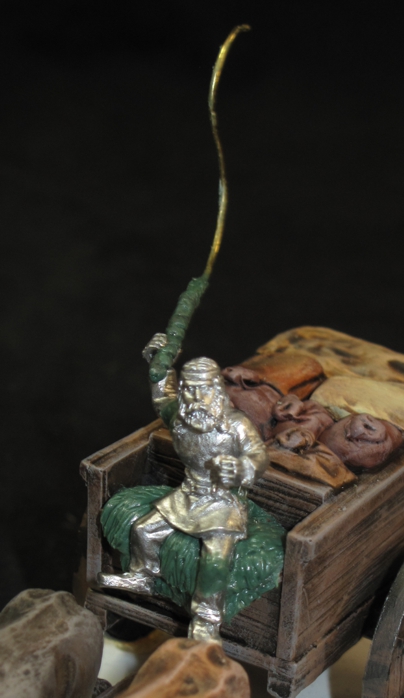
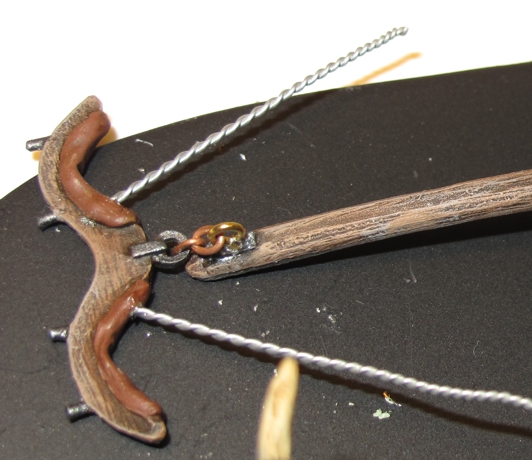
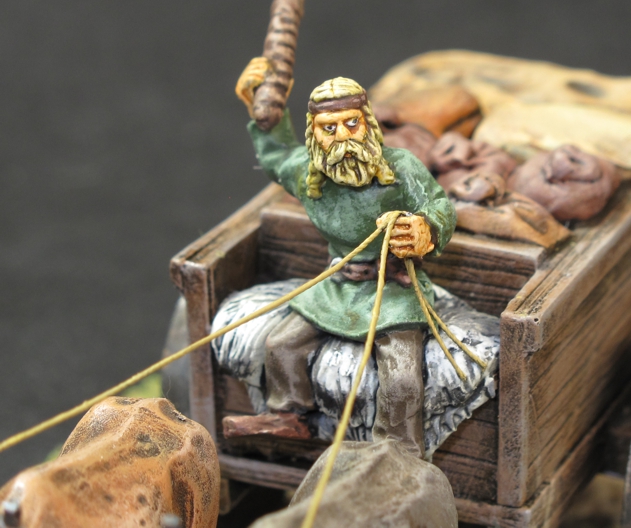
The figure also got a whip made of brass rod and a “Greenstuff” handle in the arm that normally held a spear. The green stuff was give a day to cure and primed and painted.
Brass whip really gives life to the figure!
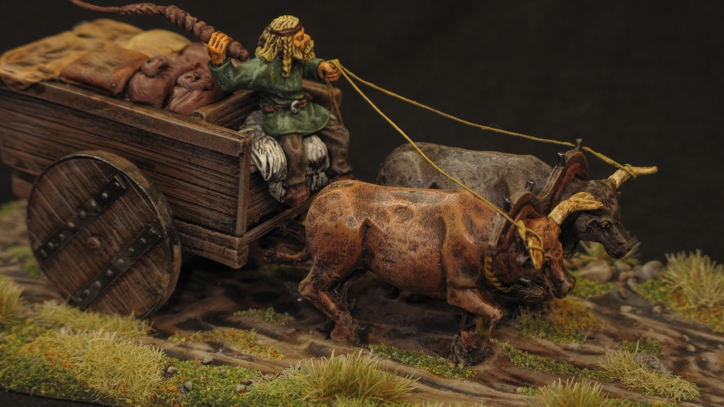
The cart itself had already had work done to it to make it look better and have more detail. Since I wanted to have the driver holding some reins I wold have to create them and make it look believable. Very little real evidence on rigs from the period really exist but ox carts still in use today use much the same systems so a believable modification was worked out.
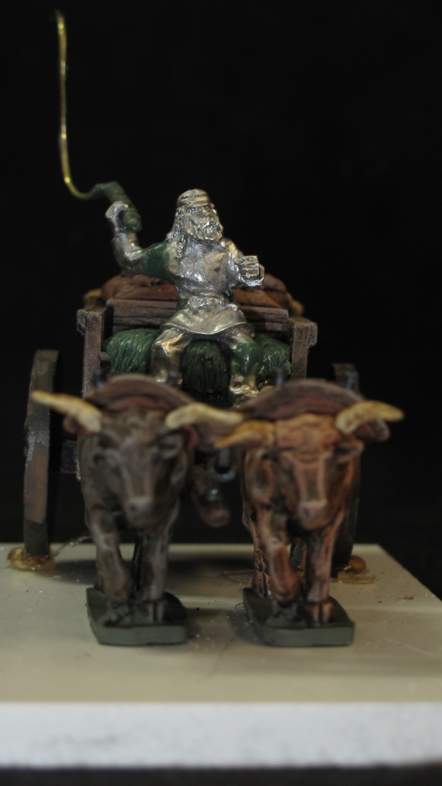
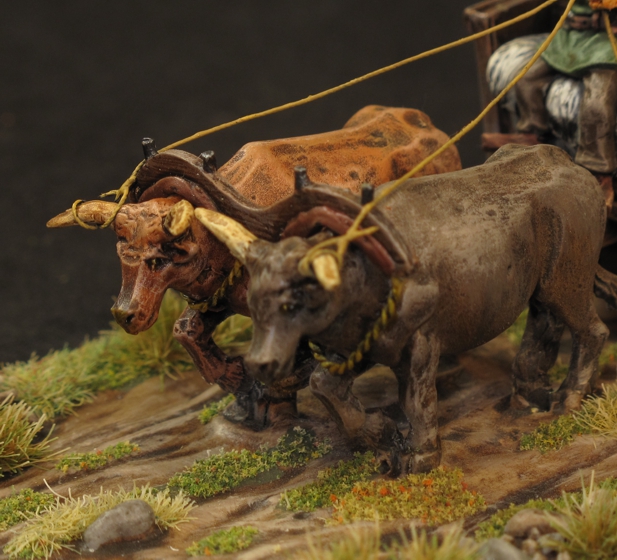
Sculpting putty was used to create pads on yoke as well as blend in the area where the horns were glued on.
I keep a lot of small cheap chains bought at a local craft stores “bead” section and used a few links to create the “iron work” as well as some small aluminum wire twisted and painted to look like rope.
Do you need this kind of detail? “I do!” it’s eye candy! The rope wire will be bent under the oxen’s necks, cut to length, connected, primed, and painted.
The white “centra” board is a thick plastic stock that later will be carved and customized into the base
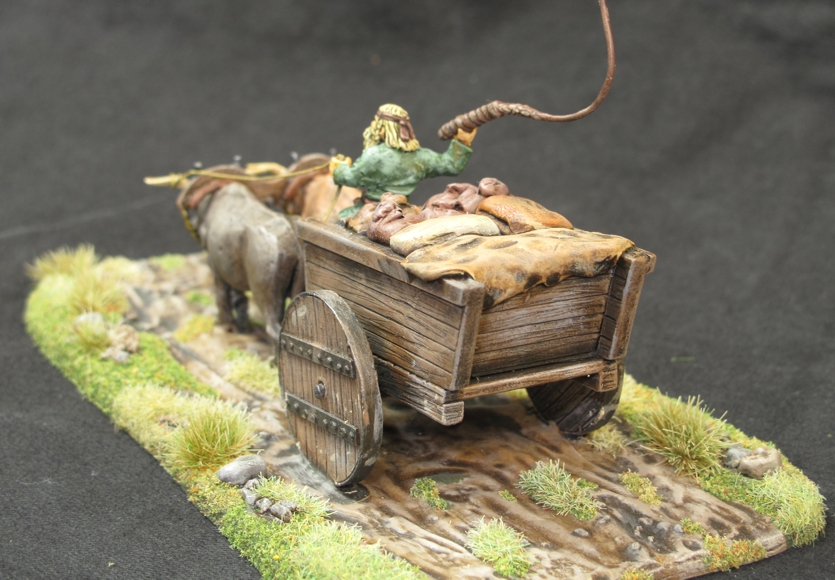
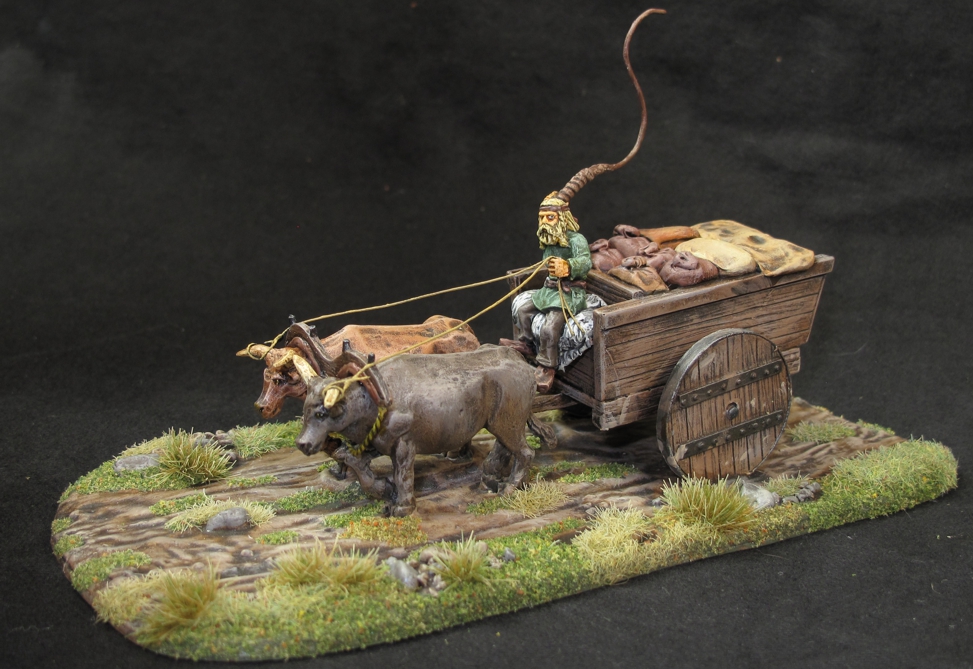
Well it’s about here in most of my projects that I just get sucked to finishing them and forget to take pictures but its mostly done anyway. I did the reins, the base, and few little touches. There is still another figure to do but he will come later. Here’s a few closing shots of the finished project….enjoy! If you like it please leave a comment, it keeps us going!
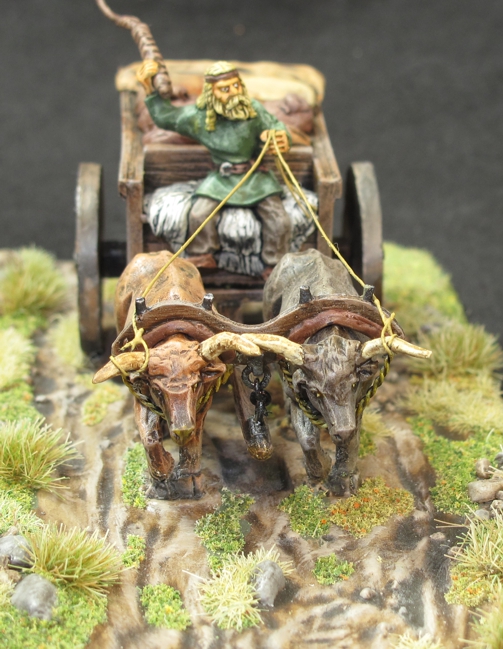
The iron yoke work shown earlier can be seen here in it’s finished state as well as the base work. Ancient dirt roads looked much different than the ones used by cars today.
I think the finished yoke work came out nicely. the reins are simplified for project, but most just involved turning an animals head in the direction you wanted to go.
Much of the baggage was created from “Sculpy” modeling clay, as well as the tarp.
The reins are thick thread painted as rope and a hole was drilled in his hand to allow pass through. I really like how the figure came out. I not sure how the figure feels being taken from “warrior” status down to “cart driving farmer”?
Well it was a fun project and one of those pieces of “eye candy” that makes the battlefield come alive! I have several more projects in the “Escort” series and they will follow shortly.
Well its been awhile since I’ve posted up anything, not that there wasn’t anything going on its just that some times there is so much going on that time for posting it up is in short supply!
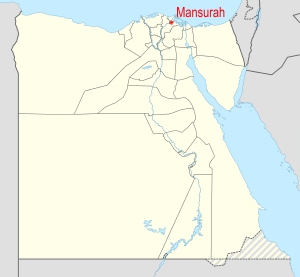
I did make some time to get down to the “Dog of War” club house for some gaming over the last month and that included a great gaming session based on the Crusader era “Crescent and Cross” SAGA rules. Tim Daun has been working on a multi player scenario featuring the 7th Crusades battle in Egypt circa 1250 for the control of the city of “MANSURAH”
The pictures are can be opened (by right clicking and selecting open) for a much higher res picture! It may take awhile if your internet speed is slow or you are using a mobile device! Use your browser’s back button to return to the article. Please be sure to check out the high speed time lapse of the game linked at the end, a 4 hour game in about 2 minutes! There are also quite a few more pictures on the official “Dogs of War” site maintained by Tim D at Dogs of War
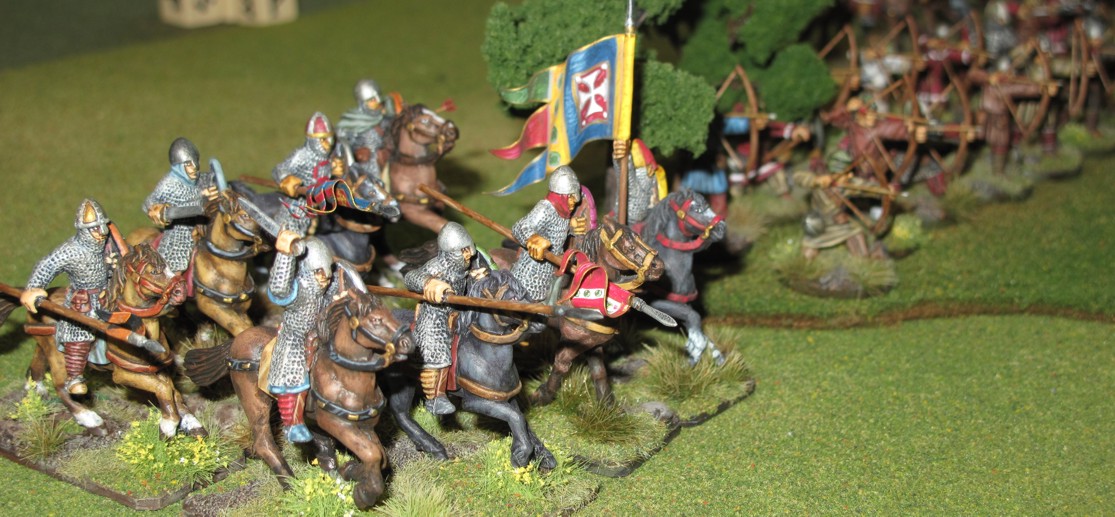
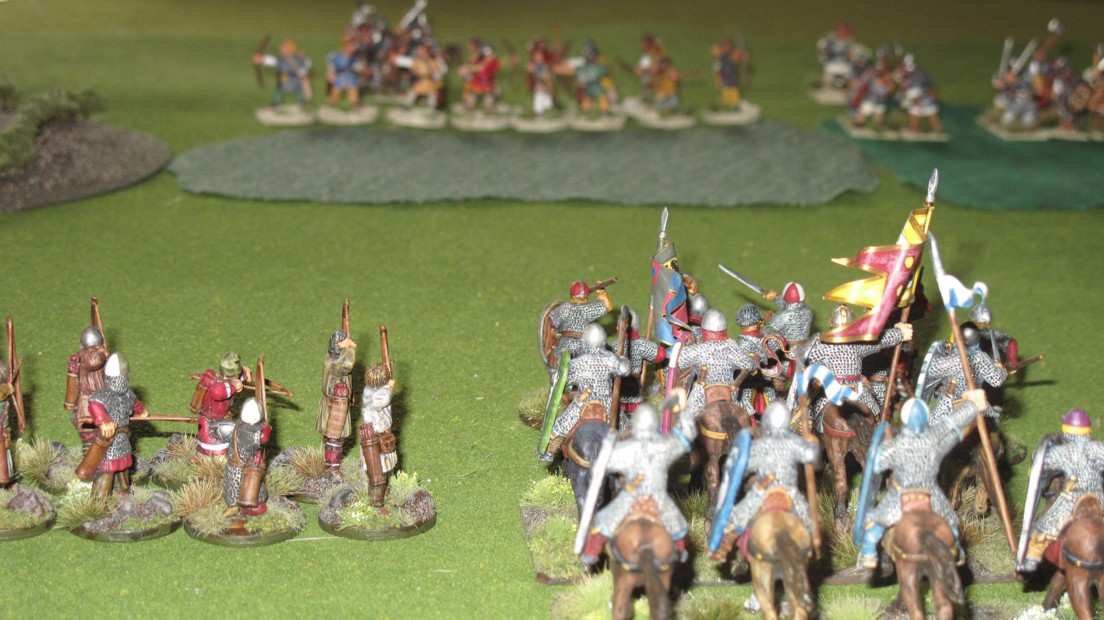
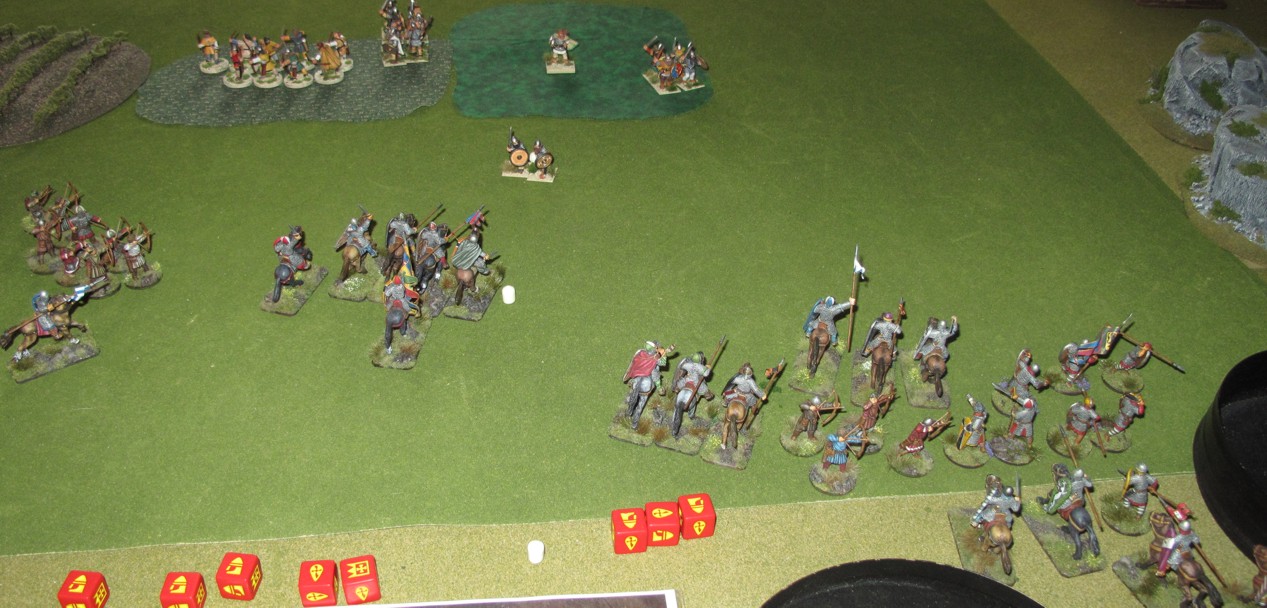
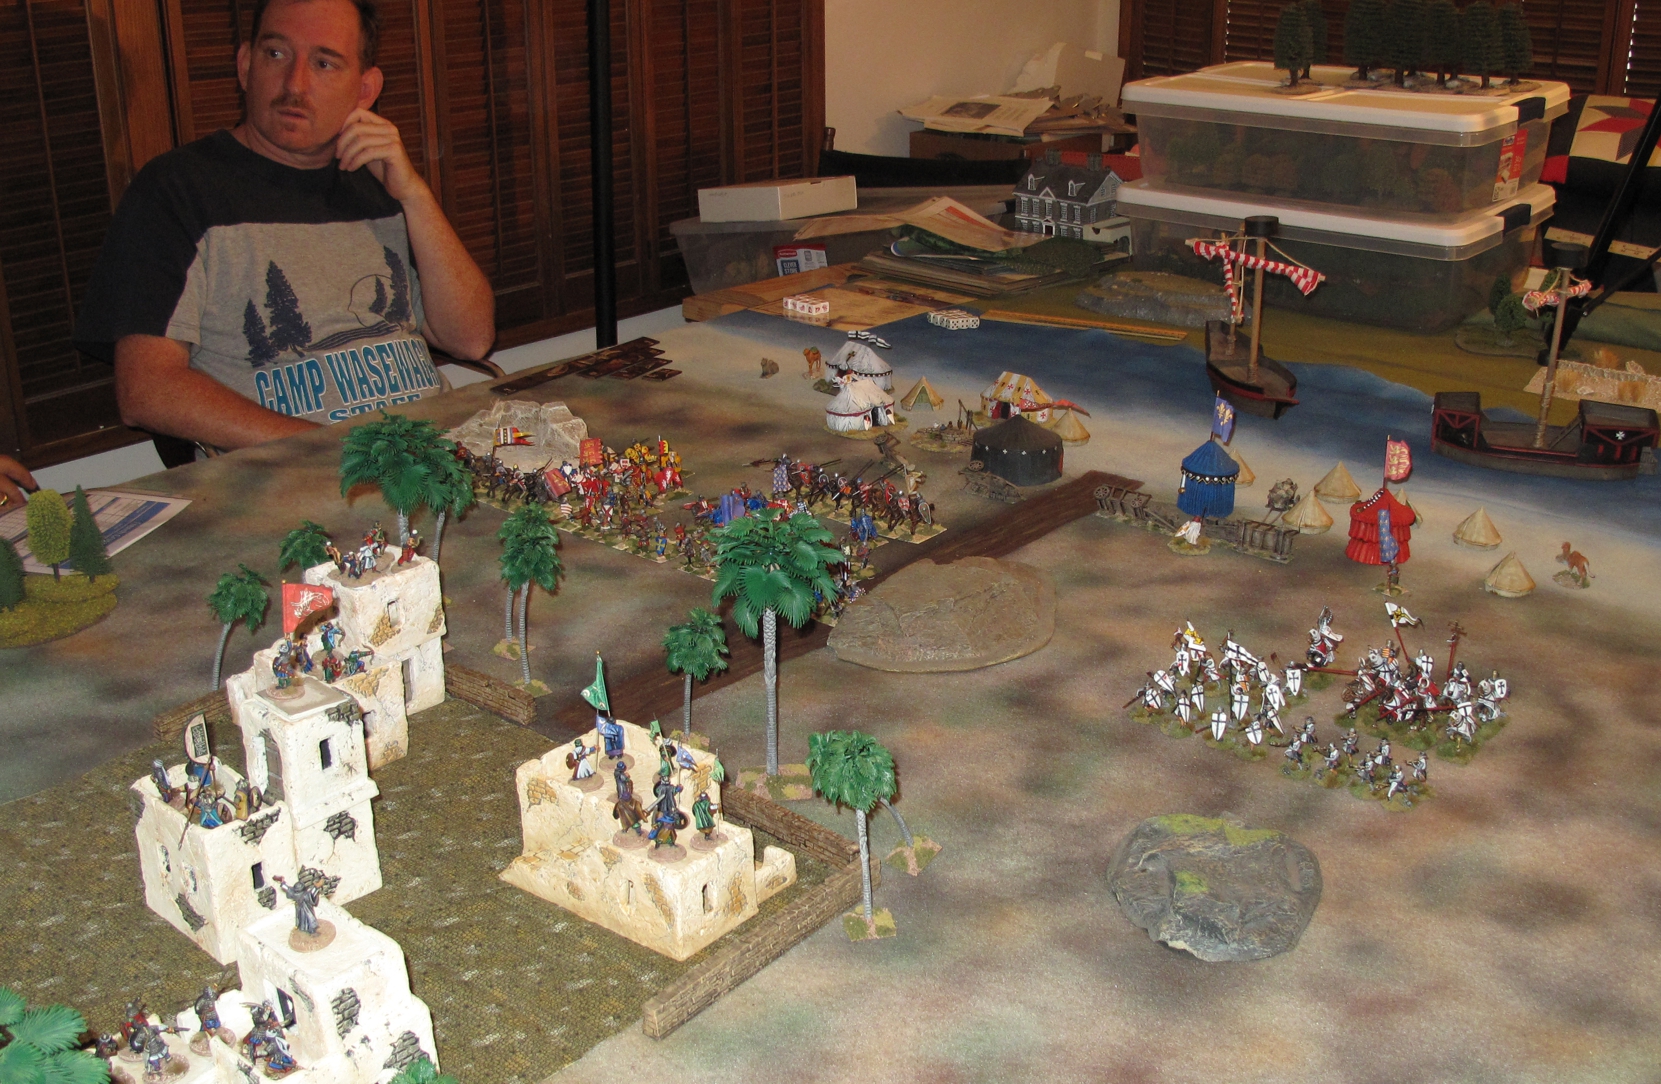
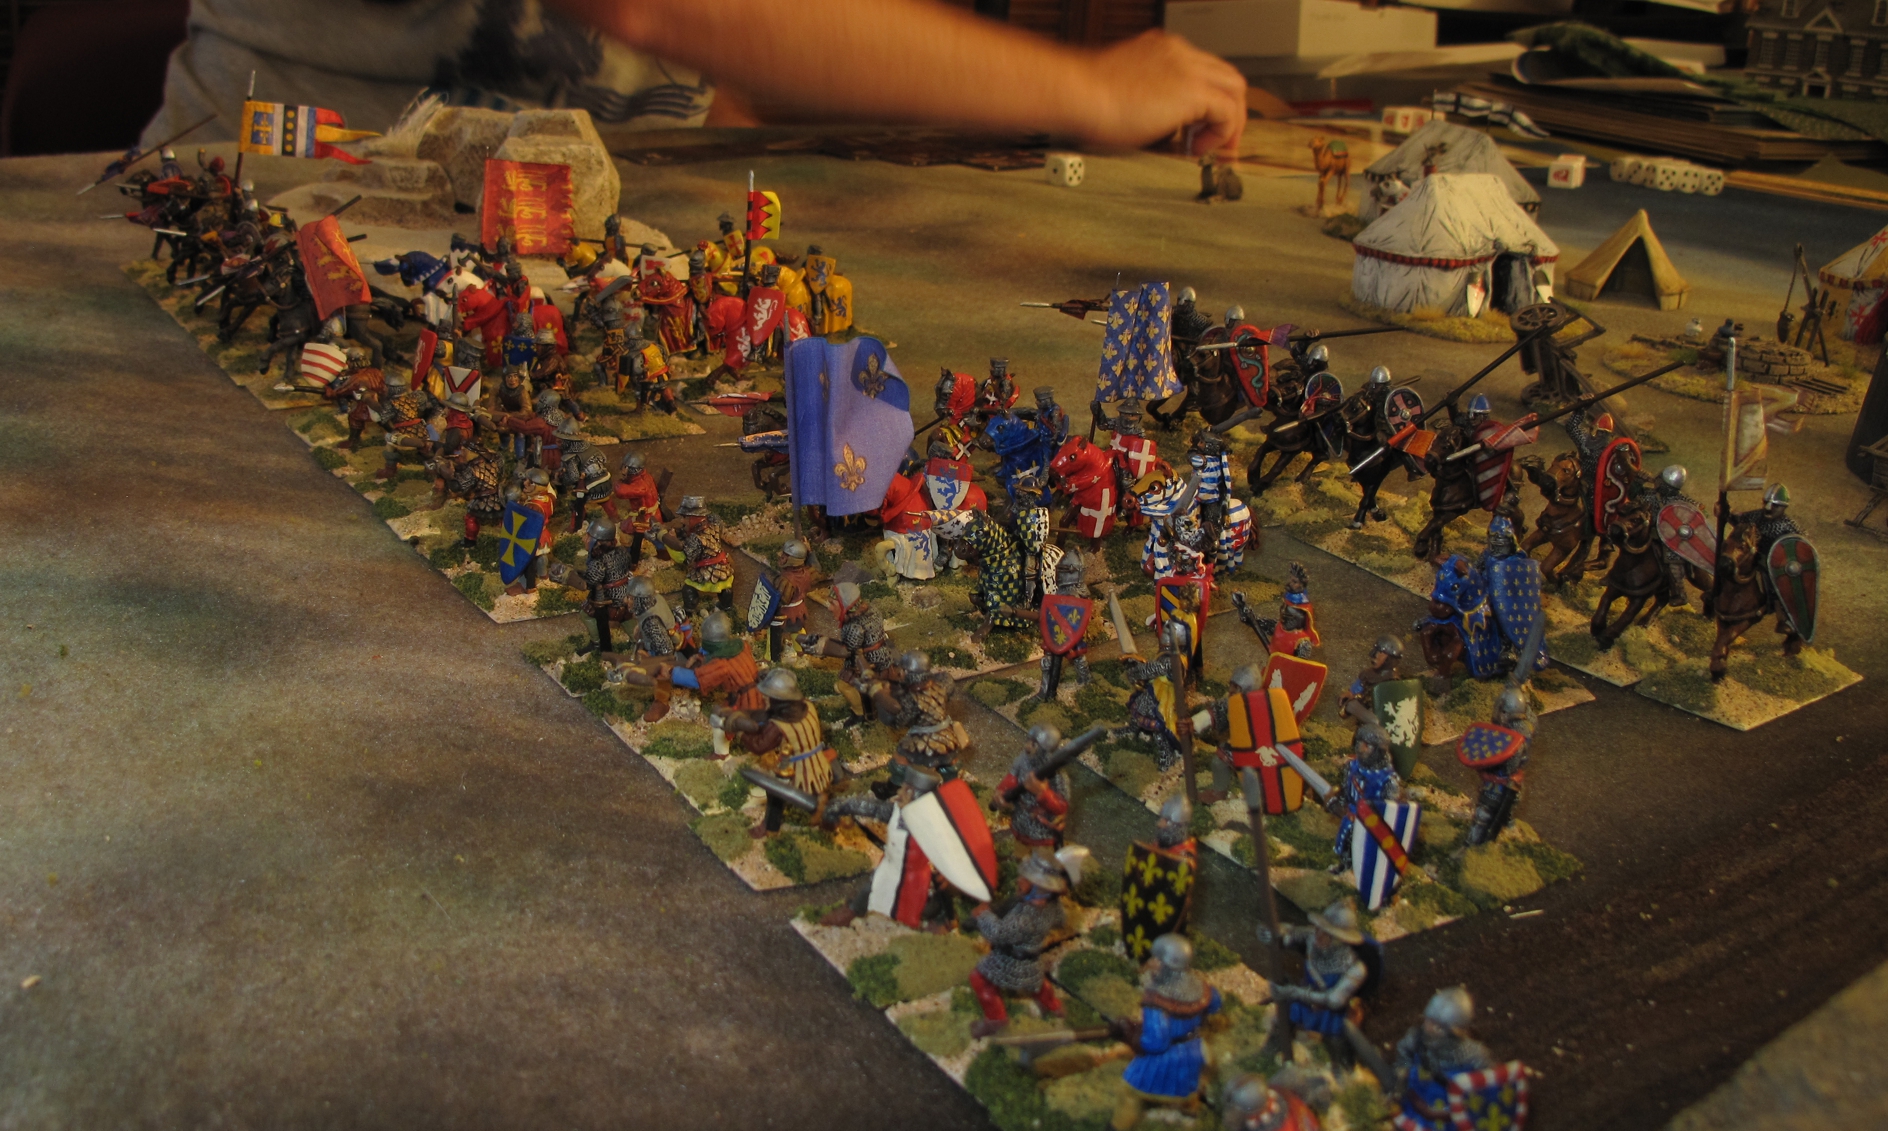
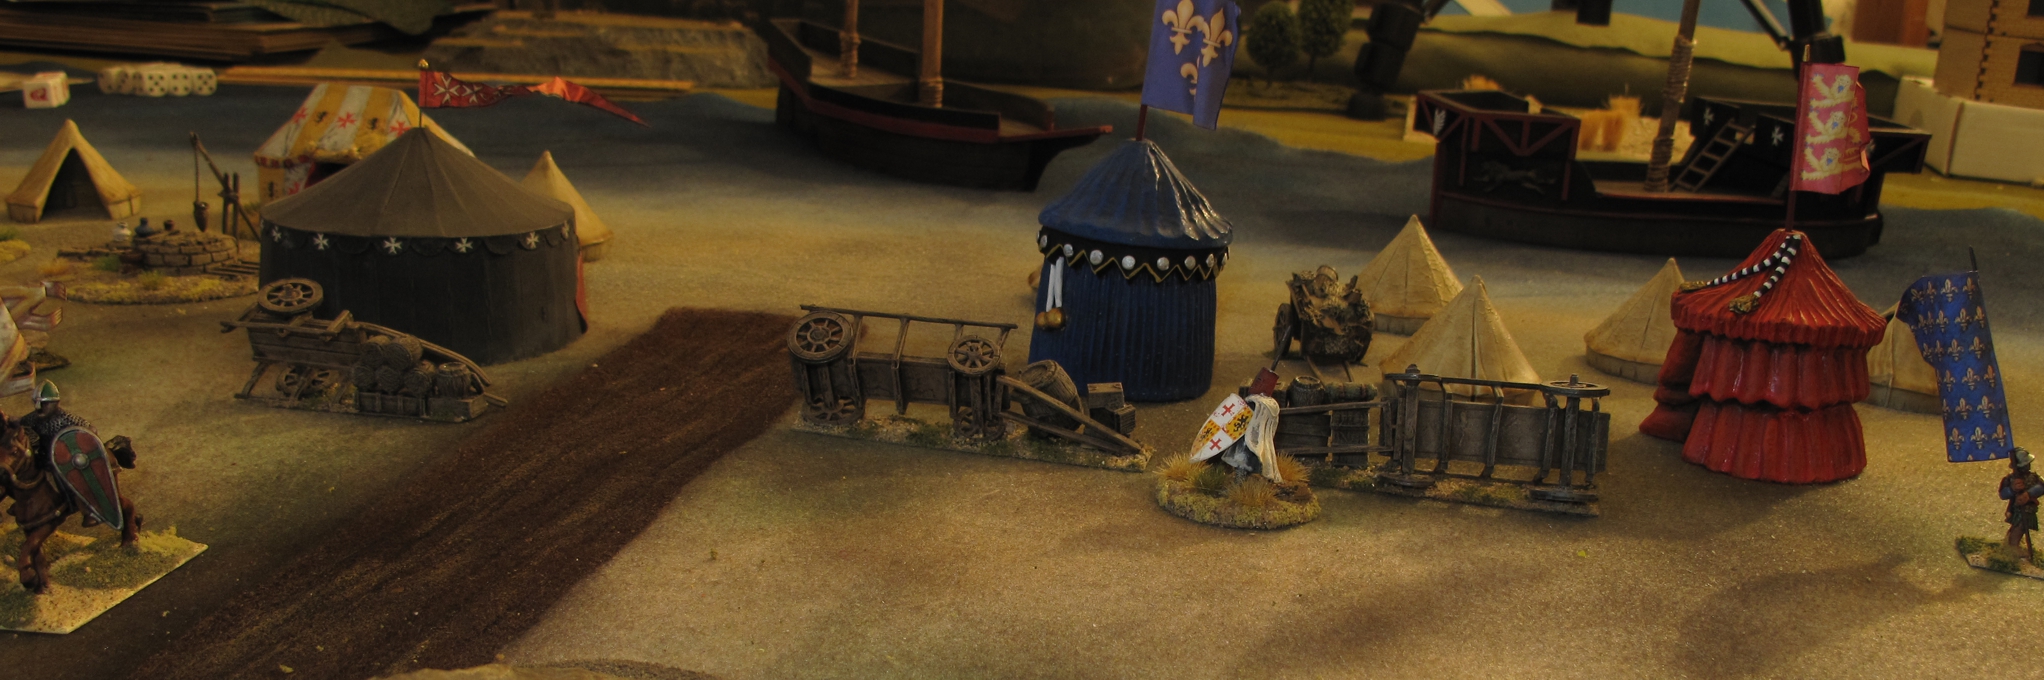
The French, English, and Milites (Military Orders) land and deploy from their camp
These beautiful French and English SAGA warbands are from the collections of Tim Daun and Chris Snell, dam nice looking on the field!
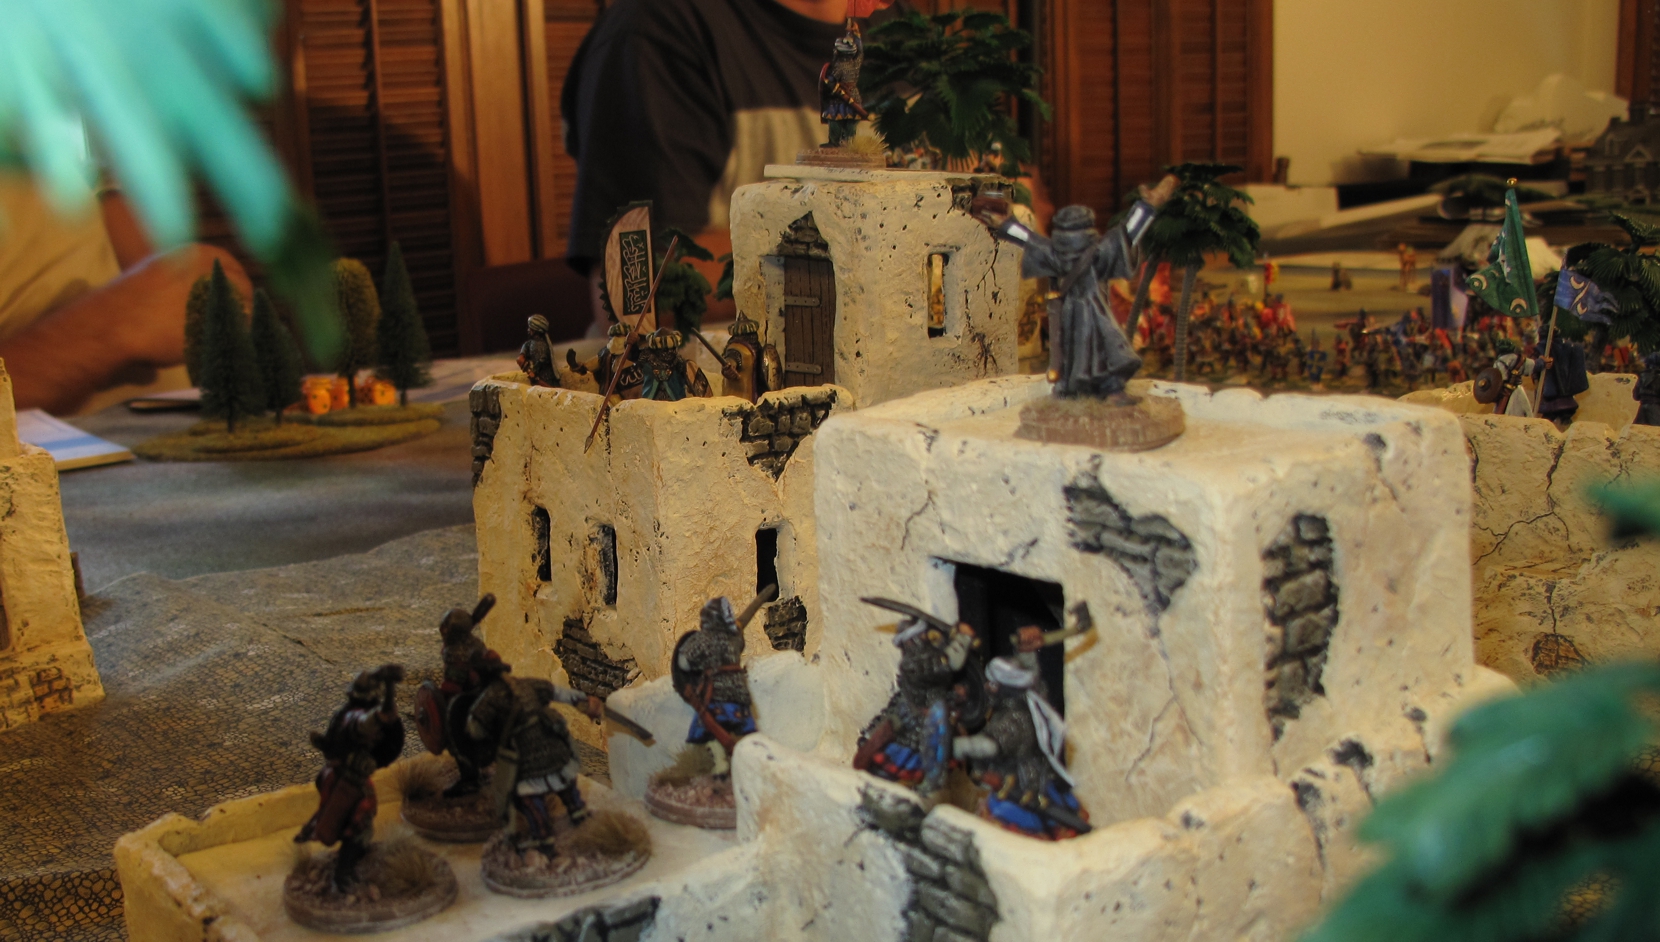
This SAGA recreation was the second “play test” of the possible game to be put on at a convention in the future. Tim D, Chris S, and Rick A would command the Muslim forces and Dave D, Chris V. and Bill W (me) commanding the assaulting Crusaders. The main task of the Crusaders is to secure the City as a base of operations for continuation of the crusade. Failing to do this leaves them stranded and open to attack, so they must clear the city completely. I wont go into the game much as it is still having play balance adjusted and needs to be played quite a few times for players to get the “feel” for it, work out strategy, and of course adjustments to be made. I will say I think it already plays well and is a lot of fun. With a few more tweaks it will be another classic “Dog’s of War” production!
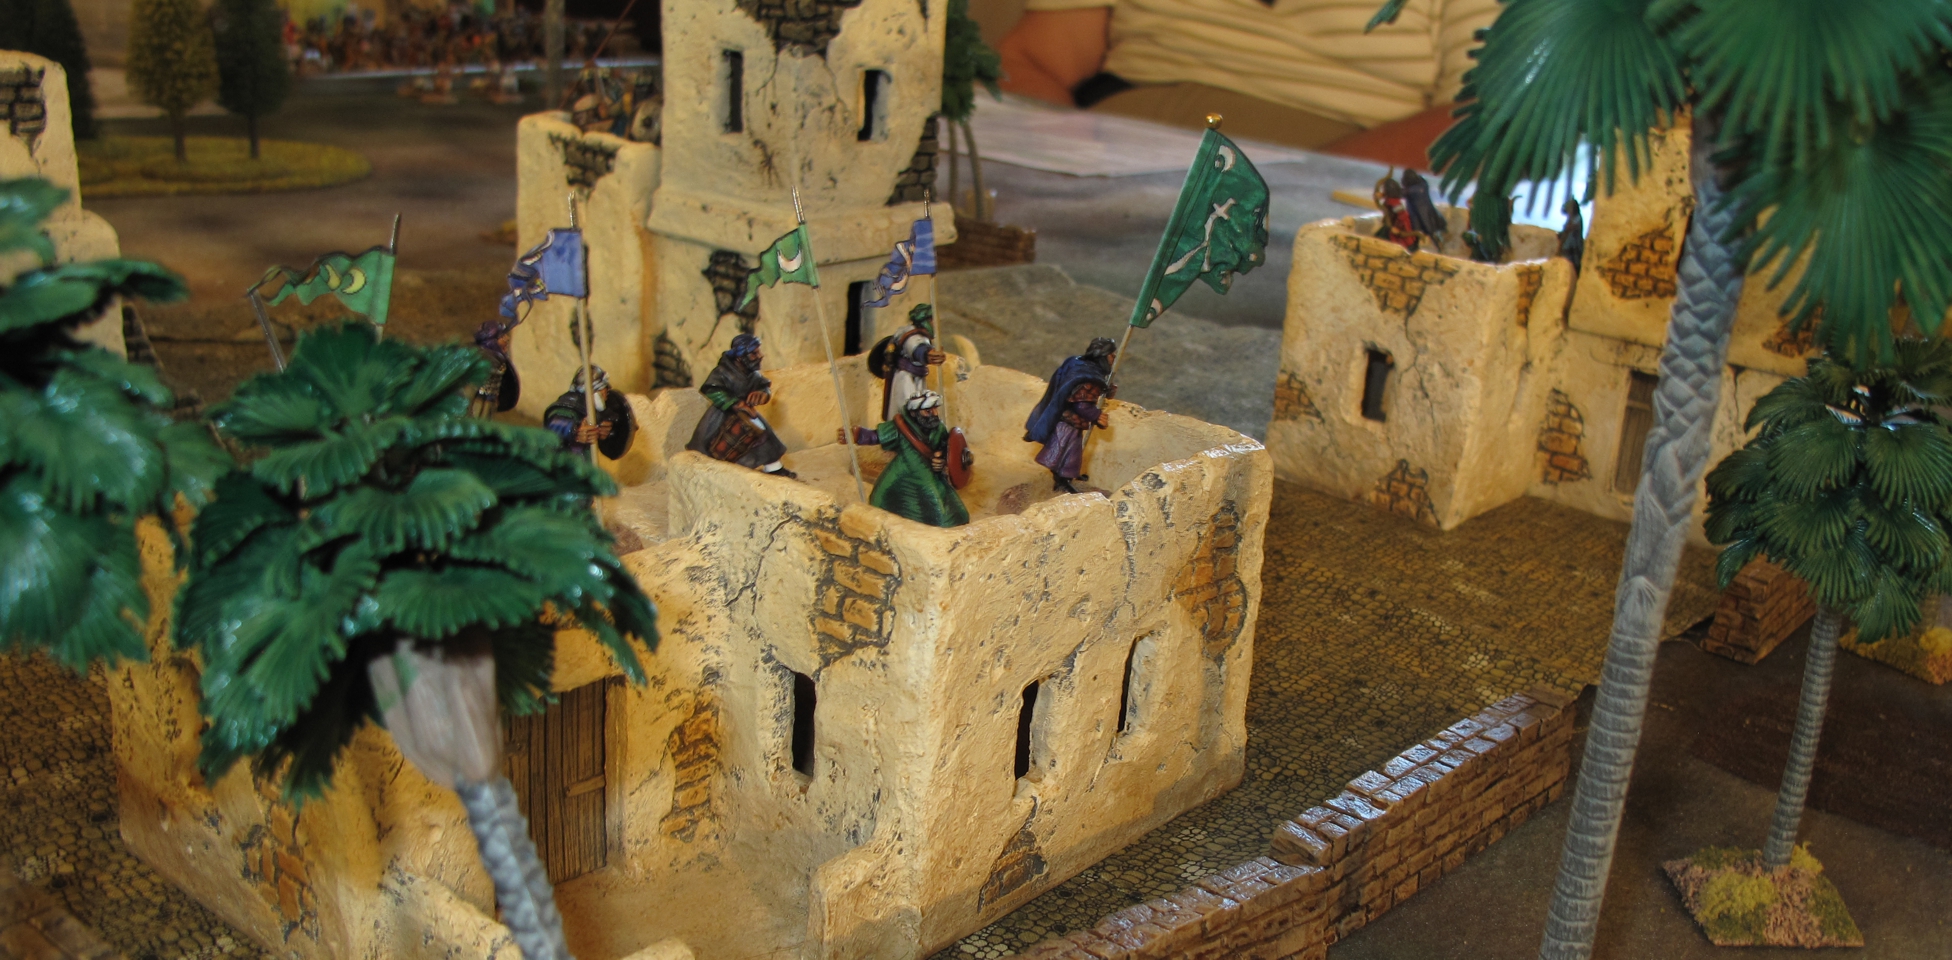
Rick “Abbu Bey” not only looks quite confident as the cities Muslim commander he looks the part! Buildings by Crescent Root Studios
We are ready to soak our sand with the infidels blood!
This battle (the 2nd) was I’m told a much better showing by crusader forces with them making it into town, clearing several buildings, while taking few losses. Other battles raged on the outskirts of the city where again the crusaders fought well and kept most of the Muslim relief forces from any hope of helping the cities defenders. The game however ended with Muslim forces still in control of half of the city so was technically a victory for the forces under the Crescent Banner!
Ricks Muslim Hearth Guard was held fast against the tide of Crusaders taking but a few losses!
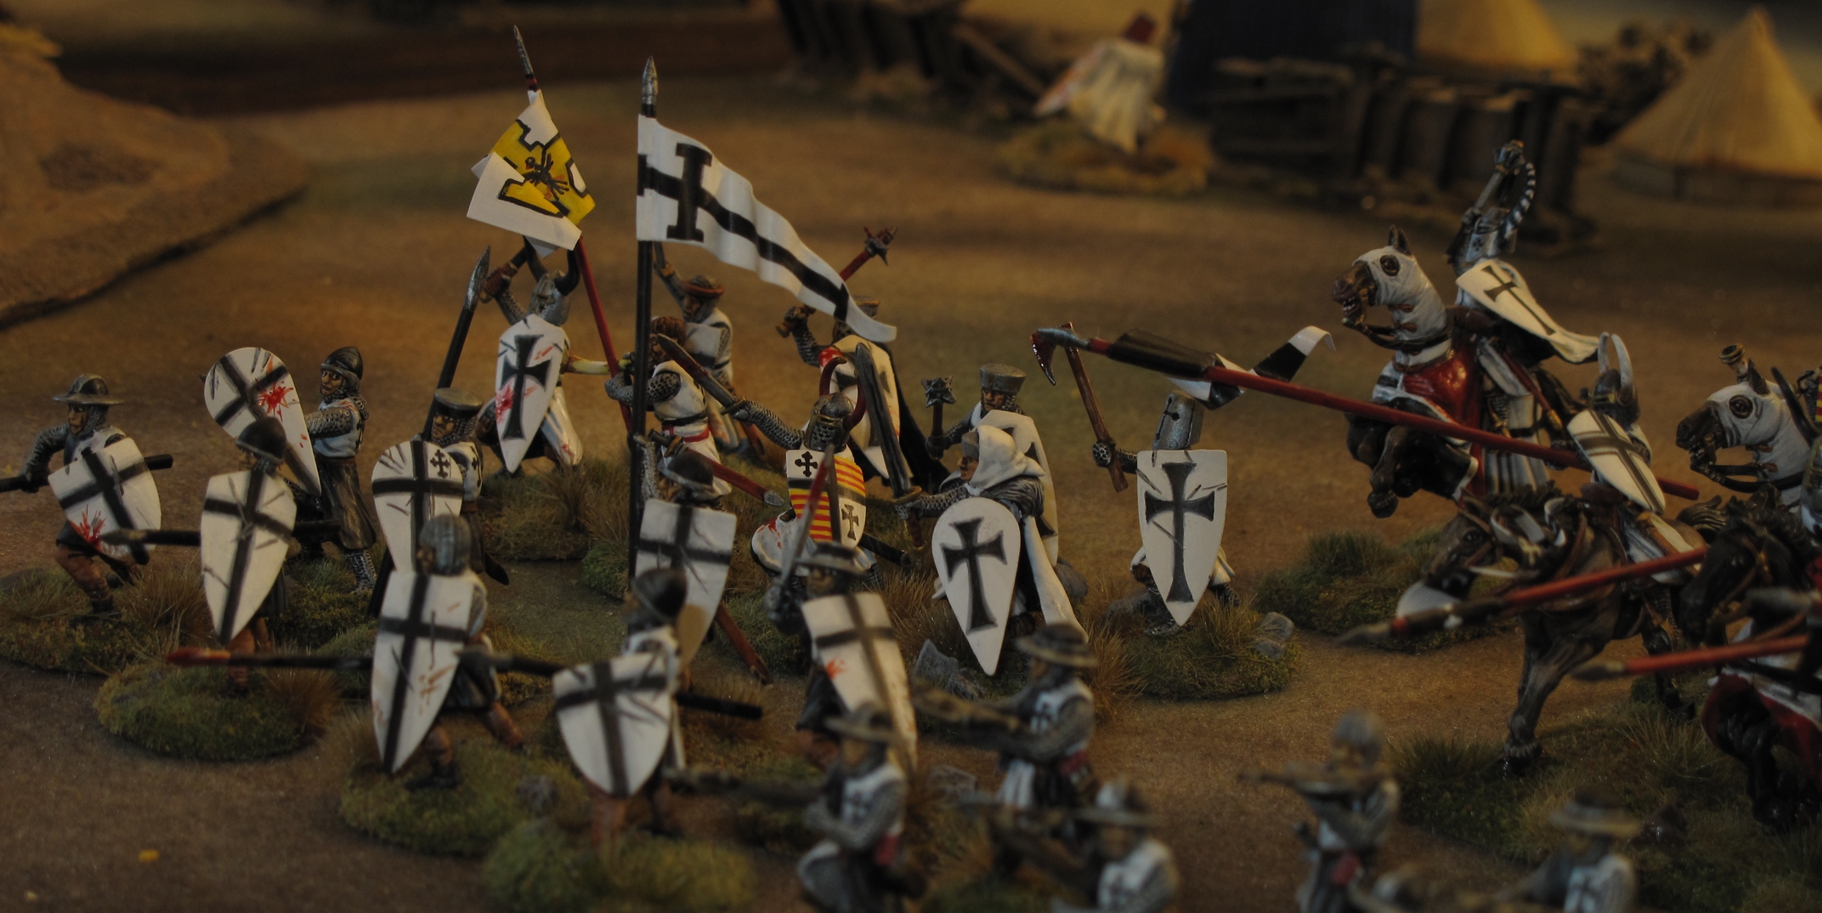
My “Teutonic Knights” are raring to go!
I played my Teutonic Knights and did well mostly by raising my “piety” level up to a “4” and at this level the bonuses become very powerful! My Crossbowmen move forward mowing down Muslim defenders as if they were all armed with 50 caliber machine guns! In hindsight I made a few mistakes being new to my Teutonic’s and the scenario. I should have moved faster and more aggressively in clearing the town (this was true across the crusade army) and my last heroic charges by the Teutonic Knight Hearth guard while glorious at first were too late and ultimately directed at the wrong target.
Joe Nacchio as always provided some great accent terrain pieces to the setup. Joe is a real team player and many wargamers do not real think about how important these little extra touches are to any game!
The terrain was top notch and sure to be much more spectacular should this game ever make it to a convention. Thanks to all the “Dogs” for a great Saturday of Gaming!
Bill W
Check the entire 4 hour battle in 2 minutes! Go full screen and have your sound on! and remember you can select higher video quality if your system supports it. (up to 4k for this video!
Below a brief synopsis of the conflict taken from Wikipedia
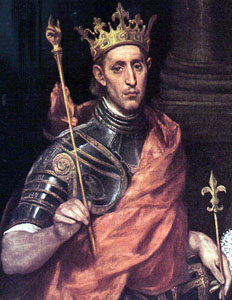
By the mid-13th century, the Crusaders became convinced that Egypt, the heart of Islam’s forces and arsenal, was an obstacle to their ambition to capture Jerusalem, which they had lost for the second time in 1244. In 1245, during the First Council of Lyon, Pope Innocent IV gave his full support to the Seventh Crusade being prepared by Louis IX, King of France.
The goals of the Seventh Crusade were to destroy the Ayyubid dynasty in Egypt and Syria, and to recapture Jerusalem. The Crusaders asked the Mongols to become their allies against the Muslims, the Crusaders attacking the Islamic world from west, and the Mongols attacking from the east. Güyük, the Great Khan of the Mongols, told the Pope’s envoy that the Pope and the kings of Europe should submit to the Mongols.
Louis the IX
The ships of the Seventh Crusade, led by KingLouis’s brothers, Charles d’Anjou and Robert d’Artois, sailed from Aigues-Mortes and Marseille to Cyprus during the autumn of 1248, and then on to Egypt. The ships entered Egyptian waters and the troops of the Seventh Crusade disembarked at Damietta in June 1249. Louis IX sent a letter to as-Salih Ayyub. Emir Fakhr ad-Din Yusuf, the commander of the Ayyubid garrison in Damietta, retreated to the camp of the Sultan in Ashmum-Tanah, causing a great panic among the inhabitants of Damietta, who fled the town, leaving the bridge that connected the west bank of the Nile with Damietta intact. The Crusaders crossed over the bridge and occupied Damietta, which was deserted. The fall of Damietta caused a general emergency (called al-Nafir al-Am النفير العام) to be declared, and
One of French King Louis’s brothers Charles d’Anjou
locals from Cairo and from all over Egypt moved to the battle zone. For many weeks, the Muslims used guerrilla tactics against the Crusader camps; many of the Crusaders were captured and sent to Cairo. As the Crusader army was strengthened by the arrival of
Alphonse de Poitiers, the third brother of King Louis IX, at Damietta, the Crusaders were encouraged by the news of the death of the Ayyubid Sultan, as-Salih Ayyub. The Crusaders began their march towards Cairo. Shajar al-Durr, the widow of the dead Sultan, concealed the news for some time and sent Faris ad-Din Aktai to Hasankeyf to recall Turanshah, the son and heir, to ascend the throne and lead the Egyptian army.
The Battle
The Crusaders approached the battle by the canal of Ashmum (known today by the name Albahr Alsaghir), which separated them from the Muslim camp. An Egyptian showed the Crusaders the way to the canal shoals. The Crusaders, led by Robert of Artois, crossed the canal with the Knights Templar and an English contingent led by William of Salisbury, launching a surprise assault on the Egyptian camp in Gideila, two miles (3 km) from Al Mansurah, and advancing toward the royal palace in Al Mansurah. The leadership of the Egyptian forces passed to the Mamluks Faris Ad-Din Aktai and Baibars al-Buduqdari who contained the attack and reorganized the Muslim forces. This was the first appearance of the Mamluks as supreme commanders inside Egypt. Shajar al-Durr, who had full control of Egypt, agreed with Baibars’ plan to defend Al Mansurah. Baibars ordered the gate be opened to let the Crusaders enter the town. The crusaders rushed in, thinking the town deserted, only to find themselves trapped inside. The Crusaders were besieged from all directions by Egyptian forces and the local population, and they took heavy losses. Robert of Artois, who took refuge in a house, and William of Salisbury were both killed along with most of the Knights Templar. Only five Templar Knights escaped alive. The Crusaders retreated to their camp in disorder, and surrounded it with a ditch and wall. Early on the morning of February 11, the Muslim forces launched a devastating offensive against the Frankish camp. On February 27, the new sultan Turanshah arrived in Al Mansurah to lead the Egyptian army, and the death of as-Salih Ayyub was formally announced in Egypt. Ships were transported overland and dropped in the Nile behind the Crusader ships blocking the reinforcement line from Damietta. The Egyptians used Greek fire, destroying and seizing many Crusader supply vessels. The besieged Crusaders soon began suffering from famine and disease. Some Crusaders deserted to the Muslim side.
Despite being overwhelmed and ultimately defeated, King Louis IX tried to negotiate with the Egyptians, offering the surrender of the Egyptian port of Damietta in exchange for Jerusalem and a few towns on the Syrian coast. The Egyptians rejected the offer, and the Crusaders retreated to Damietta under cover of darkness on April 5, followed closely by the Muslim forces. At the subsequent Battle of Fariskur, the last major battle of the Seventh Crusade, the Crusader forces were annihilated and King Louis IX was captured on April 6. Meanwhile, the Crusaders were circulating false information in Europe, claiming that King Louis IX defeated the Sultan of Egypt in a great battle, and Cairo had been betrayed into Louis’s hands. Later, when the news of Louis IX’s capture and the French defeat reached France, the Shepherds’ Crusade movement occurred in France.
Louis IX was taken prisoner.
Aftermath
According to medieval Muslim historians, 15,000 to 30,000 French fell on the battlefield and thousands were taken prisoners.[24]Louis IX of France was captured in the nearby village of Moniat Abdallah (now Meniat el Nasr), chained and confined in the house of Ibrahim Ibn Lokman, the royal chancellor, and under the guard of a eunuch named Sobih al-Moazami.[25] The king’s brothers, Charles d’Anjou and Alphonse de Poitiers, were taken prisoner at the same time, and were carried to the same house with other French nobles. The sultan provided for their subsistence. A camp was set up outside the town to shelter the rest of the prisoners. Louis IX was ransomed for 400,000 dinars. After pledging not to return to Egypt, Louis surrendered Damietta and left for Acre with his brothers and 12,000 war prisoners whom the Egyptians agreed to release.
The battle of Al Mansurah was a source of inspiration for writers and poets of that time. One of the satiric poems ended with the following verses: “If they (the Franks) decide to return to take revenge or to commit a wicked deed, tell them :The house of Ibn Lokman is intact, the chains still there as well as the eunuch Sobih”. —from stanza by Jamal ad-Din ibn Matruh.
The name of Al Mansurah (Arabic: “the Victorious”) that dates from an earlier period was consolidated after this battle. The city still holds the name of Al Mansurah today, as the capital of the Egyptian governorate, Daqahlia. The National Day of DaqahliaGovernorate (capital Al Mansurah) on February 8, marks the anniversary of the defeat of Louis IX in 1250. The house of Ibn Lokman, which is now the only museum in Al Mansurah, is open to the public and houses articles that used to belong to the French monarch, including his personal thirteenth century toilet.
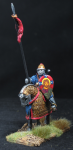
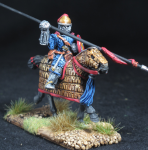
My main gaming buddy Steve Gausche had a Birthday approaching and being a guy with everything I had to figure out a gift he wanted, he needed, and something he couldn’t get anywhere else….? Easy! A Byzantine Cataphract! Steve had SAGA Byzantine Warband painted by “Monty” he purchased about a year ago, but it had not come with the very cool fully armored heavy horse cavalry used by the Byzantine Emperor Belasarious! Steve had mentioned several times he might pick up and paint some of these. Knowing Steve I sensed this would not happen soon if ever!
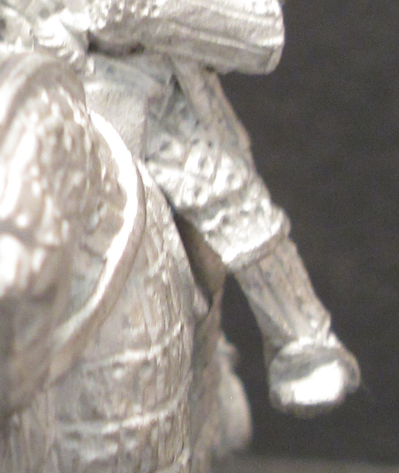
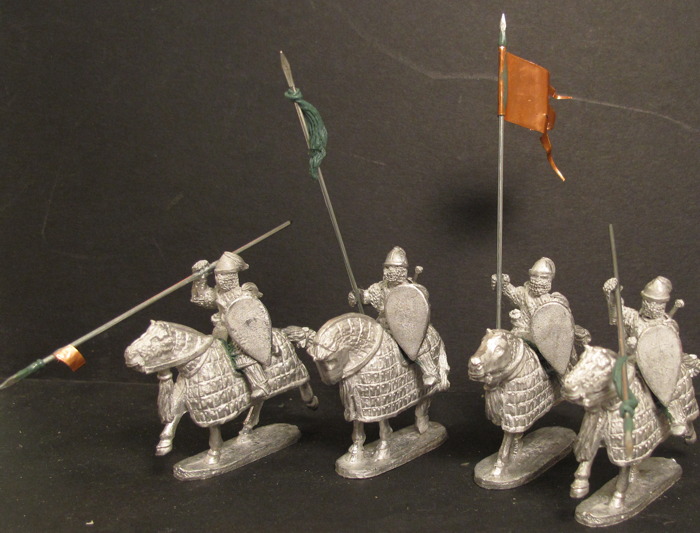
So with a couple of clicks on Gripping Beast website a 4 figure unit of 28mm BZC06 Byzantine Kataphractoi were winging their way across the sea to me and my waiting paintbrushes. Within a week they were sitting on my “workbench” going through the pre-paint process. That’s where I trim flash, alter poses, and fix any casting problems a well as make custom changes to the figures. I like to have figures that are unique and a bit better than a just painted of the shelf figure set.
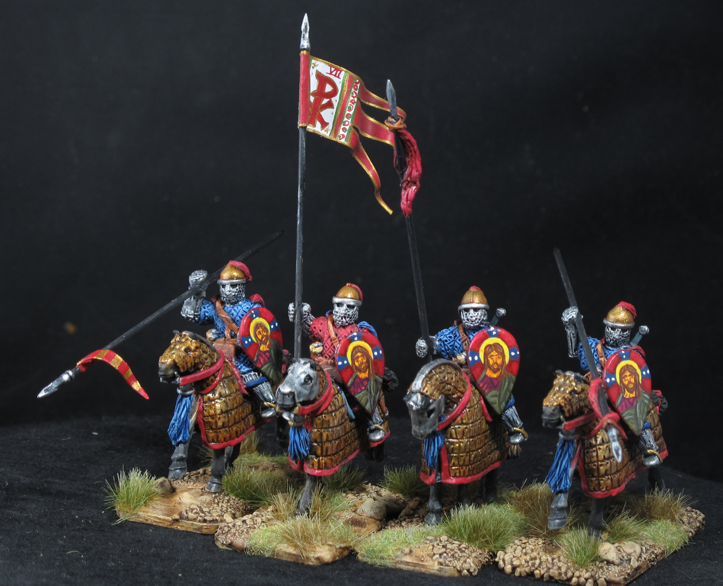
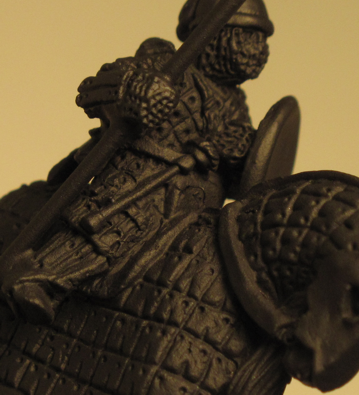
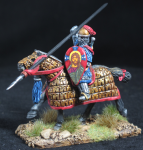
One of the first problems I found in the casting was that the riders did not fit very well on the horses, they fit but if simply glued in place there would be huge apparent gaps between horse and rider. I’m somewhat of a perfectionist in my figure work and known for taking time with details that most of the time only I would notice….oh well that’s me!
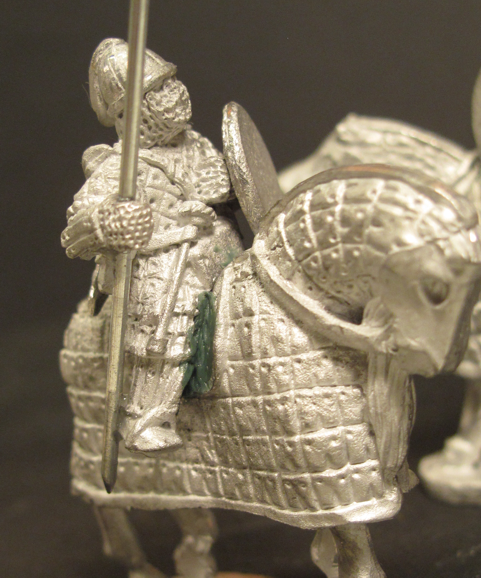
I knew that the gap was way to big for simple filling with glue. Even milliput of other filler would not look right. I decided to use kneadite, blue / yellow, the 2 part sculpting epoxy (used for sculpting figures from scratch) and sculpt the missing space to look like the rest of the figure. This would mostly be some padding and chain armor around the figures legs.
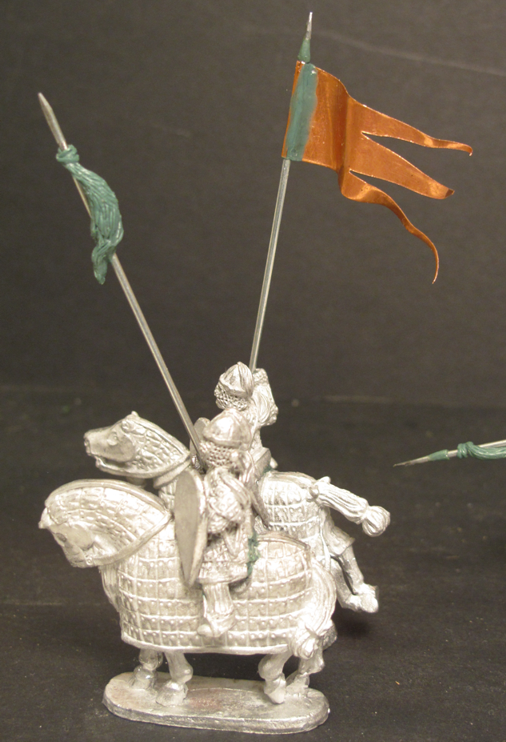
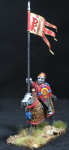
Besides the filling around the legs I would do scratch built steel spears, spear points, copper flags, and a few other additions. I was planning on just using decals for the shields but as usual I was not happy with that and painted the shields by hand.
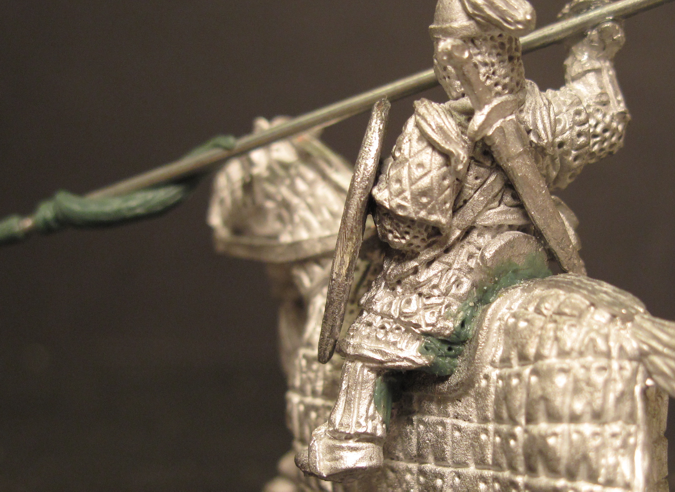
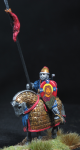
The Byzantines Kataphractoi Cavalry used “Kontos” a very, very long spear (some estimate it at around 21’) and I wanted that to be represented on these figures if I could. The only problem with that was that a true scale 21’ spear would create problems with storage as well as their use on the battlefield. I chose to use a spear length of about 15 scale feet as it gave a good “long” look and still worked reasonably well for storage in my case.
To the spear I added some flags and pennants. I sculpted some horse tail pennants as well just to give variety. I was not sure about the job at first but later pictures show it came out great, in fact I sometimes forget it was not part of the factory “sculpt”.
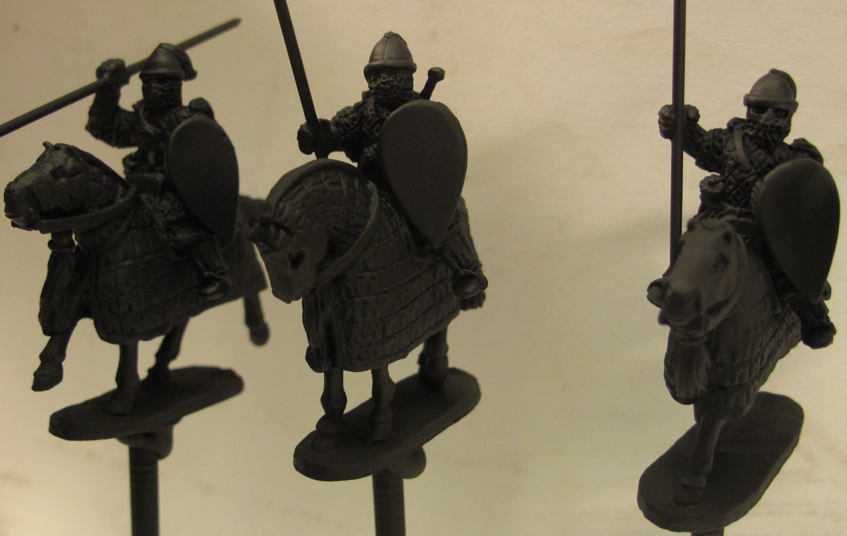
On to the prime coat and as with most of my “metal” mini’s I used “Krylon” auto primer flat black. This primer not only works great but is very inexpensive, about $5 a large can.
No more “gaps” after the additional sculpting/filling.
Well after this point I got into my painting mode and didn’t take another picture until they were based and painted! I think they came out quite nice. I went back and forth as to a shield design, at one point I was just going to decal them, but in the end I hand painted them as I like to do. Its a lot more work but I think it then gives you a true hand painted figure. I’m not a real good painter (figures yes but portraits, no!) but I took a stab at painting the “Savior” on their shields as I thought that was very appropriate. This gives them the feel of “being Protected by their Faith!”
The “Kicker” of this who story of “Steve’s Birthday Figures” is that Steve was touched, happy, and impressed with the gift of the “Byzantine Cataphract” but let slip that he was thinking of selling the “warband” since he did not like playing them….Lol! So I guess I’ll just do a unit of Viking Archers for him as he will like them a whole lot more….. the Byzantine Cav? Well I may sell them or I just might paint a Byzantine warband for myself!
So here they are all the Guidelines, Rules, Entry Form, and Schedule for the upcoming SAGA tourney at “Game Empire” in Pasadena, California. The Tournament is hosted by and run by the “Dogs of War” gaming group with support from Chuck Robbins and the Game Empire.
Forms are in both .Doc and PDF forms as well as being available at the Game Empire from Saturday, January 10th, 2015. This Tournament will focus on the original Dark Ages rule set but will allow “Warbands” from the Crescent and Cross” to be used. Details and rules are found in the Tournament Rules file. The Tournament is focused on “Fun and Fair play” with emphasis on getting the “newer” players into their first SAGA Tourney and a chance to so what they have learned. To this end we have purposely kept options limited for this FIRST tournament event. If this goes well with both attendance and play we will expand into the “Crescent and Cross” rule set with more options. Also remember there are still to “pre Tourney” gamedays on the 10th and 24th of January, 2014! Come meet everyone and “tuneup” your warband for battle!
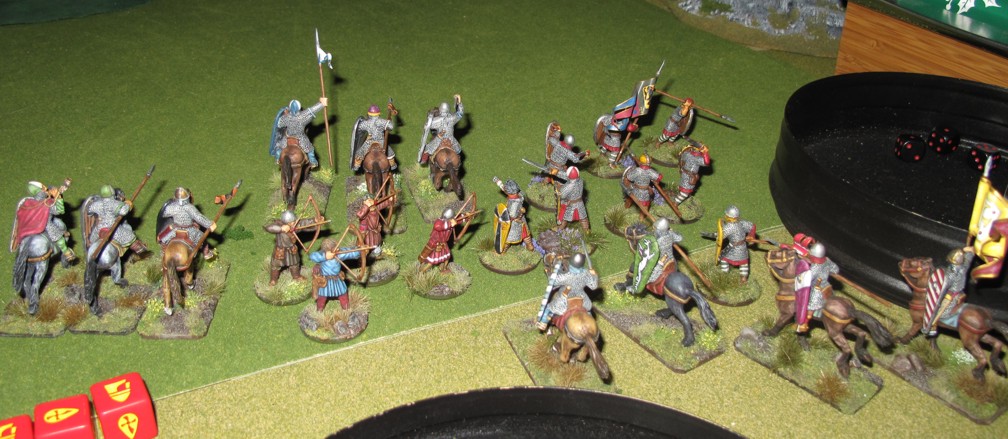
Last week I played Danny and used my Normans against his Vikings, tried some different moves, and being very tired from work went down for the count…. could not roll a save to save my life (or the Norman Hearthguard) 4 mounted Normans destroyed by his Levy’s! I didn’t take many pictures (to tired) and the battle is a bit fuzzy (same excuse) but there were a few and I do remember a some well intentioned charges by the Normans followed by horrendous die rolls….and in the end a large pile of dead Normans! Well at least I got rid of my bad dice before the con.
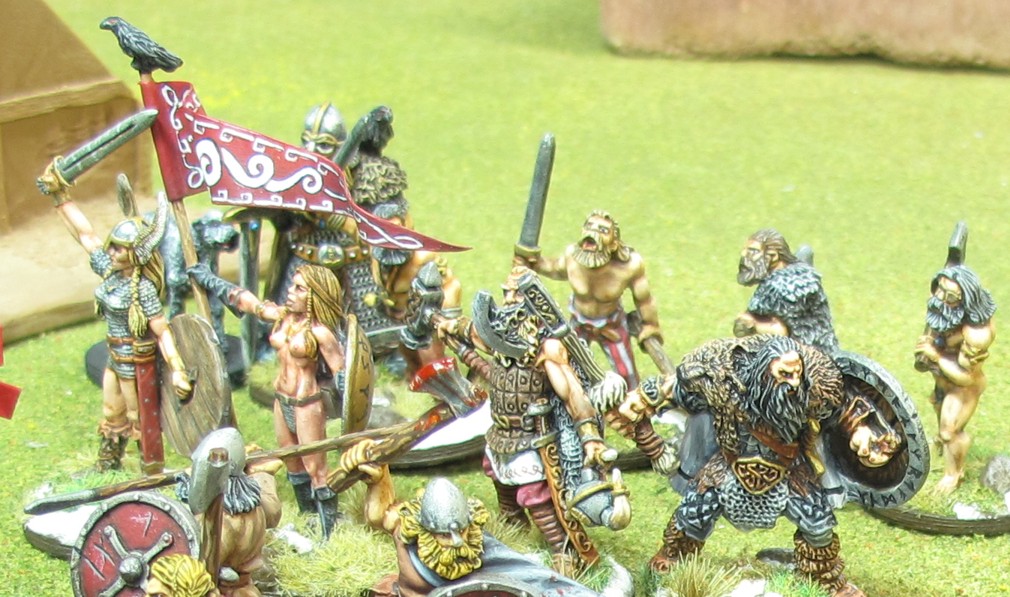
The Warbands face off!
The “Dead Pool” and it would get bigger!
Near the end, I think a last Norman charge at the two Viking Hearthguard killed them but in the fray the Normans failed saves again and took 3 casualties to the Horse!
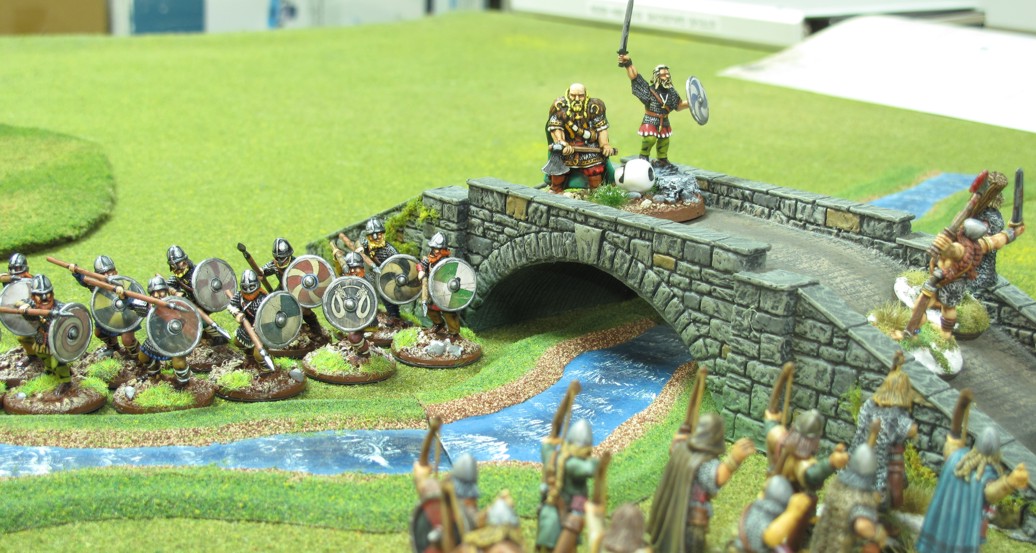
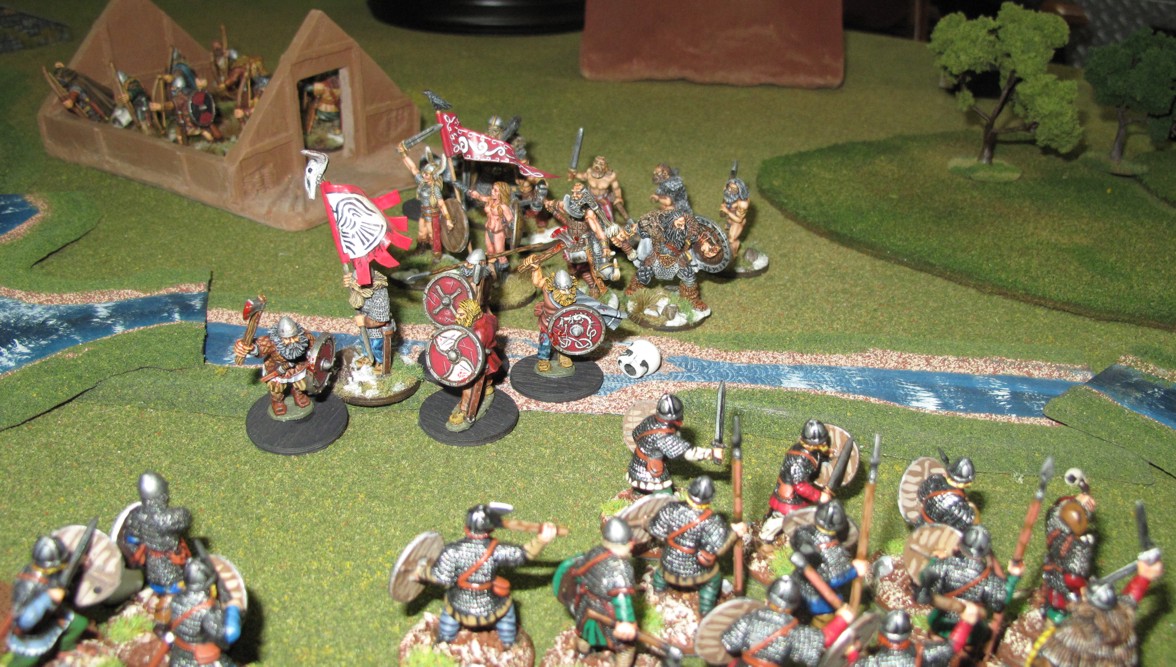
Steve G got back from Georgia Friday so we just hung at my place Saturday and Steve was kind enough to act as my “sparring” partner for a few SAGA tune-up games…lol! First a straight up Warlord vs. Warlord, Norman (me) vs. Viking bash, Vikings went down after a hard fight. The next was a Viking vs. Viking with me using my almost complete (a few with unfinished bases) Vikings warband in the “Battle at the Ford”
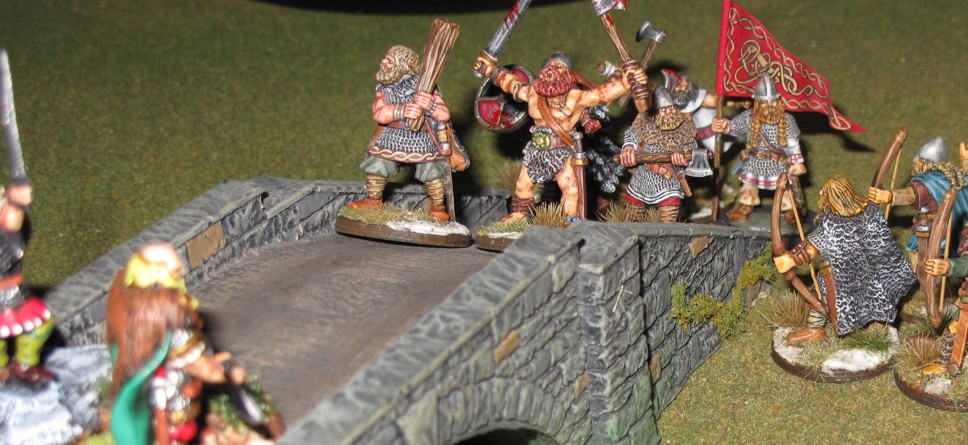
With many of our games Steve and I play “Friendly” and advise each other of mistakes or suggest better moves when playing so we improve both our games in the future, this was the case in our first game but the second one I advised him that the “gloves were off” (well sort of) and my Vikings were out for blood! Steve decided to make the first bold move and charged over the bridge on the right, he also led with his “chin” placing his Bezerkers in front of the charge across the bridge and not waiting for his bowmen’s support! Behind them a second Hearthguard and his Warlord. My bowmen had taken up position and rained arrows on the Bezerkers in the middle of the bridge…a dead Bezerker, bad as there are only four! Facing them my 8 man Hearthguard screamed in defiance as his Bezerkers charged into them, his second Hearthguard unit followed on their heels jumping off the bridge and hitting my Levy archers… My 8 man Hearth guard fought well (rolled) and after a sharp exchange his Bezerkers went to see Odin! I lost only one Hearthguard. Steves other Hearthguard unit did little better in melee taking out two bowman while losing one of theirs. On the other side of the “battle at the ford” the action consisted of little more than hard stares as his force of 2-8 man Warrior units with a 4 man Hearthguard unit faced my one 8 man Warrior units along with 2 Hearthguard units and my warlord. The next turn saw more action on the bridge with my Levy Bowmen retreating to a house in the center and my large Hearthguard charging and vaporizing his remaining Hearthguard. His Warlord now stood on the bridge alone, my Hearthguard activated a second time charged, used FRIGG to remove FATIGUE and GAIN an ATTACK die, and he too followed his warriors to Valhalla!
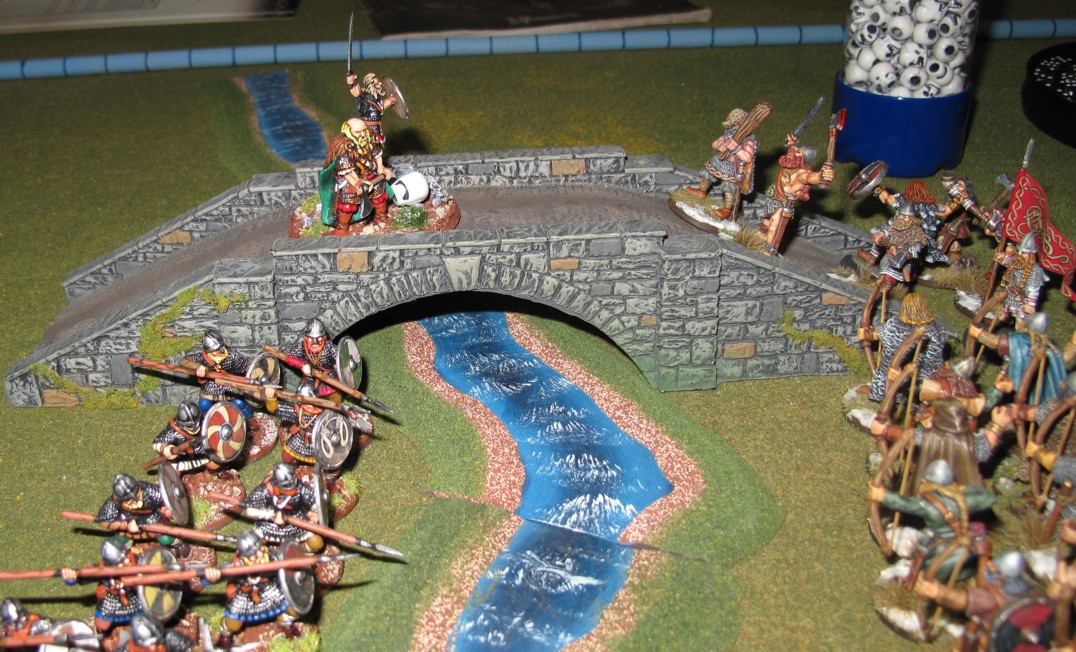
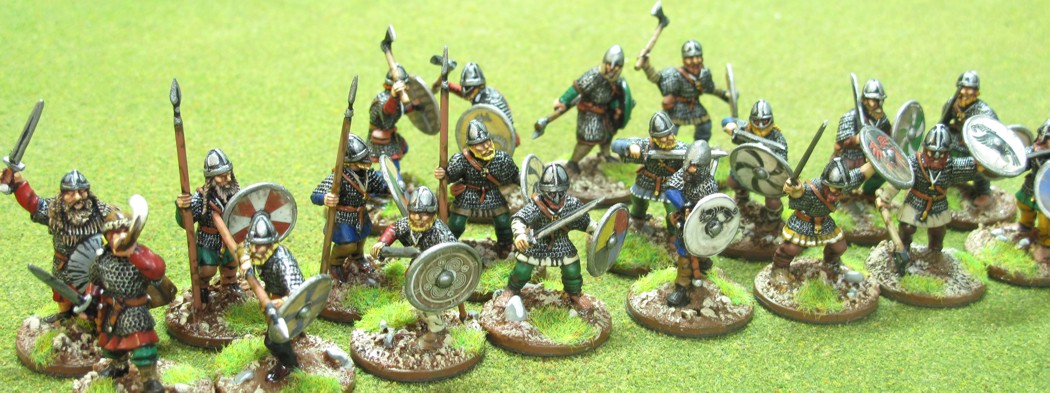
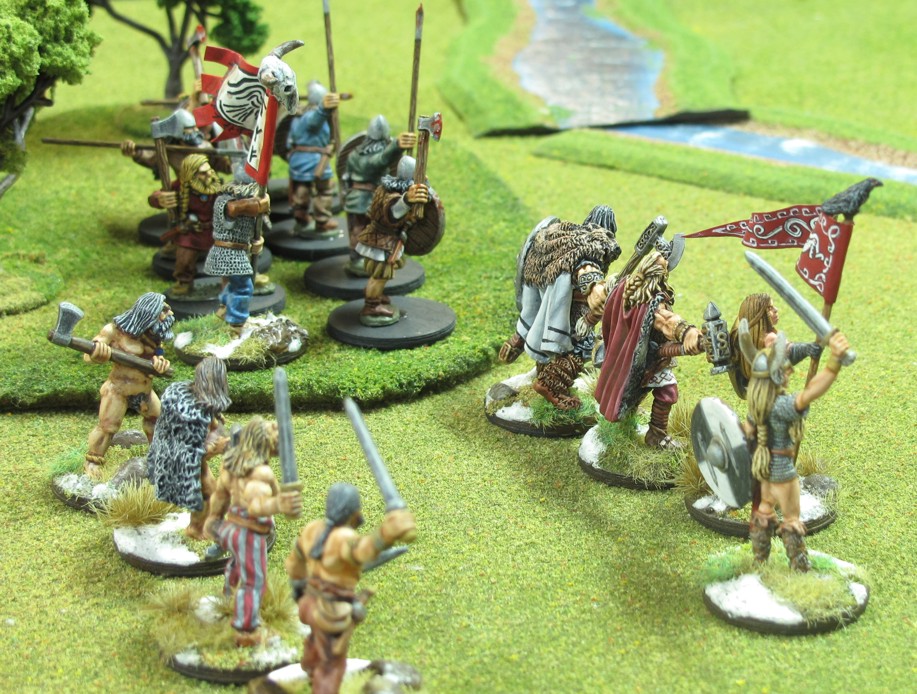
Got to love those “FOUNDRY” Vikings, Bill’s victorious Hearthguard charges over the bridge.
At this point Steve was ready to toss in the towel but after much cajoling by me about “don’t give up the ship”, “victory from the jaws of defeat” and some other rot…. He got his second wind and started to advance on the other flank. I could have sat back and let my archers weaken him (they were now occupying the building in the center) but that would not be the “Viking way” so I decided to oblige him and join battle at the ford. After all I was stronger on this flank and he was rising up to the fight, he should go down swinging!
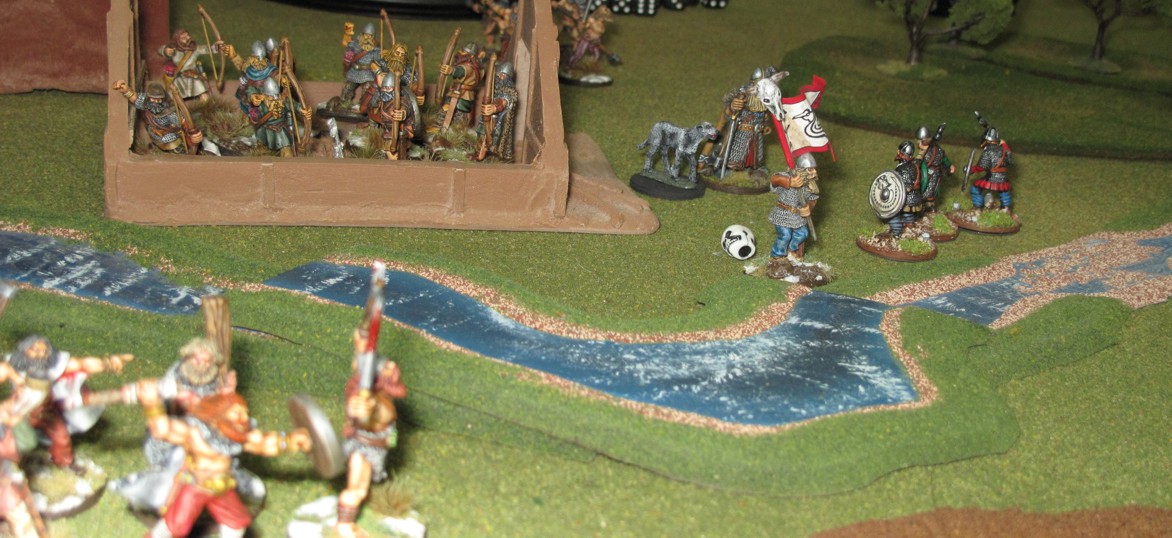
Meanwhile back at the Bridge my large Hearthguard after running down his Warlord continued over and off the bridge striking his archers in the woods, another quick fight, and using the “THOR” ability to fight a second round of MELEE at no fatigue cost Steve’s dead Archers made it a busy day in Valhalla! I now had a 6 man Hearthguard unit on his side of the river. 6 point of victory unless he could push them back…unlikely as he was was down to 3 SAGA dice per turn and I now charged over the ford to meet him on the left. Overconfidence on my side and good play and rolls by Steve made the “Ford” a bloody place! First my warriors and his Warrior unit clashed, his men obviously angered at the Death of their Warlord fought like demons and my Warriors were reduced to a single man, retreating out of the way as my 4 man
Hearthguard unit charge in to avenge their brothers. The Hearthguard severely hurt his first Warrior unit but also failed to save the hits (5) his Warriors caused, a second “defeat” for my force as my lone Hearthgurd figure retreated to join the lone warrior off in the bushes! Now it was my Bezerkers turn! A powerful unit if given the proper chance… they charged in and tore apart his second warrior unit, dead to a man! However the fighting was fierce, the Bezerkers took enough return damage and failing their saves also melted off the battlefield, Wow! This was turn seven and the game ended with Steve’s last unit, the 3 man Hearthguard unit stared at my Warlord across the ford littered with the dead and dying to see my Levy archers and Warlord standing there as ripe targets. With a bit more time they “might” avenge their Warlords death and the enemy incursion onto their side of the river…however daylight and the howling of my larger Hearthguard unit approaching to their side caused then to withdraw and think of next seasons battles!
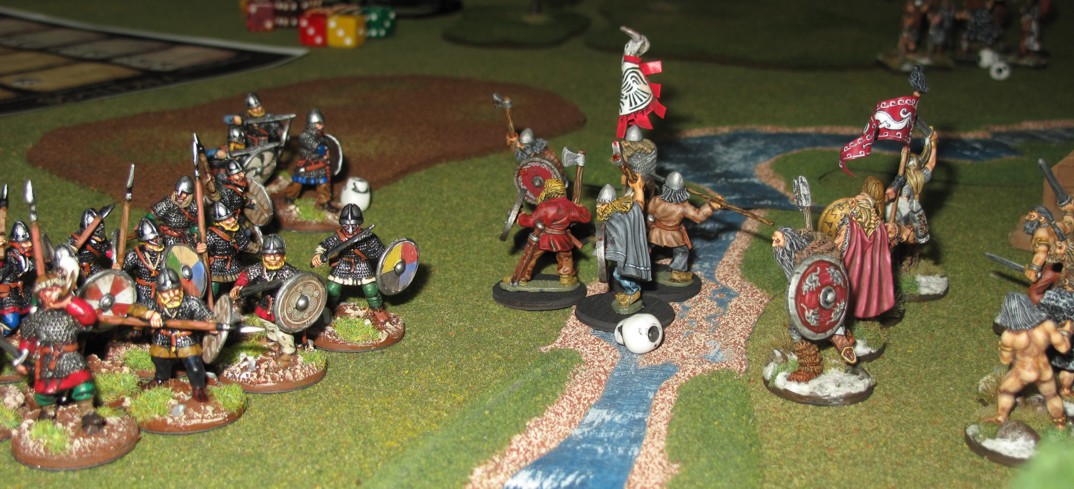
Our Warriors clash at the Ford!
This was our first “scenario” and we both liked it as a change from the Warlord vs. Warlord standard fights.
Steve G and I are probably going to Kingdom con for the SAGA tourney. Thought it might be nice to see and play and see how a different group handles SAGA. There will also be a SAGA “Samurai” demo on Friday night. Steve and I will definitely be there for the Saturday SAGA game so if anyone wants to “car pool” please let me know. Should be a hoot!
Bill W
The finish with my archers in the building, my Hearth guard on Steve’s side of the river, and my Warlord saying “Go back to your women, this land is ours now!”


 Egyptian forces passed to the