It seems that lately I have been doing more painting for others than I have ever done. I normally do not do commissions but it seems I’m starting to like doing it more for a couple of reasons, one it gives me a chance to paint thing I might not normally paint, periods, different conflicts, etc…. and I also fell better taking money earned from the hobby to buy more goodies for my hobby!
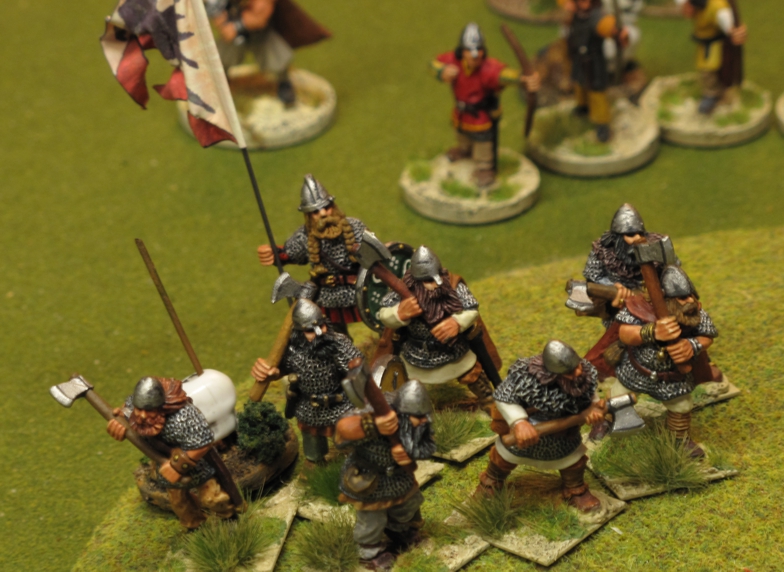
One of our group recently purchased a Byzantine SAGA war-band from another in our group and wanted to expand on the original forces. He asked me if I was interested because he wanted me to try to match the paint style of the original figures. Since I had considered painting one of my own Byzantine war-bands I thought this might be fun and a good way to really get a feel for the colors and style.
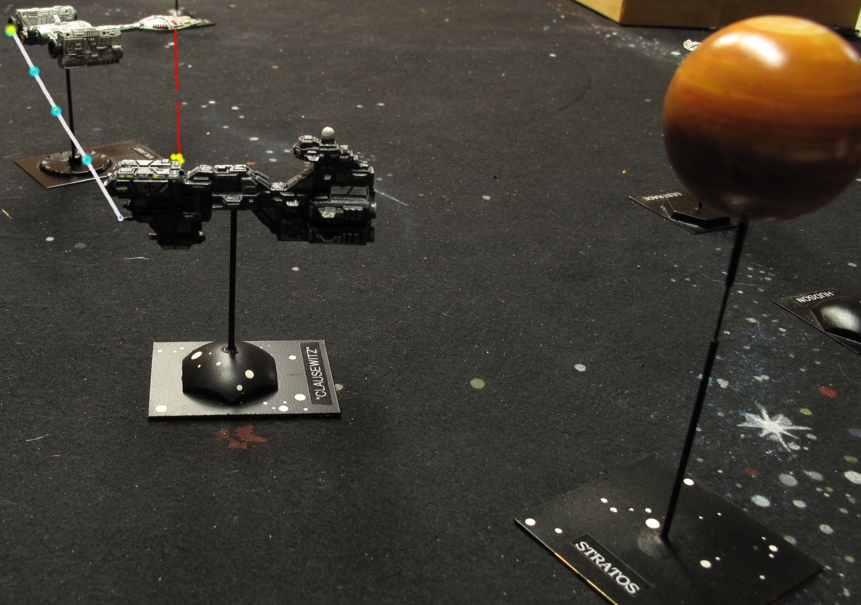
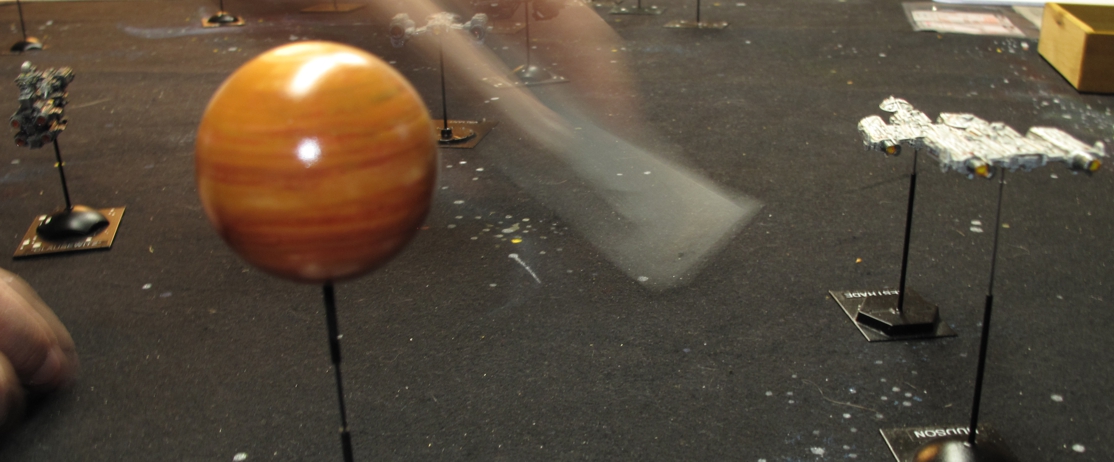
Two weeks ago I traveled down to “the Dogs of War” club room in Reseda California for a day with the lads and a visit from Dr. Ray who gamed with the Dogs when we had the clubhouse in Burbank. Chris S. had asked in his weekly after action reports for some suggestions on games to be played on “Rays day” and “Full Thrust” popped into my mind since its very well suited to have 4-6 players and I felt it would be nice to play something that we all could do together. Full thrust is fairly simple to learn the basics in a few turns and low pressure allowing for plenty of “kibitzing” as we played. I have also wanted to toss in a different game or two to mix it up anyway and have lots of ships painted and ready to go.
We did a basic learning game two players per side with me game mastering (I was re-learning as well since I hadn’t played in a few years!). I tried to balance the forces but even though the points may be close between forces if a player doesn’t know the strengths, the weaknesses, and the play style of his force (or the enemies), they may still have a hard time dealing with the enemy. “Draw swords and rush forward” strategy is not always the best course in space.
Galen Y. and Chris S took forces from my Imperial German Space fleet, 4 ships split between them and Dr. Ray and Dave D. took an opposing force of six smaller NAC ships (British/American) and squared off.
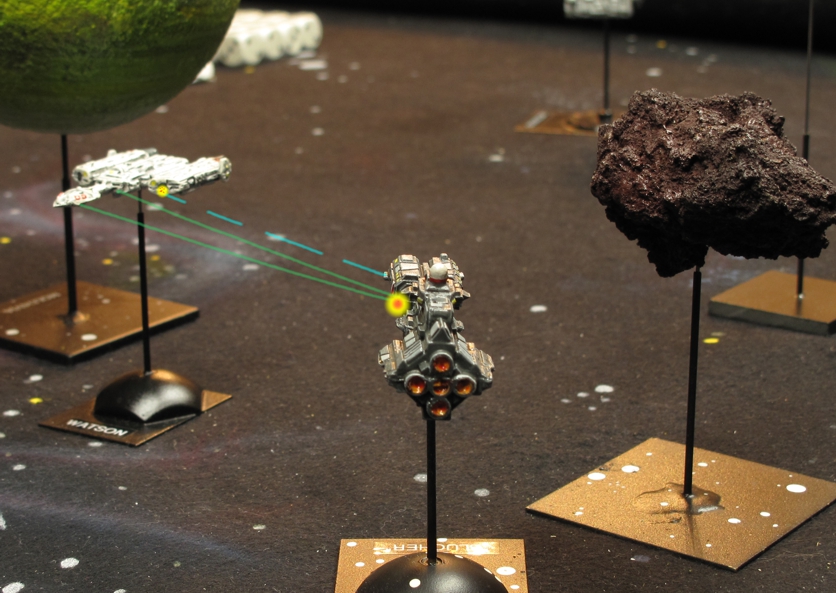
It was a learning game so a Battle report would not be fair but suffice to say that both sides gave a got plenty of lumps! Bottom line is that fun was had by all! I think there’s more “Thrust” in our future!
Dr Ray on the right giving the acknowledgement wave he learned from the Queen of England, and the gang hard at it!
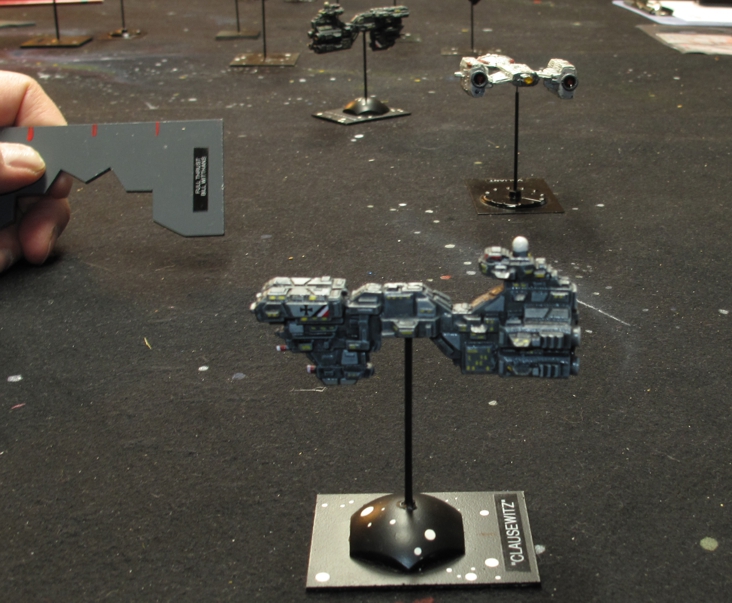
My poor attempt to do some “weapons graphics” hopefully I’ll get better!
The NAC (British) Heavy Cruiser “WATSON” and the NSL Battleship”BLUCHER” trading shots
A home made movement tool used for “square” based ship stands. The “Clausewitz” one of my battleships from the NSL or Imperial German Space fleet. Mini by Ground Zero Games.
Several times before I have posted about our gaming group the “Dogs of War” out in California’s San Fernando valley and how activities there might become a regular feature here on my site. The post below is a start in that direction, how exactly this will work is yet to be worked out. We hope to have other contributors, Chris Snell’s weekly reports now with pictures, as well as possible contributions by other “Dogs”. For now they will appear as normal post and be “categorized” under “Dogs of War”. This means that to find all post pertaining to the “Dogs of War” you only need to look at the right column scroll down and where you see “CATEGORIES” simple choose “Dogs of War” under that heading and all of the post linked “Dogs of War” post will be pulled up.
Well after resisting “Flames of War” for over ten years but I finally got hooked into playing a game down at the Dogs and surprisingly ended up on the winning side! Now that is usually enough to hook me into a new rule set and a commitment but no not yet (ok not “new” since it’s been out for 15 years!). I love WWII and the majority of my wargaming over the years has been in that period, Air combat (Mustangs and Messerschmitt’s) Navel (General Quarters) Land Combat (Tank Charts, Frontline, Soldat, Crossfire and many more). I still don’t think Flames of War is “my” idea of a good WWII ruleset, for me it lacks some elements and sometimes the look of the battlefield gets a bit silly (Phalanxs of vehicles wheel to wheel and track to track) but as a “WWII GAME” it’s good. I think its fine, especially for players new to wargaming, new to WWII, and those who want a fast, light hearted approach to the game. It’s got fair detail without being burdensome, lots of troop types, vehicles, air support, bombardment, and tons of options to keep one interested for many months if not years! The rules are exceptionally well written and the explanations are very clear. For me I think it abstracts quite a bit to fit the complexity of a modern battlefield into the fast play mechanics of the rules, I’m not always of fan of this, but for what it is and what it is intended to be it works.
While I’m not head over heels in love I think I might be sucked in just enough to paint a few units, maybe Africa Corps or Fallshirmjager for Italy or Normandy because after all its about rolling dice and having fun with friends.
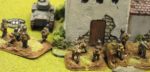
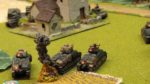
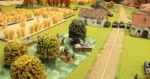
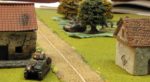
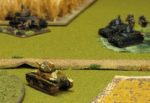
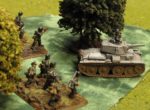
The Game we played was early war Europe (France) always fun and I jumped in with Frank on the German side, Chris Armstrong and Dave Dandridge lead the French forces. My strategy was simple, DEFENSE, always a good choice when commanding forces in an unsure situation and not knowing the rules made me unsure! I was also facing David D. a competent and tricky opponent who won’t make many mistakes and is sure to make you pay for yours! Not going to do any type of battle report here, just going to post a few quick shots I took while trying to hold off Dave’s French onslaught!
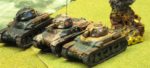
Germans PZ38Ts and infantry take up defensive positions.
The first Panzer goes down to French fire.
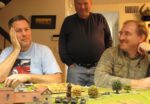
Old Guard Dogs of War members from left to right Chris Armstrong, Chris Snell, and Dave Dandridge
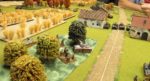
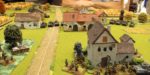
German armor and infantry use a farm as a strong point.
German fire was fairly effective! Another French tank goes down.
Well just a few bits and pieces from “my world of wargaming”.
The family did a lot of last-minute shopping for me this Christmas and since “dad” likes weird stuff (wargaming stuff) many of my gifts didn’t arrive until long after Christmas. Not a bad thing since all through January the mail was full of great items to brighten the work week!
The first items were the “new” SAGA rules, meaning SAGA II, the basic rules, along with the Vikings and Crusaders supplements, and finally the Book of Battles. There are lots of game systems out there that redo their rules, some that do it with annoying frequency (and not always to make them better as much as make them money!) but Studio Tomahawk has done a good job with the “revamped” rule sets, tons of great reading and I believe an even better game justifying the expense in upgrading.
The rules do not really change in spirit or basic structure, its more a re-balancing, clarifying, and expansion of the first set. I have played 2-3 games using them and the transition was very easy and felt smooth.
I liked that the designers have continued to look at their product, the feedback provided by players directly, and through the active Studio Tomahawk forum then made the right changes to improve and expand the game without making original players of the game feel like their previous experience and armies were now useless (a common occurrence with several other well-known companies).
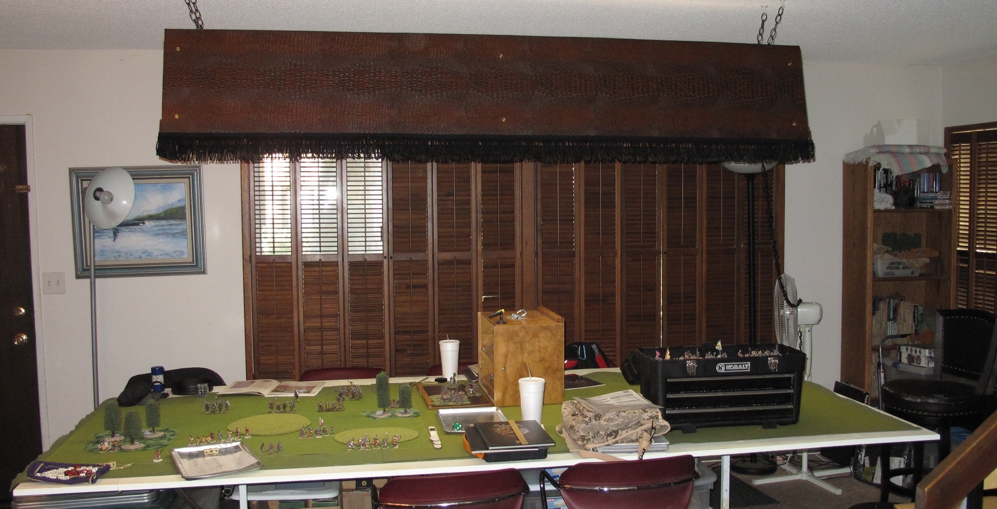
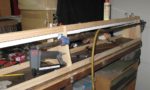
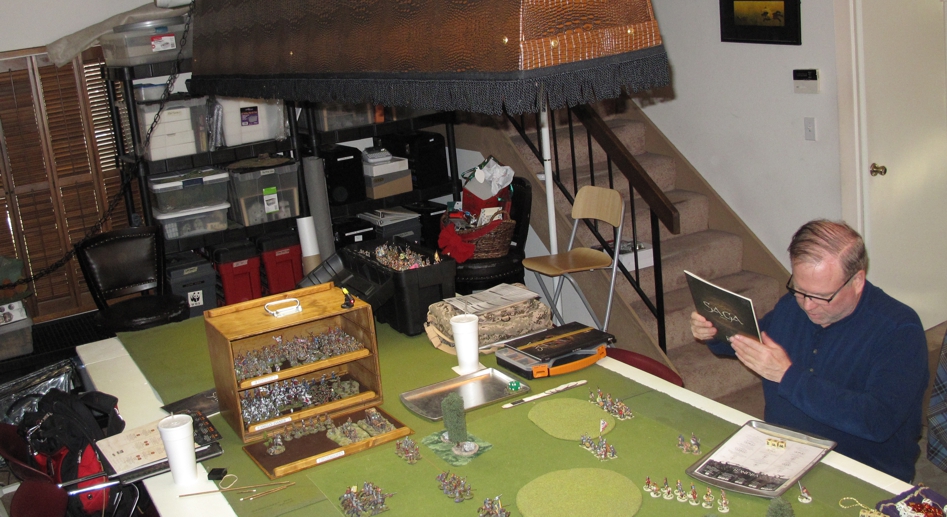
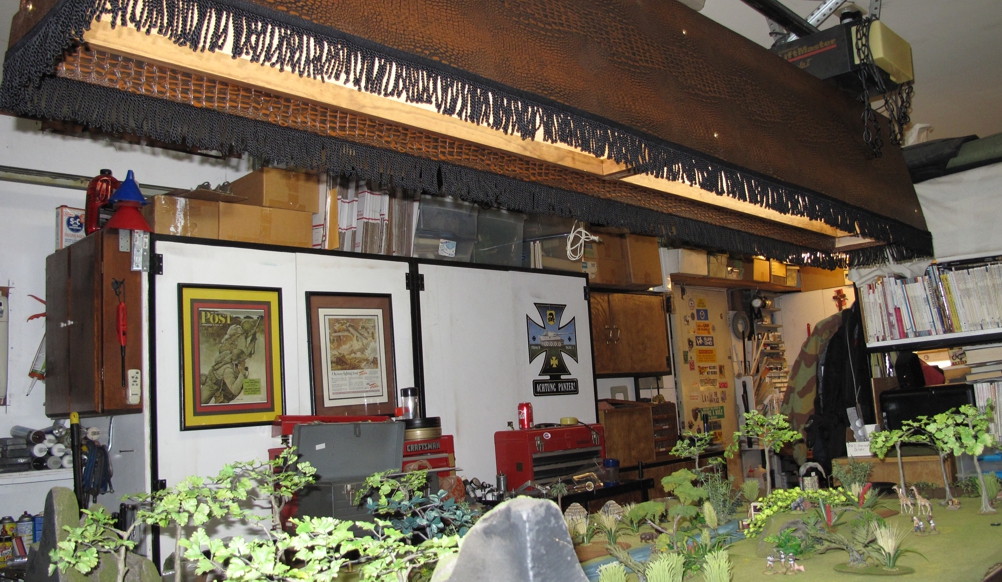
I’ve also been chipping away at my wargamers “to do” list and a big one on the list was to build some improved lighting for our game table down at the “Dogs of War” gaming group. Over the last year or so the “dogs” have been working to make the “Dog Pound” a better place to play, cleaning, building storage, tossing or selling unused / old gear, and one project was better lighting so we might better see all those beautiful miniatures on the table. This project took over a year of “thinking and research” to figure out just how and what would be the best way to do this. I / we wanted lighting that was easy to use and lite the table / miniatures without making the rest of the room look like an outdoor sports arena. I wanted the solution to look good, fit in with the club space, and not impact the members house much. Cost to build and cost of operation was also a factor. I wanted the unit to light our entire 10’ x 5’ table as evenly as possible so in the end I went with a 8’ long LED setup that would be dimmable as well! The unit hangs over the middle of the table and the design contains the majority of the light to the table exactly like pool table lights.
“Thar she blows” Lighting installed down at the “Dogs” above our 5′ x 10′ table!
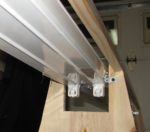
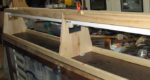
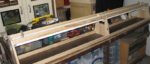
I wont go into the building of the lighting fixture now, maybe latter in a “how to post or “Workbench page” but here are a few pictures to let you get the idea.
A regular flouresent fixture was gutted and converted to LED use then a frame built around it.
Frame finished and ready for next step, skinning!
Wood “skeleton” being assembled.
1/4″ hook type bolts were installed to give a strong connection point for the hanging chains.
A dramatic improvement in my opinion. There is still a lot of work to be done on our remodel (chain will be swagged up out of the way)
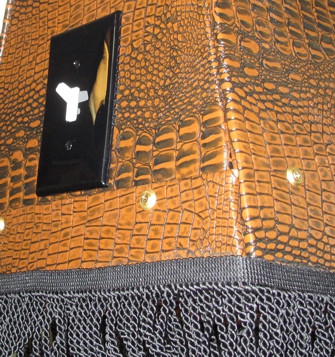
Switch allows quick on and off as well as dimming.
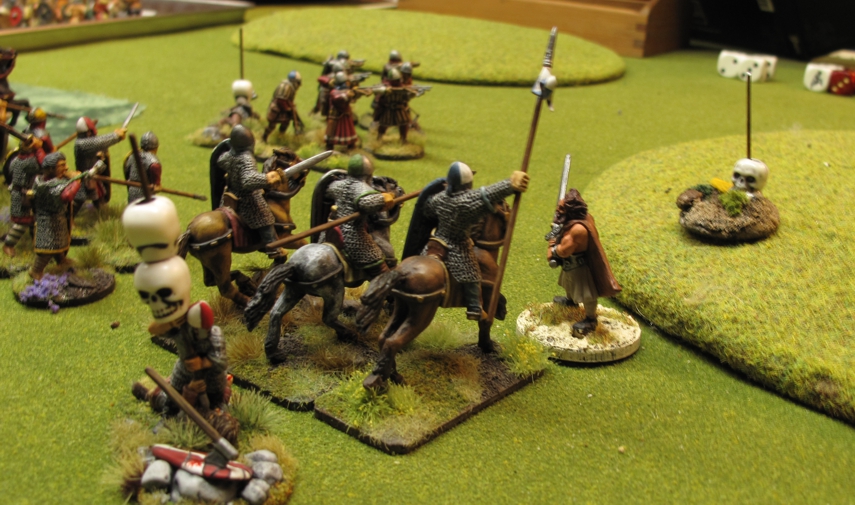
To break in the new lighting Chris and I played a game of SAGA II using the Viking supplement. Chris took Vikings and added a Banner man while I played straight up Normans heavy on cavalry. I didn’t take many pictures but the game was fairly even for the first few turns until his Hearthguard charged up the hill to take out one of my Hearthguard cavalry units only to be counter charged by another of my cavalry units and wiped out.
Chris’s Viking hearth-guard charge up the hill eliminating one of my hearth-guard units only to be charged and wiped out by another of my Norman hearth-guard units the next turn! With our old lighting set up the excellent paint jobs on these guys could hardy be seen! This shot was done with no flash and no tripod!
The battle for the top of the hill raged on with Chris’s Warlord entering the fray hoping to end it. My Norman cavalry used the “Gallup” Activation/Reaction” option and moved off leaving his Warlord standing there surrounded by angry Norman infantry. A finial charge by my Norman warriors sealed his fate and outside of a few parting bow shots by both sides ended the game with a Norman victory.
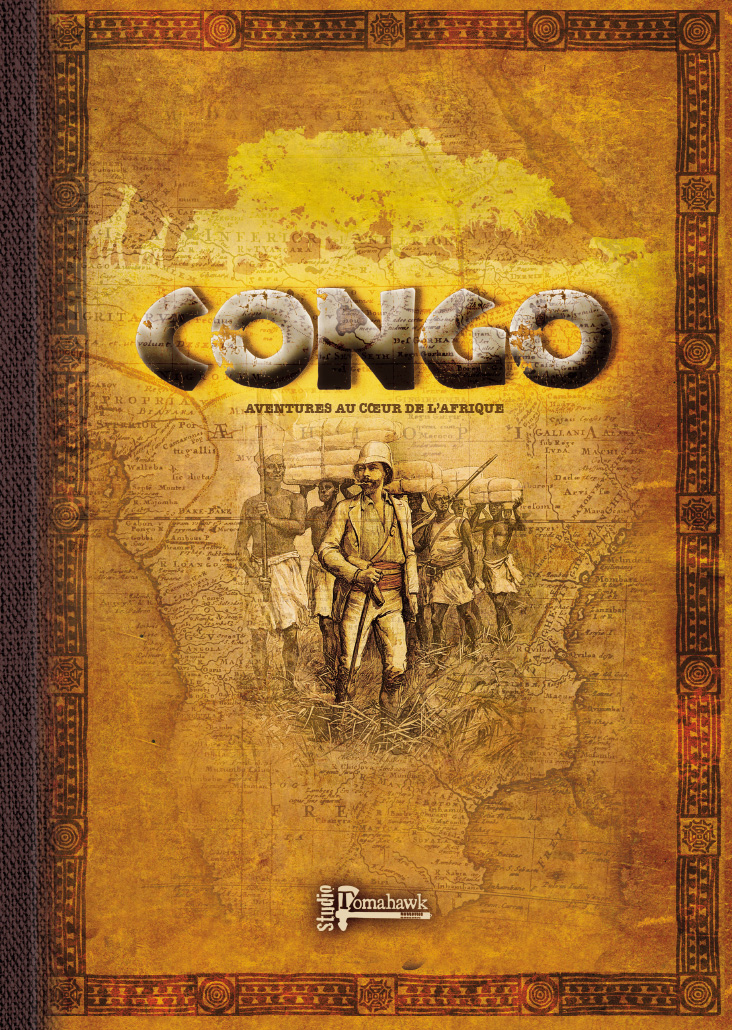
One of my other gifts was the Studio Tomahawk rules “CONGO” they look great and I’ve already played one “test” game that was quite a bit of fun. I’ve always had a great fondness for the Darkest Africa figures from Foundry, Coppelstone, NorthStar, and others! I think CONGO will be the spark to get me painting sore of the pile of Darkest Africa figure on the shelf! I have played lots of Darkest Africa games in the past but some of the rules are a bit dated and no-longer available. These follow some of the same concepts from Studio Tomahawks other rules so may be a bit easier and acceptable to players familiar with those rules.
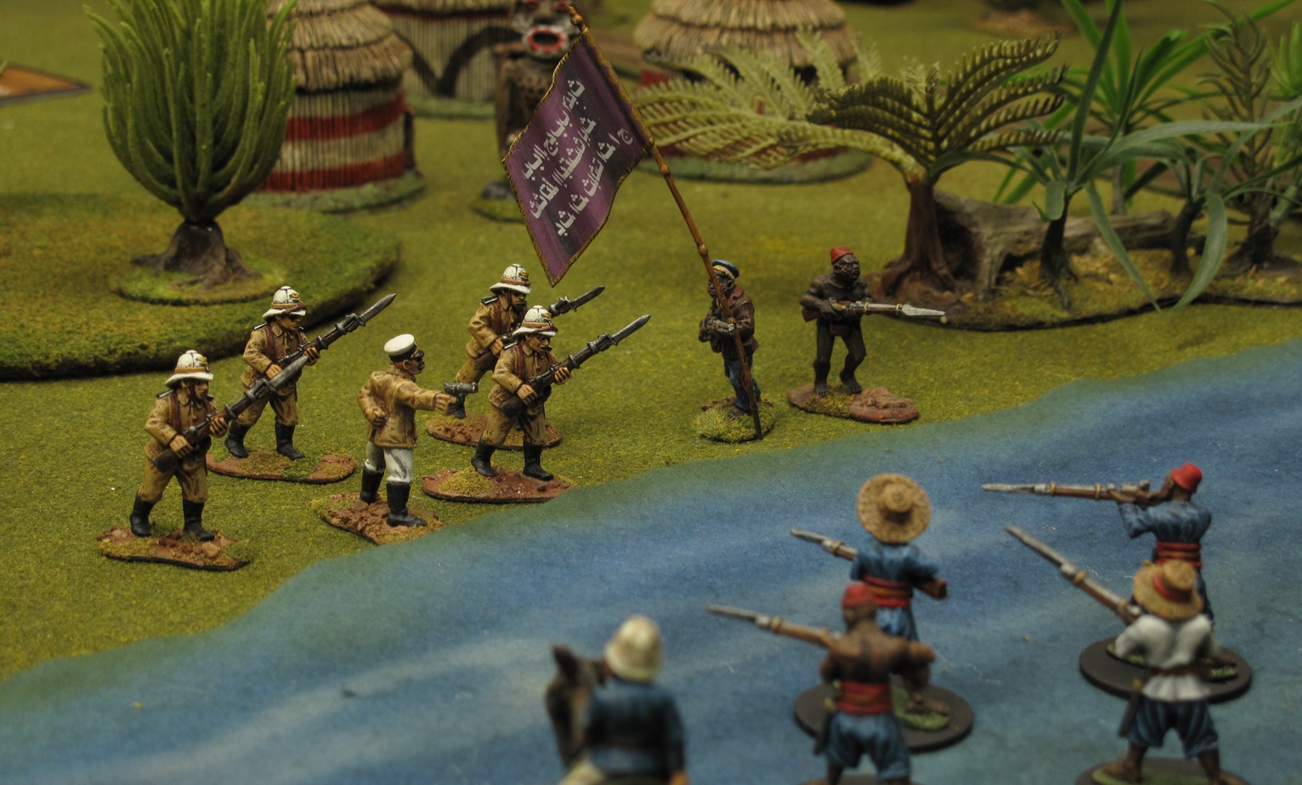
The first game under the new light, Darkest Africa isn’t so dark!
We used a pre-made scenario, basically capture the flag. Of course to make it interesting the flags were in the middle of a crocodile infested river flanked by enemy figures trying to put hole in you!
More on CONGO in the future…..
The finished light being test in my shop with a game of CONGO.
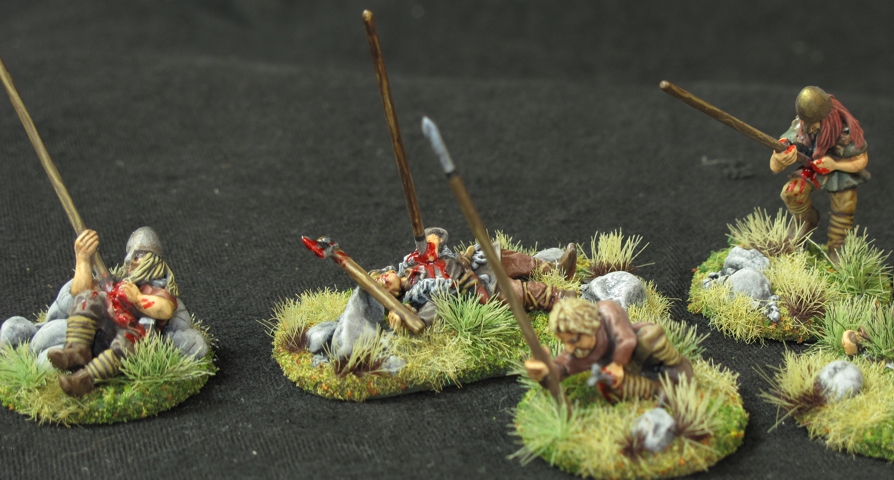
A set of six should be plenty for a warband since 6 point armies are the norm and each unit is normally 1 point.
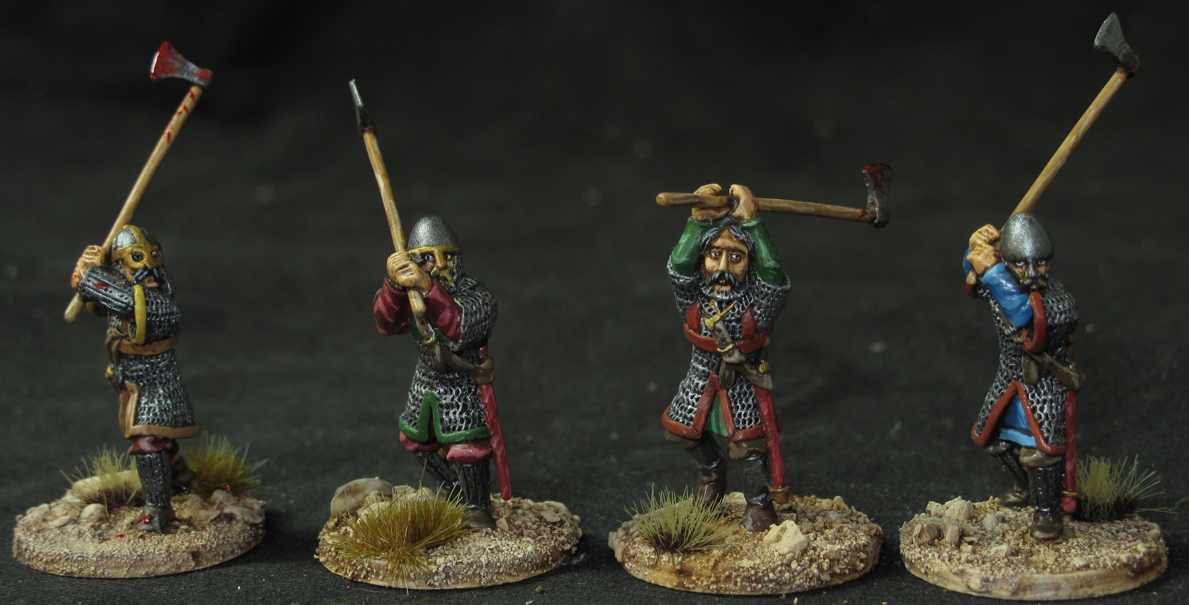
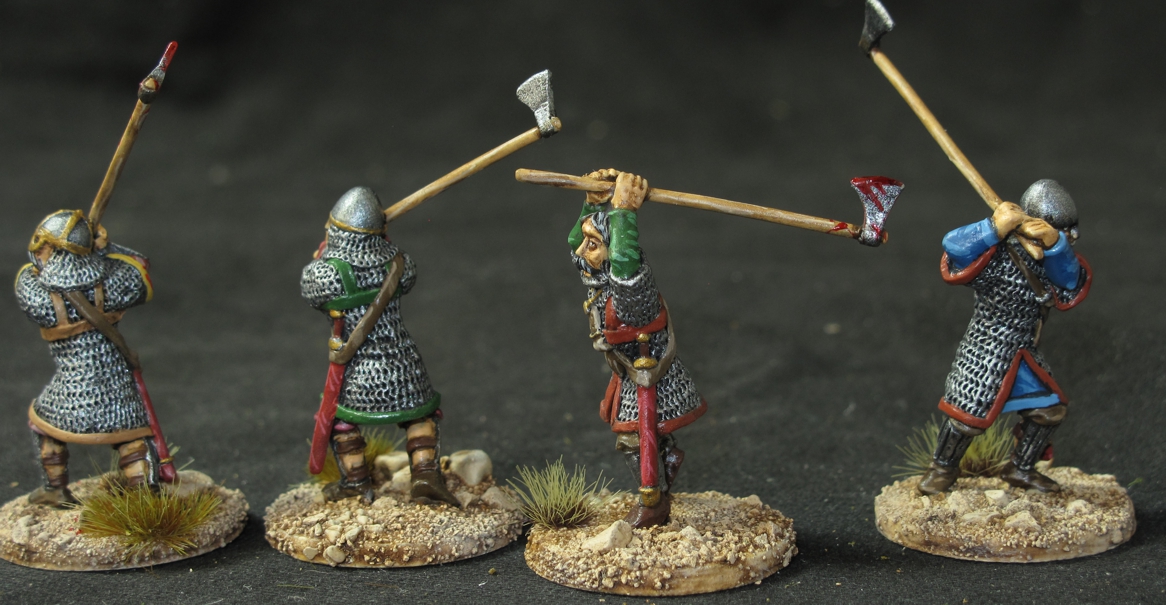
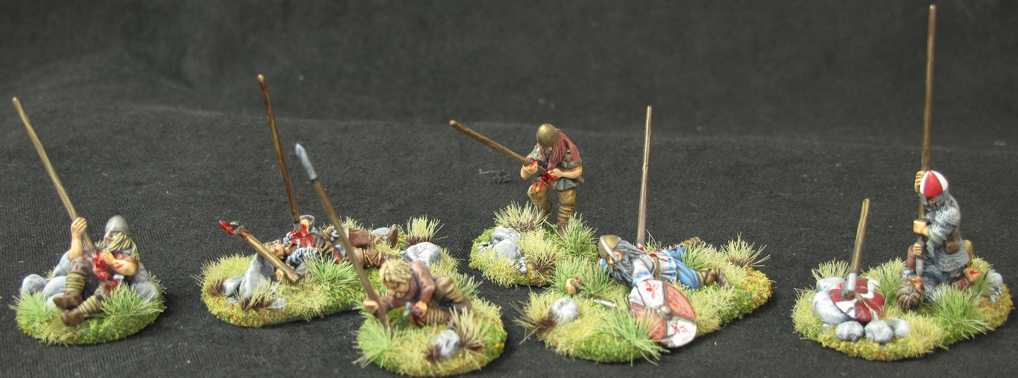
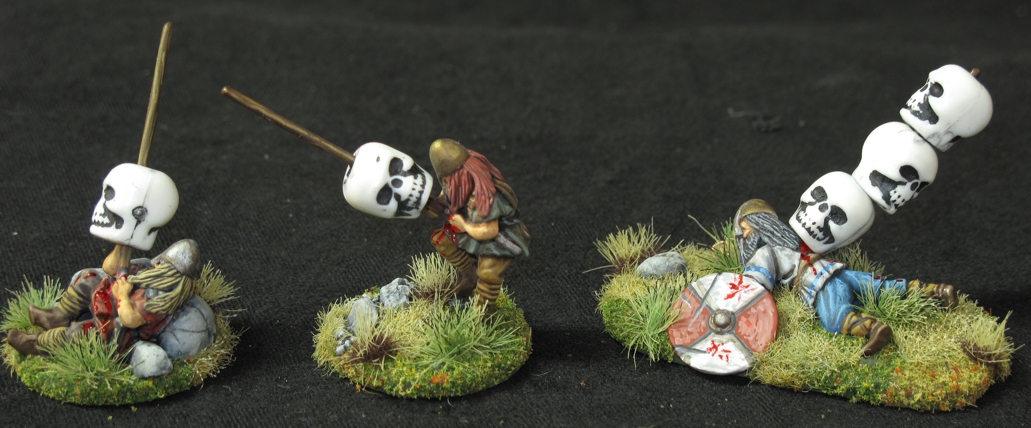
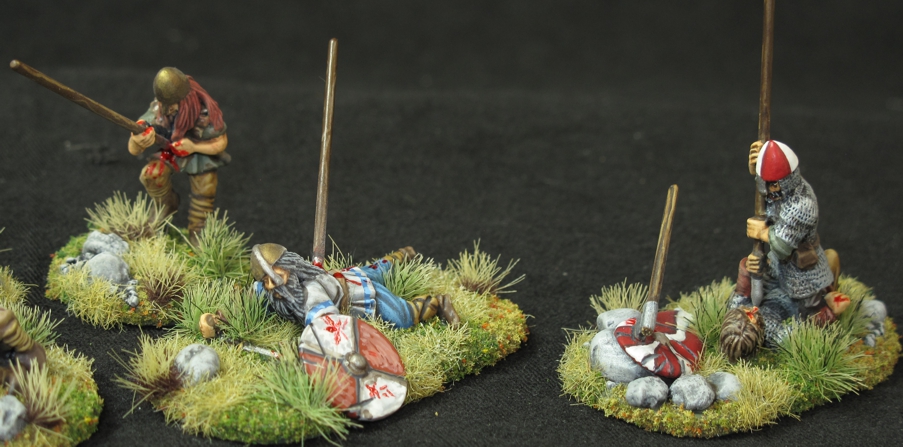
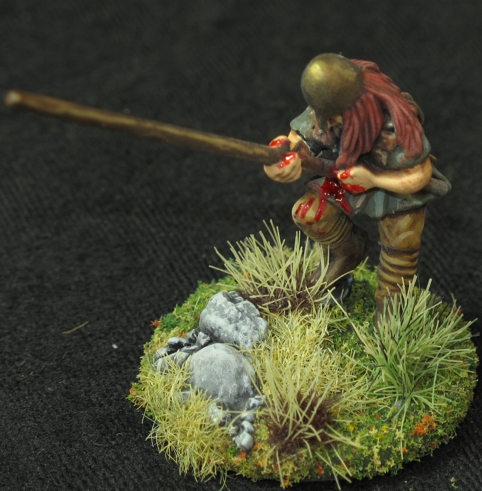
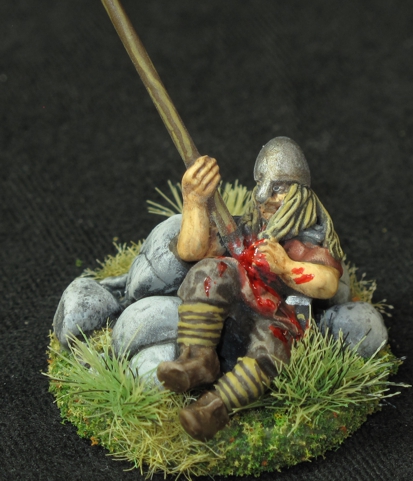
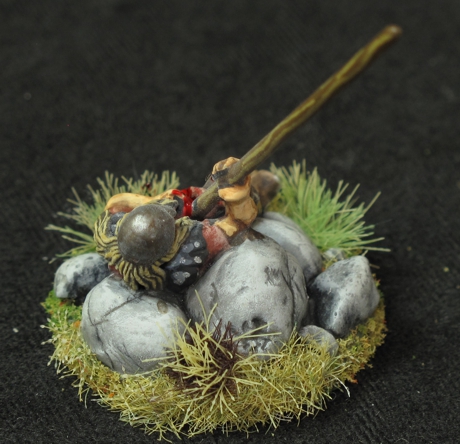
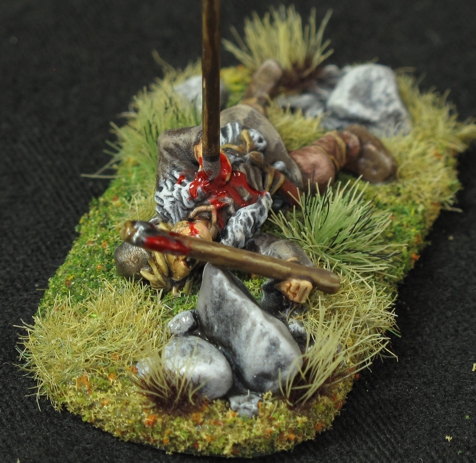
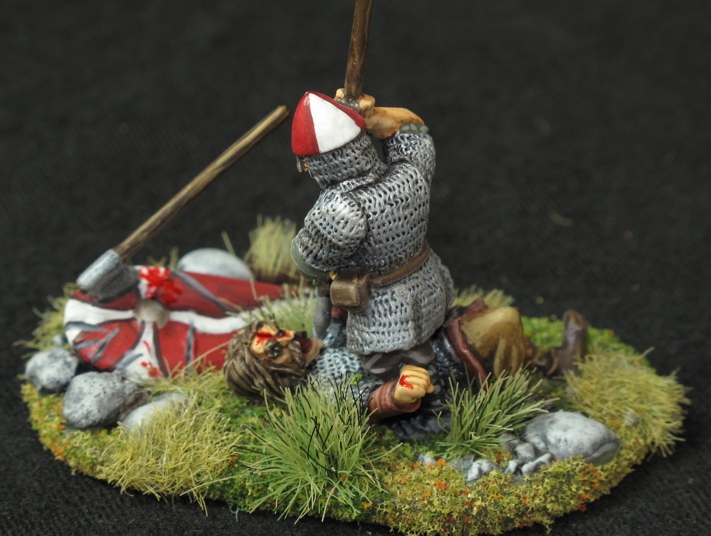
SAGA has been one of the games that has held my focus for the last few years and a lot of my painting and building has been centered around the game. I always like to make things better and improve if I can the look or play of the game. I never like game tables littered with markers, chits, or anything that takes away from the visual and SAGA is very good in this respect only requiring “fatigue markers” when a unit is tired out for one reason or another. I have seen all sorts of things used as fatigue markers, the original game produced markers in the form of shields, as well as coins, beads, small rocks, etc… Our group started long ago to use small plastic “Skull” beads as they looked cool. I think the first skulls where brought in by me after my buddy Stevie G bought me a pack at a convention. Another member of the group started making little vignette stands that used dice as part of the vignette to show the “fatigue” level. Rick Abbo then began to make some that used spear shafts in the vignette allowing the Skull bead to be slid on, they looked cool!
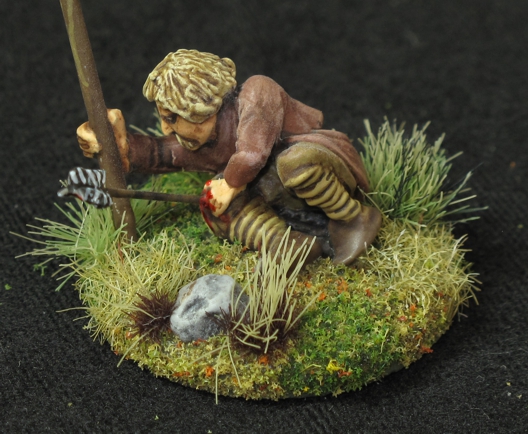
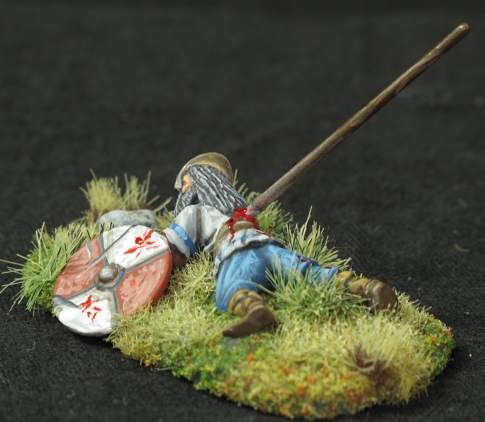
Well I finally got around to making my own and once again they are highly customized. This first set is based on wounded / dead figures that could be Vikings, Danes, Saxons, etc.….(sure they really work with any warband) I’ve added a hand cut steel rod for a spear to each one by drilling a hole in the figure to make them look wounded and hold the “skulls”. I have also added extra pieces from the “bits” box, real and “epoxy” rocks to give more life and character to the stands. If I can find the right wounded/dead figures, I plan to do this type of “Fatigue” stand for other factions as well.
The spear a just long enough to hold three fatigue marker skulls since the new SAGA 2 rules treat 3 fatigues as exhausted and excess fatigue is ignored. I like this since before you had to make the spears longer to get more markers on and looked not quite right.
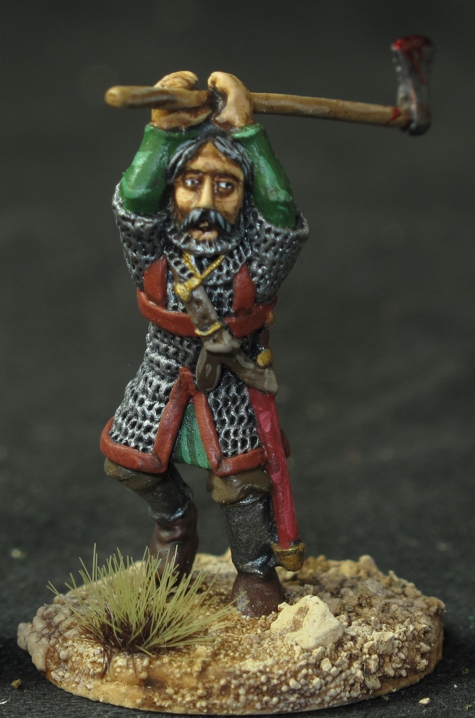
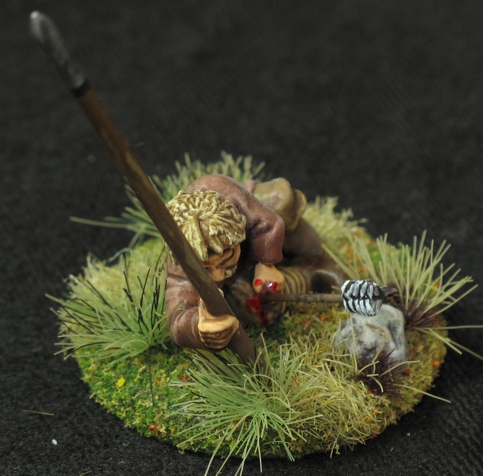
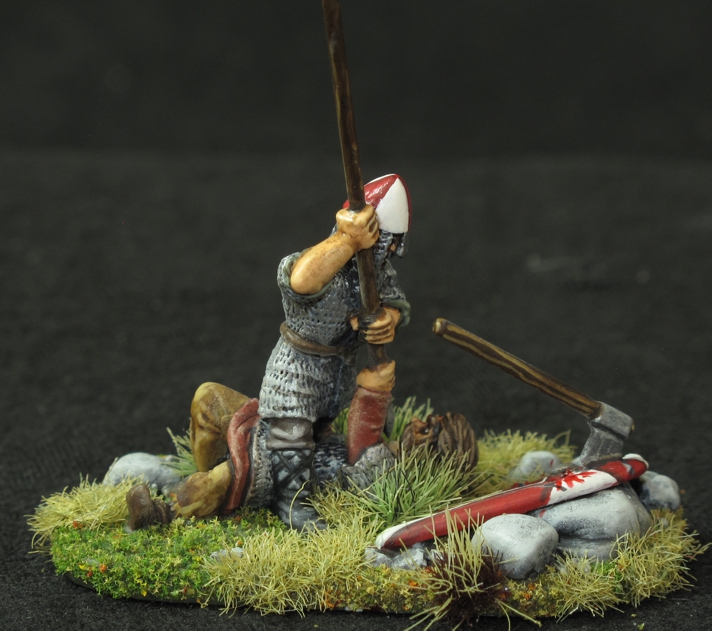
This figure got a hand made arrow of piano wire and epoxy feathers to show a wound. The “steel” spear was also added giving the effect that he’s trying to stand and get to safety.
This is the same figure as the standing figure above but slightly re-sculpted to a lying down version. I sculpted some big rocks from two part epoxy in order to prop the figure up a bit and a better viewing angle.
A view of the additional sculpted rocks.
The fresh blood look is a TAMIYA color “clear red” over regular Vallejo red. It has to be applied after dull coating.
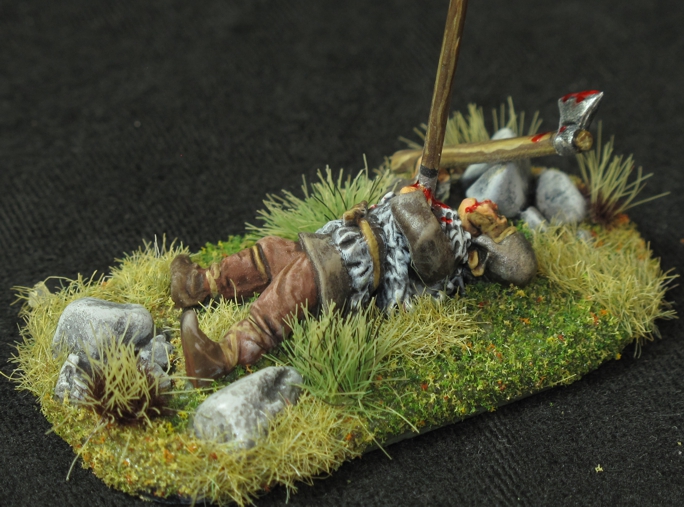
I put an ax in his hands to create that finial moment as a Viking dies when its so important to die in battle clutching a weapon to insure entry into Valhalla!
I love this one! I added some extra items, the shield with embedded ax to further the appearance of an on going desperate struggle!
Like I said in my last post I’ve been hard at work…ok well I’m making a real effort to clean out my shelf of partially done projects and I got to say that things are looking good! I have 3-4 projects finished and off the shelf and ready for a bit of a photo shoot when I get the time. This project here was number 4 to come off the shelf and just happened to get in for pictures ahead of the other projects. There is still a bit of work to do on the bases, stands, and maybe a bit more weathering, but I was so happy to get the project to this point that I couldn’t wait to get it up for all to see. Funny since it has been on the shelf for at least 5 years!
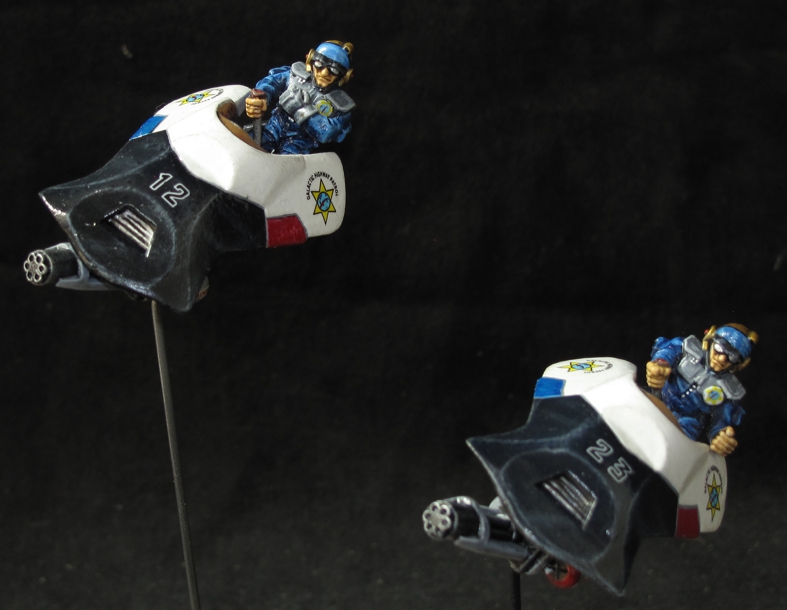
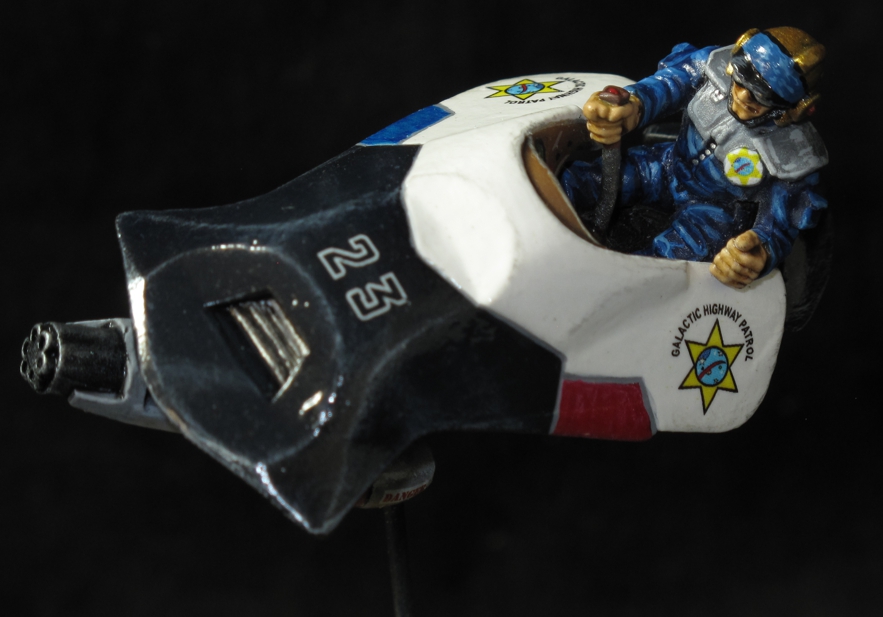
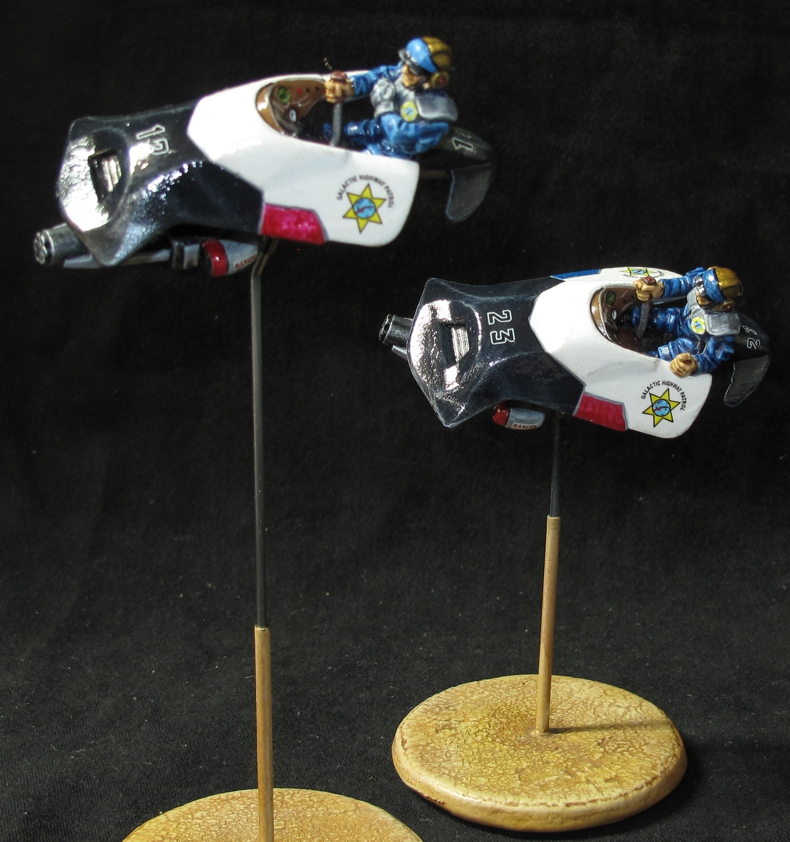
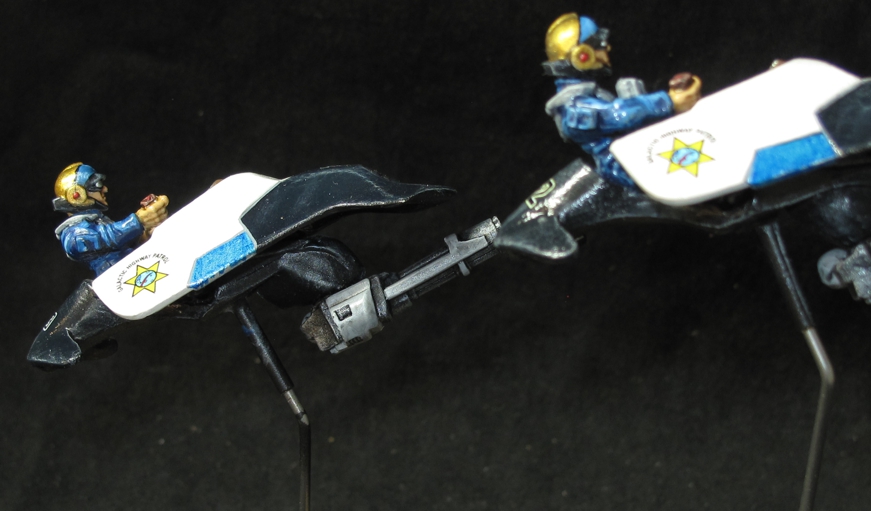
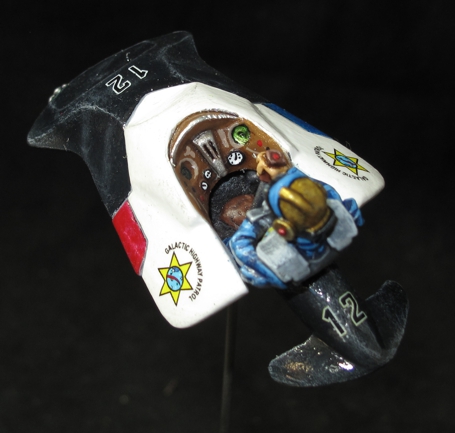
I have always loved the Starship Troopers mini’s and built an entire setup that I ran at conventions several times. I wanted to add to the ST universe on the Human side with additional forces to fight the bugs. The current force I used in the games for the humans were some Games Workshop Candian troops purchased off eBay fully painted. I bought them just to get the game going for the conventions. I had painted all the bugs but did not want to wait until I had painted all the Troopers to start playing. Now these “Mercenary” troopers were very well painted but me being me I wanted something different and painted by me. I thought about getting duplicate unpainted Candians, or stripping the paint off the current ones but wasn’t thrilled by either option. I then hit upon building a whole new force, different figures, not really military (tired of painting camo uniforms) but sort of “para military” and the idea for the “GALACTIC HIGHWAY PATROL” was born! A force that patrolled the Galaxy keeping the peace, restoring order, a force that would often find itself in unexpected and dangerous situations.
Your cruising along in your speeder on Rigeil 7, radio playing, your favorite green Orion slave girl at your side when you see this in the rear-view mirror!
I’ve collected a ton of minis for this force and this pair was the start of the project. I planned to paint them in an slightly updated style of the California Highway Patrol. A style I thought I could have fun with and would be very distinctive on the battlefield.
The decals were printed on a HP Laser printer using decal paper. The design being done with “vector” graphics instead of say a drawing program as bit map allows me to take and scale these up and down for any uniform or vehicle in the future without losing definition or sharpness! I scaled some down to make their uniform badges.
The minis were done so long ago that I can’t remember what I used other than I think the speeders were from some GW Eldar, the troopers are Candians out of a different GW flying gunship, and the Gatling cannon I picked up somewhere else. I remember I got to the point of painting them and was stuck on division of color for the vehicle and basic uniform color. I also was stuck on what to call them and how to paint all the insignia. I like to hand paint flags and such but in this scale on a more modern type project I knew that hand painting no matter how well it was done would not cut it! Finally, I bit the bullet and made my own “vector graphics” design and turned them into decals that could scaled to fit in several places.
All in all, I think it was worth the five years of contemplation!
I love the colors and the look of the California Highway Patrol now expanded into the future! The helmets came out just great!
I built a brass and steel pin system into the jet bikes frame so the under slung Gatling cannons can be swiveled around.
I’m thinking about ways to create some short clear windshields for them…..