“Norman?” is that you?

Wow two post in as many days! a new record! Well really just part of one of those resolutions you make to yourself around this time of year, to do something more, or do something less! Well one was to do more painting of mini’s, more playing with mini’s, and actually posting more about it! I also vowed to try and take pictures of and categorize my entire collection here…lol we’ll see about that, I will try. So here goes the first “mini post” of 2020.

It seems that my breaking from the tradition of never taking commissions for painting a few years back has led to more and more commissions, mostly for friends and many times to try painting figures that I would not paint for myself but I feel may be interesting or a challenge to paint.

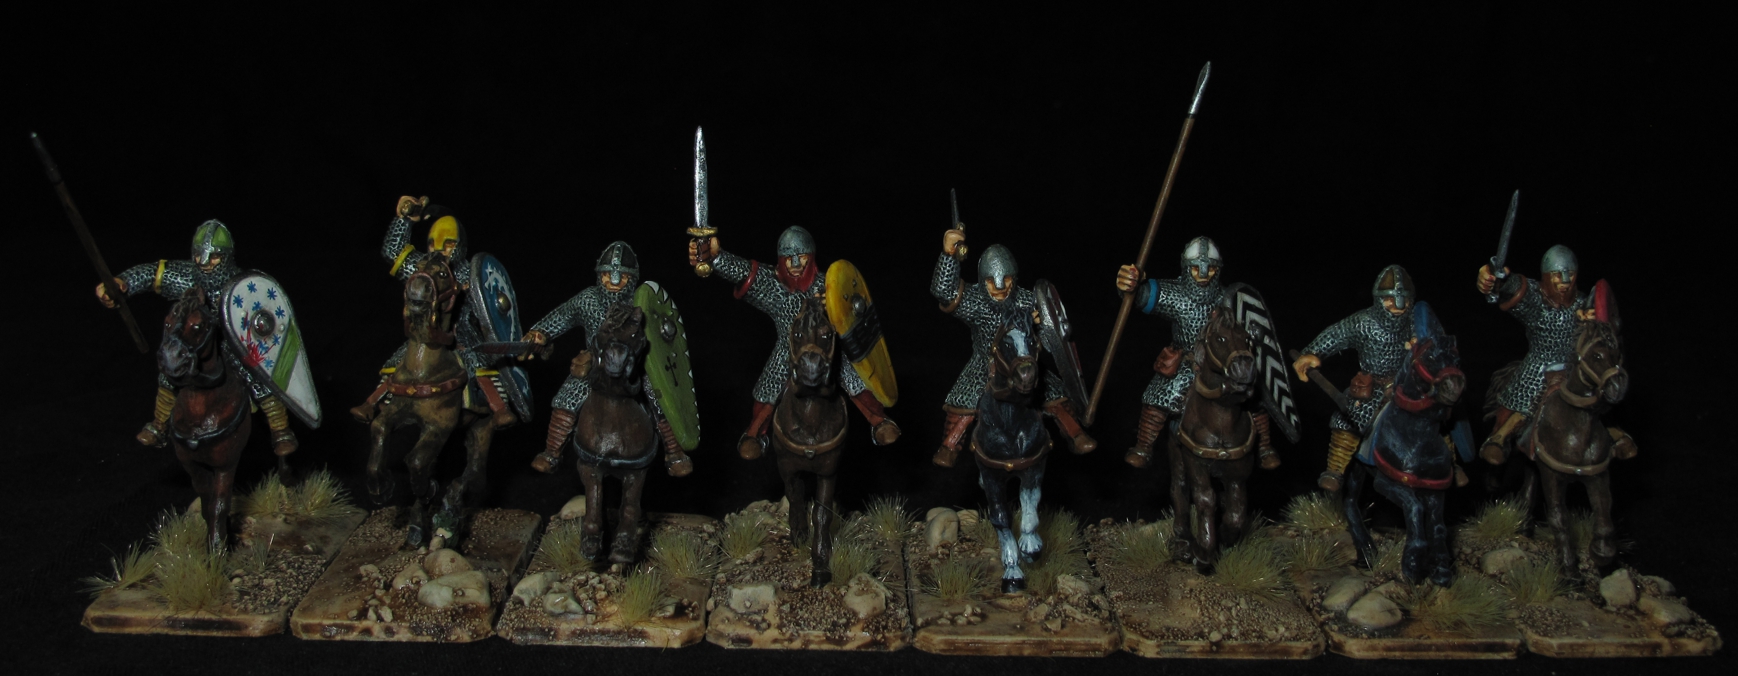
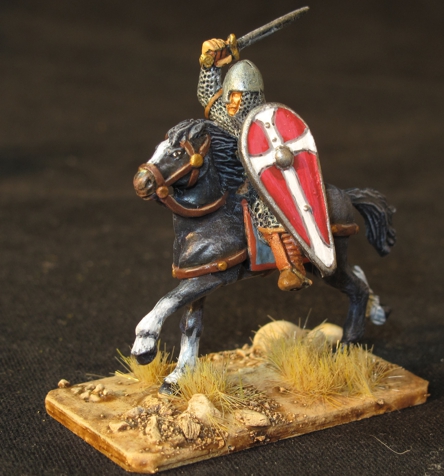
This is yet another unit for Chris Armstrong’s ever-growing Byzantine SAGA warband. This time it’s a “warrior” unit of 8 Mounted horsemen. They are painted as Normans in Byzantine service but I kept the paint job a bit more “generic Norman” so they can be used by Chris as mounted Medieval horsemen in many roles.

The horses and the riders are from Gripping beast and have had some modifications to their poses as well as hand made steel spears added. Shields are hand painted. The next unit up for Chris’s Byzantine army is a 4 horse Cataphract unit.

More mercenaries!

Quick little post to prove I’m still alive….. Lol! Been busy with life, work, and work, but still been managing to paint quite a bit, play a bit, and also working with Stevie G to reorganize and label our 15mm Napoleonic army’s!

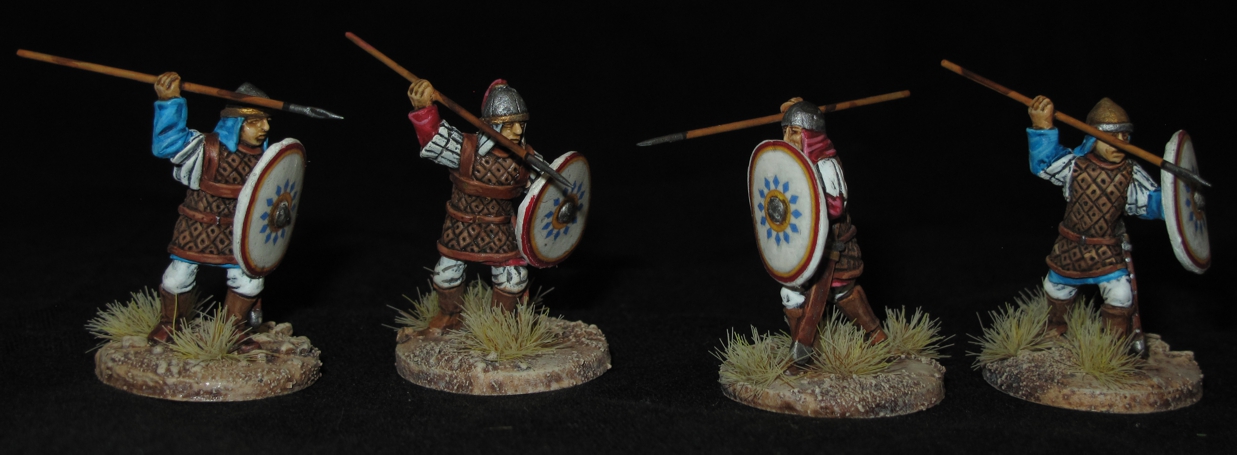
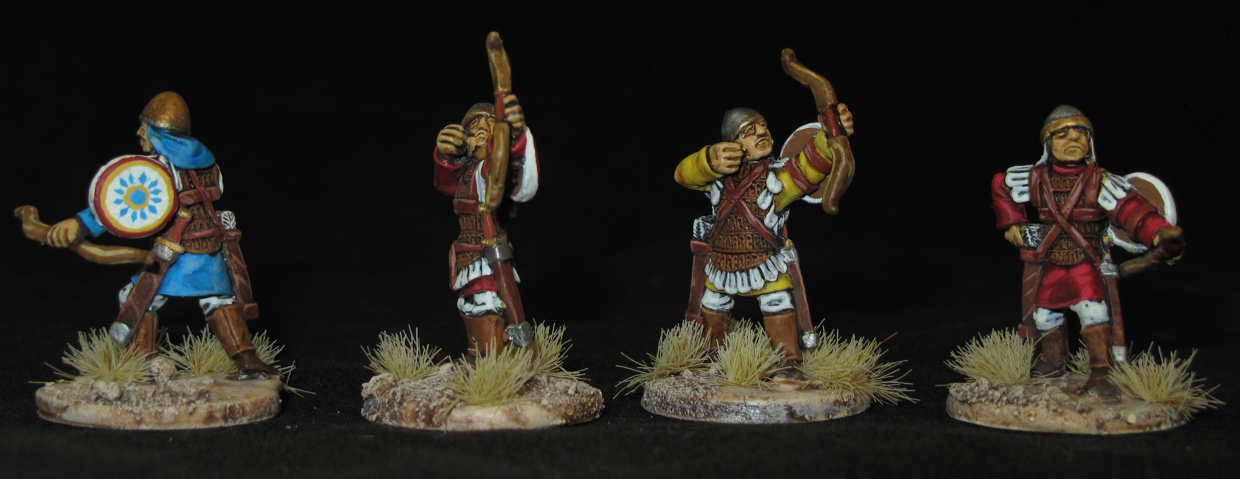
So, here are some more of those Byzantine troops painted up to match Chris A’s SAGA war band. 4 Skutatoi Archers and 4 Spear men. Not my normal painting style but they needed to match. I think I’ve done this pretty well and even made them a bit better but not so much that it’s a noticeable difference. Chris gave me transfers for the shields (something I’m not a fan of using on my stuff) so I tried them, on the spear men they worked ok and match the original army perfect but the ones for the archers were too big and I had to hand paint those. Matched the basing, coated, and done, enjoy Chris!

Click to enlarge.

Hand made Steel Spears and applied transfer shield designs.

With theses I had to paint the shields, not to bad I think.

Next?

Custom SAGA Casualty Markers

A set of six should be plenty for a warband since 6 point armies are the norm and each unit is normally 1 point.

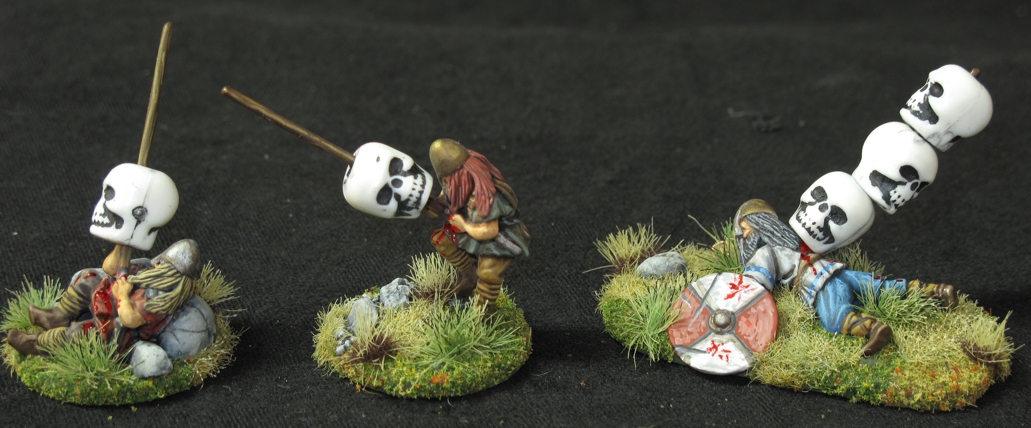
SAGA has been one of the games that has held my focus for the last few years and a lot of my painting and building has been centered around the game. I always like to make things better and improve if I can the look or play of the game. I never like game tables littered with markers, chits, or anything that takes away from the visual and SAGA is very good in this respect only requiring “fatigue markers” when a unit is tired out for one reason or another. I have seen all sorts of things used as fatigue markers, the original game produced markers in the form of shields, as well as coins, beads, small rocks, etc… Our group started long ago to use small plastic “Skull” beads as they looked cool. I think the first skulls where brought in by me after my buddy Stevie G bought me a pack at a convention. Another member of the group started making little vignette stands that used dice as part of the vignette to show the “fatigue” level. Rick Abbo then began to make some that used spear shafts in the vignette allowing the Skull bead to be slid on, they looked cool!

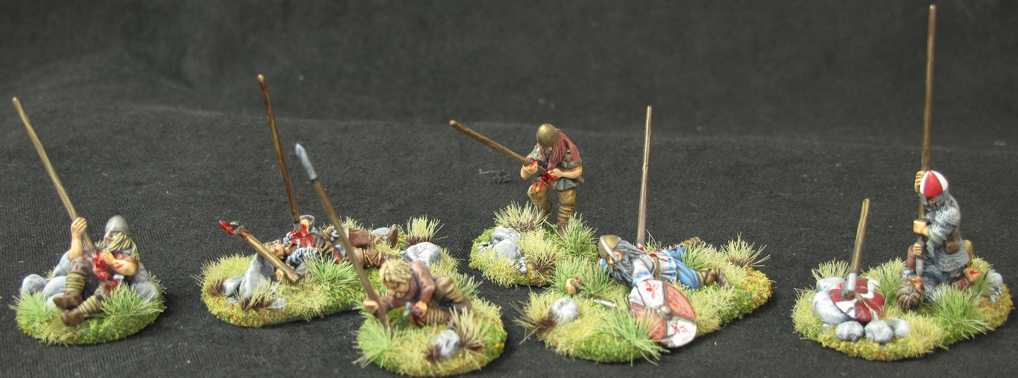
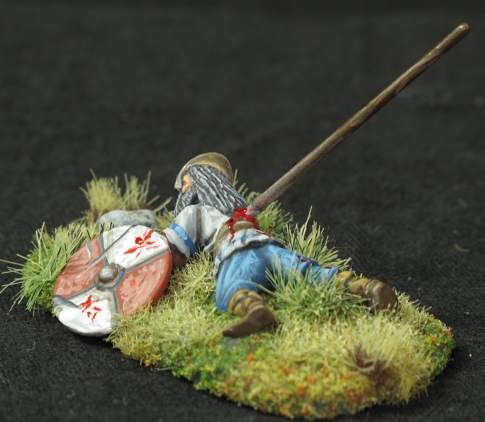
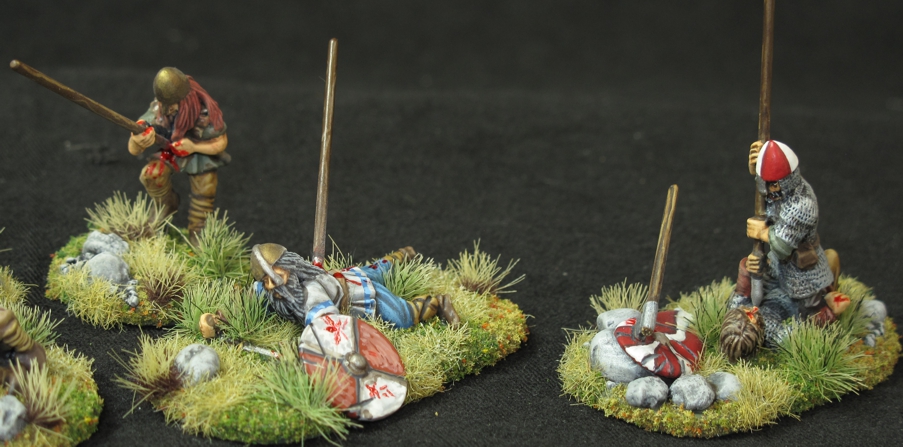
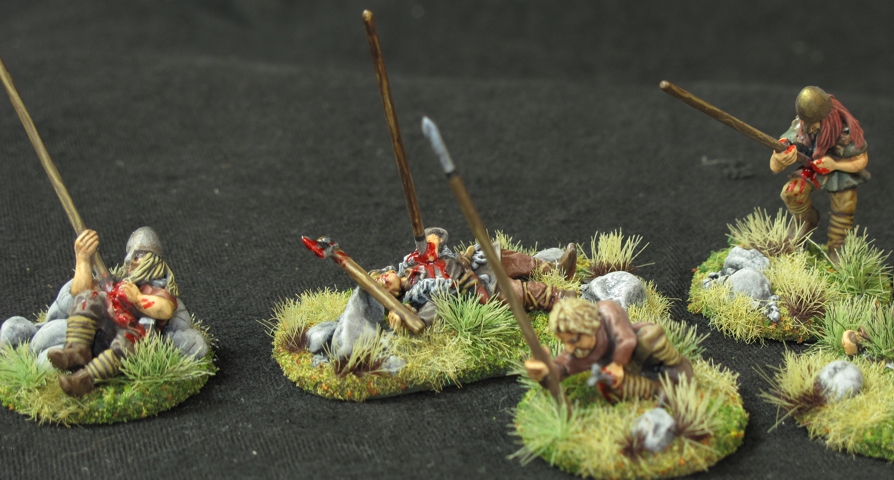
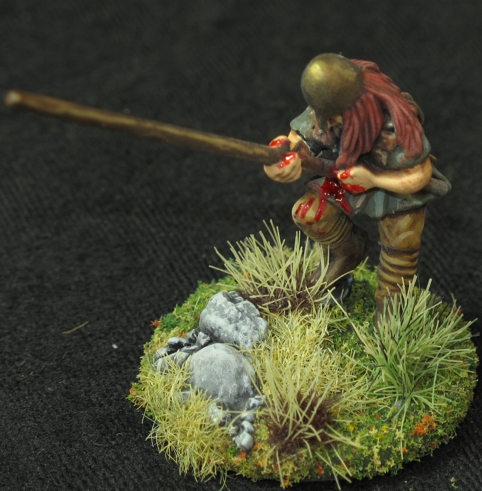
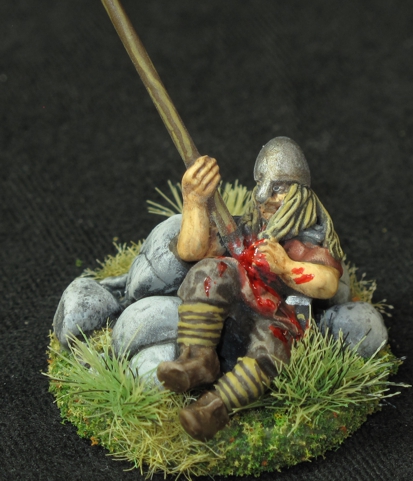
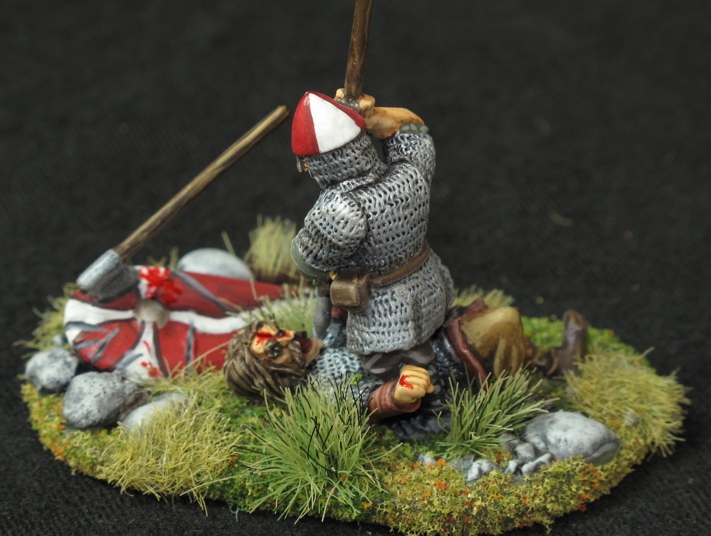
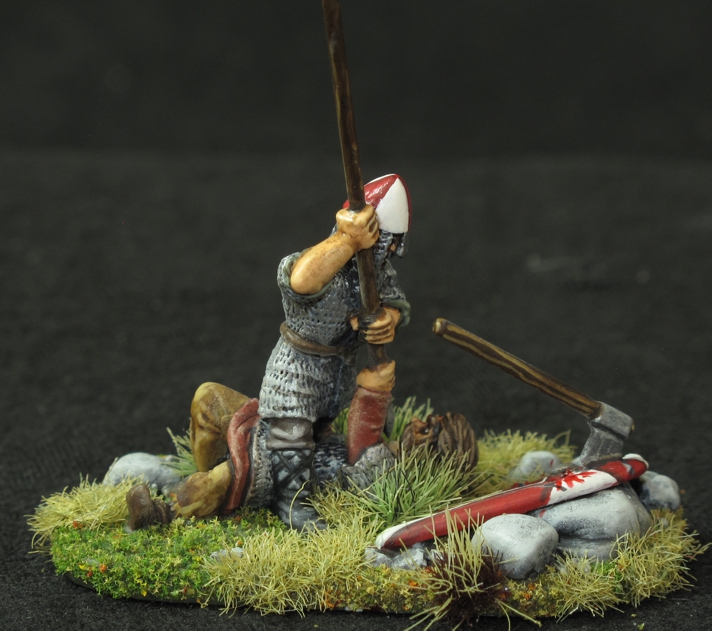
Well I finally got around to making my own and once again they are highly customized. This first set is based on wounded / dead figures that could be Vikings, Danes, Saxons, etc.….(sure they really work with any warband) I’ve added a hand cut steel rod for a spear to each one by drilling a hole in the figure to make them look wounded and hold the “skulls”. I have also added extra pieces from the “bits” box, real and “epoxy” rocks to give more life and character to the stands. If I can find the right wounded/dead figures, I plan to do this type of “Fatigue” stand for other factions as well.

The spear a just long enough to hold three fatigue marker skulls since the new SAGA 2 rules treat 3 fatigues as exhausted and excess fatigue is ignored. I like this since before you had to make the spears longer to get more markers on and looked not quite right.

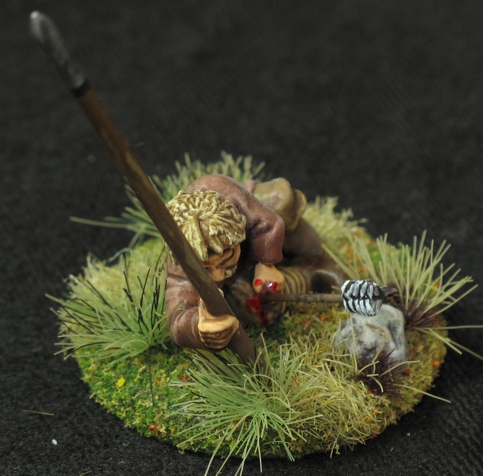
This figure got a hand made arrow of piano wire and epoxy feathers to show a wound. The “steel” spear was also added giving the effect that he’s trying to stand and get to safety.

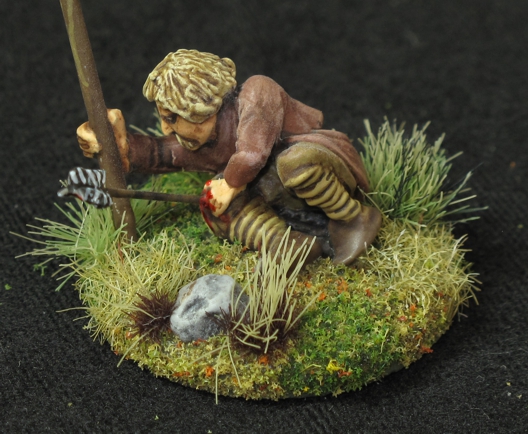
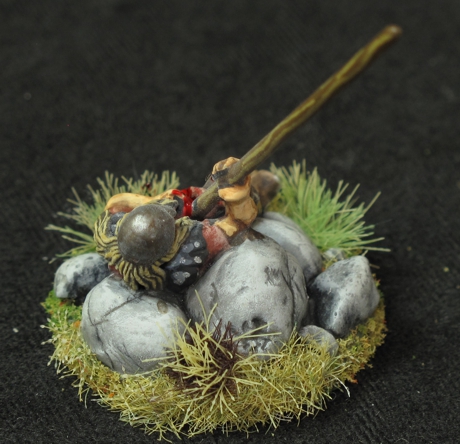
This is the same figure as the standing figure above but slightly re-sculpted to a lying down version. I sculpted some big rocks from two part epoxy in order to prop the figure up a bit and a better viewing angle.

A view of the additional sculpted rocks.

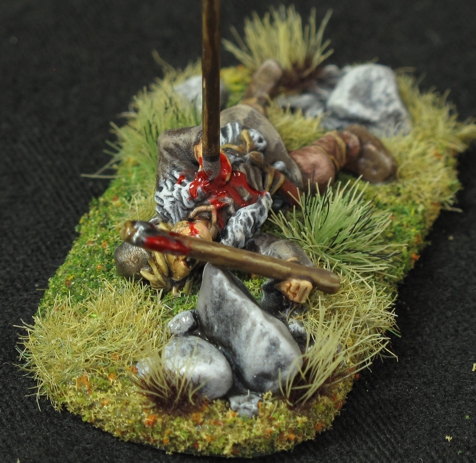
The fresh blood look is a TAMIYA color “clear red” over regular Vallejo red. It has to be applied after dull coating.

I put an ax in his hands to create that finial moment as a Viking dies when its so important to die in battle clutching a weapon to insure entry into Valhalla!

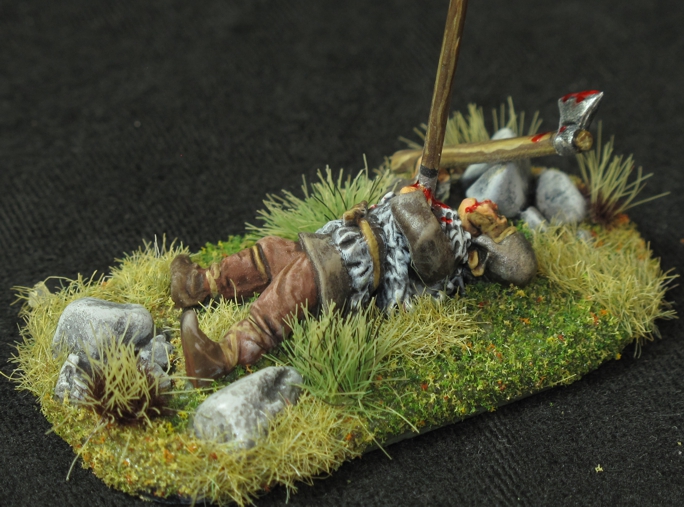
I love this one! I added some extra items, the shield with embedded ax to further the appearance of an on going desperate struggle!


Another project off the shelf!

Like I said in my last post I’ve been hard at work…ok well I’m making a real effort to clean out my shelf of partially done projects and I got to say that things are looking good! I have 3-4 projects finished and off the shelf and ready for a bit of a photo shoot when I get the time. This project here was number 4 to come off the shelf and just happened to get in for pictures ahead of the other projects. There is still a bit of work to do on the bases, stands, and maybe a bit more weathering, but I was so happy to get the project to this point that I couldn’t wait to get it up for all to see. Funny since it has been on the shelf for at least 5 years!

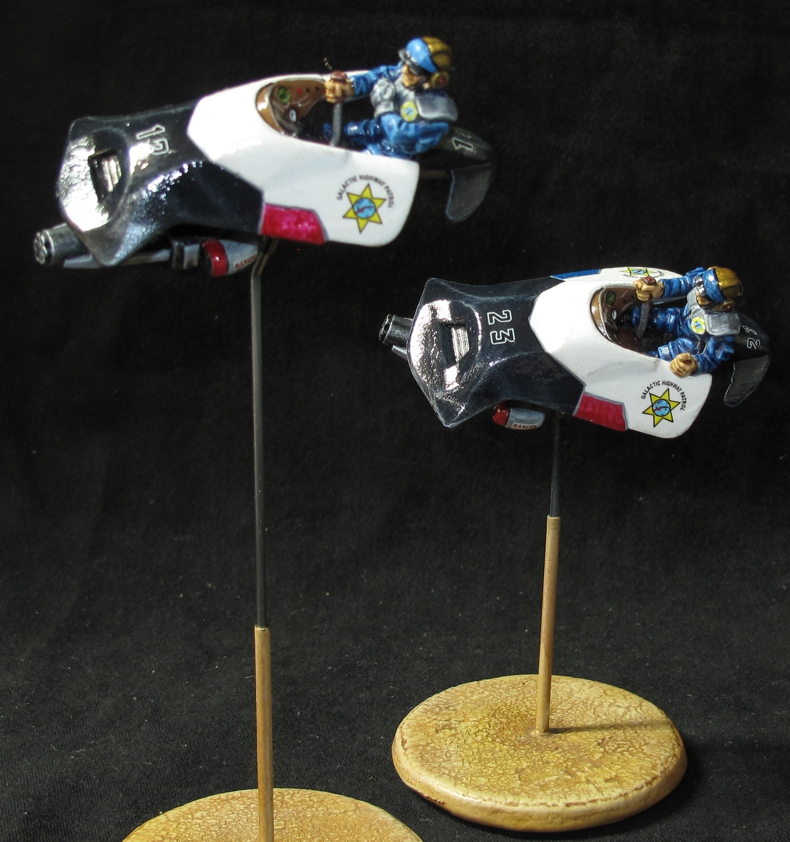
I have always loved the Starship Troopers mini’s and built an entire setup that I ran at conventions several times. I wanted to add to the ST universe on the Human side with additional forces to fight the bugs. The current force I used in the games for the humans were some Games Workshop Candian troops purchased off eBay fully painted. I bought them just to get the game going for the conventions. I had painted all the bugs but did not want to wait until I had painted all the Troopers to start playing. Now these “Mercenary” troopers were very well painted but me being me I wanted something different and painted by me. I thought about getting duplicate unpainted Candians, or stripping the paint off the current ones but wasn’t thrilled by either option. I then hit upon building a whole new force, different figures, not really military (tired of painting camo uniforms) but sort of “para military” and the idea for the “GALACTIC HIGHWAY PATROL” was born! A force that patrolled the Galaxy keeping the peace, restoring order, a force that would often find itself in unexpected and dangerous situations.

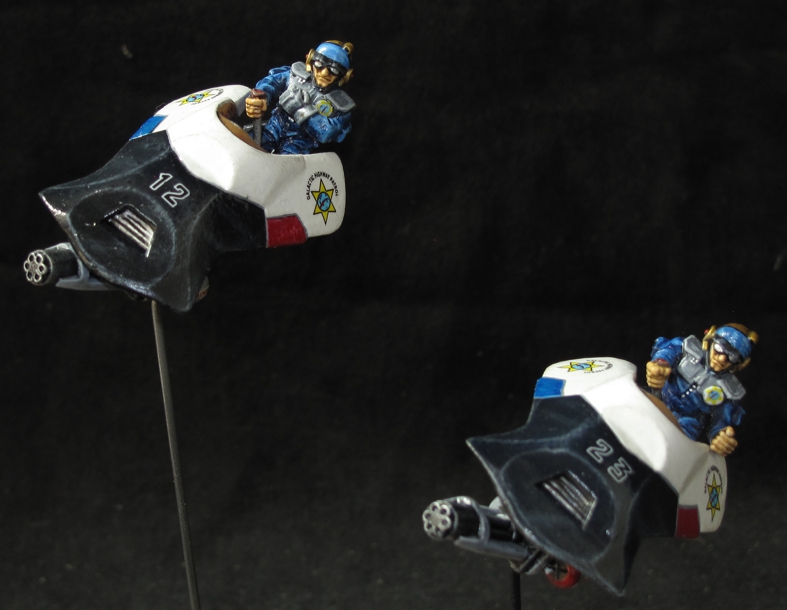
Your cruising along in your speeder on Rigeil 7, radio playing, your favorite green Orion slave girl at your side when you see this in the rear-view mirror!

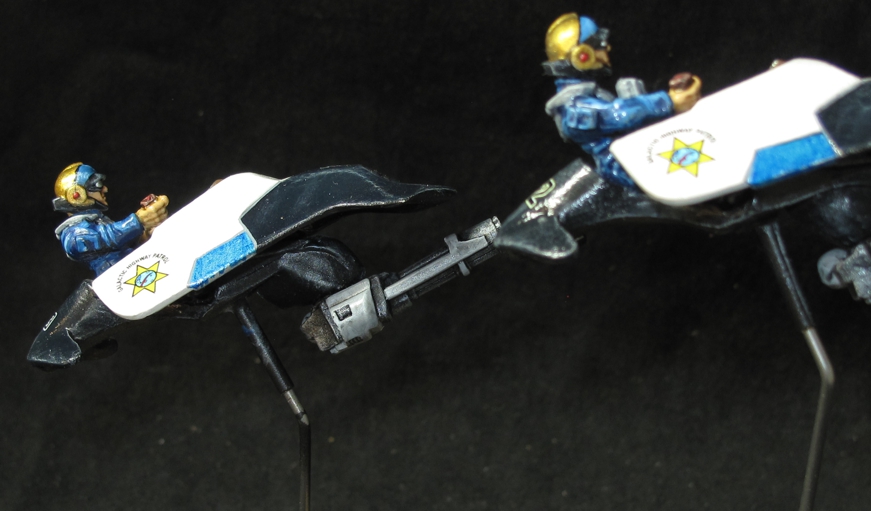
I’ve collected a ton of minis for this force and this pair was the start of the project. I planned to paint them in an slightly updated style of the California Highway Patrol. A style I thought I could have fun with and would be very distinctive on the battlefield.

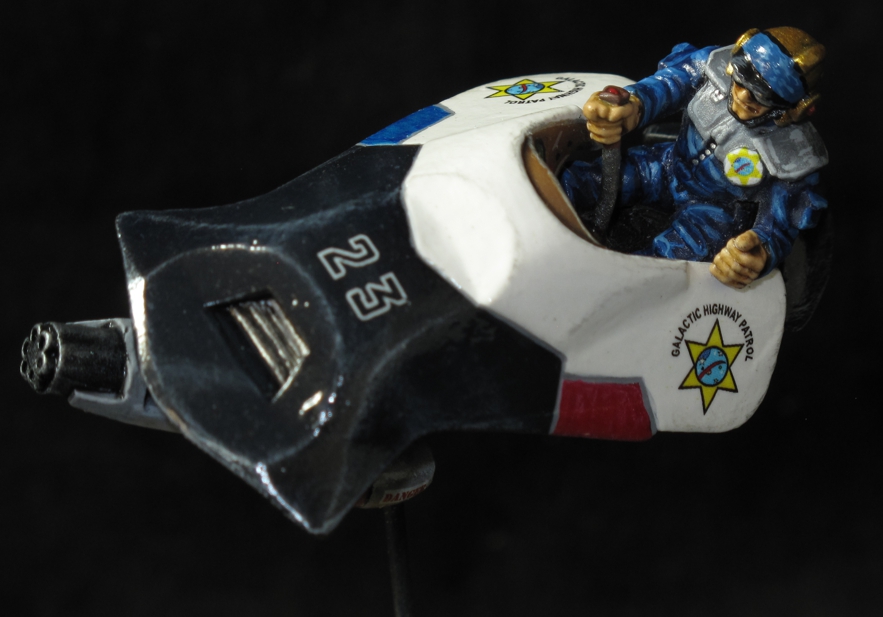
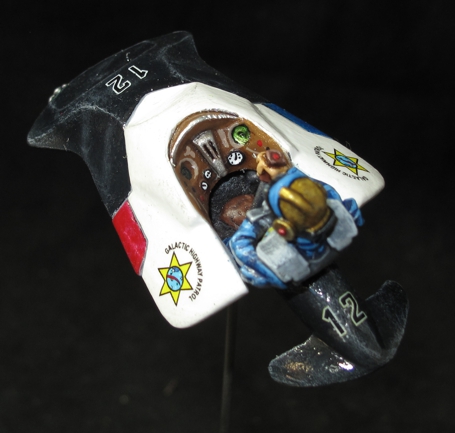
The decals were printed on a HP Laser printer using decal paper. The design being done with “vector” graphics instead of say a drawing program as bit map allows me to take and scale these up and down for any uniform or vehicle in the future without losing definition or sharpness! I scaled some down to make their uniform badges.

The minis were done so long ago that I can’t remember what I used other than I think the speeders were from some GW Eldar, the troopers are Candians out of a different GW flying gunship, and the Gatling cannon I picked up somewhere else. I remember I got to the point of painting them and was stuck on division of color for the vehicle and basic uniform color. I also was stuck on what to call them and how to paint all the insignia. I like to hand paint flags and such but in this scale on a more modern type project I knew that hand painting no matter how well it was done would not cut it! Finally, I bit the bullet and made my own “vector graphics” design and turned them into decals that could scaled to fit in several places.

All in all, I think it was worth the five years of contemplation!


I love the colors and the look of the California Highway Patrol now expanded into the future! The helmets came out just great!

I built a brass and steel pin system into the jet bikes frame so the under slung Gatling cannons can be swiveled around.

I’m thinking about ways to create some short clear windshields for them…..

Swedish Army (Figures for a Friend) part 2

Just a quick post to increase my sad flow of content here…lol! I do a lot more painting, building, and even playing than I post because posting is just not near as much fun or rewarding as “doing”! The last month though I have been making a real effort to catch up on projects that have been sitting on the shelf in various states of completion for one reason or another. I started by cleaning up the workbench and trying to make my painting process quicker without sacrificing the quality of work, since for me the building and painting are the most fun, playing is just an excuse to build and paint. Churning out mediocre troops in large numbers is not my thing. To do this I built a pretty cool painting accessory and changed my method of handling with the figures while painting slightly, more on that in a future article.

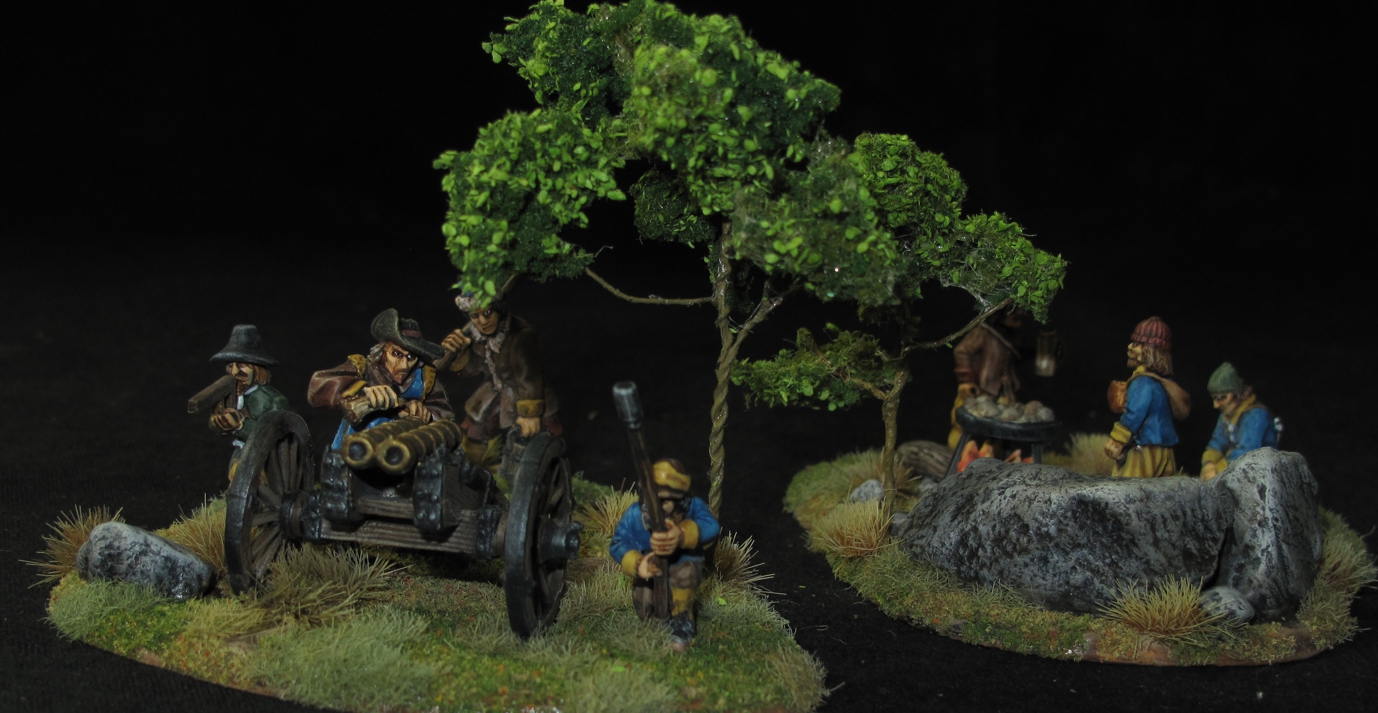
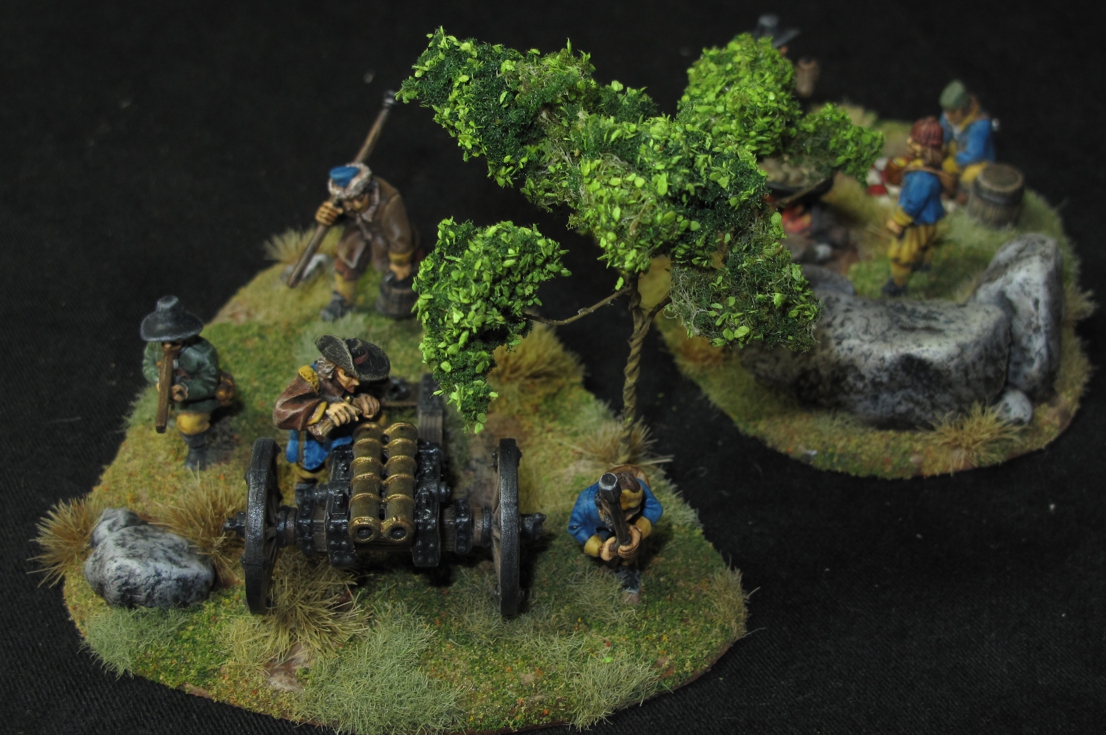
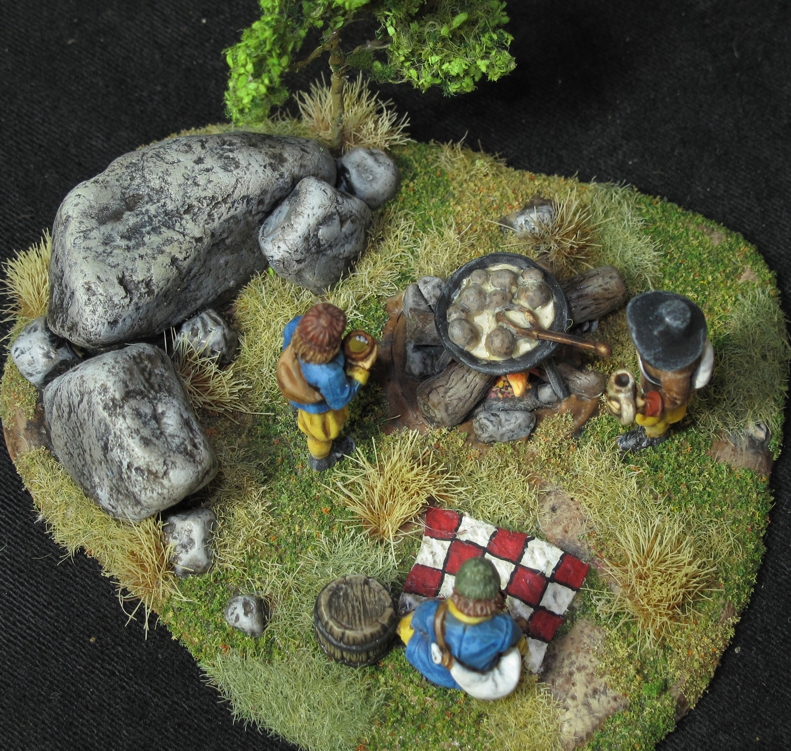
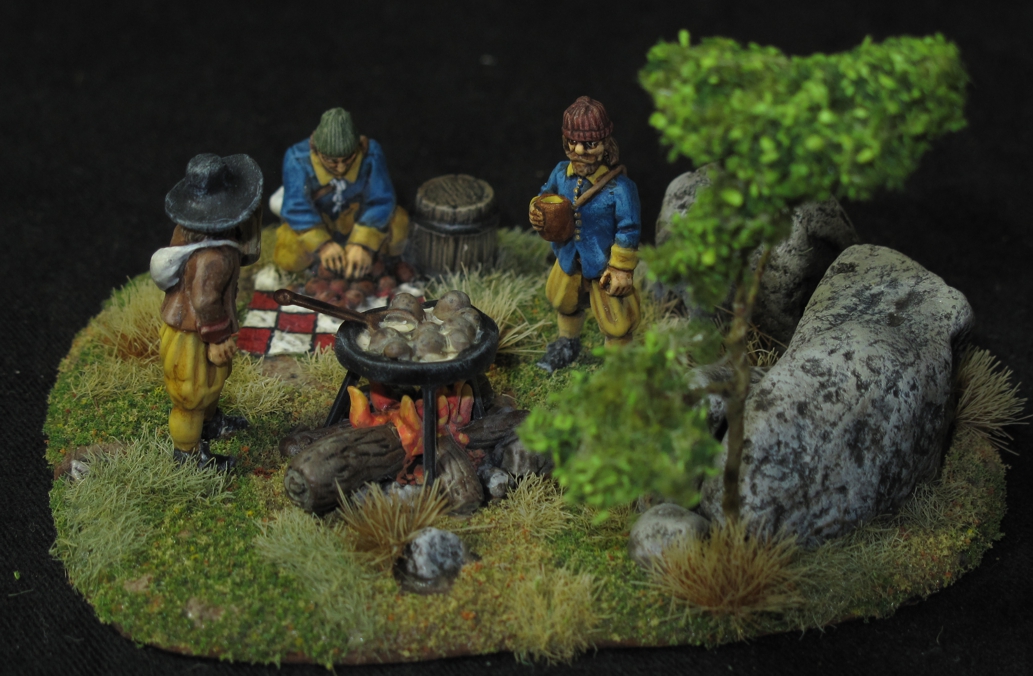
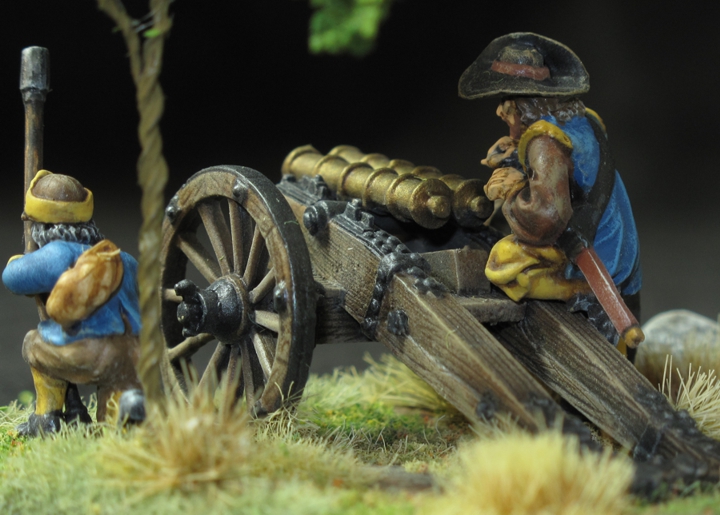
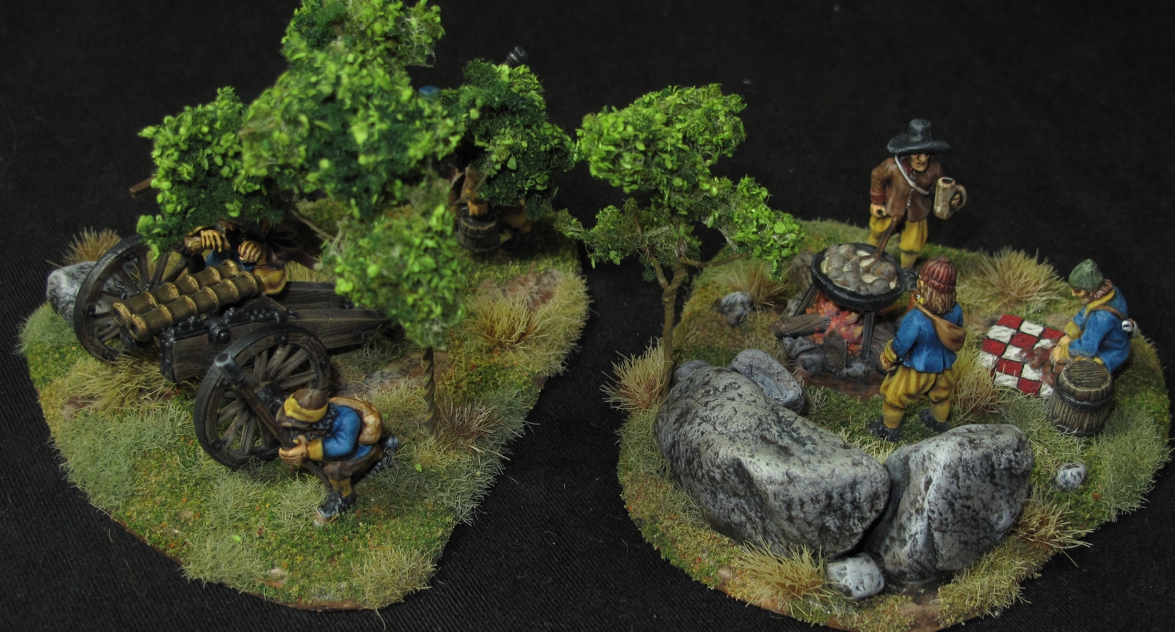
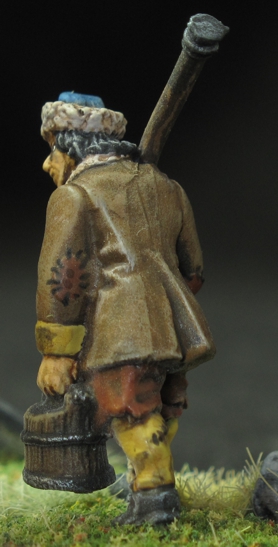
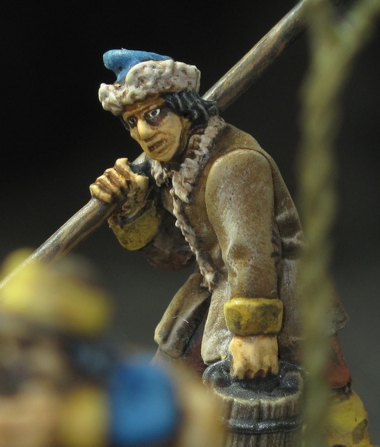
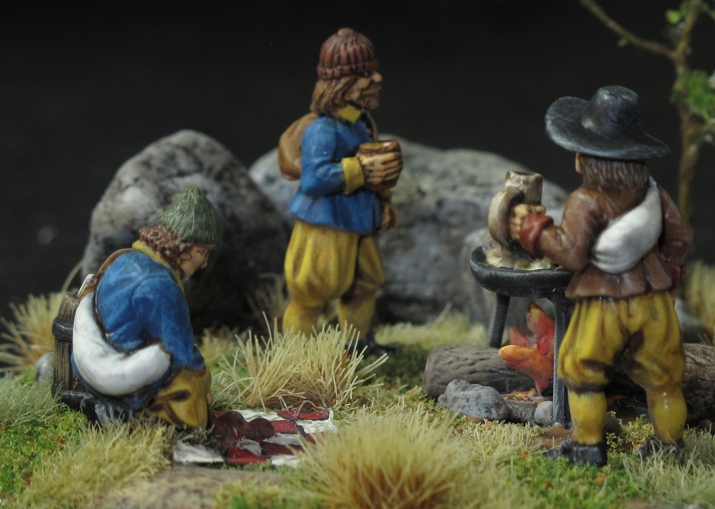
One of the first things to move to the finished pile was the last stage of the Swedish Army circa 1600 I had done as a commission for a friend. I had finished and delivered the main army last spring but the last part was the artillery section. Now my friend had pointed out that he had extra crew members for the piece and that one of them (the guy fusing the cannon balls) looked like he was making Swedish meatballs and could I possibly do a little vignette based on that. Well that itched my scratch building bones no end!

There was a lot of scratch building, the fire, frying pan, meat balls, spoon, mugs in the figures hands, “picnic cloth”, Rocks, bases, and trees. I’m not going to explain what I did as those of you who build will know and those of you who don’t wont care, I’ll simply present them and answer questions from your comments.

I did them as two bases, a sort of serious one and a fun one.

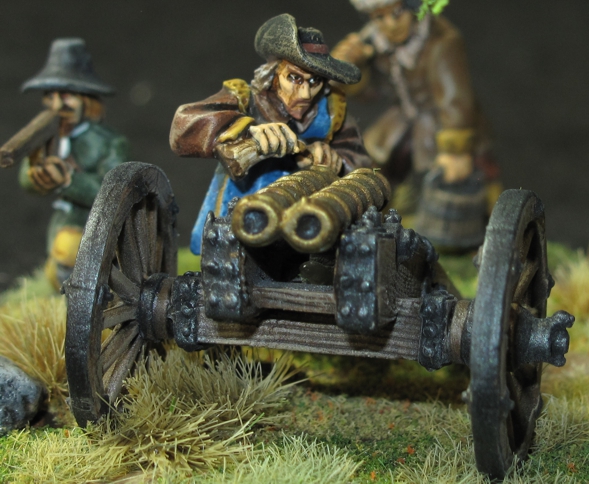
While one group mans the guns the other prepares the “Swedish Meatballs”

The “Assault Group” figures are very nice and a pleasure to paint.

Logs, fire, pan, spoon, and meatballs all made of two part kneadite epoxy.

This little vignette was just a hoot to work out and build!

The figure priming the guns is just a great sculpt and fits very well kneeling on the gun. Really makes the whole scene work!

What figures are those?

“Who makes that miniature? I want one!” Most of us who game have heard that countless times and we reply “oh so & so miniatures out of England” or “such and such minis in New Jersey”. Some of us answer this way “I did” because we either did the figure from scratch or modified an existing figure.
Compared to 30 years ago when I started gaming the selection of figures, terrain, and miniature accessories has grown to a point where even some of the most obscure armies and periods are easily found and, in several scales, things we before only imagined are now found with just a few mouse clicks! For most people this is great, wonderful, but there are still quite a few of us who like the scratch building and customizing side of the hobby and that many times creates the problem that now commercially produced item do not fit the bill. When this is the case, for me out comes the saws, drills, sculpy, kneadite, green stuff, x-acto knives, and all the different materials and tools the scratch builder uses to bring his imagination to the table.
I thought for this post I would just toss up a few of my recent conversions.

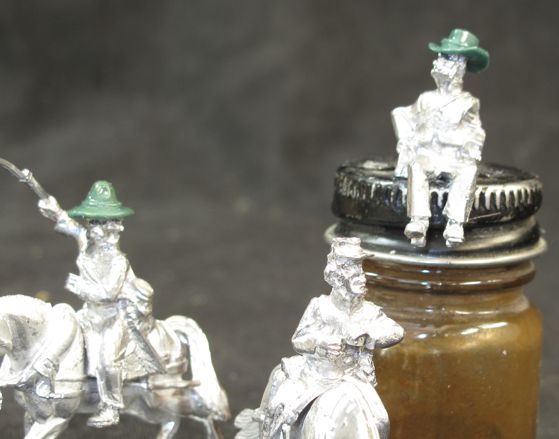
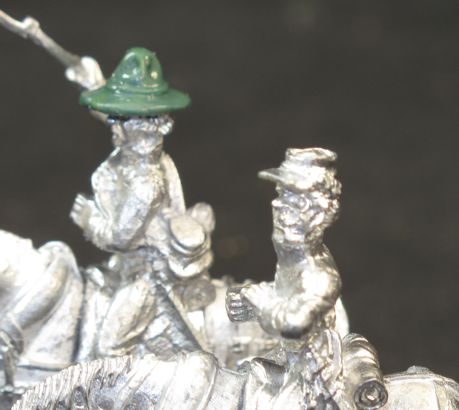
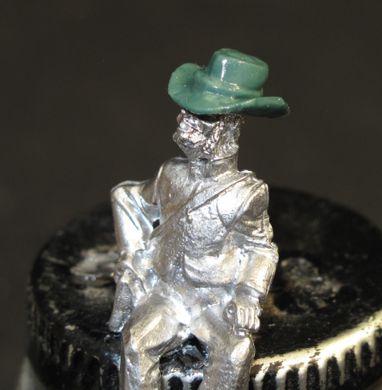
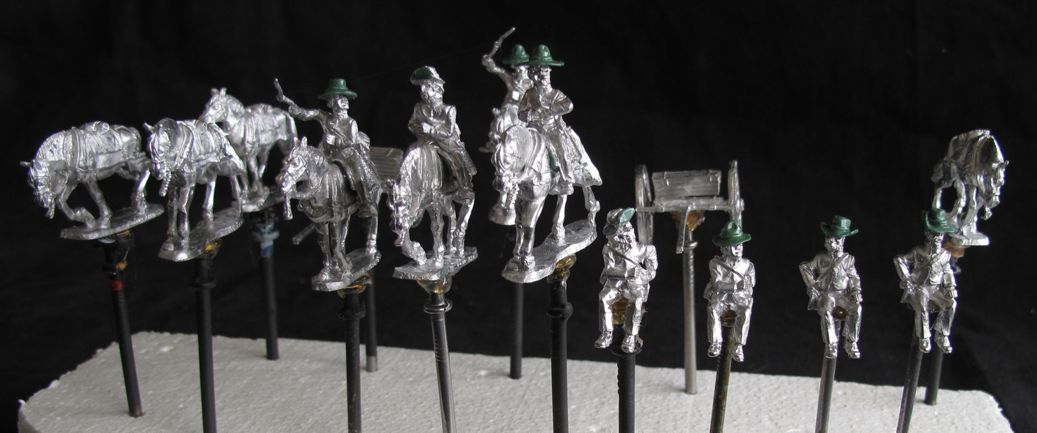
These are 28mm “Old Glory” figures from one of their American Civil War packs. My buddy Steve has been painting a US force for use in battles from around 1880 to 1910 (Spanish American War to the Boxer Rebellion) and wanted some artillery limbers for them. He found some ACW limbers that would work but the figures all wore the Kepi style hat that would be wrong for the period. I took up the challenge to modify them with new headgear.

They came out better that I expected and only took about 15 minutes each to do.

On the right figure with “Kepi” style hat still in place. On the left, Kepi cut off and sculpted replacement.

The “Western” style wide brimmed hat was very popular with the troops in the sunny hot climates.

I think the hat conversion gives them the feel and look of a late US artillery crew.

Figures for a friend, Swedish Warband 1650

Ready to defend Swedish soil or perhaps add a little! I think they have a very distinctive look easily recognized on they battlefield.

I rarely paint for hire, then if I do its for a friend who wants “Something special” and when one of the “Dogs of War” gaming buddies Frank asked several times to think about painting his Swedish Warband for use with the “Donnybrook” rules system I hesitated to do it. I looked at the figures from the “Assault Group”, 24 infantry, 12 cavalry he had already purchased, they were very nice, well-proportioned and sculpted. These were no “old Glory” figures, these would paint up well but would show any mistake or lack of care. In other words, they would look great if painted well, short cuts would show with these unlike “rougher sculpted” figure types. I decided that the cash generated from the commission would slide me into my 28mm Samurai Warband figures from the Perry’s nicely, so I agreed.
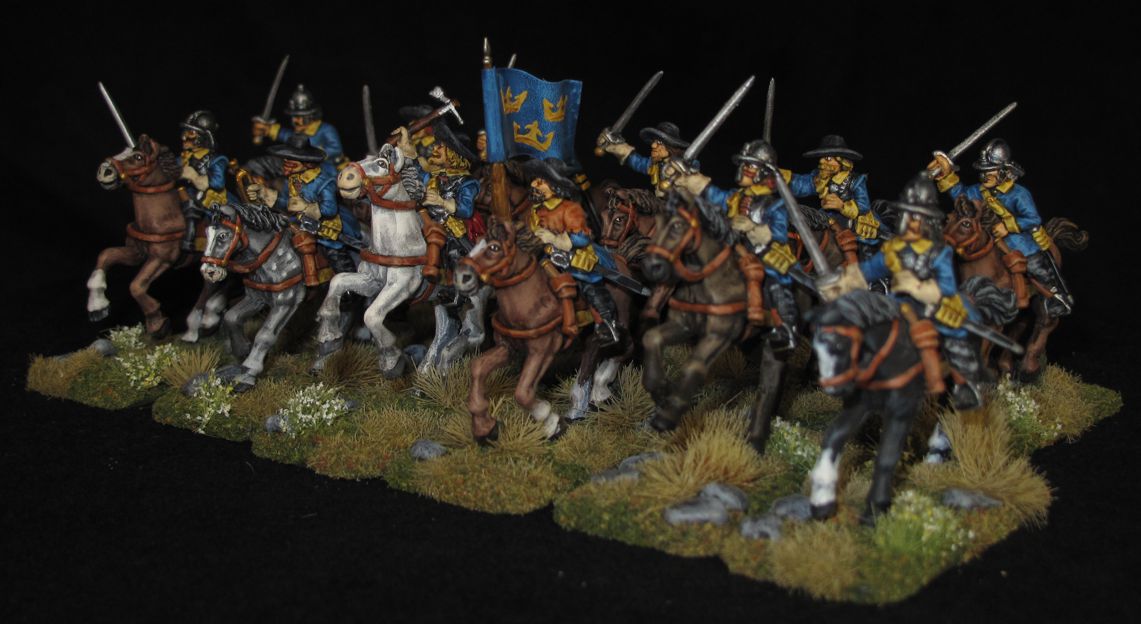
For a long time I have dreaded painting horses, tough to make look “alive”, I think over the years I have developed a style and method that accomplishes this and is almost “fun” for me to do!

There was also going to be quite a bit of custom work involved, hand made pikes, pose alterations, and custom flags to be made. I also do very custom bases on my figures and when I paint for others it’s a complete “head to toe” job, flag tip down to magnetic base. I don’t want a great looking figures sitting on a so-so base! I take quite a bit of time on figure prep and finish since I think the majority of figure painters and especially sellers don’t! I have seen quite a few mini’s in my day and lots of friends have purchased figures to flush out their collections. The vast majority of these figures are not prepped properly or coated and sealed after painting resulting in wear marks from handling, spears, swords, and other pieces breaking off, and the flocking and basing looking old and worn very quickly. Cheap figures ALWAYS have a short cut involved, that’s why their CHEAP. A good automotive primer sprayed on and left to dry for 24 hours is best. Sealing with at least two coats of GLOSS COAT is a must, DULL COAT is NO protection! Let the Gloss coat dry for 12 hours, less depending on weather (dry and hot out) or speed it up GENTLY with a warm blow dryer! My figures and much of my terrain has been done this way and you can take my stuff to the sink and gently was off dust with cool water and a soft brush! If need be.
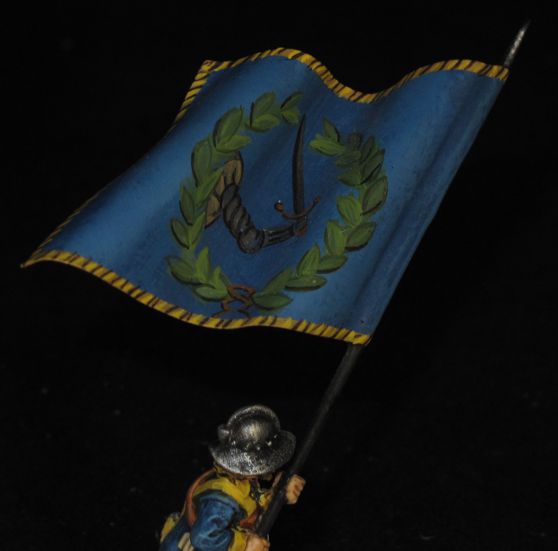
I make my own flags, copper sheet, and handpaint them, I think for better or worse its now a completely “painted” figure.

The job was tough but it was also fun! It was a period I had not painted and the color scheme included lots of yellow, a color that is always tough to paint. Below is a short run down of what was done. The pictures will speak for themselves as to how successful I was…enjoy!
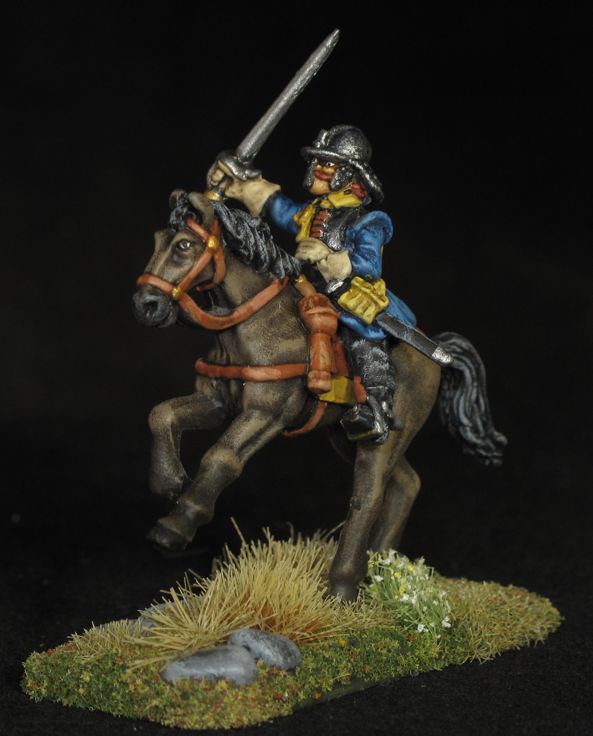
A little cutting and filling can make horse’s look quite different from one another and add a dynamic feeling.

I played a game of “Donnybrook” at the “Dog Pound” Saturday and enjoyed it! Not sure if I’ll bite, jury is still out as I’m not a fan of card driven activation where you can have a player sit around doing nothing for most of the game, as well as units unable to react to clear threats for to long a period. The use of so many different dice to preform actions and the fact they change as a unit takes damage is a bit confusing and I think could have been handled differently. I will play again since I have Moors that can be used, perhaps Frank won’t want his Swedish, and it’s really about getting together with friends, kibitzing, and just having fun!
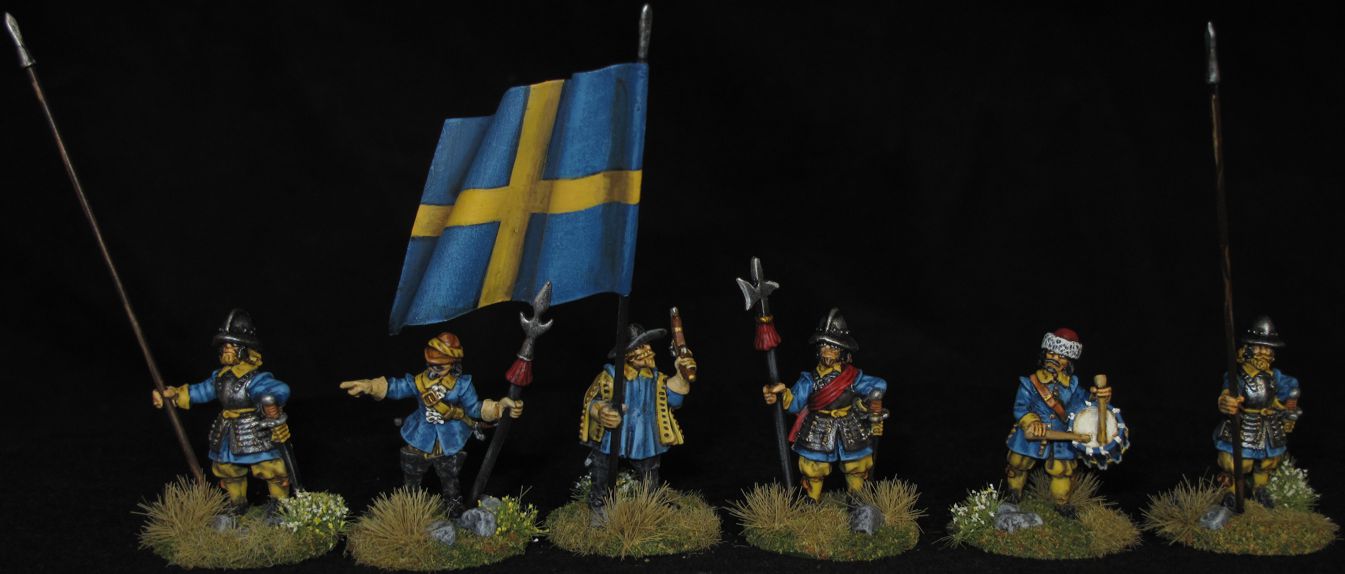
The command group from the Pike-man unit. These are really nicely sculpted and have great poses! Click and enlarge the picture we reveal the pike tip work done with kneadite “green stuff”
Swedish Warband 1630,

(36 x 28mm Figures, 24 infantry plus 12 cavalry)

Clean and prep. (mold lines and flash removed, figures washed, hands drilled)
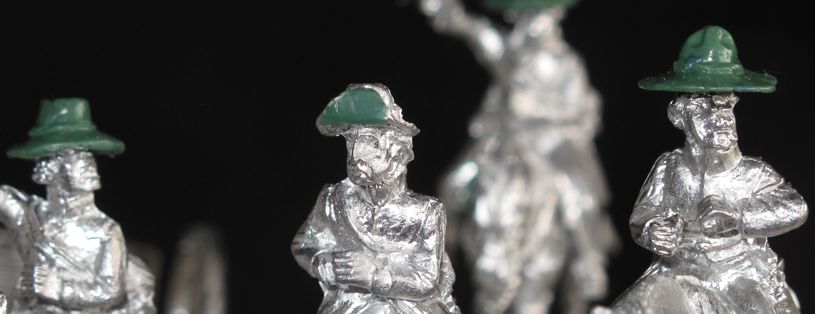
Figure modifying and assembly. (Including handmade pikes & horse positioning)

Handmade flags and poles. (custom copper flags and steel poles.)

Prime with high quality automotive primer. (Krylon ulta flat black)

Painting to a Collector Standard. (Blending, highlighting, washes, aging, ect..)

Hand painted flags. (3 separate designs attributed to “The Blue Regiment”)

Figure sealing. (two coat of Testors gloss coat on figures, One coat gloss to seal base material, One coat dull coat to entire finished figure and base)

Mounting (3mm Litko plywood + .30mm magnets, custom 45 degree base clipping)

Base treatment. (filler putty, rocks, paint. Two color flock, Static grass, Tufting and flowers) The entire base is gloss coat sealed and the figure can be lightly washed, softly and quickly in cold water if needed to remove future dust.