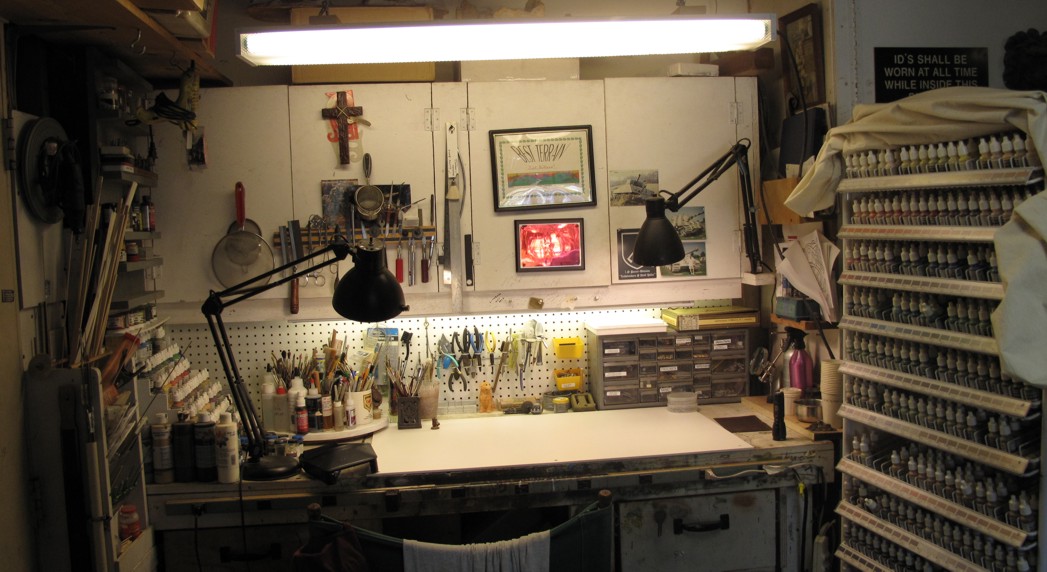
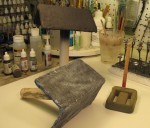
I have a pretty busy life with work, family, and life’s other distractions so when I do paint or build I tend to be very, very intense and as such I have one bad habit that eventually causes problems for me while painting or building. The problem is that I tend to multi task or have several projects going at once in various stages…while that is not necessary a bad thing it can cause quite a mess on my work bench. Now before I start whining to much I must say I’m extremely lucky to have the work bench and tools I have since this is more than most miniaturist ever have, I’ve worked hard for years to put it together and I’m very thankful for it. This “gripe” is just about using it and that applies to all of us no matter how big small your setup is. So the problem in doing several projects at once or moving to fast through any “one” project is that I have a habit of just dropping one tool and picking up the next one, scraps, shavings, paint, and anything else is just pushed aside to save time, finish a project and get it on the gaming table….This leads to a work bench that although bigger than most only has a tiny space in the middle for working. I also find dust and scraps form other projects contaminating my current paint jobs! Well the other day I got fed up and decided to do a major cleaning and re-organizing of it and despite my initial unhappiness at doing it instead of actually painting something I soon got into the swing of it and actually had fun! I soon found items I had lost or forgotten, the barrel of a Russian T-26, the machine gun off a Russian JS3, half a dozen various minis in different scales and periods, a “new” bottle of glue, a long lost “favorite” paintbrush, and a dozen other little gems buried in the rubble of dozens of long finished projects. I cleaned and tossed large pile of old paint bottles, broken brushes, scraps of every type, pile of minis I decided I would not use, and on and on….ok long story short after going through the whole area including drawers and shelves and reorganizing them I had a work bench back that was 4 times the size I was working on, I had a spot that was organized and I could now be twice as fast as I was working in the “cluttered” space as before. I now did not waste time looking for things….”ah so much better!”
Ahh, the pleasant time I’ve spent here!
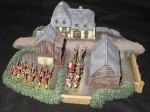
So after basking in the glow of a job well done I decided to rip into a new project that I had been putting off specifically because I had so little “working” room on that bench! Dark Age terrain and buildings.
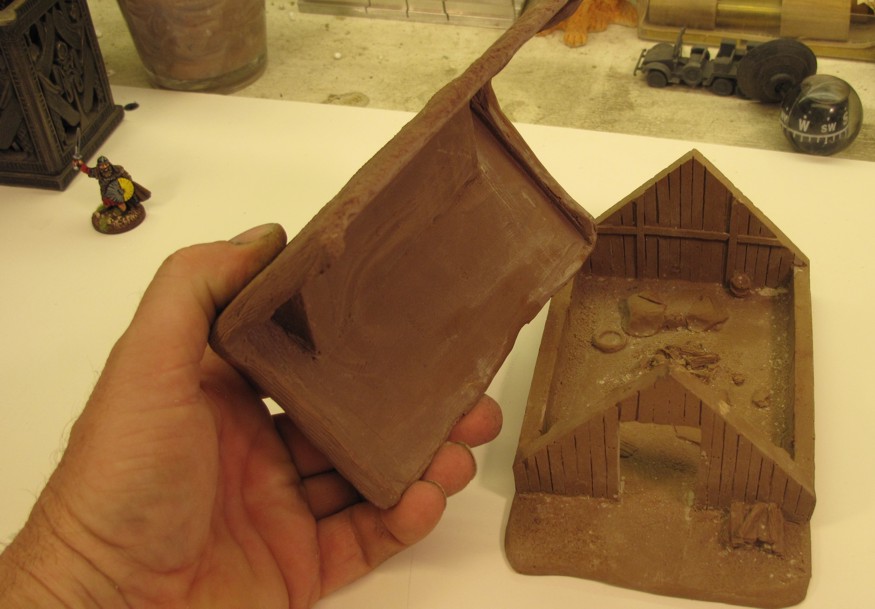
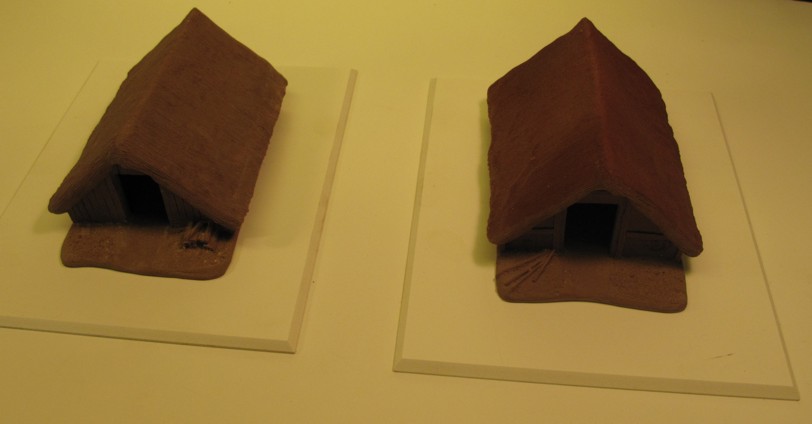
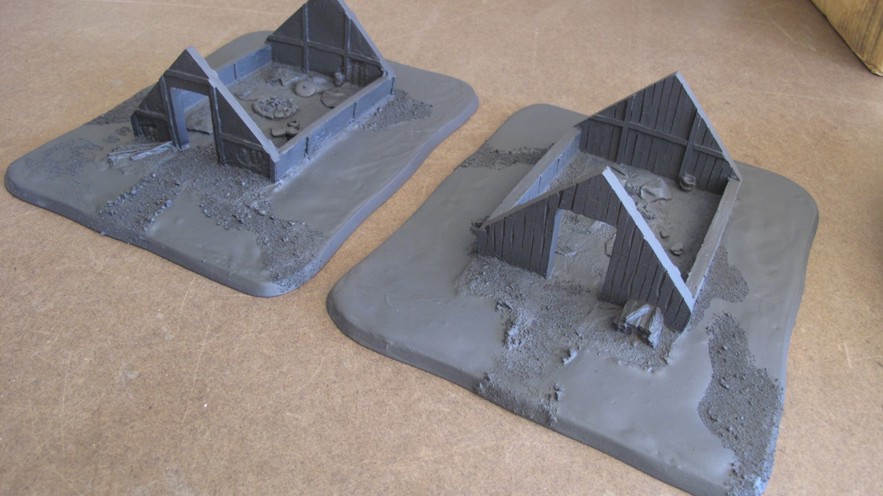
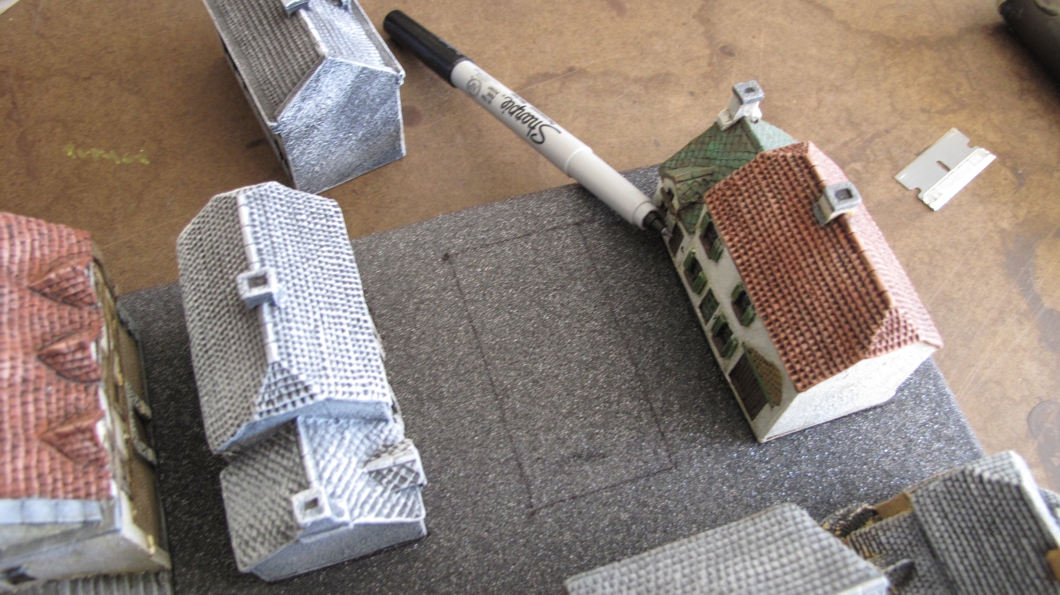
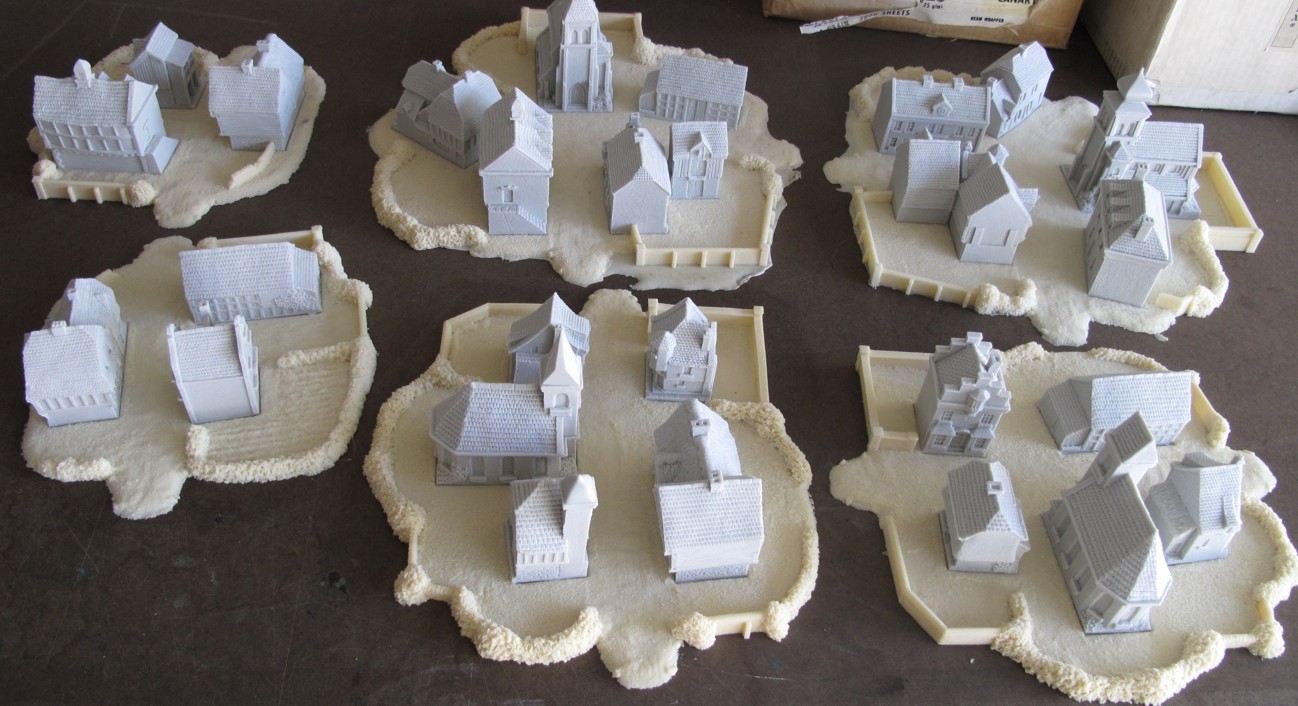
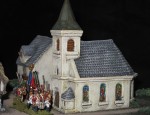
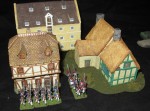
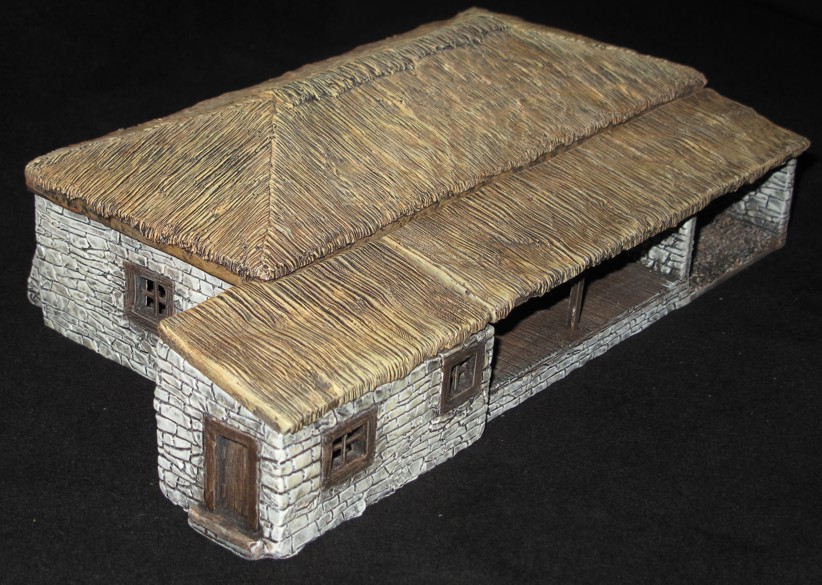
The buildings as I got them off “ebay” the original owner had just given then a once over with brown paint….
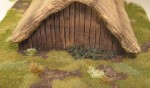
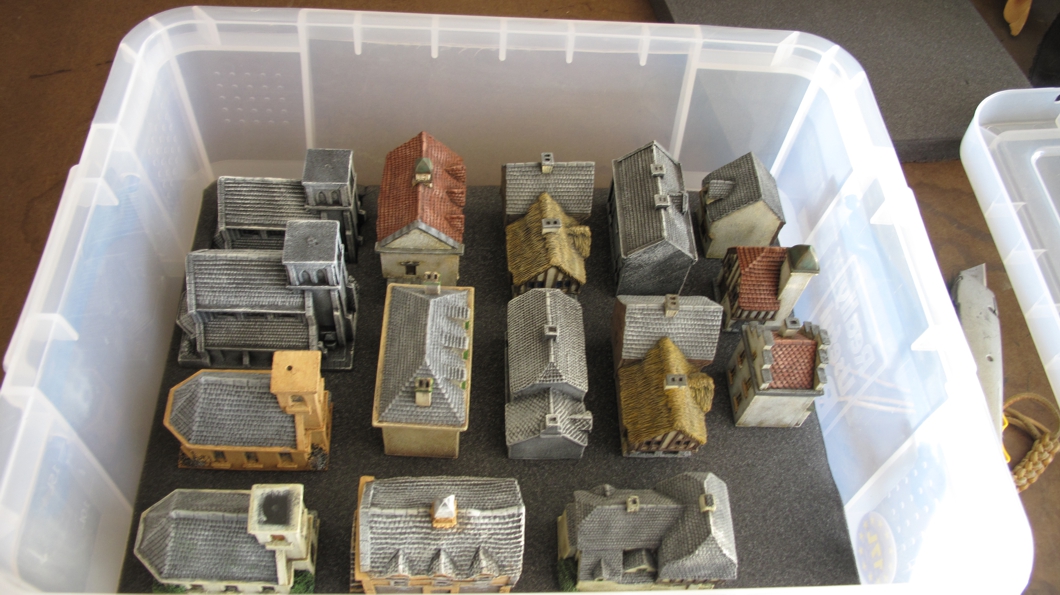
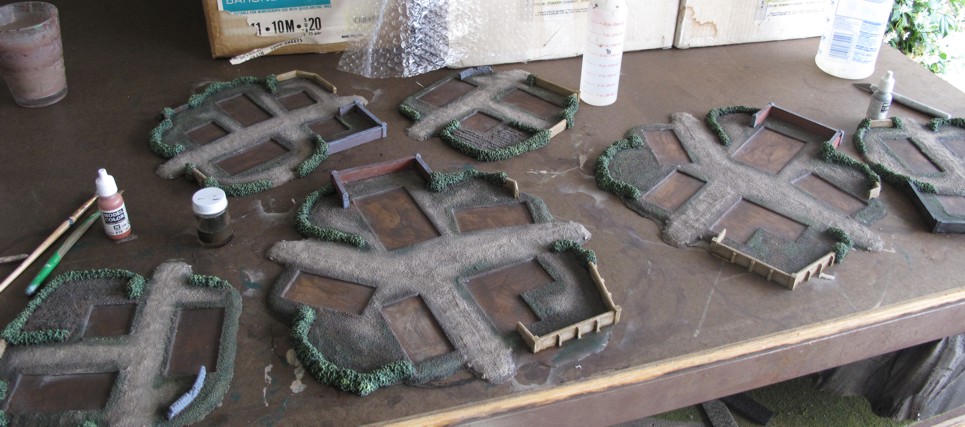
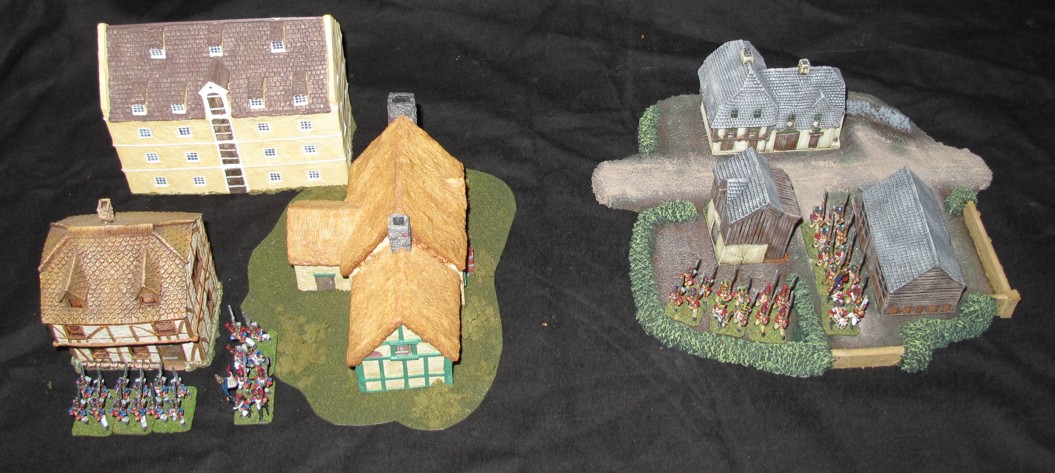
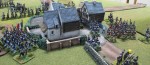
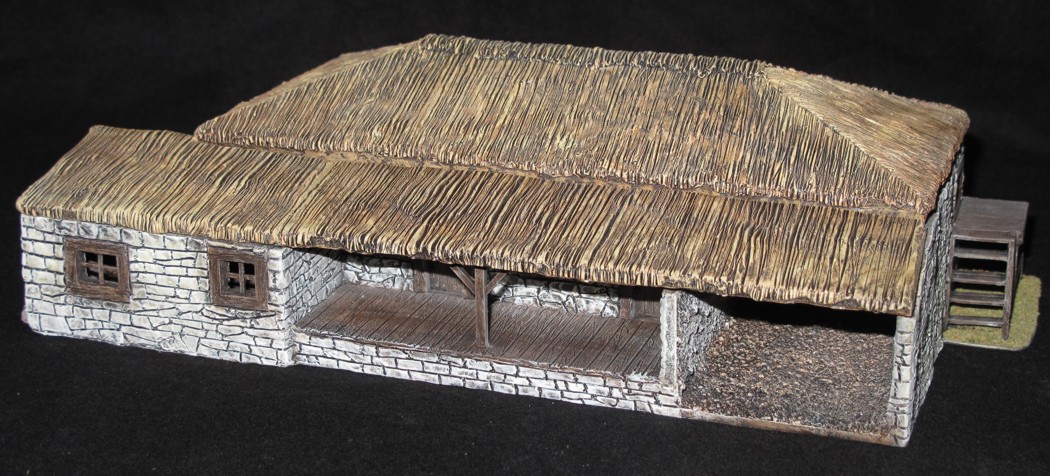
I love terrain! Even badly painted miniatures look good on a nice bit of terrain! My latest foray in miniatures took me to a period I’m not very familiar with, the “Dark ages” and after buying and painting a few Warbands it was time to delve into some real “Dark Ages” terrain. A few scans of EBAY brought me someone’s cast offs, a couple of Saxon / Viking buildings (by Architects of War?), some Wattle fencing, and a couple of small fishing boats. These were either unpainted or just had a bit slapped here and there. In many games building and terrain need to be clearly defined to avoid disagreements as to who’s in and who’s out of it. In SAGA when troops occupy a building any enemy troops that come within “VS” (very short) or 2” must melee defending units or stay out side the “VS” range. This leads to lots of measuring and re-measuring, in some games. I like buildings with bases because it gives me a chance to better blend the terrain feature into my matt; the buildings I had bought had no bases. I decided to add my own and incorporate the 2” melee zone into them so that at a glance we could tell if a unit was in the zone or not.
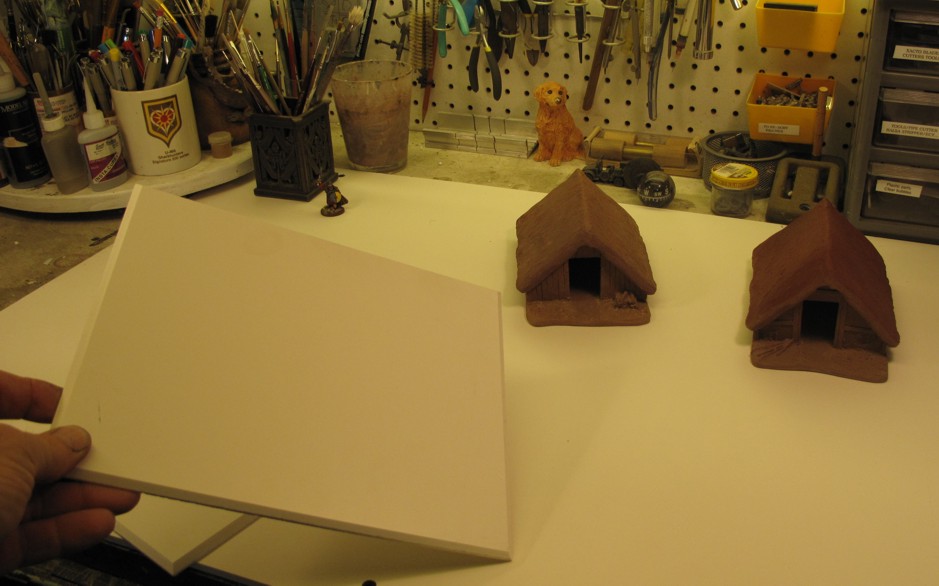
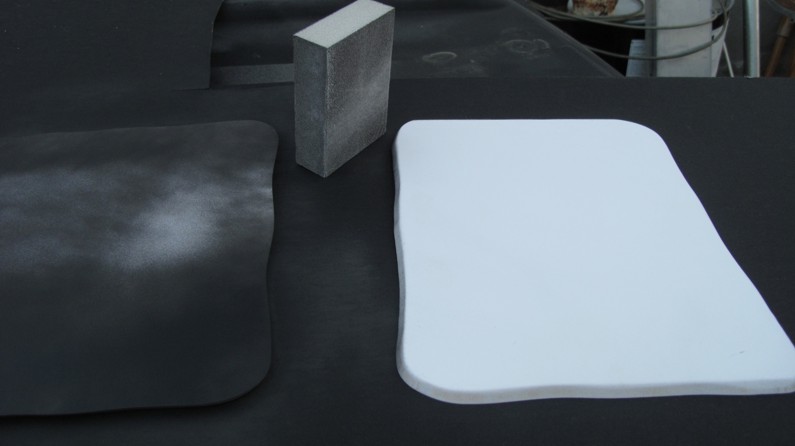
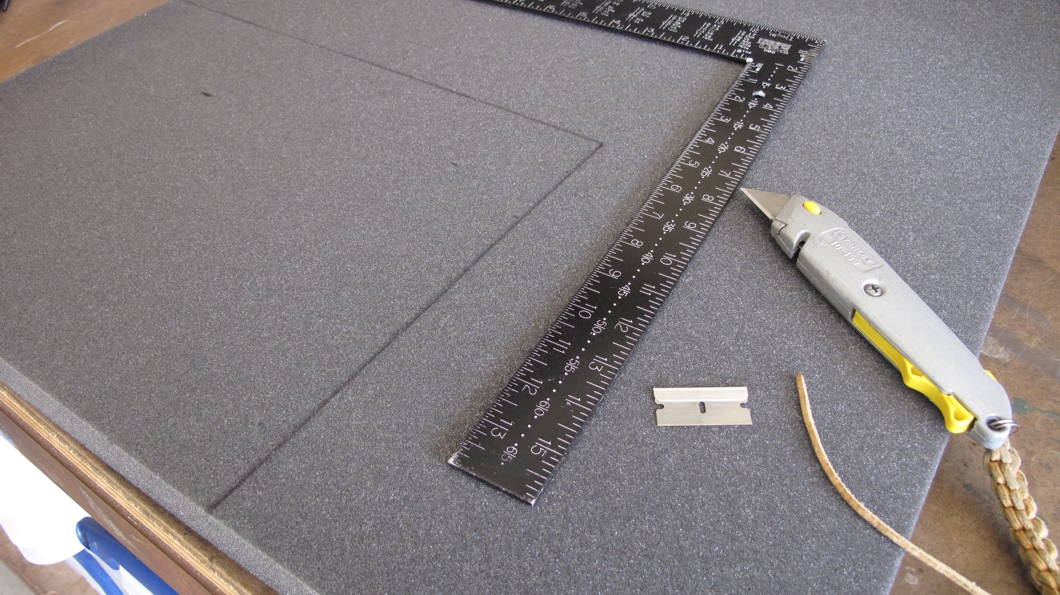
First thing you want to do is find the proper basing material!!! I can’t stress this enough!!! Wrong choice here and all the rest of your hard work will be for nothing. I cry every time I see someone put their lovingly painted $40 building on a .50 cent base!!! “ok” you say smart guy “what should I use?”
You want a material that is;
1. Is easy to work with and not to cost prohibitive. Remember though that going cheap here may cost you in the long run!
2. Will not warp! (Art board, Card board, etc…bad choices) Plywood, MDF, and other materiel may work but HEAT and HUMIDITY affect these materials as well as the thickness you use. So consider local conditions and “chose wisely young Jedi”
3. Is easily obtainable for later building projects to give your terrain consistency!
I have been in this hobby longer than some LAFers have been alive and one of the things I learned over the years was to base my figures and buildings well as this increased my (and others) enjoyment of them as well as later on if I decided to sell them they always sold faster and for a better price when the buyer realized he would not have to re-base!
Yes the plastic used in the base was also used to re-surface my workbench!
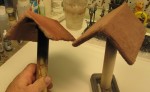
I use plastic sheets (Styrene) from 1/8 to ¼ inch thick. Its easy to cut with many different tools and in a pinch can be just “scored” with a sharp knife and snapped in two. I having LOTS of tools available to me around the shop so I used a band saw but the same angled cut can be done with a “copping saw” (see picture) and they are handy and not expensive. A very good investment for the terrain builders work box!
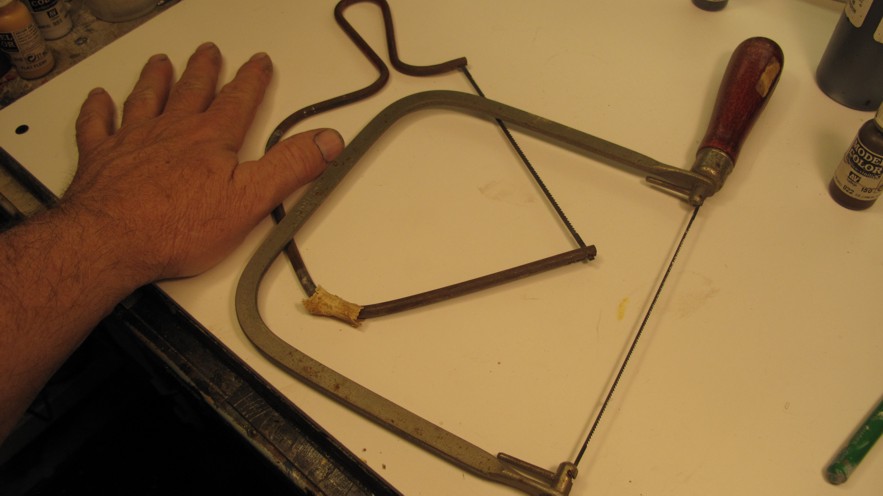
Coping saws for fine cuts in wood or plastic. A great tool!
The plastic used here is not from a hobby shop but direct from a plastic supplier. I can’t stress enough that many times we miniaturist need to think “outside” the box of getting all our materials from only “hobby” sources! Many times you can get your materials much cheaper from other sources, however you may have to purchase much larger pieces or quantities at first costing more, in the long run you will save a bunch! The sheet you see here came from a 4 foot by eight foot sheet!!! Yes and it cost about $50, but I had them cut it in half for transport and ease of working later. I have had and used this sheet for a dozen projects over the last 10+ years and saved $100s plus dollars it would have cost if I hard gone and tried to get the same stuff at a “hobby” shop and I still have another half sheet! There is also the fact that the largest sheets most hobby shops sell are 8”x12”!
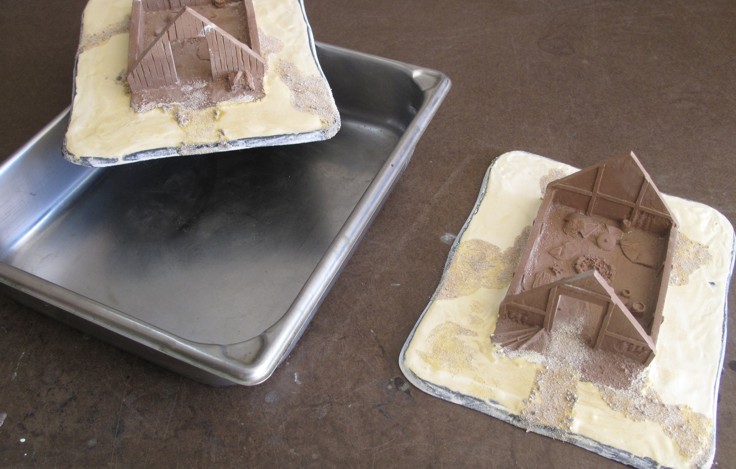
The first cut of the bases showing clearly the contrast of the square base verse the roundness of the house. The base material is almost 1/4 inch thick. Not to worry it wont be very noticeable when we finish.
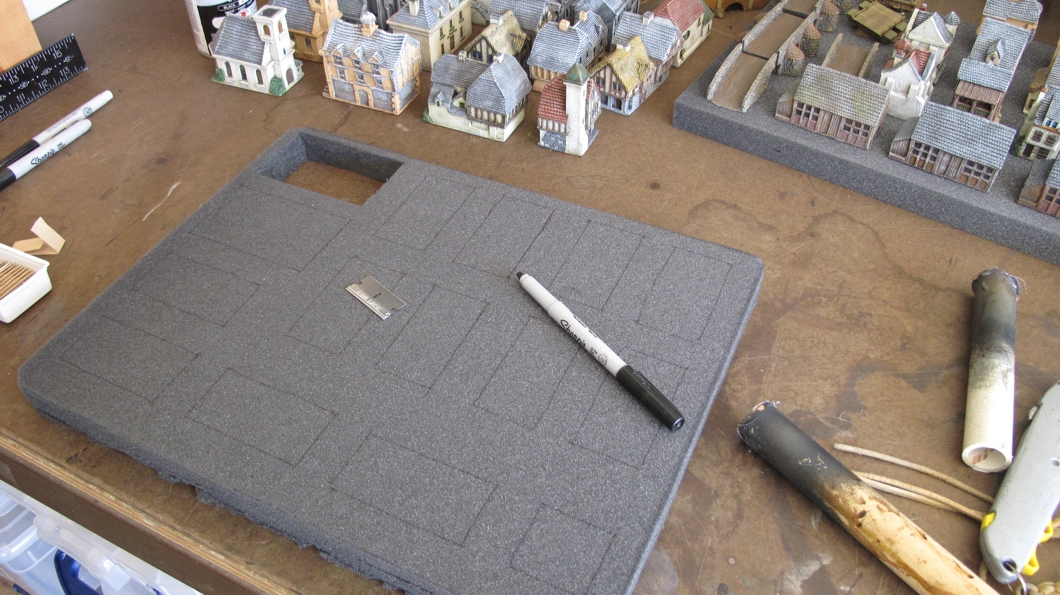
Most projects I do I’ll think out a plan that gives me my general direction and most things are worked out in advance but since the miniatures hobby is visual there are many things that can change once you “see” the project develop in the flesh so to speak! On this one I was thinking of just have the bases square since I was having them determine specific gaming areas per the rules but when I looked at the base under the building I realized that the square corners would look way out of place on a “Dark Ages” rural battlefield! As far as the rules it would require to “fudge” a bit but would still be a clear definition of where your troops were.
You can cut bases perfectly square BUT I like to slightly curve and vary my edges on most base’s as this helps blend the base into the rest of your scenery since your eyes will tend to pick out straight lines as not being in nature. Of course the exception to this would be say in a town or fortification where it is man made. I also like to “angle” the cut made along the base, at least a 45 degree angle to further soften the transition of terrain piece to game mat. Now some of you are saying “humph, I can’t be bothered with all that” well fine if that what you like but this hobby is all about the “visuals” and every little bit helps.
Base’s re-cut with with a gentle curving pattern and the edges “softened” with the sanding block.
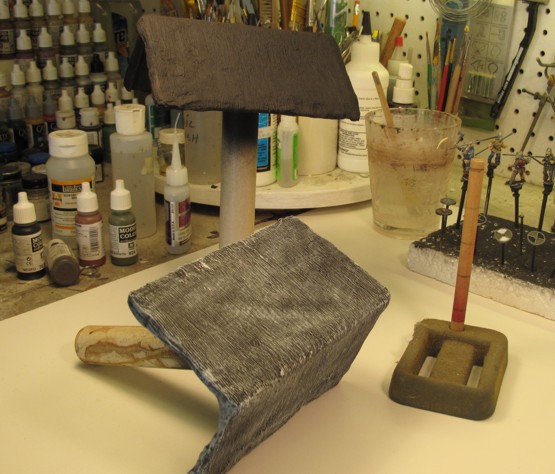
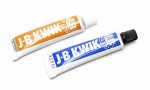
After the base is cut I use some fine grit (220+) sand paper to smooth edges and also a bit on the top to give some “bite” to the surface to help the paint stick better. Wrapping the sand paper around a piece of foam to make a sanding block works a treat (they also make pre-made sanding pads) I then primer the base either before or after I set the piece to it. I use JB WELD (fast set version) a 2 part epoxy to affix my bases to the buildings as it make a very good bond (better than “super glue”) but any 2 part epoxy will work.
The bomb! one of my favorite epoxies!
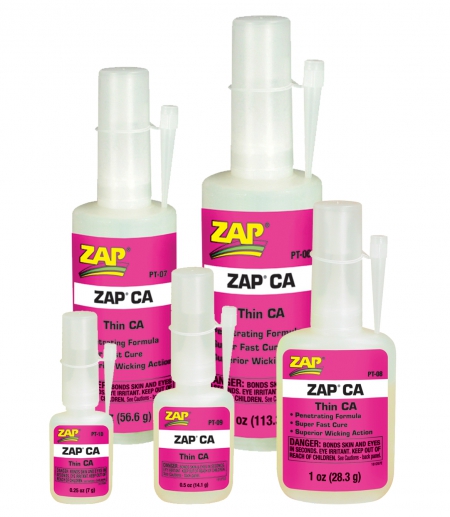
While we are on the subject of gluing with “super glue” I can’t stress enough about using GOOD glue!!! The cheap “super glues” you find at the super market just are not up to the task. Most people I have ever heard say they had trouble gluing figures together or have their models later drop pieces off have used CHEAP “super glues” Go to the local hobby shop or online and by the best cyanoacrylate glue you can find!!! After all it is one of the foundation items your miniature collection is built on.

 Now many castings are not completely flat on the base so some work might have to be done to smooth it out so it sets flat on its new base. Don’t fret to much as the next step will hide any little gaps. I have been doing miniatures for quite awhile now (25-30 years) and have learned a lot from others in the hobby, I have also I think developed many ways of doing things on my own that over the years have gone out into the community and are now accepted practice. Yes I do have a bit of an “ego” about “raising the bar” for wargamers over the years and I have the trophies to prove it…lol…ok to the point…I learned a lot of build and modeling stuff from my father who was a great carpenter and all around builder of real stuff and also did some modeling and “train set” work. I was exposed to a whole world of materials and how to work with them that was absent from the “Wargaming” or “Miniature Painting” world. One of these items was wood fillers, a whole range of “putties” and fillers used to fill gaps in wood that I saw could be used in basing and modeling…yes parallel development that others around the world also see this over time, but I like to think that I was one of the first (ego creeps out!) and I’m certain the way I do it is unique to me (at least it was).
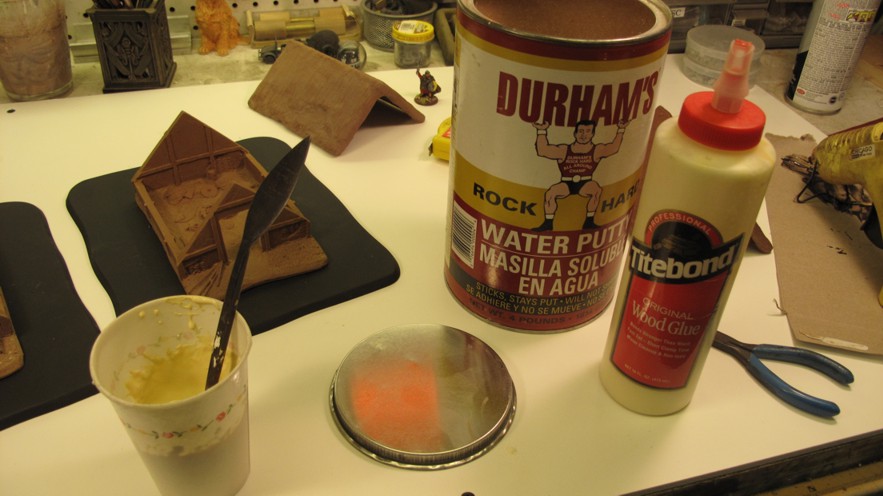
Always use “Quality” materials in your projects! This can of Durham’s Rock Hard cost about $10 but contains enough for years of projects and NEVER spoils!
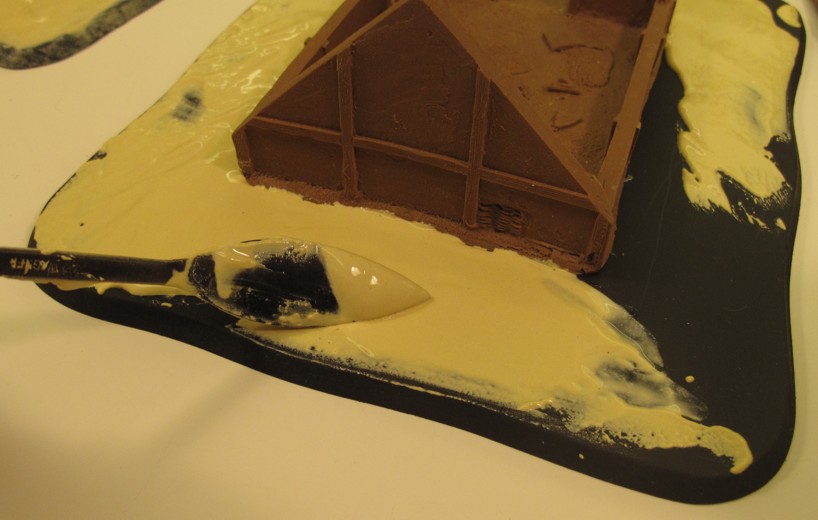
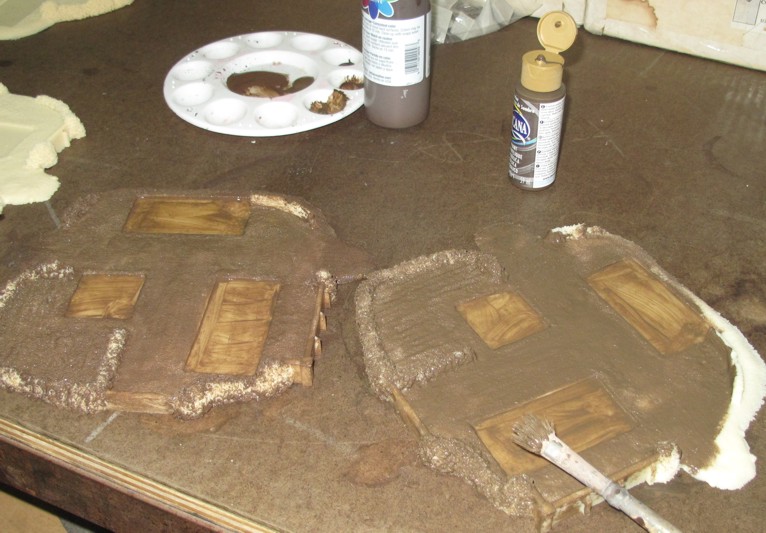
I use “DURHAMS ROCK HARD” water putty. It’s a powder that you mix with water into a paste. Now by its self I found it works BUT is a bit delicate when put on thin and roughly handled as you might with your terrain. To toughen it up I add not only water but white wood glue in a ratio of about 65% water to 35% glue added to the Durhams powder. I mix this adding more water or glue until I get a mixture about the consistency of yogurt.
This little trowel is OLD and was found at a garage sale, used by sculptors of big statues it has a another end that is rounded, made in Germany its one of my all time favorite tools!
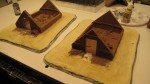
Basic baseing finished.
Using a small hobby trowel, butter knife, or even a wedge cut piece of card board I spread this onto the base, from the edge to the mini or in this case the building. The “filler” can then be worked smooth, rough, left high in some spots, or what ever you like.
On these buildings I also sprinkled broken sand and rocks to create rough spots as well as blend in the walkways from those on the original building casting to the “new” base.
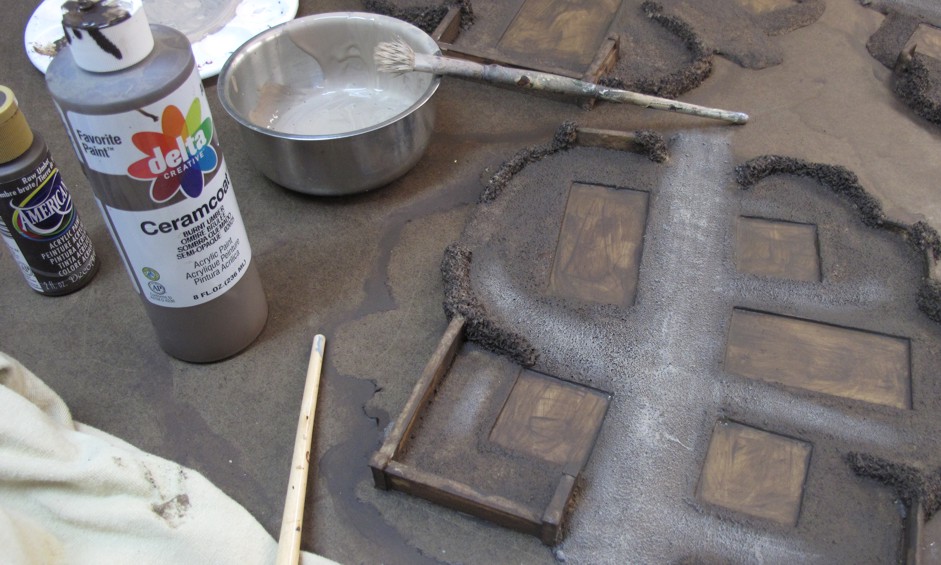
Adding rock work and defining paths.
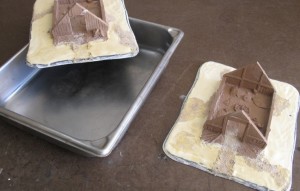
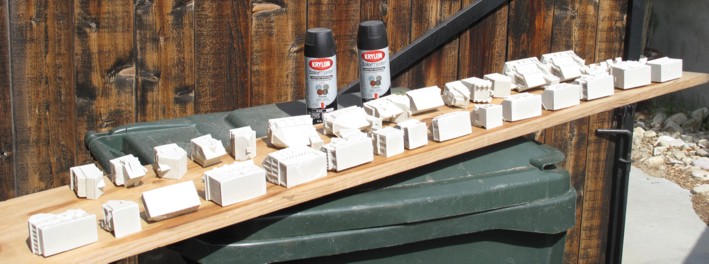
I use a big medium stiff bristled brush dipped in water to move around and smooth the filler. Any of the additional materials such as rocks, pebbles, gravel, ect, can be added while the paste is still soft and wet to help it blend. Let the “Durham Rockhard” filler dry over night and then I prime the whole thing with “Krylon Automotive” black primer.
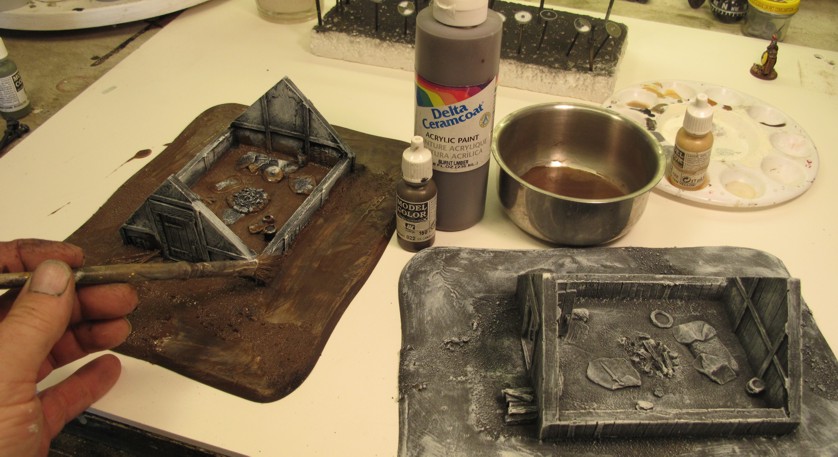
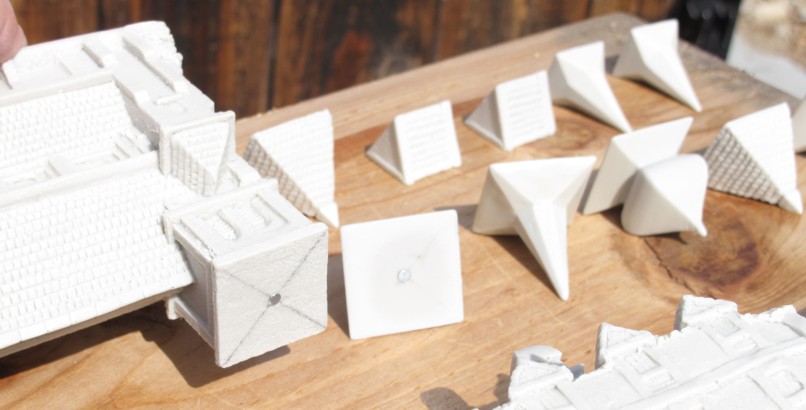
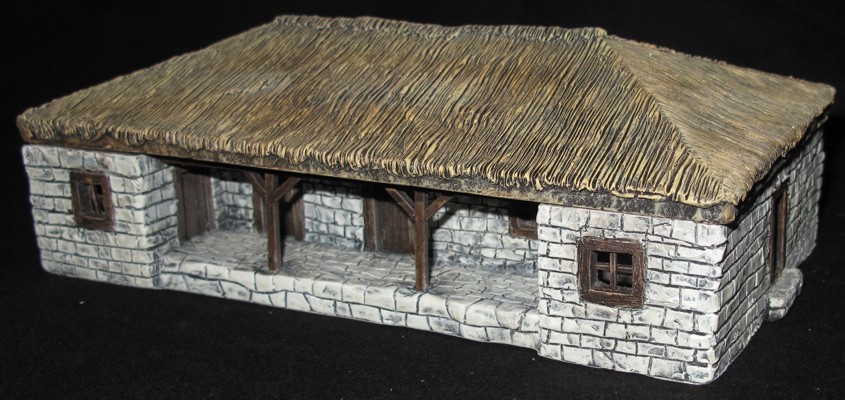
Now your model is ready for painting, and finish details. I’m not going to detail my painting to much here as most of you are masters beyond me already. Questions will be answered of course…lol.
One thing I’ll mention is that for “terrain” I ofter use “cheap” craft paint for the big areas and save the good stuff for details. I also have a box of old paints that I try to use up on terrain when they they are replaced or deemed to old for first line use. The two bottles in the picture are the same color, the little Vallejo bottle is $3 for about 1/2 ounce (17ml), the big “Creamcoat” bottle from craft store is 8 ounces and $3.50. While I would not use the big bottle stuff on a mini as it just not near as good, it is fine for larger less important projects and will work fine generally it is so much cheaper!
Then it’s on to flocking and such. Years ago I was able to pick up some stainless steel tubs in a few different sizes (flea market) and I use these when I’m flocking and applying terrain material it catches all the fall off and allows you to return excess flock clean to the flocking container as well as keeps your work area “flocking” clean!
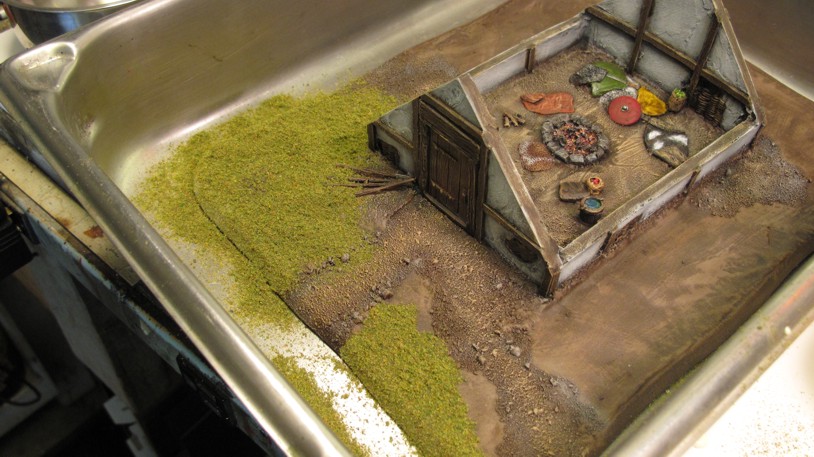
Any kind of non-stick pan or tub is your best friend during the flocking process!
I then let it dry over night. One step I will mention and it’s a good one you may not have thought of. To finish up I SPRAY clear gloss on the model as well as all the flocking, grass, bushes, and trees…. Why? Because it helps to “bond” the “flocking/brush” material more than the glue you used to lay it down originally. It seals the whole thing and keeps the flocking from not rubbing off from handling and game play. It also allows the gentile rinsing with cool water your pieces that gather dust over time. I use Testor’s in my air brush for mini’s but on larger projects I go with Krylon fast drying clear Gloss (in a spray can). The Gloss will darken the “flock/brush” a bit but it will lighten up a bit as it dries. Let it dry for a few hours and then you can DULL coat the entire model to taste! You now have a well protected model ready for some hard action!
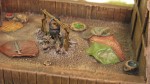
I was toying with putting in a LED light and flasher to show the fire but this was deemed “overkill” since it would be seldom seen!
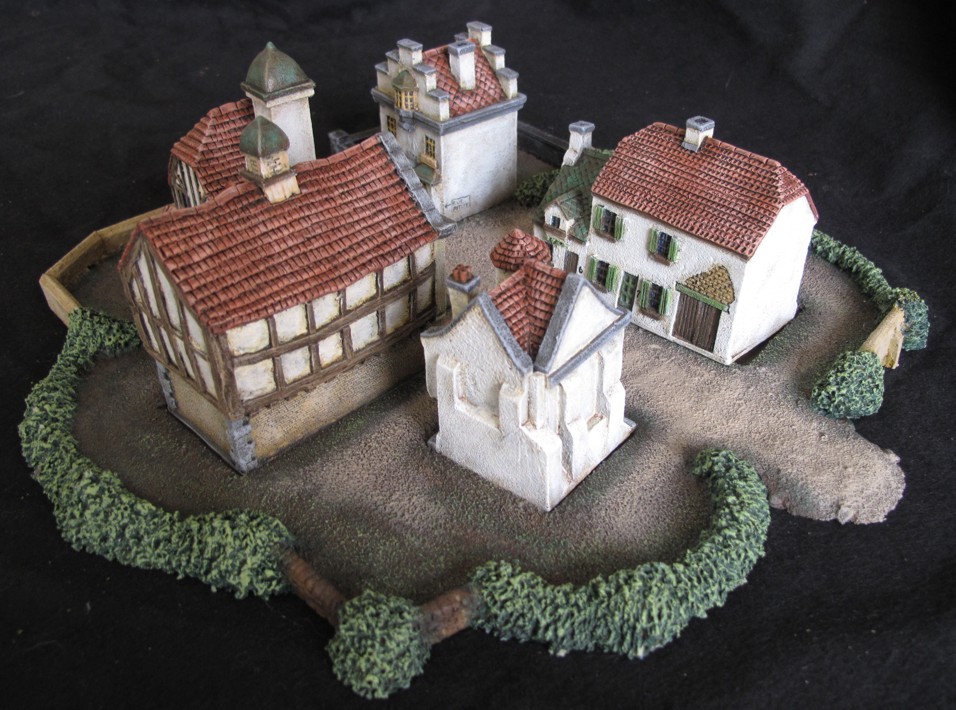
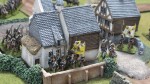
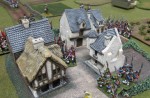
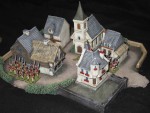
Here is the finished project, I was happy with it I hope you all enjoy it as well!
Bill W
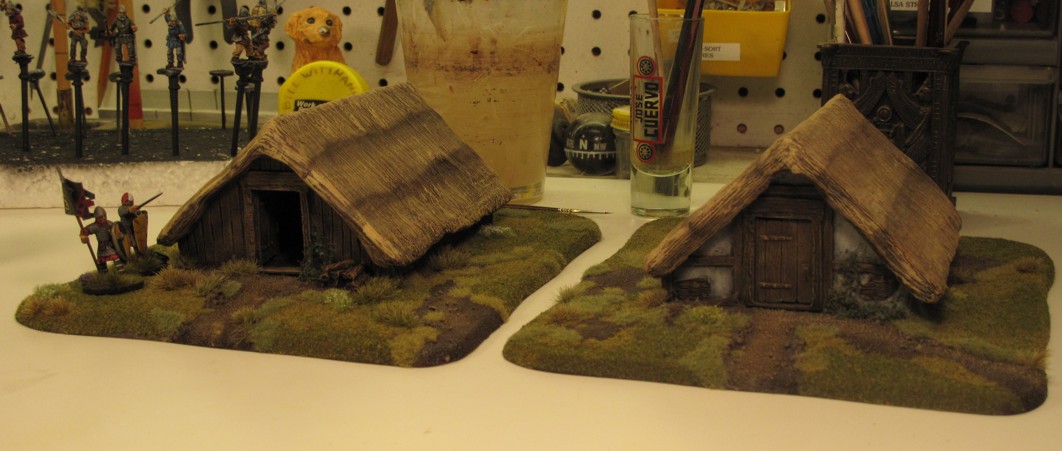
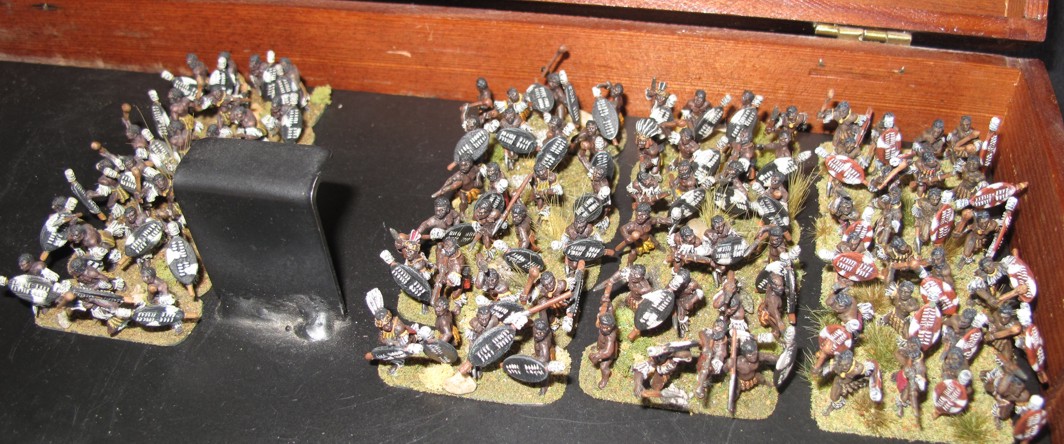
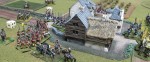
My “Flemish Mercenaries” cant wait to plunder these baby’s!
CLICK on photo for larger picture!
-

-
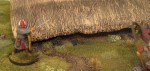
So peacefull! “oh Norman? are you in there?”
-

-
“Hey, put down the dam banner and check inside!”
-
-
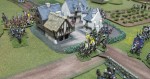
Randomness is the “key”
-
-
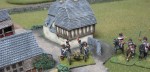
Not everyone will see this detail, but I will!
-
-
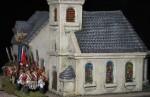
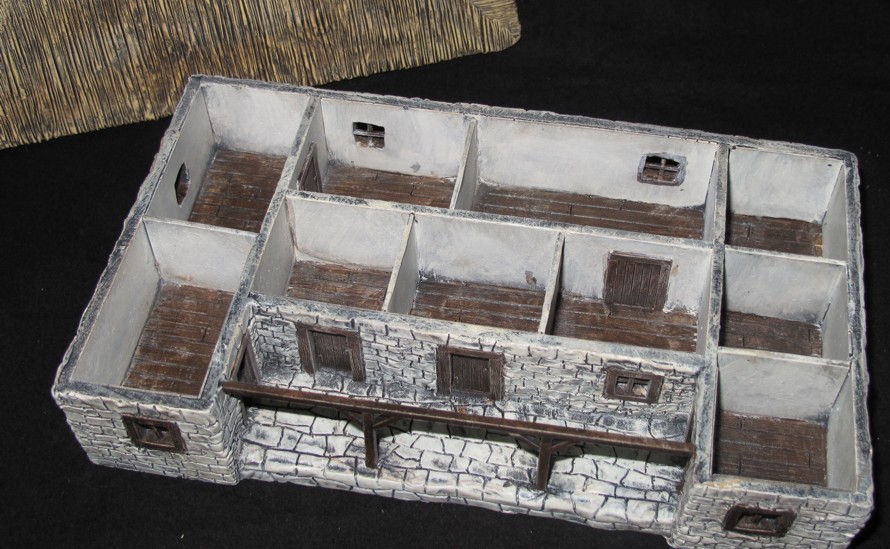
These castings came with nicely detailed interiors! I have since added flames to the fire…
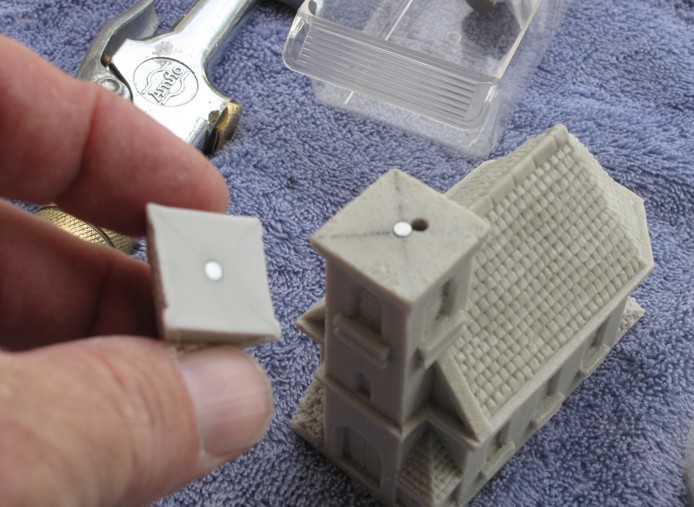
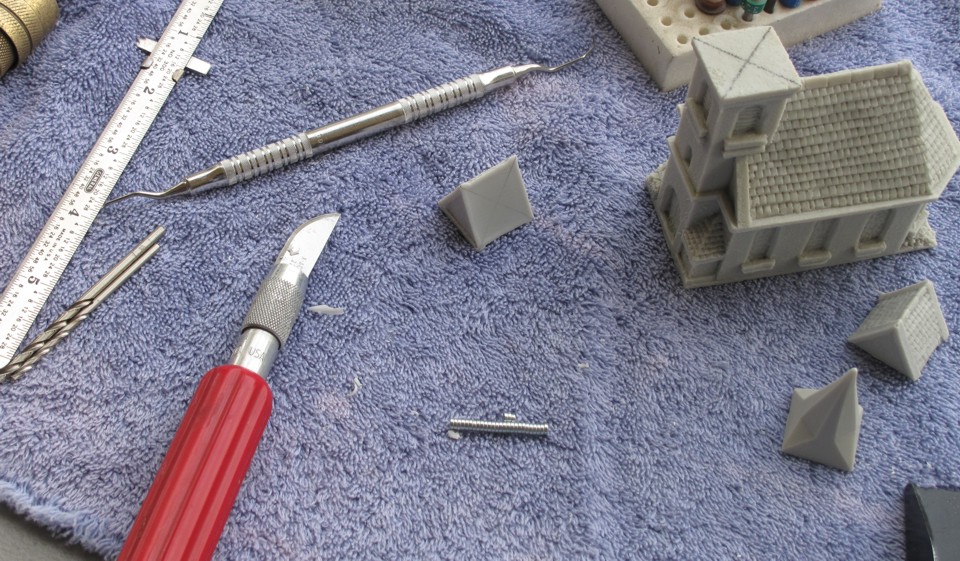
But wait there’s more!……One of the invaluable tools I use is a “hot glue gun” I use a bit of it on a nail of in the case of these larger building a short piece pf plastic pipe. This gives me a handle on the piece or miniature so I can firmly grip it and maneuver it almost 360 degrees in all directions with out touching it! I combine it with a few weighted upright “stands” to slip the pipe over, holding the piece upright while it dries.

 I make a lot of terrain and while making a damaged “Sphinx” model for a friend I thought about what a pain it was to spread out filler on the base while creating the underlay for the drifting sand. I use “Durham’s Rock-Hard” wood putty quite a bit and it can be messy and a bit troublesome when trying to apply in a controlled manner quickly. It spreads easy when very thin, gets into cracks, but wont hold shape well or stay put. When its thicker it is hard to spread out evenly, retains brush marks and starts to set up.
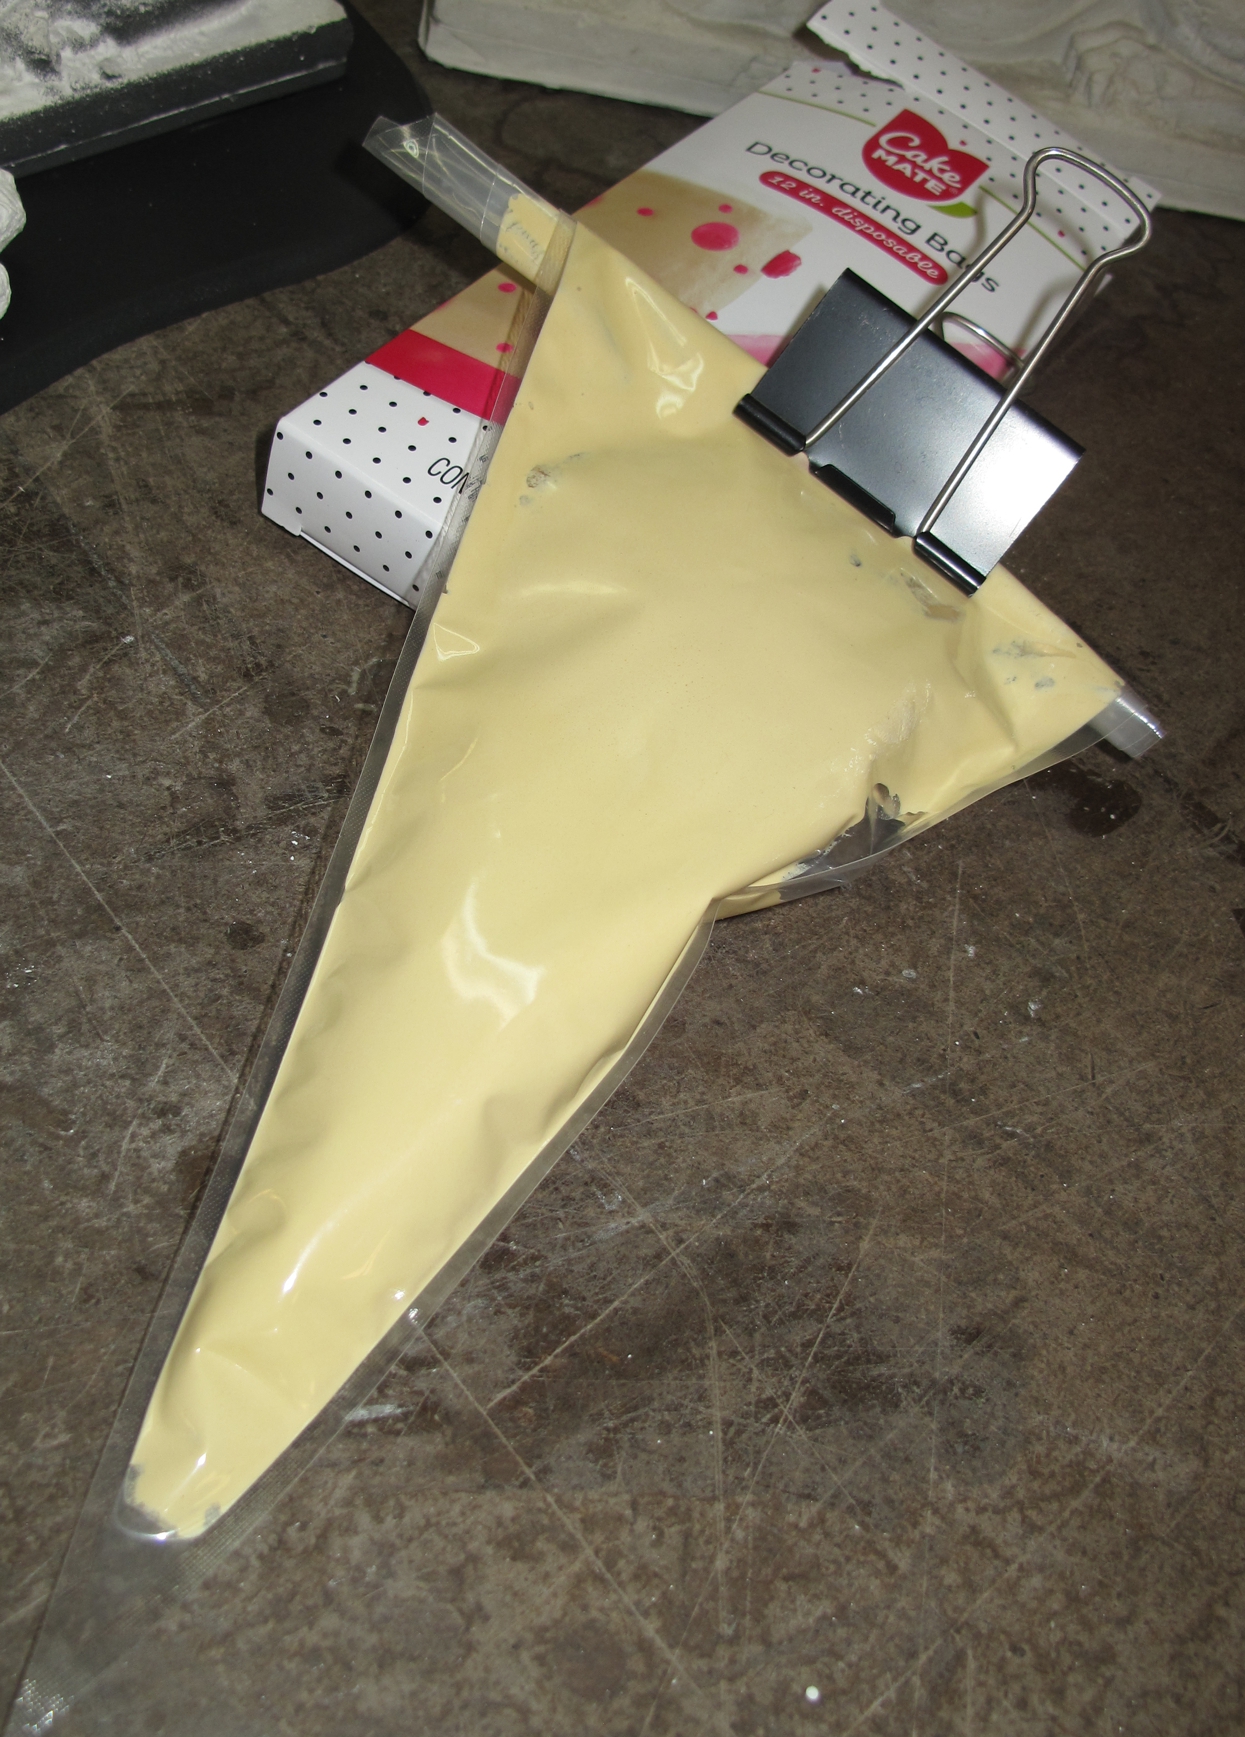 I spent a few days on other projects, always though in the back of my mind thinking on a new way to apply the filler. Then bingo I thought back to the baking show and how they used “icing cones” when decorating cakes, would it work with wood putty?
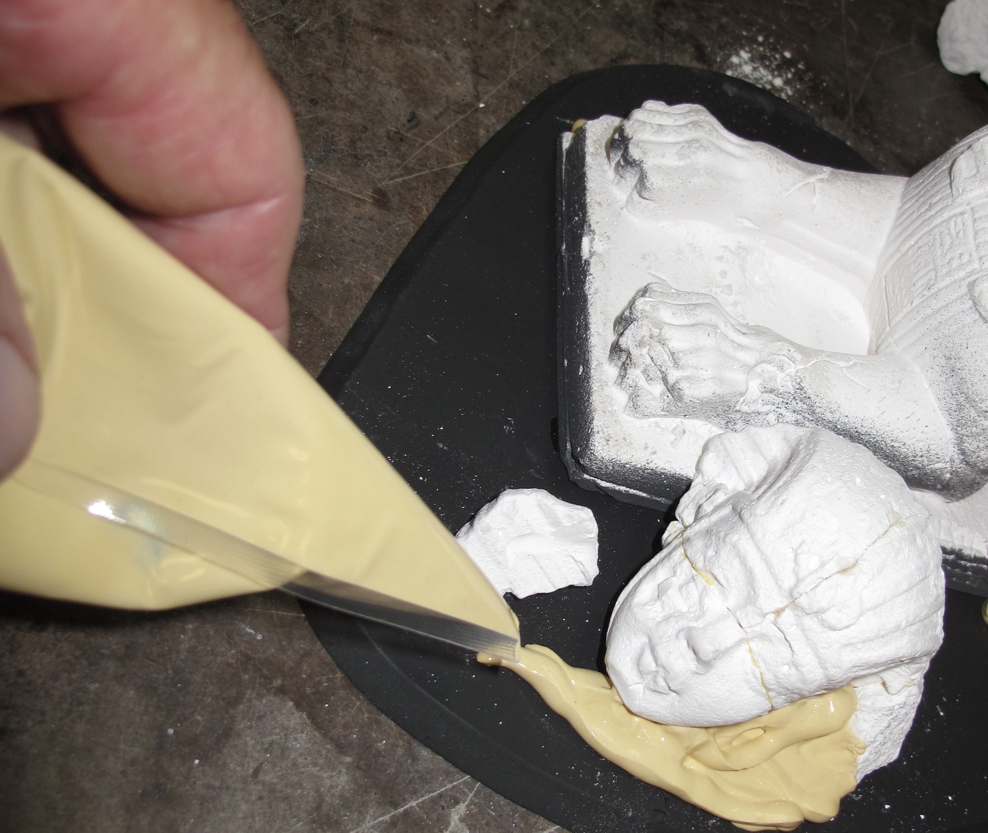 Wow, just like a tube of toothpaste, it worked better than I had hoped for.
 Who would have thought that watching “the Great British Baking Show” would make one a better painter… just goes to show you never know where that next “cool trick” will come from!
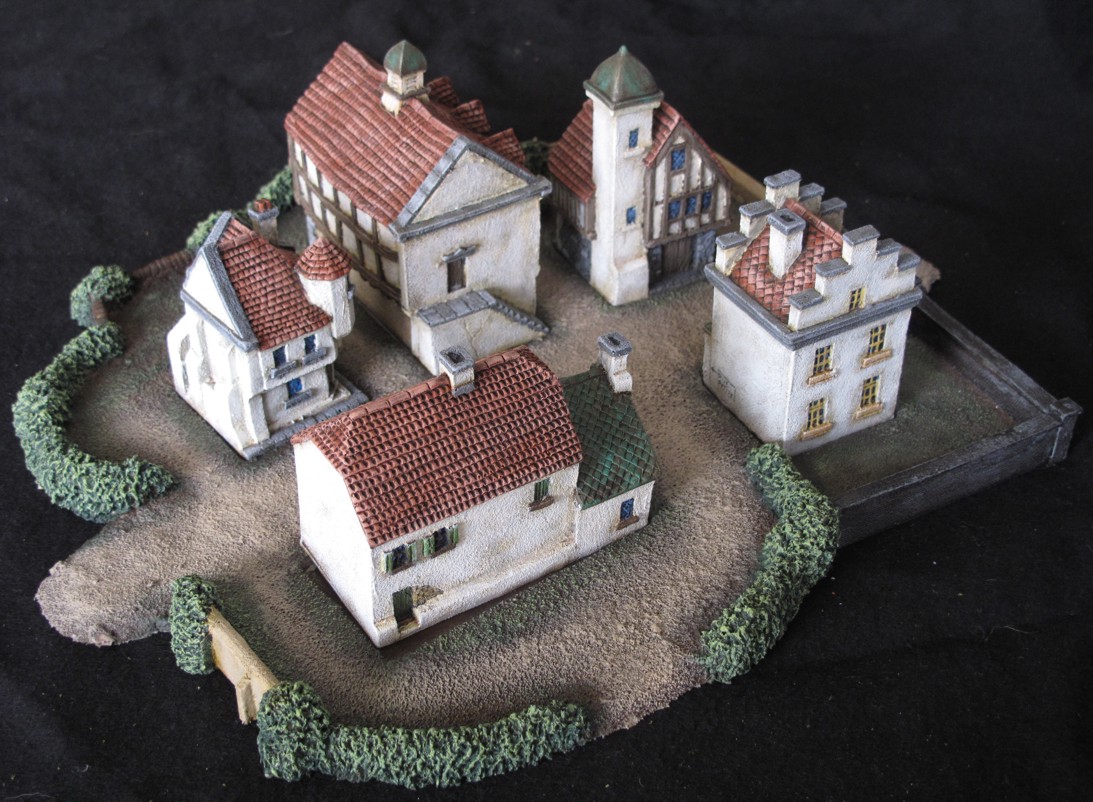


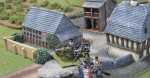
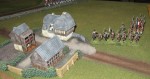
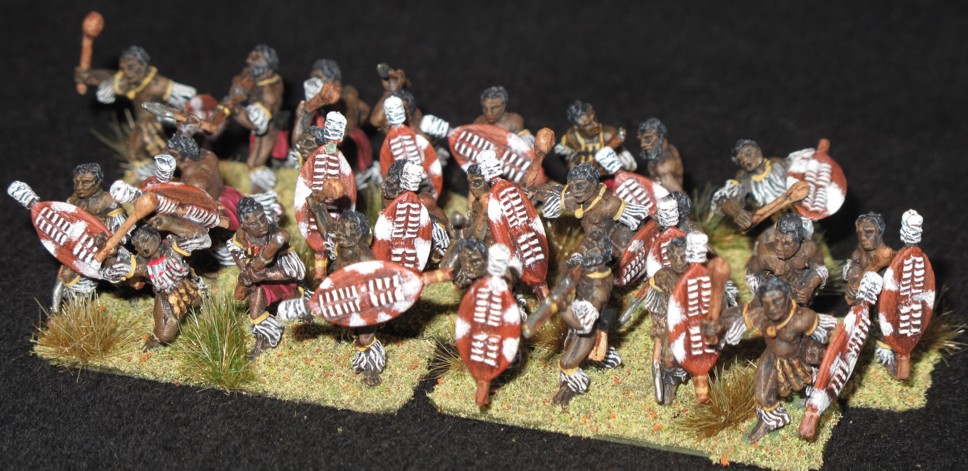
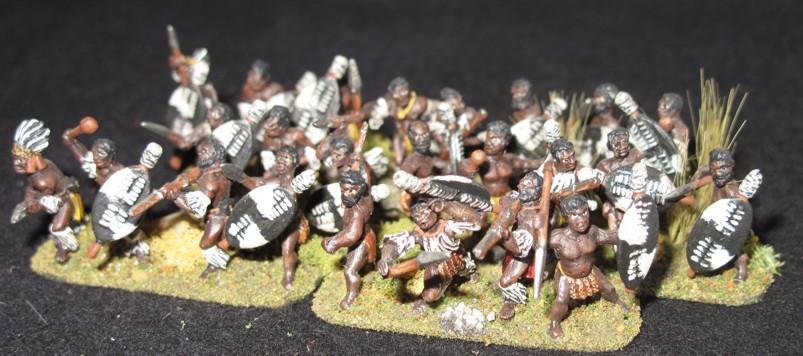
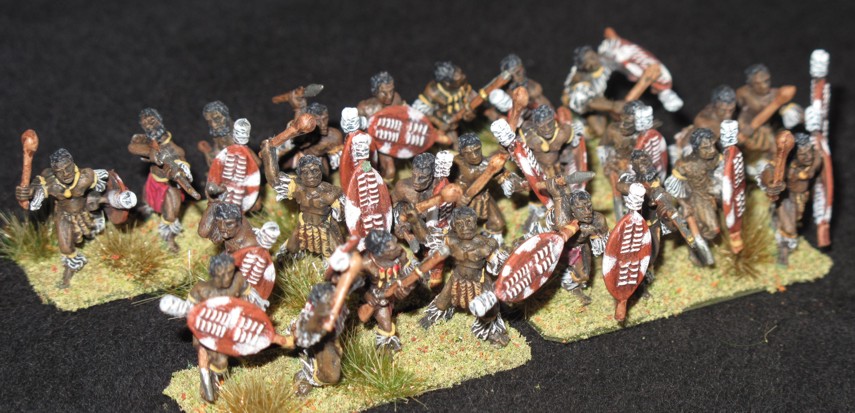
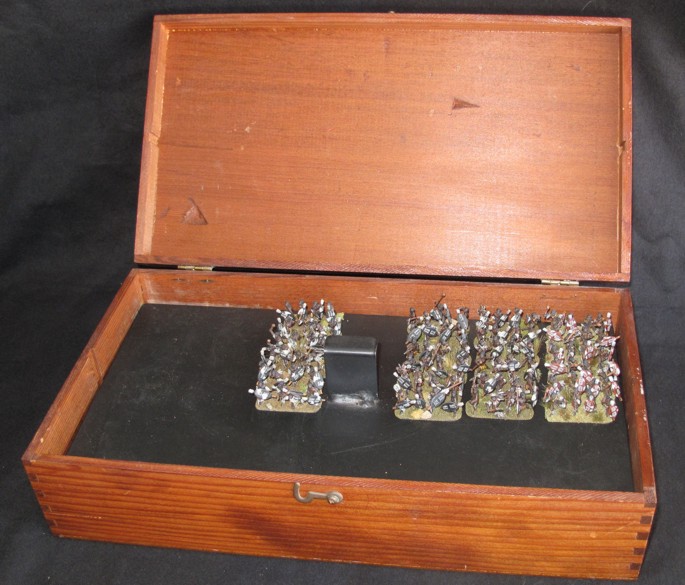
 Thought I would post a few pictures of an ongoing project of mine. Years ago at the “HISTORICON” wargaming convention I picked up the “Old Glory” 15mm “Rourke’s Drift”
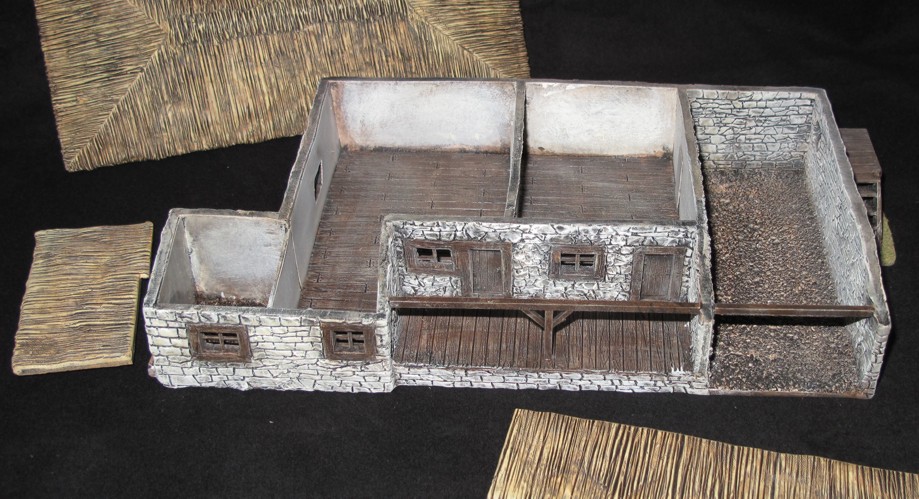
 then coated in clear gloss followed by some matte spray.