Well just a few bits and pieces from “my world of wargaming”.
The family did a lot of last-minute shopping for me this Christmas and since “dad” likes weird stuff (wargaming stuff) many of my gifts didn’t arrive until long after Christmas. Not a bad thing since all through January the mail was full of great items to brighten the work week!
The first items were the “new” SAGA rules, meaning SAGA II, the basic rules, along with the Vikings and Crusaders supplements, and finally the Book of Battles. There are lots of game systems out there that redo their rules, some that do it with annoying frequency (and not always to make them better as much as make them money!) but Studio Tomahawk has done a good job with the “revamped” rule sets, tons of great reading and I believe an even better game justifying the expense in upgrading.
The rules do not really change in spirit or basic structure, its more a re-balancing, clarifying, and expansion of the first set. I have played 2-3 games using them and the transition was very easy and felt smooth.
I liked that the designers have continued to look at their product, the feedback provided by players directly, and through the active Studio Tomahawk forum then made the right changes to improve and expand the game without making original players of the game feel like their previous experience and armies were now useless (a common occurrence with several other well-known companies).
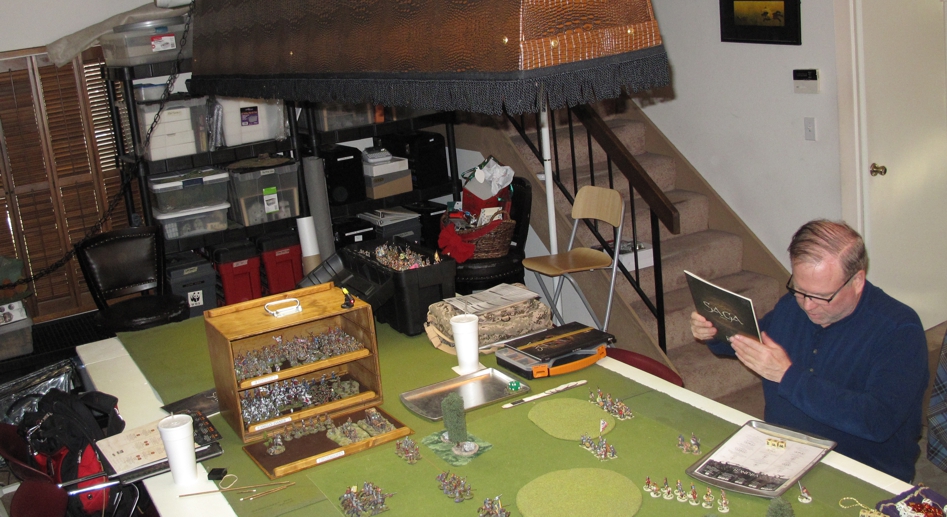
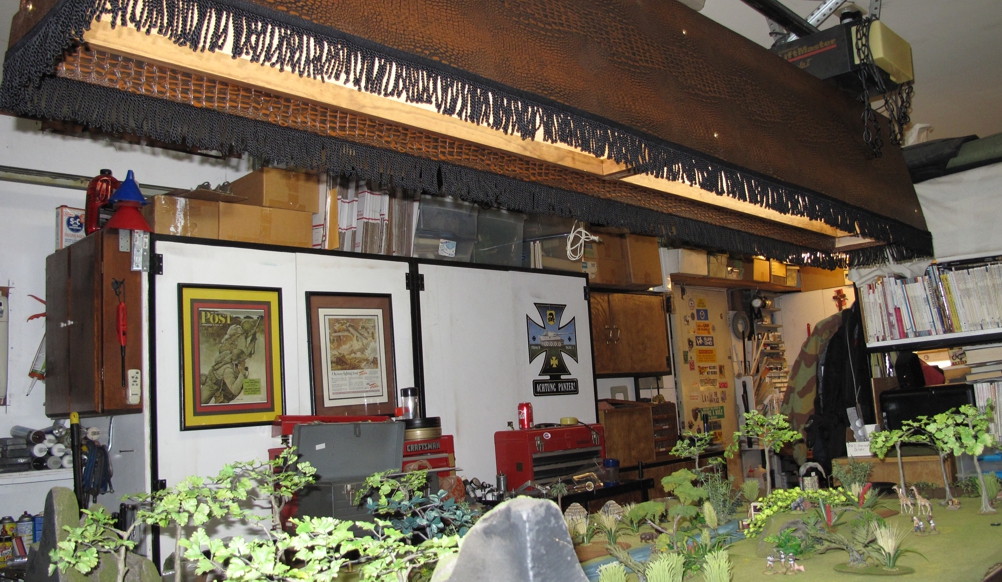
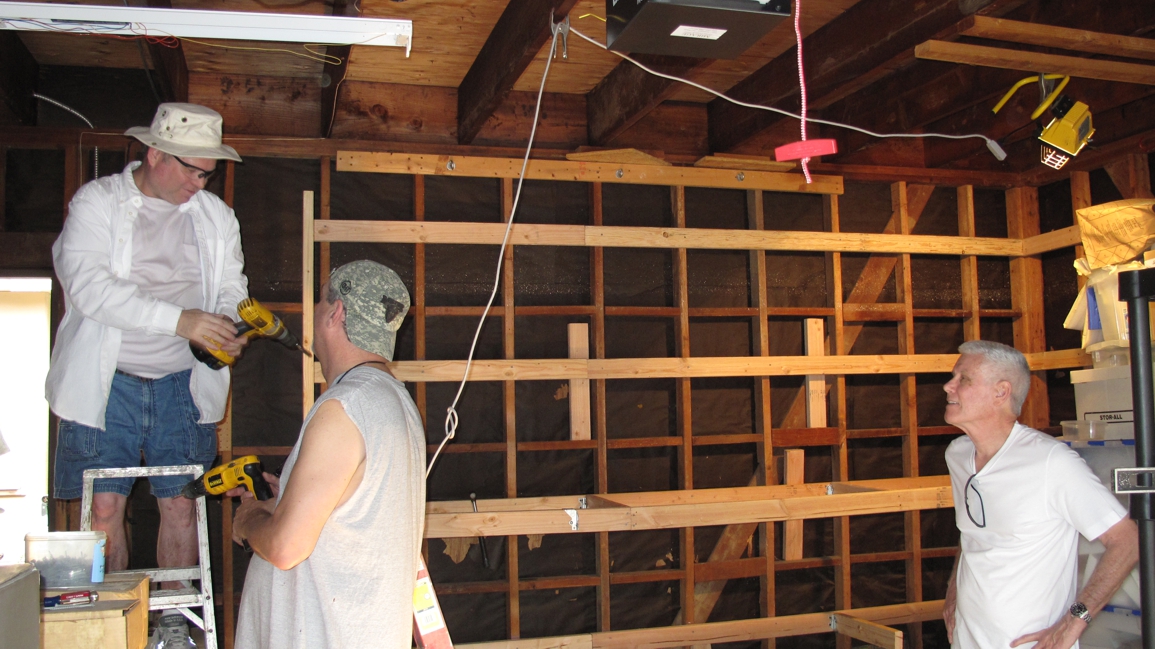
I’ve also been chipping away at my wargamers “to do” list and a big one on the list was to build some improved lighting for our game table down at the “Dogs of War” gaming group. Over the last year or so the “dogs” have been working to make the “Dog Pound” a better place to play, cleaning, building storage, tossing or selling unused / old gear, and one project was better lighting so we might better see all those beautiful miniatures on the table. This project took over a year of “thinking and research” to figure out just how and what would be the best way to do this. I / we wanted lighting that was easy to use and lite the table / miniatures without making the rest of the room look like an outdoor sports arena. I wanted the solution to look good, fit in with the club space, and not impact the members house much. Cost to build and cost of operation was also a factor. I wanted the unit to light our entire 10’ x 5’ table as evenly as possible so in the end I went with a 8’ long LED setup that would be dimmable as well! The unit hangs over the middle of the table and the design contains the majority of the light to the table exactly like pool table lights.
“Thar she blows” Lighting installed down at the “Dogs” above our 5′ x 10′ table!
I wont go into the building of the lighting fixture now, maybe latter in a “how to post or “Workbench page” but here are a few pictures to let you get the idea.
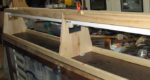
A regular flouresent fixture was gutted and converted to LED use then a frame built around it.
Frame finished and ready for next step, skinning!
Wood “skeleton” being assembled.
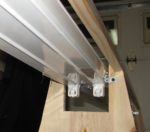
1/4″ hook type bolts were installed to give a strong connection point for the hanging chains.
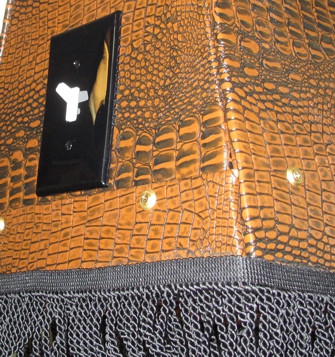
A dramatic improvement in my opinion. There is still a lot of work to be done on our remodel (chain will be swagged up out of the way)
Switch allows quick on and off as well as dimming.
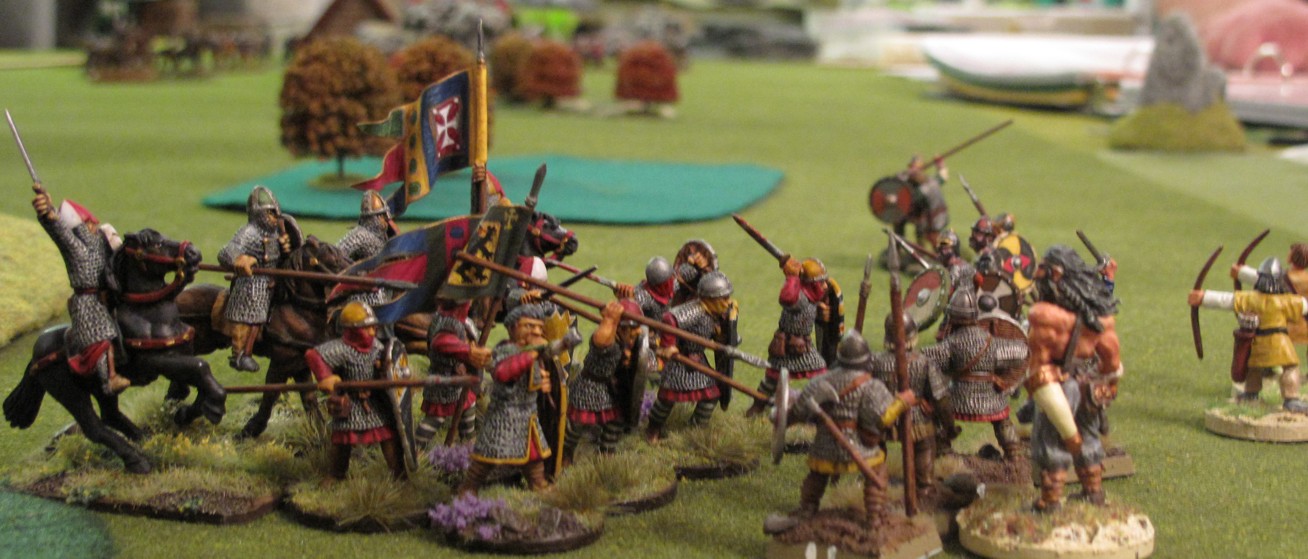
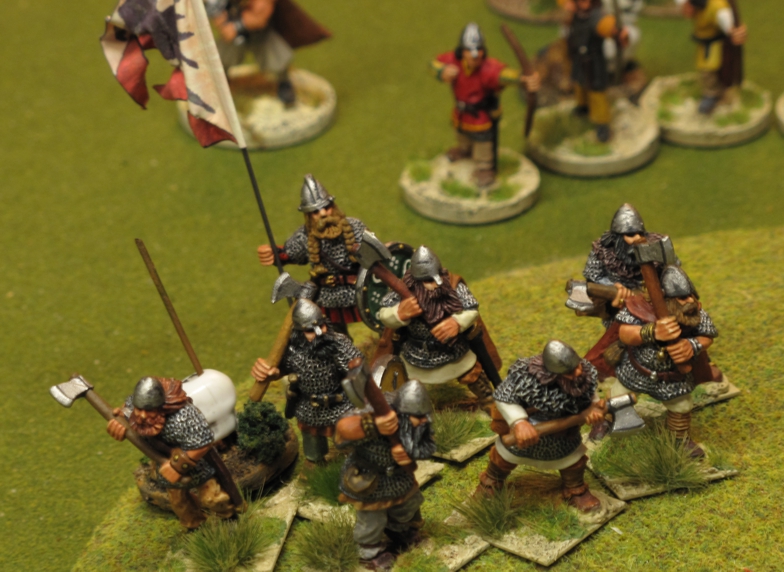
To break in the new lighting Chris and I played a game of SAGA II using the Viking supplement. Chris took Vikings and added a Banner man while I played straight up Normans heavy on cavalry. I didn’t take many pictures but the game was fairly even for the first few turns until his Hearthguard charged up the hill to take out one of my Hearthguard cavalry units only to be counter charged by another of my cavalry units and wiped out.
Chris’s Viking hearth-guard charge up the hill eliminating one of my hearth-guard units only to be charged and wiped out by another of my Norman hearth-guard units the next turn! With our old lighting set up the excellent paint jobs on these guys could hardy be seen! This shot was done with no flash and no tripod!
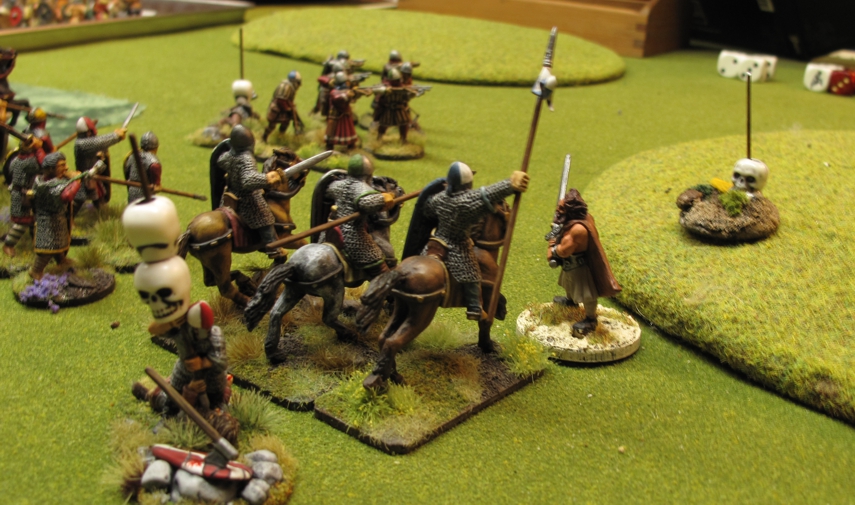
The battle for the top of the hill raged on with Chris’s Warlord entering the fray hoping to end it. My Norman cavalry used the “Gallup” Activation/Reaction” option and moved off leaving his Warlord standing there surrounded by angry Norman infantry. A finial charge by my Norman warriors sealed his fate and outside of a few parting bow shots by both sides ended the game with a Norman victory.
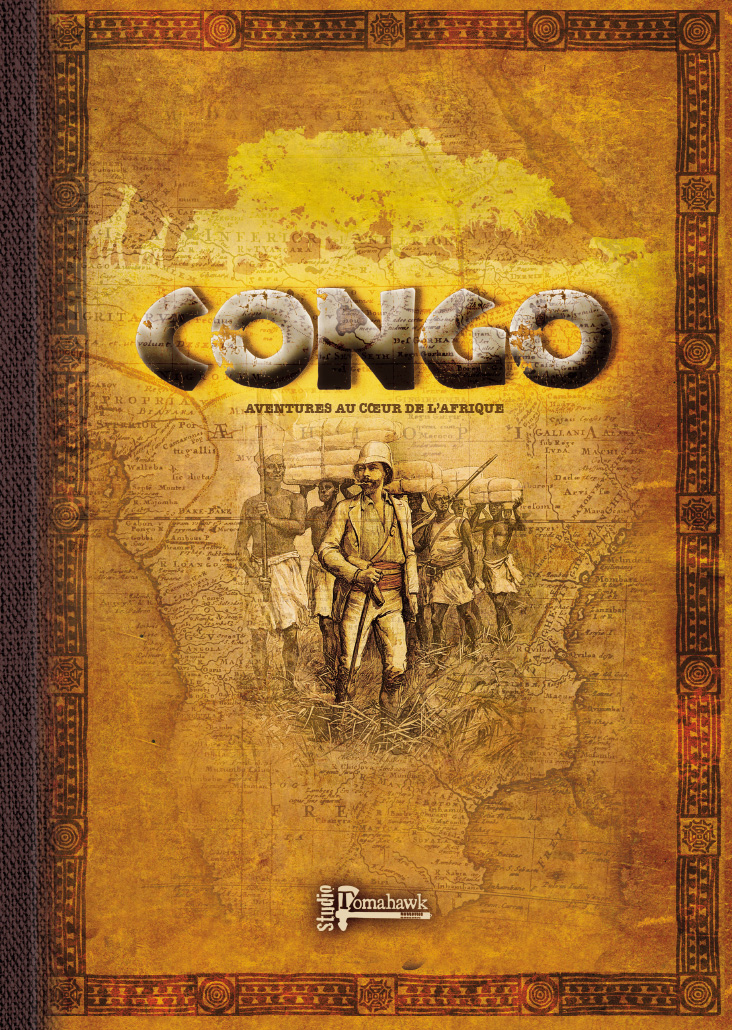
One of my other gifts was the Studio Tomahawk rules “CONGO” they look great and I’ve already played one “test” game that was quite a bit of fun. I’ve always had a great fondness for the Darkest Africa figures from Foundry, Coppelstone, NorthStar, and others! I think CONGO will be the spark to get me painting sore of the pile of Darkest Africa figure on the shelf! I have played lots of Darkest Africa games in the past but some of the rules are a bit dated and no-longer available. These follow some of the same concepts from Studio Tomahawks other rules so may be a bit easier and acceptable to players familiar with those rules.
The first game under the new light, Darkest Africa isn’t so dark!
We used a pre-made scenario, basically capture the flag. Of course to make it interesting the flags were in the middle of a crocodile infested river flanked by enemy figures trying to put hole in you!
More on CONGO in the future…..
The finished light being test in my shop with a game of CONGO.
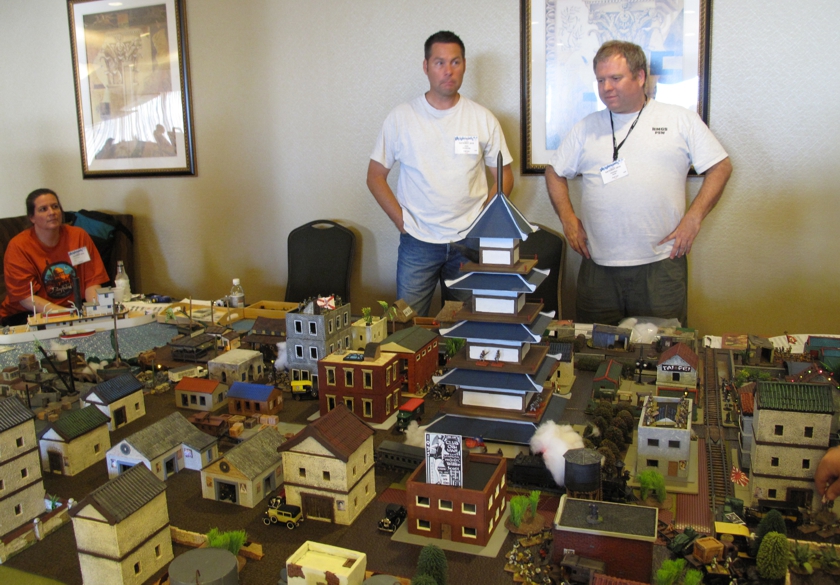
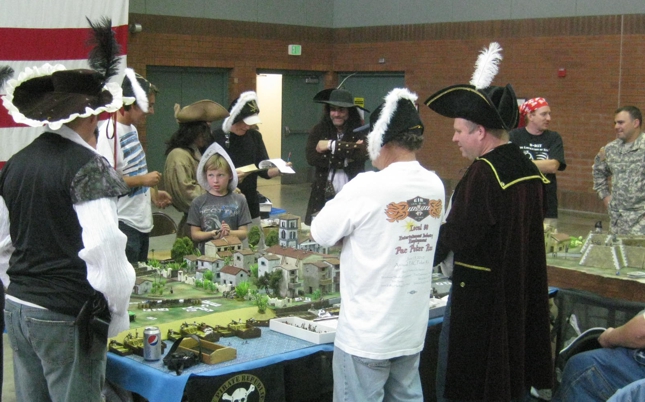
Chris A (left) and Chris S (right) running one of the “Dog’s” mega convention games “SHANGHAI”
My “Primary” gaming group the “Dogs of War” will soon be posting their Battle Reports here on my site. Chris Snell the great patron of “The Dogs” (he devotes part of his house to us) has for many years sent out weekly emails covering what has gone on and what is coming up at the club. Over the last year we have been refurbishing the club and I thought it might nice to also have the weekly battle reports Chris does get a facelift as well and giving Chris the ability to post them here with pictures would be a great way to do this.
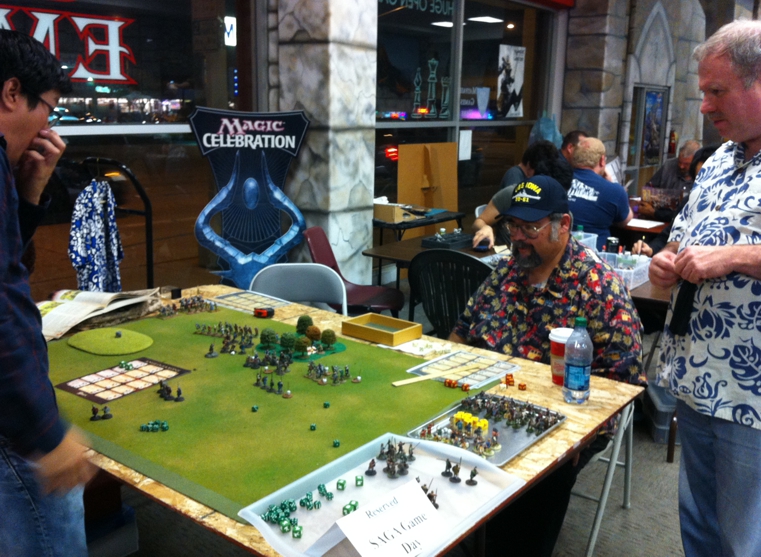
Chris Snell (standing right) helps run the SAGA event at Games Empire. Seated is another Dog, Frank V.
A little bit about Chris…. Well Chris has been one of the original “Dogs of War” since the beginning and also probably the most active. In fact I can’t remember any “Dogs” game or activity that he has not been at!!! Chris has put himself in the forefront of all the projects and his efforts contribute mightily to everything the Dogs have ever been, done, or hope to do. Without Chris’s patronage the “Dog’s” may well have dissolved long ago. The “Dogs” are a great bunch and they all contribute much to the whole, but in any group there are always a few who provide the backbone that others build on, thanks Chris.
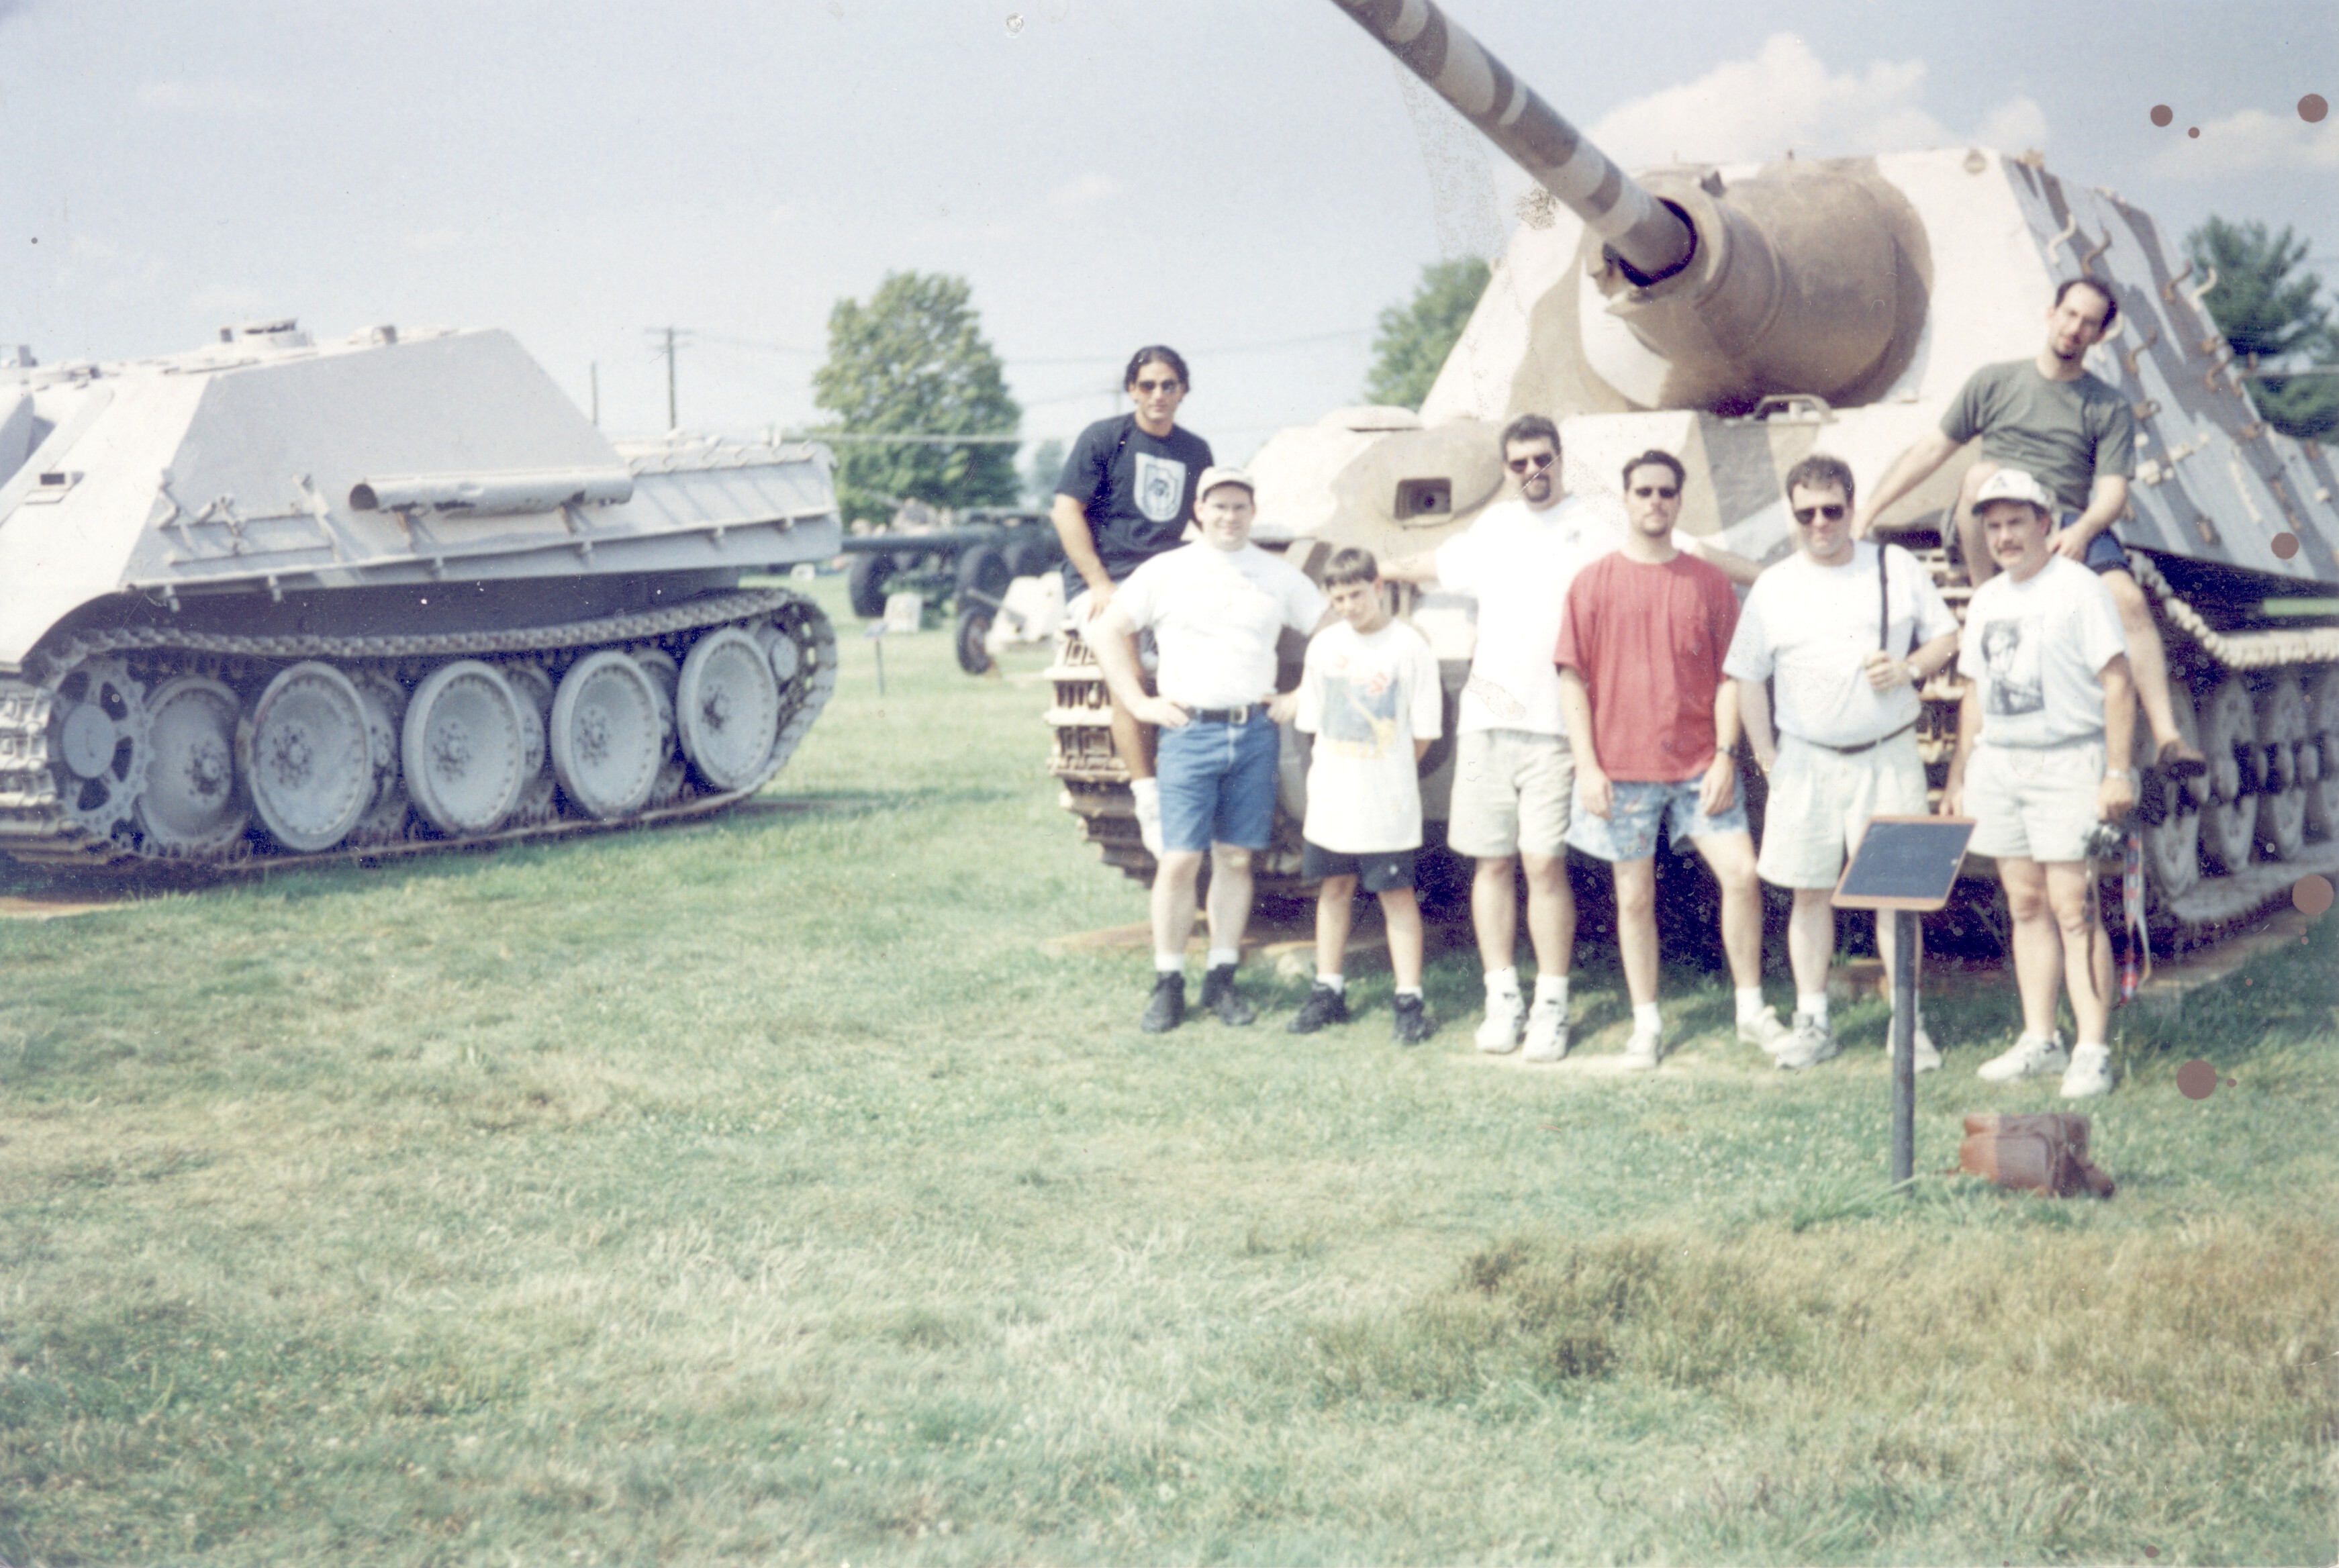
Side trip to Aberdeen Proving grounds, Historicon 1999? Joe, Dave L, Joe’s nephew, Tim D, Chris A,Chris Snell, Bill W (me) and sitting on fender of German Jagd Tiger is Ron Green.
So you will soon see Chris’s weekly reports appearing here! Yea Chris! I encourage all the “Dogs” to subscribe to this site and receive notifications when these reports go up. You can simply scroll down the main page and towards the bottom of the right side column you will see an option to enter your email and receive notification of new articles and updates on the site.
So welcome Chris and “Reports from the Pound”
Chris S (in tri-corner hat and long coat) helps run the Dogs pirate game “Maracaibo Mambo” at a past HMGS/PSW convention.
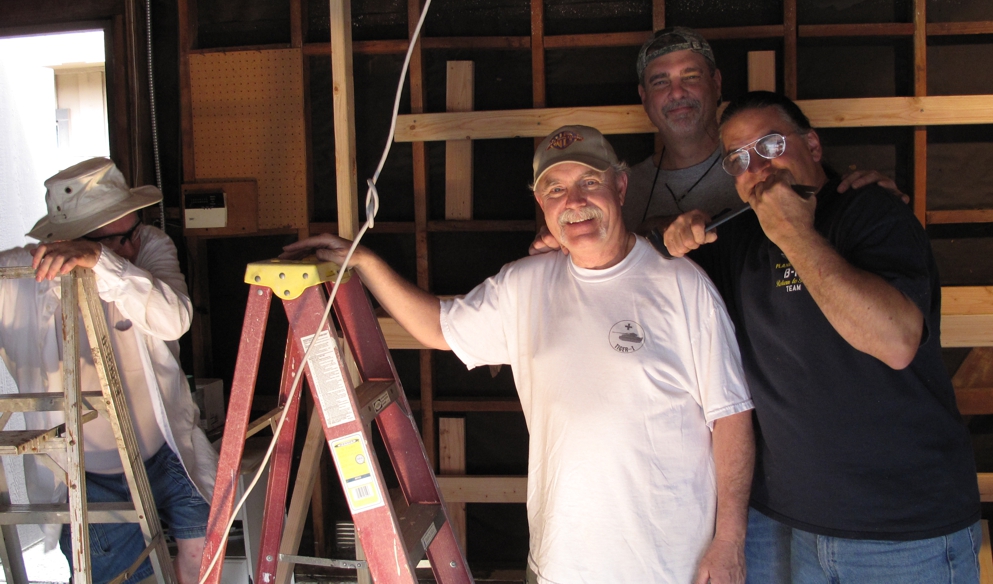
Over the years my local gaming group in Southern California the “Dogs of War” have amassed a huge collection of miniatures, terrain, mats, and all manner of gaming material that when not in use has to be stored somewhere! When we moved from our long time clubhouse in Burbank (thanks to Danny’s garage) to our present digs (the bottom floor of Chris’s house) we found out just how much stuff had accumulated!!! well in the years since that move it has grown by leaps and bounds. Some of it ended up in a few storage units but most went into Chris’s garage and got to the point that it was near impossible to find things or get a car in it. The main gaming area had reached gridlock and the place was being suggested for an episode of “Hoarders”
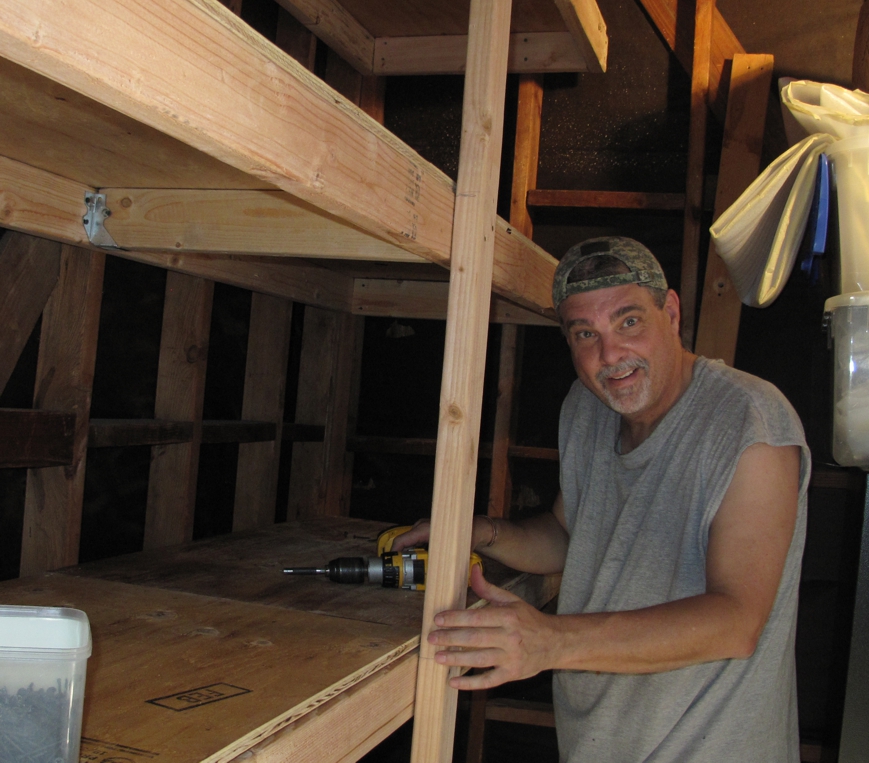
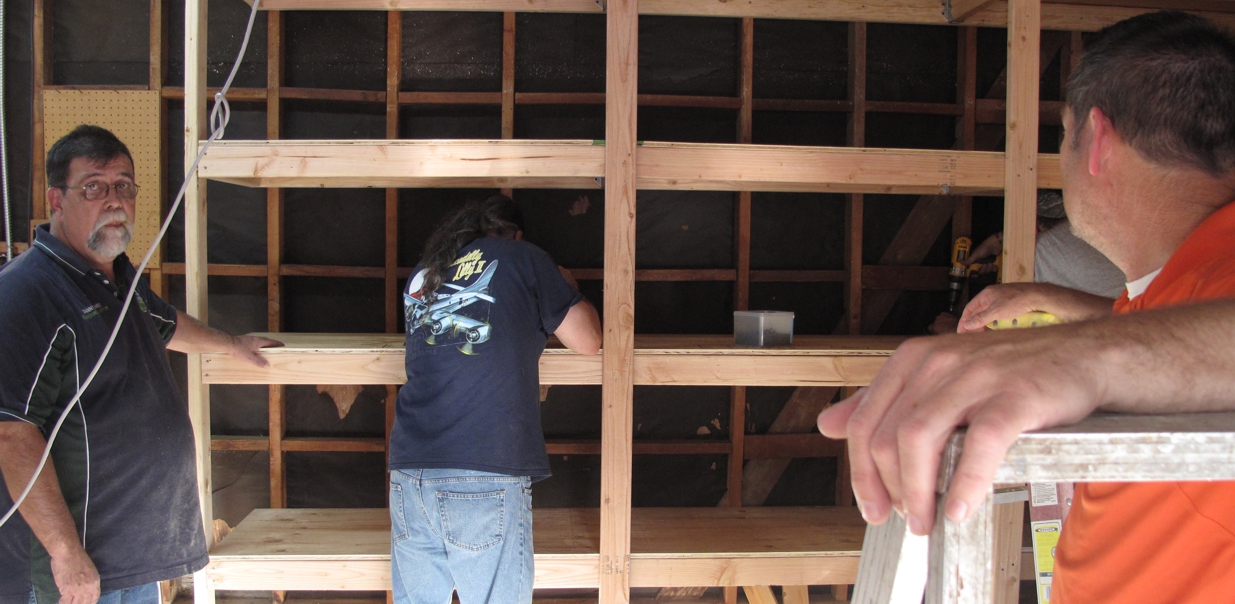
The group put its collective head together and decided that it was time for a massive clean out and refurbish! I came up with a bit of a plan and this started with organizing the garage and building proper shelves for storage. The current shelves were plastic and groaning under the weight of several tons of lead! When newcomers visited the club and were asked if we had figures for such and such period the response was always “sure what scale do you want to play in” So it was decided to build strong shelves that would both hold the weight, provide additional space, and survive the earthquakes our area has from time to time!
Since I have built and out fitted trucks for the “Movie Biz” for many years the task of organizing this was my job, labor was pulled from all the core club members, and the material bought and paid for by selling off un-needed miniatures and terrain from the clubs pile.
The first stage of the project was to clean out and redo garage and this is a short video done over one of two weekends this stage took.
Well its been awhile since I’ve posted up anything, not that there wasn’t anything going on its just that some times there is so much going on that time for posting it up is in short supply!
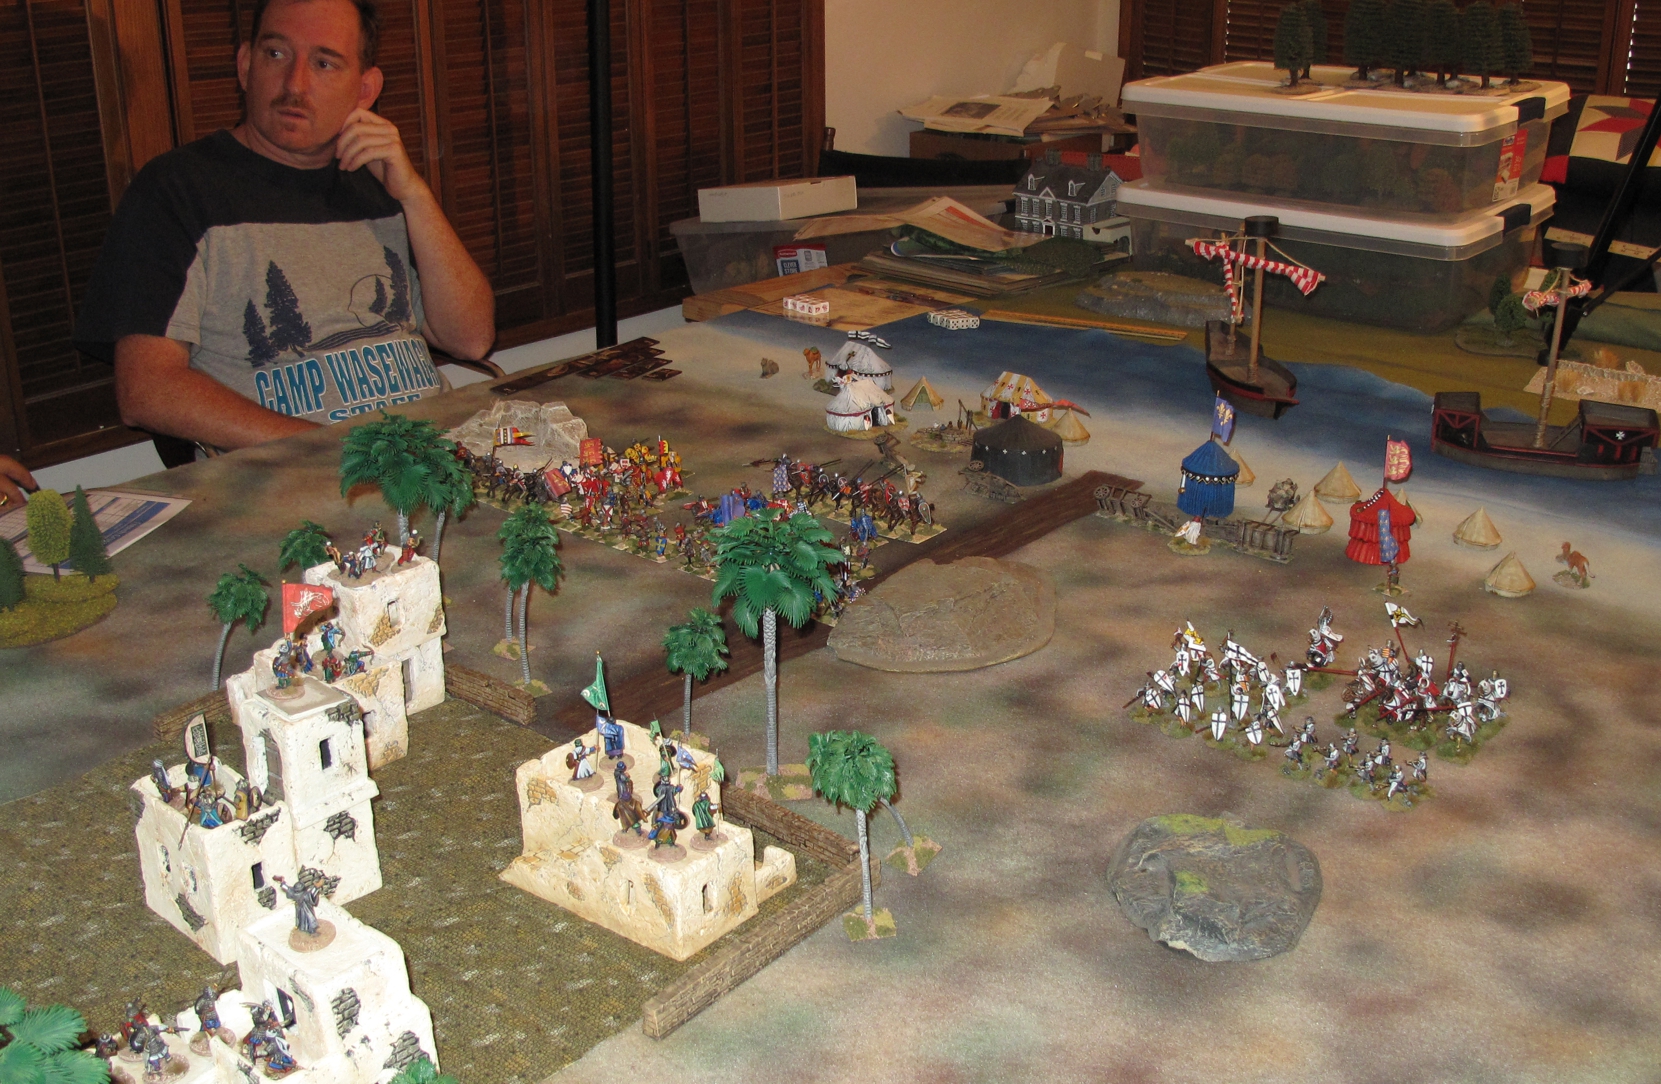
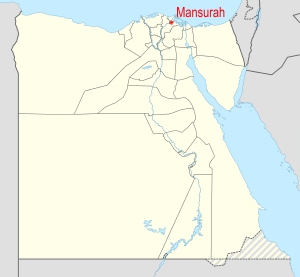
I did make some time to get down to the “Dog of War” club house for some gaming over the last month and that included a great gaming session based on the Crusader era “Crescent and Cross” SAGA rules. Tim Daun has been working on a multi player scenario featuring the 7th Crusades battle in Egypt circa 1250 for the control of the city of “MANSURAH”
The pictures are can be opened (by right clicking and selecting open) for a much higher res picture! It may take awhile if your internet speed is slow or you are using a mobile device! Use your browser’s back button to return to the article. Please be sure to check out the high speed time lapse of the game linked at the end, a 4 hour game in about 2 minutes! There are also quite a few more pictures on the official “Dogs of War” site maintained by Tim D at Dogs of War
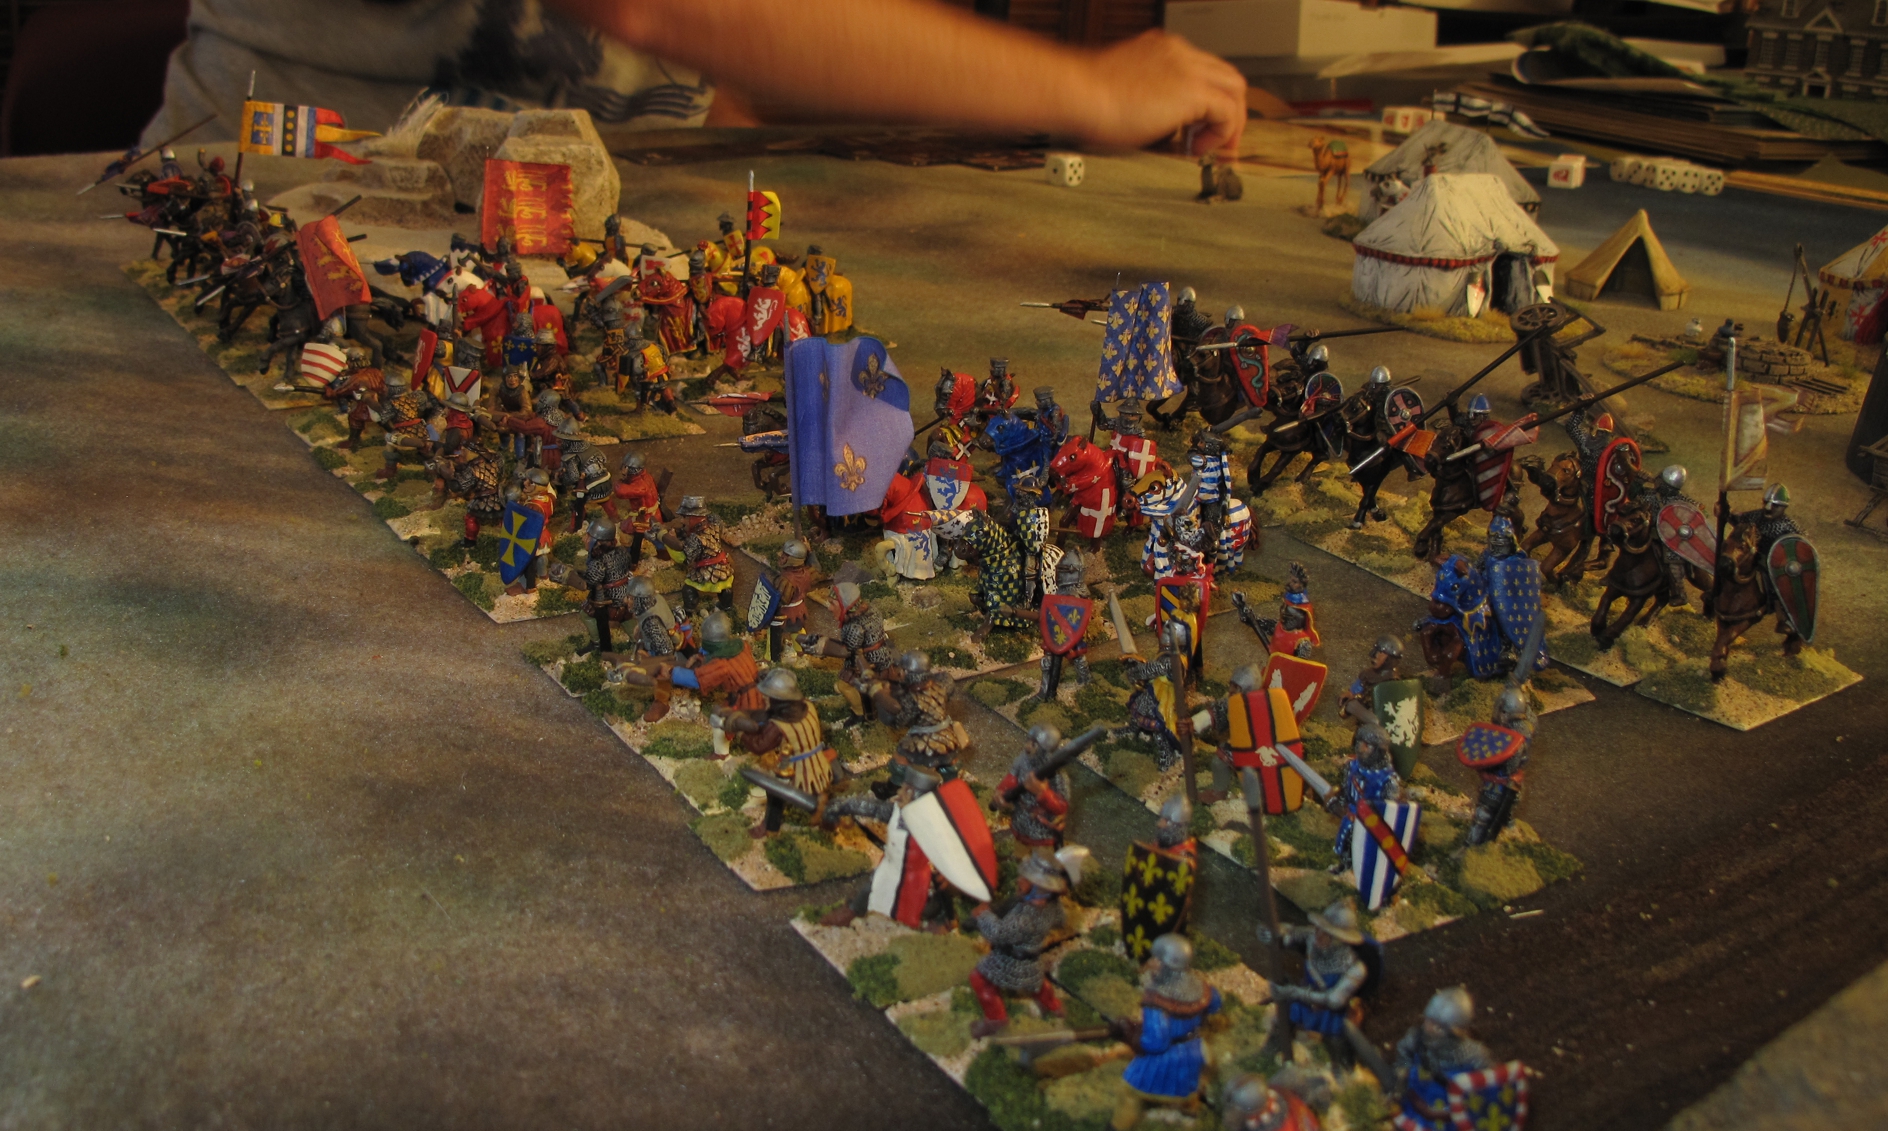
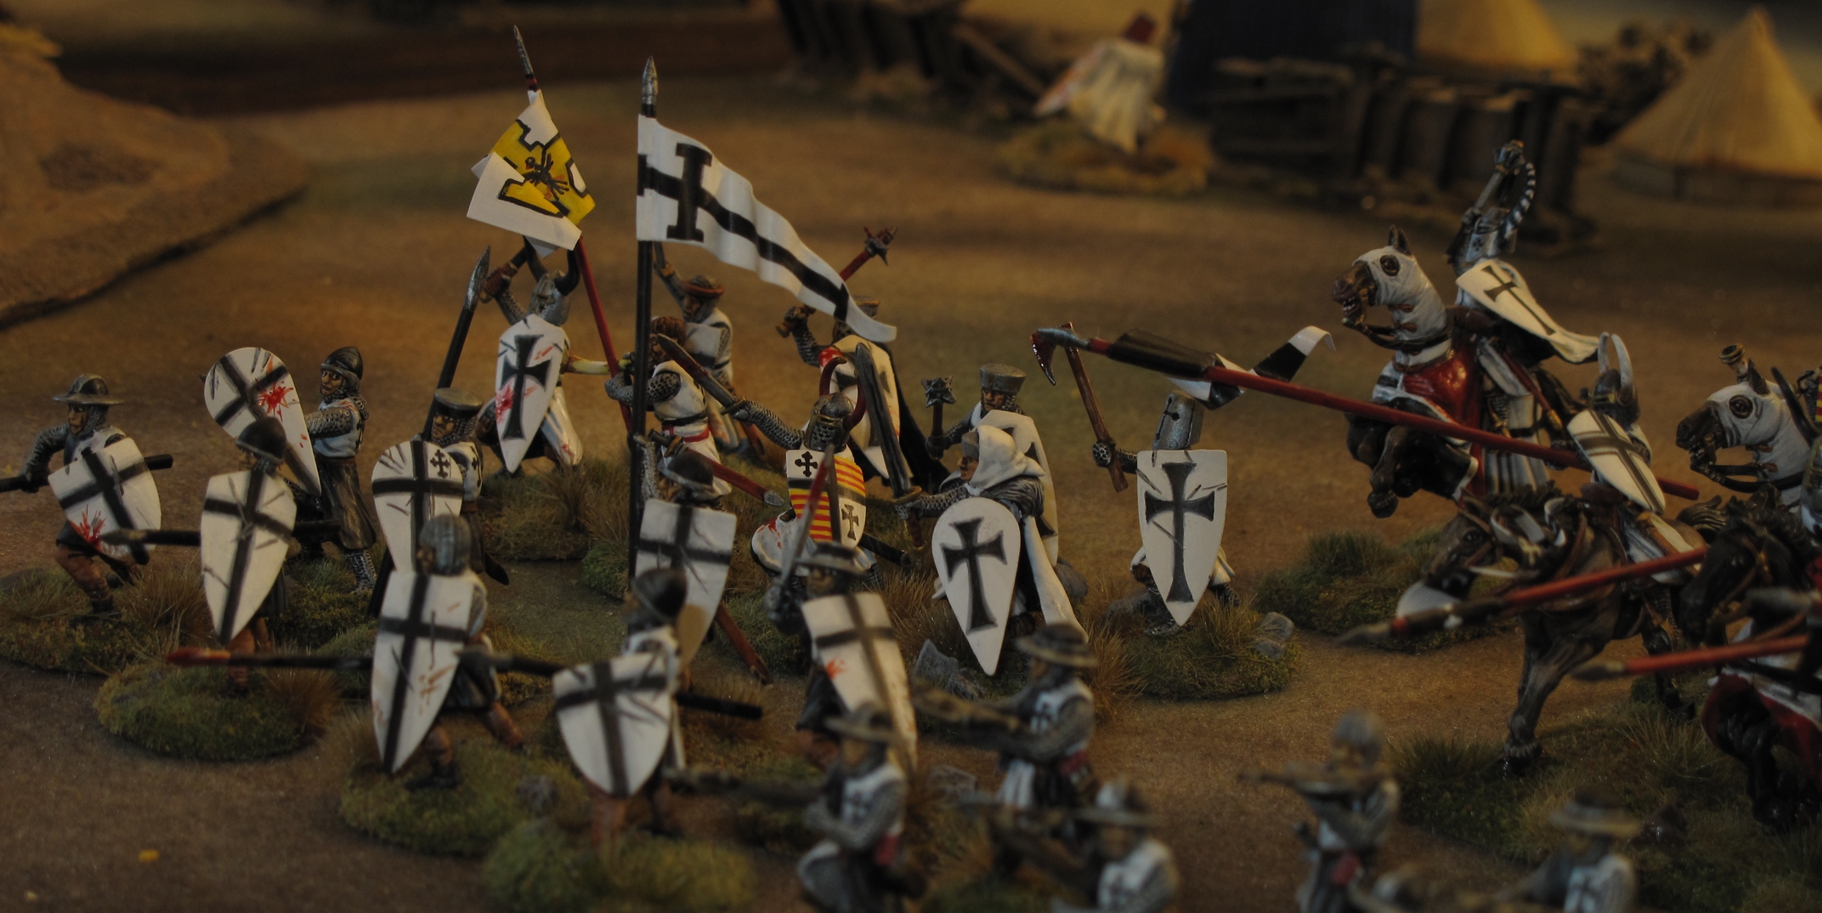
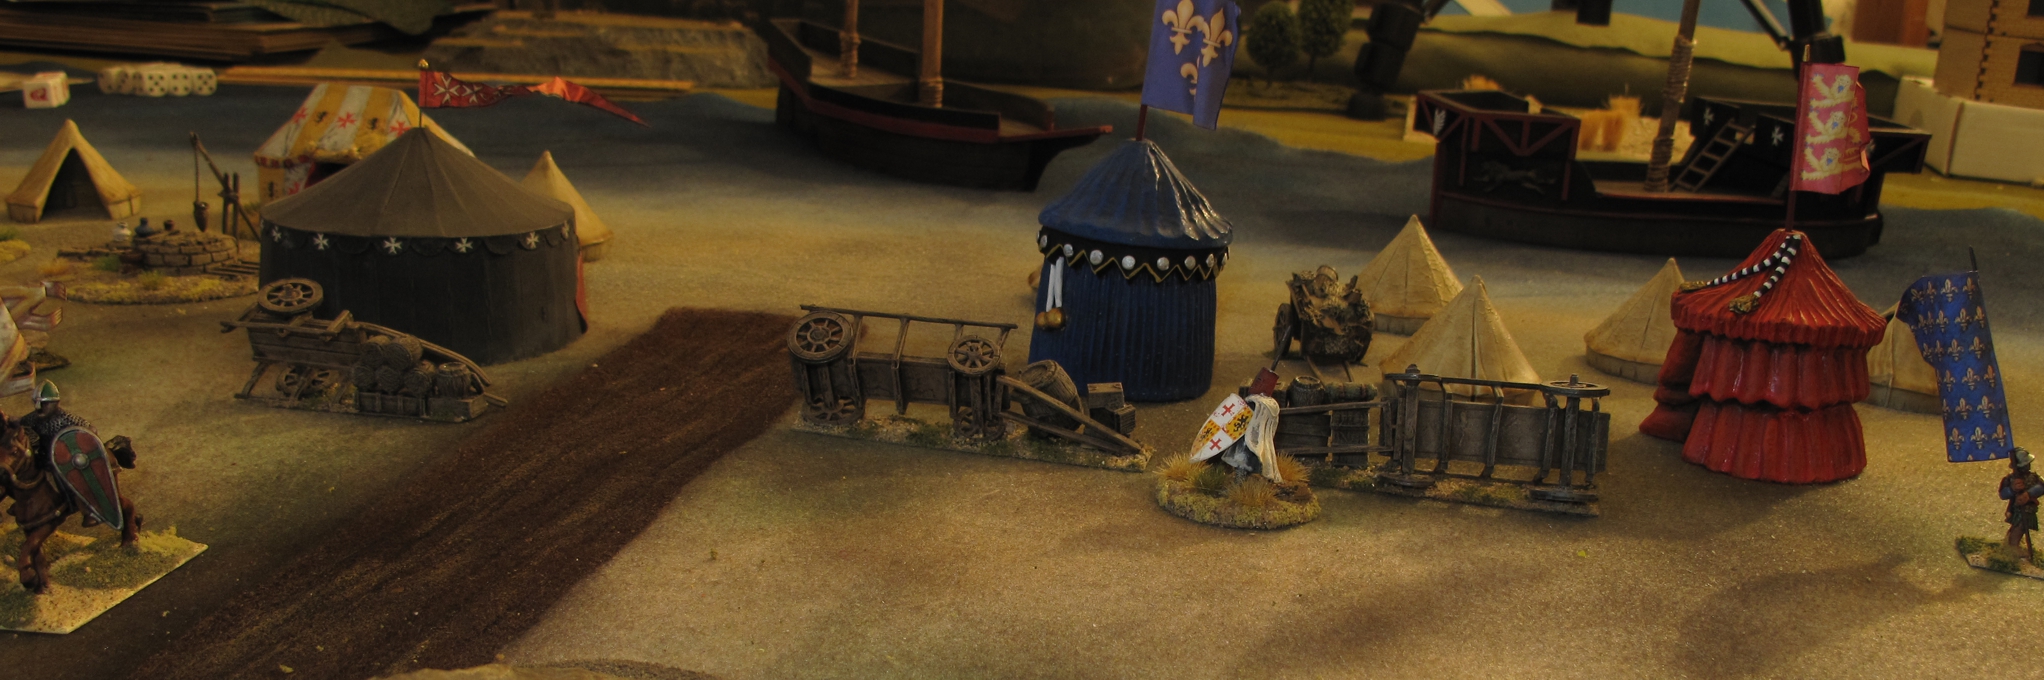
The French, English, and Milites (Military Orders) land and deploy from their camp
These beautiful French and English SAGA warbands are from the collections of Tim Daun and Chris Snell, dam nice looking on the field!
This SAGA recreation was the second “play test” of the possible game to be put on at a convention in the future. Tim D, Chris S, and Rick A would command the Muslim forces and Dave D, Chris V. and Bill W (me) commanding the assaulting Crusaders. The main task of the Crusaders is to secure the City as a base of operations for continuation of the crusade. Failing to do this leaves them stranded and open to attack, so they must clear the city completely. I wont go into the game much as it is still having play balance adjusted and needs to be played quite a few times for players to get the “feel” for it, work out strategy, and of course adjustments to be made. I will say I think it already plays well and is a lot of fun. With a few more tweaks it will be another classic “Dog’s of War” production!
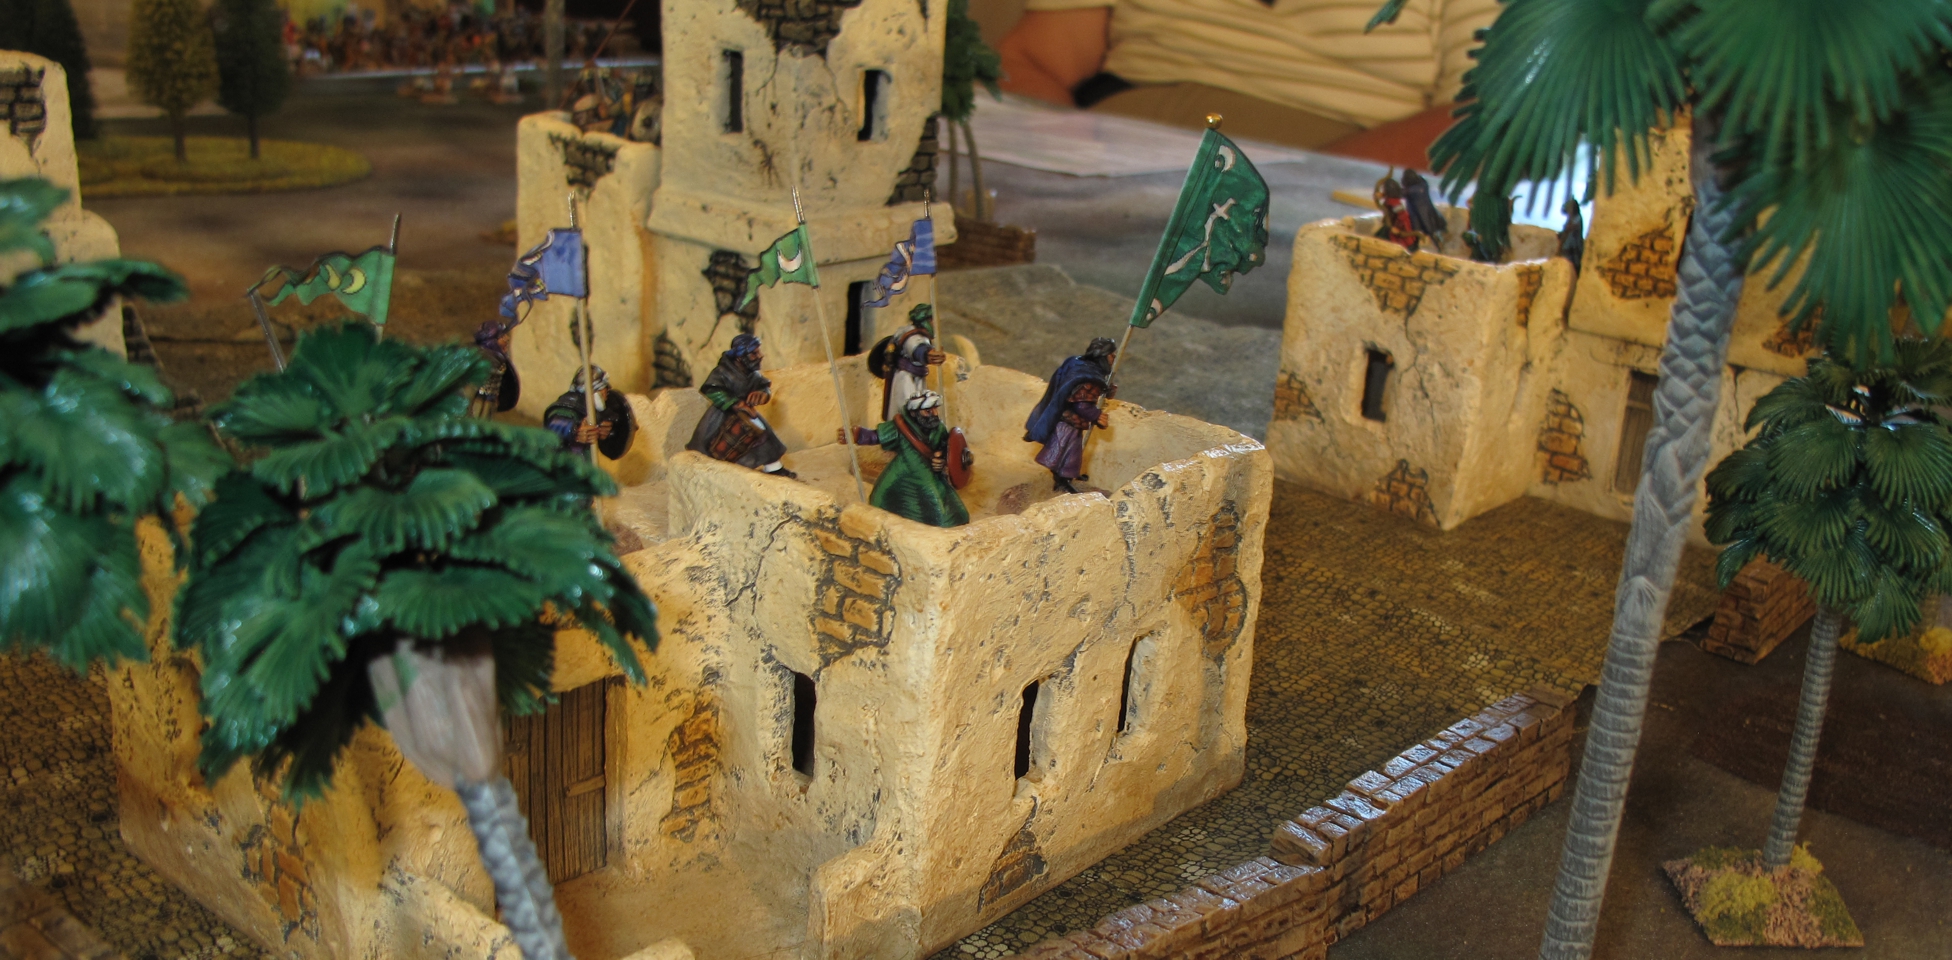
Rick “Abbu Bey” not only looks quite confident as the cities Muslim commander he looks the part! Buildings by Crescent Root Studios
We are ready to soak our sand with the infidels blood!
This battle (the 2nd) was I’m told a much better showing by crusader forces with them making it into town, clearing several buildings, while taking few losses. Other battles raged on the outskirts of the city where again the crusaders fought well and kept most of the Muslim relief forces from any hope of helping the cities defenders. The game however ended with Muslim forces still in control of half of the city so was technically a victory for the forces under the Crescent Banner!
Ricks Muslim Hearth Guard was held fast against the tide of Crusaders taking but a few losses!
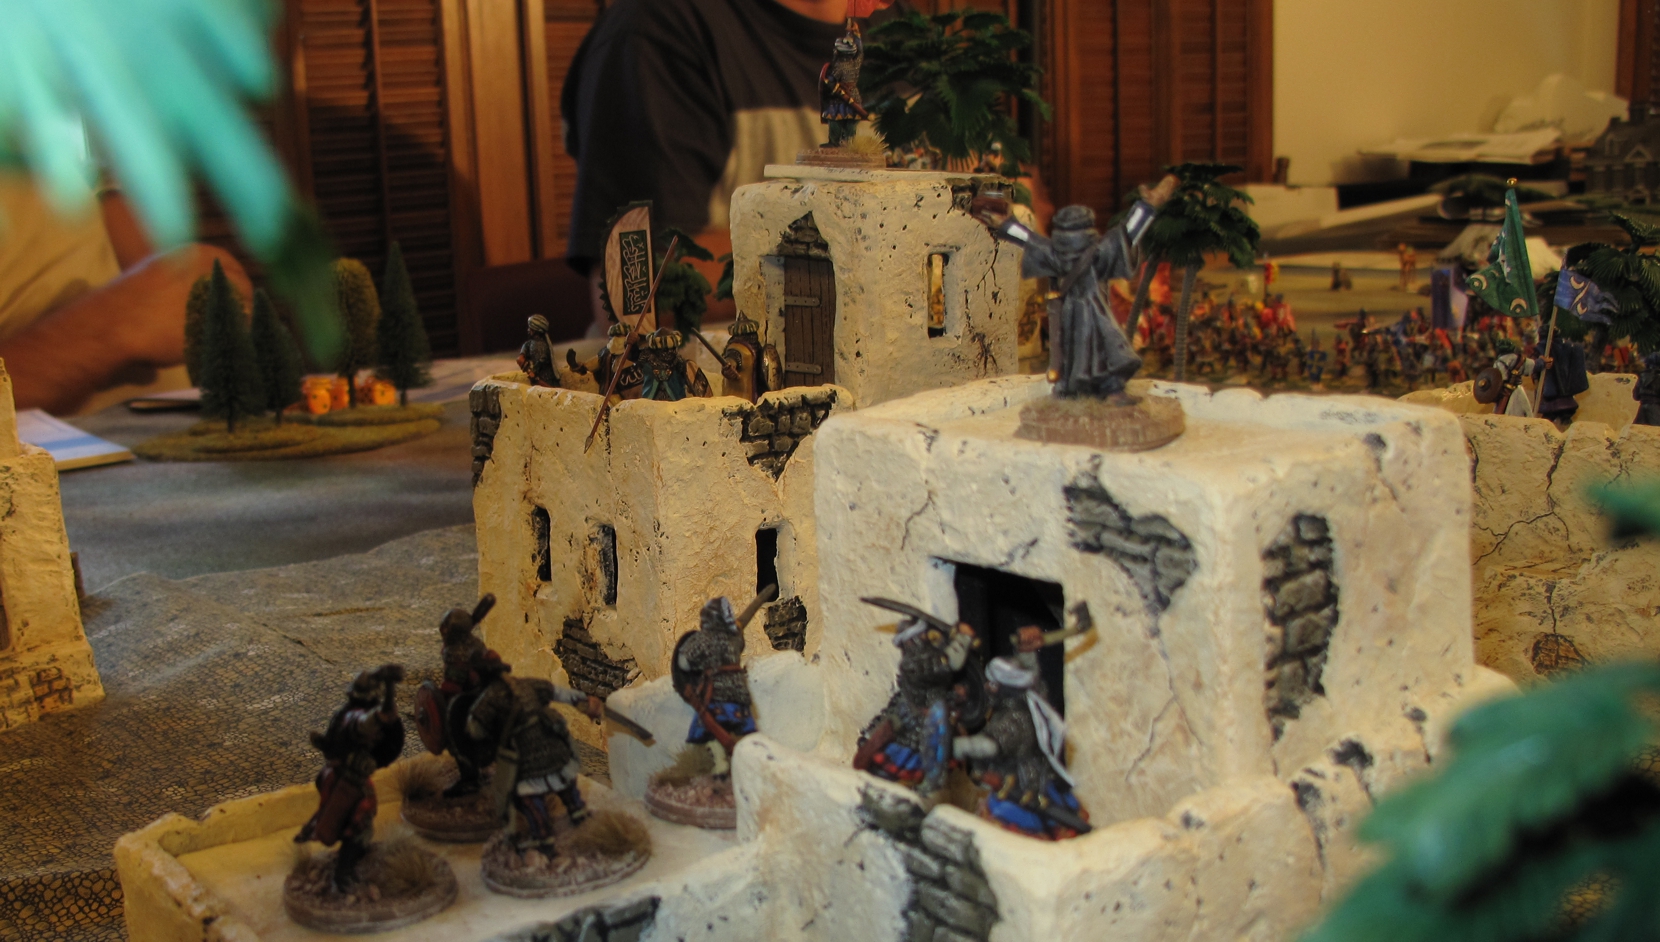
My “Teutonic Knights” are raring to go!
I played my Teutonic Knights and did well mostly by raising my “piety” level up to a “4” and at this level the bonuses become very powerful! My Crossbowmen move forward mowing down Muslim defenders as if they were all armed with 50 caliber machine guns! In hindsight I made a few mistakes being new to my Teutonic’s and the scenario. I should have moved faster and more aggressively in clearing the town (this was true across the crusade army) and my last heroic charges by the Teutonic Knight Hearth guard while glorious at first were too late and ultimately directed at the wrong target.
Joe Nacchio as always provided some great accent terrain pieces to the setup. Joe is a real team player and many wargamers do not real think about how important these little extra touches are to any game!
The terrain was top notch and sure to be much more spectacular should this game ever make it to a convention. Thanks to all the “Dogs” for a great Saturday of Gaming!
Bill W
Check the entire 4 hour battle in 2 minutes! Go full screen and have your sound on! and remember you can select higher video quality if your system supports it. (up to 4k for this video!
Below a brief synopsis of the conflict taken from Wikipedia
By the mid-13th century, the Crusaders became convinced that Egypt, the heart of Islam’s forces and arsenal, was an obstacle to their ambition to capture Jerusalem, which they had lost for the second time in 1244. In 1245, during the First Council of Lyon, Pope Innocent IV gave his full support to the Seventh Crusade being prepared by Louis IX, King of France.
The goals of the Seventh Crusade were to destroy the Ayyubid dynasty in Egypt and Syria, and to recapture Jerusalem. The Crusaders asked the Mongols to become their allies against the Muslims, the Crusaders attacking the Islamic world from west, and the Mongols attacking from the east. Güyük, the Great Khan of the Mongols, told the Pope’s envoy that the Pope and the kings of Europe should submit to the Mongols.
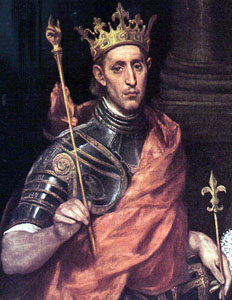
Louis the IX
The ships of the Seventh Crusade, led by KingLouis’s brothers, Charles d’Anjou and Robert d’Artois, sailed from Aigues-Mortes and Marseille to Cyprus during the autumn of 1248, and then on to Egypt. The ships entered Egyptian waters and the troops of the Seventh Crusade disembarked at Damietta in June 1249. Louis IX sent a letter to as-Salih Ayyub. Emir Fakhr ad-Din Yusuf, the commander of the Ayyubid garrison in Damietta, retreated to the camp of the Sultan in Ashmum-Tanah, causing a great panic among the inhabitants of Damietta, who fled the town, leaving the bridge that connected the west bank of the Nile with Damietta intact. The Crusaders crossed over the bridge and occupied Damietta, which was deserted. The fall of Damietta caused a general emergency (called al-Nafir al-Am النفير العام) to be declared, and
One of French King Louis’s brothers Charles d’Anjou
locals from Cairo and from all over Egypt moved to the battle zone. For many weeks, the Muslims used guerrilla tactics against the Crusader camps; many of the Crusaders were captured and sent to Cairo. As the Crusader army was strengthened by the arrival of
Alphonse de Poitiers, the third brother of King Louis IX, at Damietta, the Crusaders were encouraged by the news of the death of the Ayyubid Sultan, as-Salih Ayyub. The Crusaders began their march towards Cairo. Shajar al-Durr, the widow of the dead Sultan, concealed the news for some time and sent Faris ad-Din Aktai to Hasankeyf to recall Turanshah, the son and heir, to ascend the throne and lead the Egyptian army.
The Battle
The Crusaders approached the battle by the canal of Ashmum (known today by the name Albahr Alsaghir), which separated them from the Muslim camp. An Egyptian showed the Crusaders the way to the canal shoals. The Crusaders, led by Robert of Artois, crossed the canal with the Knights Templar and an English contingent led by William of Salisbury, launching a surprise assault on the Egyptian camp in Gideila, two miles (3 km) from Al Mansurah, and advancing toward the royal palace in Al Mansurah. The leadership of the Egyptian forces passed to the Mamluks Faris Ad-Din Aktai and Baibars al-Buduqdari who contained the attack and reorganized the Muslim forces. This was the first appearance of the Mamluks as supreme commanders inside Egypt. Shajar al-Durr, who had full control of Egypt, agreed with Baibars’ plan to defend Al Mansurah. Baibars ordered the gate be opened to let the Crusaders enter the town. The crusaders rushed in, thinking the town deserted, only to find themselves trapped inside. The Crusaders were besieged from all directions by Egyptian forces and the local population, and they took heavy losses. Robert of Artois, who took refuge in a house, and William of Salisbury were both killed along with most of the Knights Templar. Only five Templar Knights escaped alive. The Crusaders retreated to their camp in disorder, and surrounded it with a ditch and wall. Early on the morning of February 11, the Muslim forces launched a devastating offensive against the Frankish camp. On February 27, the new sultan Turanshah arrived in Al Mansurah to lead the Egyptian army, and the death of as-Salih Ayyub was formally announced in Egypt. Ships were transported overland and dropped in the Nile behind the Crusader ships blocking the reinforcement line from Damietta. The Egyptians used Greek fire, destroying and seizing many Crusader supply vessels. The besieged Crusaders soon began suffering from famine and disease. Some Crusaders deserted to the Muslim side.
Despite being overwhelmed and ultimately defeated, King Louis IX tried to negotiate with the Egyptians, offering the surrender of the Egyptian port of Damietta in exchange for Jerusalem and a few towns on the Syrian coast. The Egyptians rejected the offer, and the Crusaders retreated to Damietta under cover of darkness on April 5, followed closely by the Muslim forces. At the subsequent Battle of Fariskur, the last major battle of the Seventh Crusade, the Crusader forces were annihilated and King Louis IX was captured on April 6. Meanwhile, the Crusaders were circulating false information in Europe, claiming that King Louis IX defeated the Sultan of Egypt in a great battle, and Cairo had been betrayed into Louis’s hands. Later, when the news of Louis IX’s capture and the French defeat reached France, the Shepherds’ Crusade movement occurred in France.
Louis IX was taken prisoner.
Aftermath
According to medieval Muslim historians, 15,000 to 30,000 French fell on the battlefield and thousands were taken prisoners.[24]Louis IX of France was captured in the nearby village of Moniat Abdallah (now Meniat el Nasr), chained and confined in the house of Ibrahim Ibn Lokman, the royal chancellor, and under the guard of a eunuch named Sobih al-Moazami.[25] The king’s brothers, Charles d’Anjou and Alphonse de Poitiers, were taken prisoner at the same time, and were carried to the same house with other French nobles. The sultan provided for their subsistence. A camp was set up outside the town to shelter the rest of the prisoners. Louis IX was ransomed for 400,000 dinars. After pledging not to return to Egypt, Louis surrendered Damietta and left for Acre with his brothers and 12,000 war prisoners whom the Egyptians agreed to release.
The battle of Al Mansurah was a source of inspiration for writers and poets of that time. One of the satiric poems ended with the following verses: “If they (the Franks) decide to return to take revenge or to commit a wicked deed, tell them :The house of Ibn Lokman is intact, the chains still there as well as the eunuch Sobih”. —from stanza by Jamal ad-Din ibn Matruh.
The name of Al Mansurah (Arabic: “the Victorious”) that dates from an earlier period was consolidated after this battle. The city still holds the name of Al Mansurah today, as the capital of the Egyptian governorate, Daqahlia. The National Day of DaqahliaGovernorate (capital Al Mansurah) on February 8, marks the anniversary of the defeat of Louis IX in 1250. The house of Ibn Lokman, which is now the only museum in Al Mansurah, is open to the public and houses articles that used to belong to the French monarch, including his personal thirteenth century toilet.
Well this Saturday saw it happen, Lord Bluster and the Normans finally caught up with the Skraelings led by the legendary Chief Half-baked and his fearsome band of Indian warriors. The battle was one of the hardest yet for yours truly against Joe N. a master wargamer whos reputation on the battlefield and dice rolling is well known throughout the area. I myself am considered by many to be pretty good and roll well especially when “cornered” so I was confident of giving a good account of myself but still figured to end up one more “head on a stick” outside of Chief Half-baked’s lodge!
The battle was intense and therefore I devoted all my energy to the game and none to pictures or notes on the battle so the report will be sort of brief and of course seen from the Norman perspective….Joe can post his rebuttal in comments below…
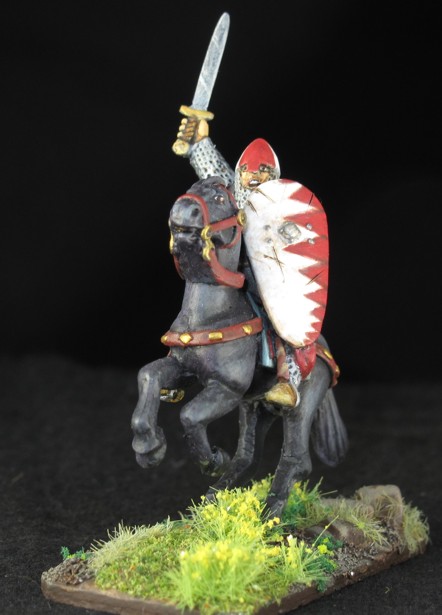
My Normans were led by Lord Bluster.
We started with terrain, of course the Indians wanted as much as possible and the Normans as little as possible, so we ended up with 3 pieces, 2 woods and a marsh. I picked a marsh, a mistake that I would suffer with all through the game as it plugged up the center for quicker movement of my troops. Good for my normal Norman strategy of delay and counter attack but this time I was forming a “Panzer Wedge” of armor and attacking. I hoped this would throw Joe off his game a bit and figured that a quick closing with his warlord was my only hope.
The Skraelings have the ability to mimic your battle board in SAGA and can be much like fighting a mirror image of your own army. They also regenerate units (some say like zombies) from their dead pile but this is really to represent other near by villages joining the fight. On my side I felt the Normans would be a tough fight for the Indians since my mounted troops could outdistance them (if they could stay out of the woods!) and quickly exploit opportunities as they appeared. I also realized that much of my battle board would be useless to them since the battle board abilities were tailored to mounted troops and could not be used by them at all. I also decided to not use the usual “levy bowmen” as I figured the Skraelings could out shoot me easily and a rapid close into hand to hand where my superior armor and weapons would quickly tell on his lightly clothed warriors was best. Instead of the levies I brought out the “Flemish Mercenaries” a fun unit that is much like an armored tank for the Dark Ages. Hard to kill, painfully slow, but if you can close packs a punch in melee!
The complete unit of “Flemish Mercinaries” for SAGA. I painted the group using a limited color palette to create a sense of a professional unit for hire.
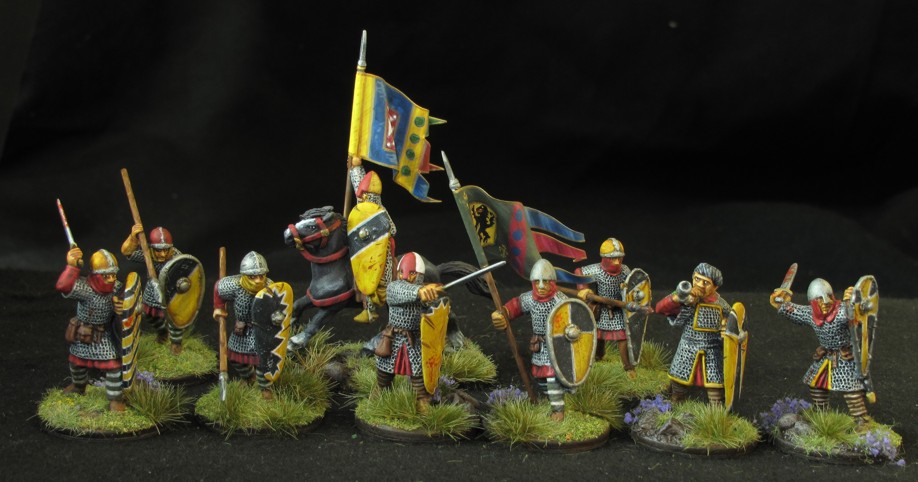
The game started with me winning the setup roll and placing my Warlord in the center, and followed with my force of 12 Hearth guard (1 x 8, 2×4), 8 Warrior crossbow men, and 8 Flemish Warrior Mercenaries. All in a sort of wedge formation in the center aimed at the marsh between the woods. Infantry forward with cavalry in the rear.
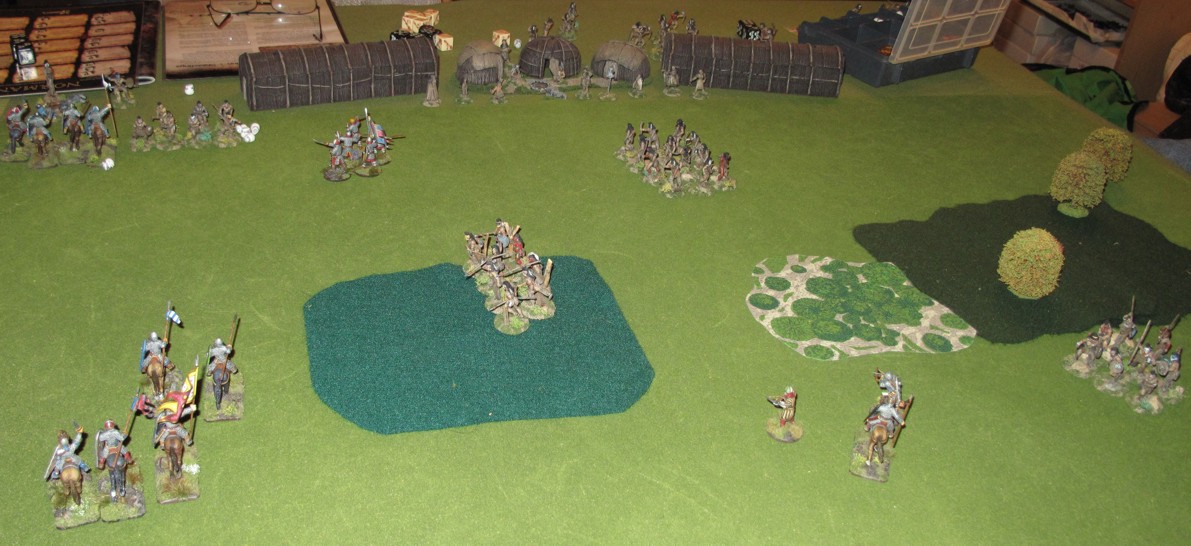
Joe setup in typical Indian fashion Javelin armed warriors to the sides behind the woods with 2 huge bands of bowmen covering the center, his warlord to the rear with the women and children…ohh I mean he was protecting the helpless ones.
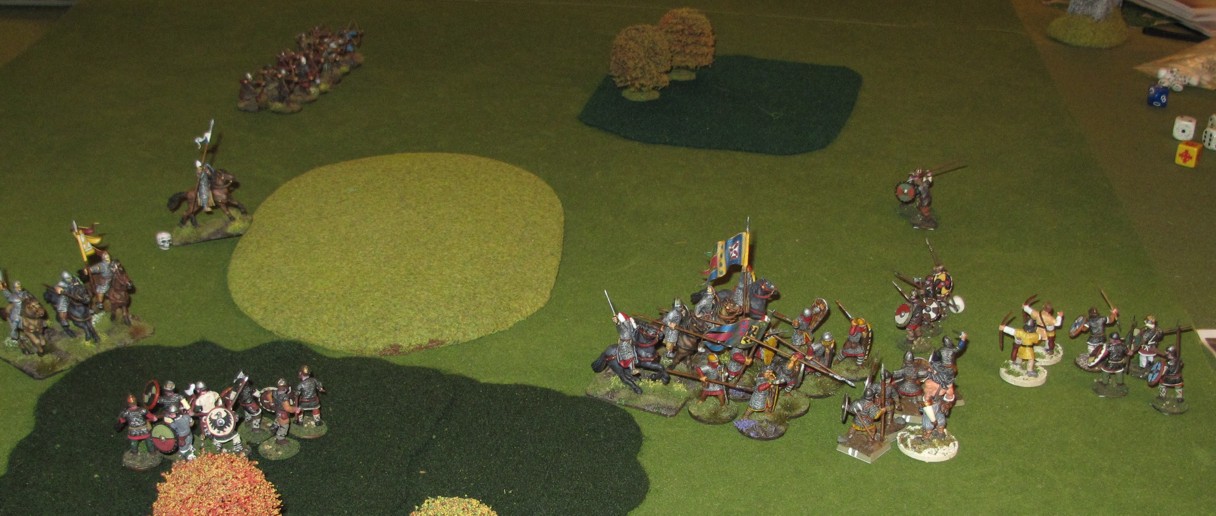
From the start of the game I pushed forward just a bit at first, Joe and the Skraelings also moved forward into the woods on either flank. I had led with my crossbow men which proved to be a mistake as they died under a hail of Indian arrows but kept the Skraelings busy. I had forgotten how SLOW the dammed Flemish were and had to rethink my plans for them. I pulled them out of the marsh and funneled them up the center towards the Skraeling bowmen. If I remember this was the point that Joe pulled his bowmen and his Warlord back to the left behind his warriors. I pushed up the middle while feinting to the right with a small hearth guard unit to keep his warriors grouped there interested and away from the left. My second Hearth Guard unit had ventured into the woods, immediately being brought under attack by Joes Warriors javelins there but some good saving rolls by me kept them together long enough to Melee with them, succeeding in pushing them back with heavy losses. My Normans were closing the ring on the Indians and if I could just move fast enough.
Most of the battle it was interesting that I never really rolled that well with the SAGA dice to get a lot of ability board use and found myself just using activations to rest and move as fast as possible before the Skraelings could re deploy. My 8 man Hearth Guard unit was making the end run up the open land left of the woods on the left.
The fight was intense and Joe played hard, he didn’t get any better dice then I did and when he did I managed to counter with great saving roles, once my Normans closed into close combat it was pretty much decided but Joe once again showed his ability by bringing a fresh unit onto the board just as I was about to close with his Warlord. This last fight was on the edge of the Skraeling rear board and showed how important and chess like the rules can be. After meleeing the “fresh” unit Joe’s unit having “lost” should have retreated but given that in the rules that if a defeated unit cant because of enemy troops or terrain be pushed back the winning unit moves back. This had the effect of allowing me to move out of his units zone of control therefore not forcing me to attack him but being able in my last move swing over attack and defeat his Warlord! Pheewww! What a game, well fought and a nail biter to the end. Many have fought Joe and his “Skraelings” and nearly all have fallen to them. I’m lucky to have won…I was happy midway to just have pushed him back and caused some concern never thinking I would carry the Chiefs “beads” back to Normandy. Thanks Joe! A great battle with a great warlord!
My “hero” bowmen up left and the woods they cleared of Welsh warriors!
The evening was coming on but I stayed for one more battle with Dave D. and his Welsh! The Welsh are a real tough fight and Dave knows how to use them! Fortunately my levy Bowmen got their range and nearly wiped out some of his units!. Using nearly the same type of aggressive tactics coupled with good roles be me and poor ones by Dave the Welsh nearly went down but in the end, Warlord on Warlord I bit the dust……
It was a good day at the “Dog Pound” and “a good day to die!” thanks to all.
The last moments in the battle with the Welsh. I thought that with this force I could crush the Welsh warlord but he used his Hearth Guard block me and ran for cover behind some other troops. My band fought well but lack luster dice, time, and good shooting by the Welsh did them in. The point were even up until I lost my Warlord.

 mily did a lot of last-minute shopping for me this Christmas and since “dad” likes weird stuff (wargaming stuff) many of my gifts didn’t arrive until long after Christmas. Not a bad thing since all through January the mail was full of great items to brighten the work week!
 structure, its more a re-balancing, clarifying, and expansion of the first set. I have played 2-3 games using them and the transition was very easy and felt smooth.
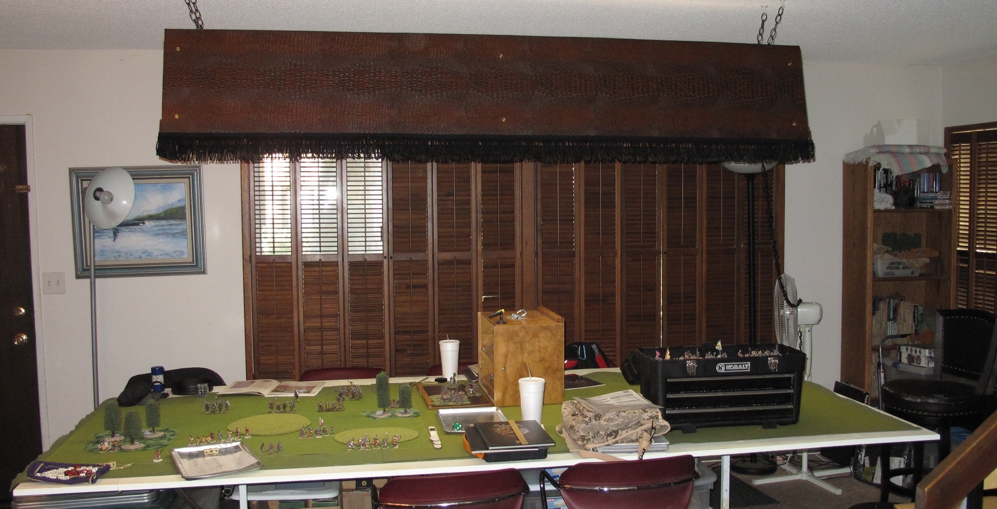


 already played one “test” game that was quite a bit of fun. I’ve always had a great fondness for the Darkest Africa figures from Foundry, Coppelstone, NorthStar, and others! I think CONGO will be the spark to get me painting sore of the pile of Darkest Africa figure on the shelf! I have played lots of Darkest Africa games in the past but some of the rules are a bit dated and no-longer available. These follow some of the same concepts from Studio Tomahawks other rules so may be a bit easier and acceptable to players familiar with those rules.
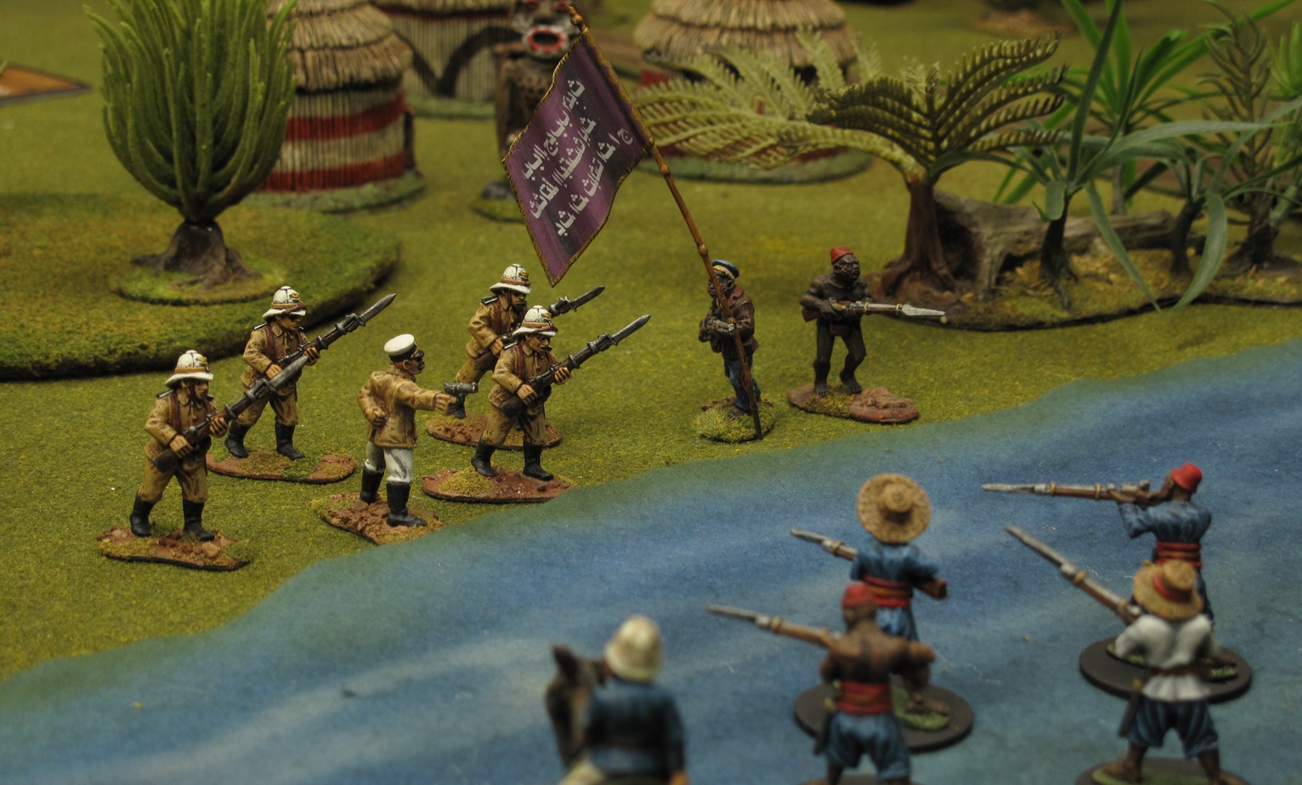


 Egyptian forces passed to the